
Home>Home & Furniture>Doors & Windows>How to Build a DIY Dog Fence for Your Window
Doors & Windows
How to Build a DIY Dog Fence for Your Window
Published: August 12, 2024
Learn how to build a DIY dog fence for your window to keep your furry friend safe and secure. Follow our step-by-step guide for an easy and effective solution.
(Many of the links in this article redirect to a specific reviewed product. Your purchase of these products through affiliate links helps to generate commission for Twigandthistle.com, at no extra cost. Learn more)
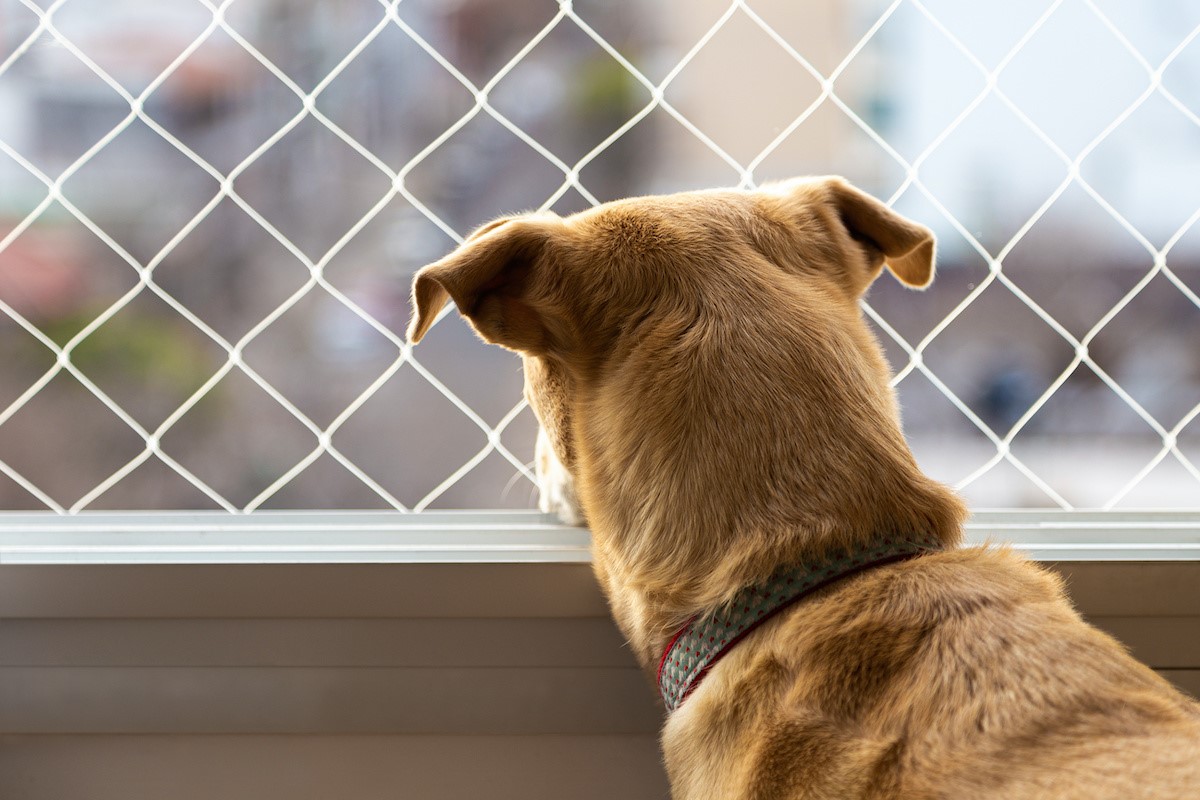
Keeping your dog safe while allowing them to enjoy the view from the window can be challenging. With a bit of creativity and some basic tools, creating a DIY dog fence for your window becomes an easy project. This guide will walk you through the steps to build a sturdy and reliable barrier, ensuring your puppy can bask in the sunlight without any risk. Whether you live in an apartment or a house, this simple solution provides peace of mind knowing your dog stays safe indoors. Let’s get started on this fun and practical home improvement project!
Getting Ready for Your Project
Measure the Window: Use a tape measure to get the exact dimensions of your window. Write these down.
Gather Materials: Collect wood, screws, hinges, a latch, sandpaper, paint, and a saw. Make sure everything is within reach.
Set Up Workspace: Clear an area where you can work comfortably. Lay down a tarp or old sheet to catch sawdust and paint drips.
Safety Gear: Wear safety goggles, gloves, and a dust mask. Keep a first aid kit nearby.
Cut the Wood: Use the saw to cut wood pieces according to your window measurements. Sand the edges to avoid splinters.
Assemble the Frame: Lay out the wood pieces and screw them together to form a frame. Ensure it fits snugly in the window.
Attach Hinges and Latch: Secure hinges to one side of the frame and the window. Attach the latch on the opposite side.
Paint or Stain: Apply paint or stain to the wood. Let it dry completely before installing.
Test Fit: Place the frame in the window to ensure it fits and functions properly. Make adjustments if needed.
What You Need: Materials and Tools
Materials and Tools Needed
Wooden Planks: These will form the main structure of the fence. Choose sturdy, untreated wood to ensure safety for your dog.
Measuring Tape: Essential for measuring the window dimensions and ensuring the fence fits perfectly.
Saw: Used to cut the wooden planks to the required lengths.
Sandpaper: Smooths out any rough edges on the wooden planks to prevent splinters.
Screws: Secure the wooden planks together. Opt for weather-resistant screws if the fence will be exposed to the elements.
Drill: Makes holes for the screws and helps in assembling the fence.
Hinges: Attach the fence to the window frame, allowing it to open and close easily.
Latch: Keeps the fence securely closed when needed.
Paint or Wood Stain: Protects the wood from moisture and adds a finished look. Choose non-toxic options safe for pets.
Paintbrushes: Apply the paint or wood stain evenly.
Pencil: Mark measurements and cutting lines on the wood.
Level: Ensures the fence is installed straight and even.
Safety Goggles: Protect your eyes while cutting and drilling.
Work Gloves: Keep your hands safe from splinters and sharp tools.
Clamps: Hold the wooden planks in place while you drill and screw them together.
Skill Level and Time Commitment
Skill Level: Intermediate
Time Required: 3-4 hours
- Measure the Window: 15 minutes
- Gather Materials: 30 minutes
- Cut Wood to Size: 45 minutes
- Assemble Frame: 1 hour
- Attach Mesh: 30 minutes
- Install Fence: 30 minutes
Important Keywords: Measure, Gather Materials, Cut Wood, Assemble Frame, Attach Mesh, Install Fence
Instructions: Step-by-Step Guide
Measure the Window:
- Use a tape measure to get the width and height of the window where the fence will go.
Gather Materials:
- Wooden Planks: Choose planks that match the window's measurements.
- Screws: Ensure they are long enough to secure the planks.
- Hinges: For creating a gate, if needed.
- Latches: To keep the gate closed.
- Paint or Stain: Optional, for finishing the wood.
Cut the Wood:
- Using a saw, cut the wooden planks to fit the window's width and height.
Assemble the Frame:
- Lay out the cut planks on a flat surface.
- Use screws to attach the planks together, forming a rectangular frame.
Add Vertical Slats:
- Cut additional planks to fit vertically within the frame.
- Space them evenly and screw them into place.
Attach Hinges (if making a gate):
- Fix the hinges to one side of the frame.
- Ensure they are aligned properly for smooth opening and closing.
Install the Latch:
- Attach the latch on the opposite side of the hinges.
- Make sure it secures the gate firmly.
Paint or Stain (optional):
- Apply paint or stain to the wood for a finished look.
- Allow it to dry completely.
Mount the Fence:
- Position the fence in the window.
- Use screws to secure the frame to the window sill or surrounding wall.
Test the Fence:
- Ensure the fence is sturdy.
- Check that the gate opens and closes smoothly.
Adjust if Necessary:
- Make any needed adjustments to ensure the fence fits well and functions properly.
Helpful Tips and Tricks
Measure your window accurately before starting. Use PVC pipes for a lightweight, sturdy frame. Zip ties can secure the pipes together easily. Mesh wire or chicken wire works well for the fencing material. Staple guns help attach the mesh to the frame securely.
Common mistakes include not measuring correctly, leading to gaps or an ill-fitting fence. Avoid using weak materials like thin plastic or cardboard. Ensure the fence is tall enough to prevent your dog from jumping over.
Alternatives for materials include using wooden dowels instead of PVC pipes for a more natural look. Velcro straps can replace zip ties for easier adjustments. Plastic garden fencing can be a substitute for mesh wire, offering a softer barrier.
Estimating the Cost
Materials:
- Wooden planks: $20-$30
- Screws and nails: $5-$10
- Metal brackets: $10-$15
- Sandpaper: $5
- Paint or stain: $10-$20
- Mesh or wire: $15-$25
Tools:
- Saw: $20-$50 (or borrow)
- Drill: $30-$60 (or borrow)
- Screwdriver: $5-$10
- Measuring tape: $5-$10
- Paintbrush: $2-$5
Total Cost: $127-$240
Budget-friendly alternatives:
- Reclaimed wood: Free or cheaper
- Borrow tools: Save $50-$110
- Use leftover paint: Save $10-$20
Different Ways to Customize
Materials: Instead of using traditional wood, consider PVC pipes for a lightweight, weather-resistant option. Metal fencing can provide extra durability. Bamboo offers a natural look and is eco-friendly.
Colors: Paint the fence in bright colors like yellow or blue to make it stand out. For a more subtle look, use earth tones like brown or green. White paint can give a clean, classic appearance.
Styles: Create a picket fence style for a charming, classic look. Use horizontal slats for a modern feel. Lattice designs can add a decorative touch while still being functional.
Height: Adjust the height based on your dog's size. For small dogs, a shorter fence will suffice. Larger dogs may need a taller fence to keep them safe.
Decorations: Add planter boxes to the fence for a touch of greenery. Attach decorative elements like metal art or wooden cutouts to personalize it. String fairy lights around the fence for a magical touch at night.
Safety Features: Use rounded edges to prevent injuries. Ensure there are no sharp points or gaps that could harm your dog. Install a secure latch if the fence includes a gate.
Portability: Make the fence foldable or modular for easy storage and transport. Use hinges or connectors that allow you to disassemble and reassemble the fence quickly.
Weatherproofing: Apply a waterproof sealant to protect the fence from rain and moisture. Use UV-resistant paint to prevent fading from sunlight. Consider rust-proof materials if using metal.
Eco-Friendly Tips
Reclaimed wood can be used to build the frame. Look for old pallets or leftover lumber from other projects. Bamboo is another great option because it grows quickly and is very strong.
For the mesh, consider using recycled plastic or metal mesh from old screen doors or windows. These materials are durable and can be easily cut to size.
Use non-toxic paint or stain to finish the wood. This ensures the safety of your dog and reduces harmful chemicals in your home.
Instead of buying new screws or nails, reuse hardware from old furniture or other DIY projects. This reduces waste and saves money.
When assembling, use hand tools like a screwdriver or hammer instead of power tools to save energy.
Finally, consider adding a plant-based sealant to protect the wood from weather and wear. This keeps the fence eco-friendly and long-lasting.
Your DIY Dog Fence Awaits
Building a DIY dog fence for your window isn't just about keeping your furry friend safe; it's also a fun project that adds a personal touch to your home. With some basic materials and a bit of elbow grease, you can create a sturdy, reliable barrier. Remember to measure your window accurately, choose the right tools, and follow the steps carefully. Don't forget to involve your dog in the process to ensure the fence meets their needs. Once completed, you'll have peace of mind knowing your pet is safe while enjoying the view. Plus, you'll have the satisfaction of having built something with your own hands. So, gather your supplies, roll up your sleeves, and get started on your DIY dog fence today. Your dog will thank you, and you'll feel proud of your handiwork.
How do I measure my window for the dog fence?
Measure the width and height of your window frame. Make sure to measure from the inside edges to get an accurate fit.
What materials will I need?
You’ll need wooden planks, screws, a drill, a saw, sandpaper, and some paint or stain. Don’t forget a measuring tape and pencil for marking.
How do I attach the fence to the window?
Use screws to secure the wooden planks to the window frame. Make sure they’re tight enough to hold but not so tight that they damage the frame.
Can I paint or stain the fence?
Absolutely! Painting or staining not only makes it look nice but also protects the wood from weather and wear.
How high should the fence be?
The fence should be high enough to keep your dog from jumping over but low enough to not block your view. Usually, about 2-3 feet works well.
Is it safe for my dog?
Yes, as long as you use sturdy materials and secure everything properly, it should be safe. Always check for any sharp edges or loose parts.
How long will it take to build?
Depending on your skill level, it might take a few hours to a weekend. Take your time to ensure everything is done right.