
Home>Home & Furniture>Bedroom>DIY Fort Building Guide
Bedroom
DIY Fort Building Guide
Published: July 20, 2024
Discover the ultimate DIY fort building guide! Learn step-by-step tips, creative ideas, and essential materials to create the perfect indoor or outdoor fort.
(Many of the links in this article redirect to a specific reviewed product. Your purchase of these products through affiliate links helps to generate commission for Twigandthistle.com, at no extra cost. Learn more)
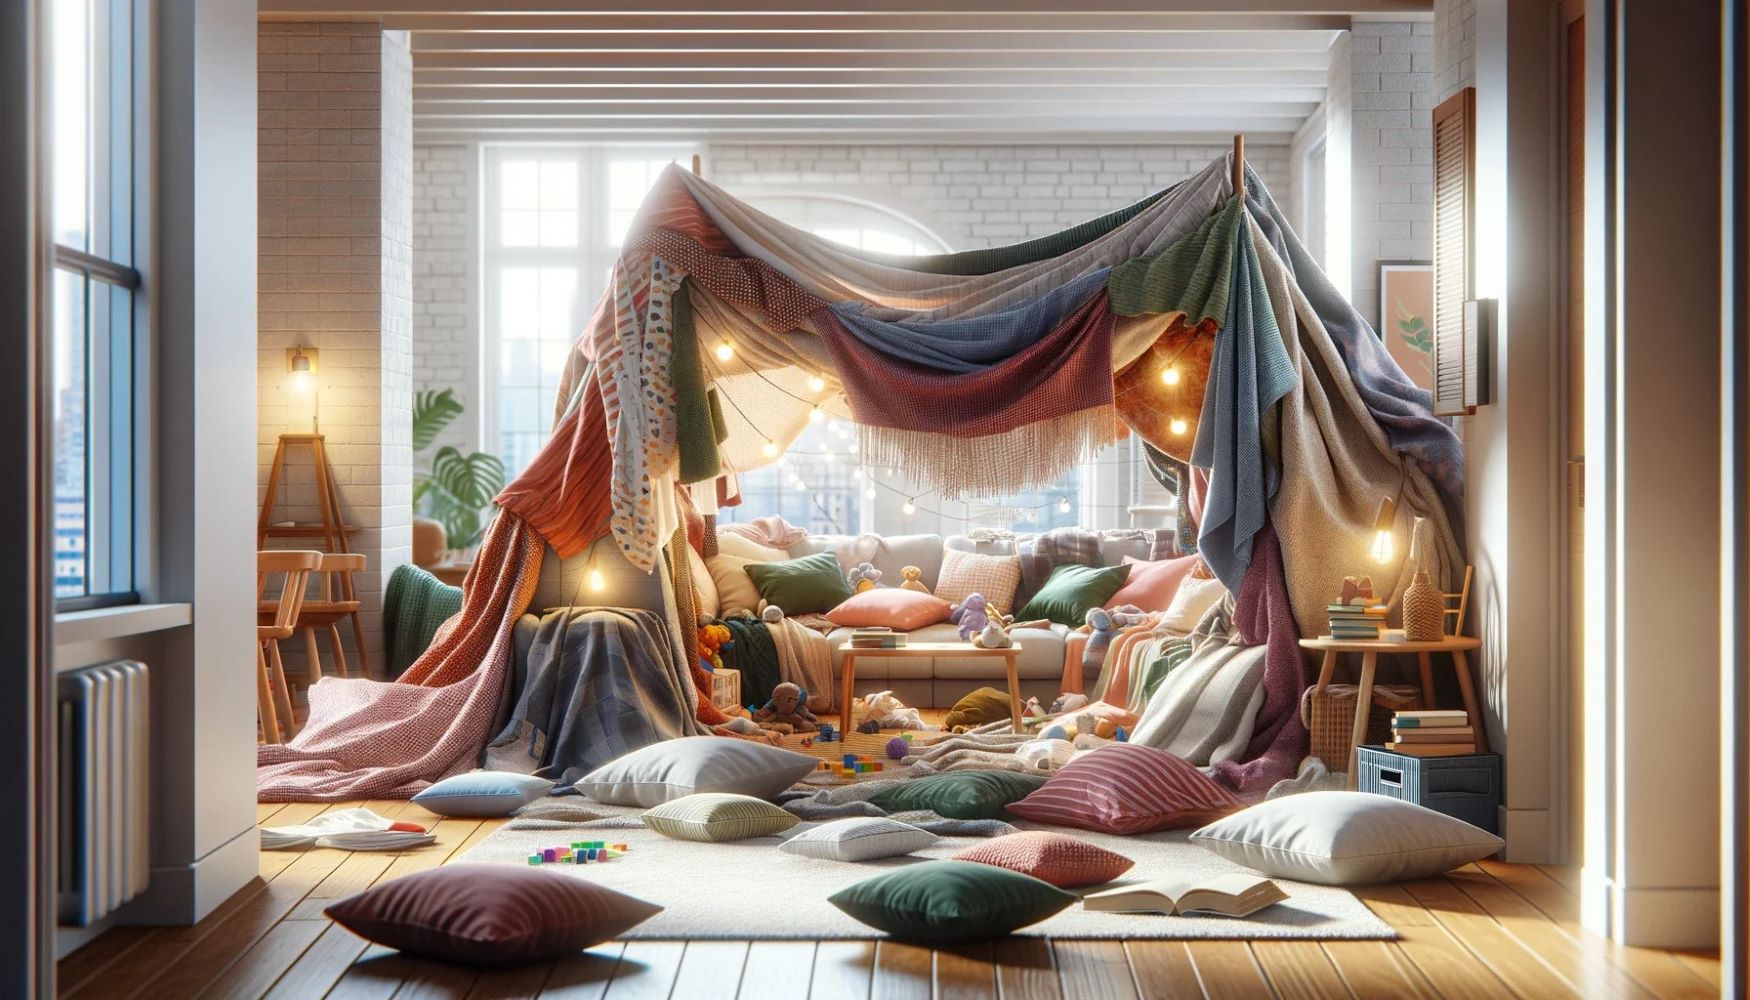
Building a fort is a fun project for kids and adults alike. Whether indoors or outdoors, creating a cozy hideaway sparks creativity and offers a sense of achievement. This guide will help you gather materials, choose a location, and follow simple steps to build a fantastic fort. From classic blanket forts to more elaborate structures using cardboard or wood, there's something for everyone. With a bit of imagination and effort, you can transform everyday items into a magical space. Let's get started and make fort-building an unforgettable adventure!
Getting Ready for Your Fort
Choose a Location: Pick a safe, spacious spot indoors or outdoors. Avoid areas with sharp objects or heavy traffic.
Gather Materials: Collect blankets, sheets, pillows, chairs, and clothespins. For outdoor forts, gather sticks, tarps, and rope.
Clear the Area: Remove any fragile items or obstacles. Ensure the ground is clean and dry.
Set Up a Base: Lay down a blanket or tarp to define the fort's boundaries. This also makes it more comfortable.
Build the Structure: Use chairs or sticks to create the frame. Drape blankets or tarps over the frame, securing them with clothespins or rope.
Add Cushions: Place pillows and cushions inside for comfort. This makes the fort cozy and inviting.
Lighting: Use battery-operated lights or flashlights. Avoid candles or anything that could cause a fire.
Safety Tips: Ensure the fort is stable. Avoid using heavy objects that could fall. Keep an eye on younger kids to prevent accidents.
Materials and Tools Needed
Blankets and Sheets: Use these to create walls and roofs. They are flexible and easy to drape over furniture.
Pillows and Cushions: Provide support for the structure and make the fort comfortable inside.
Chairs and Sofas: Act as the main framework. Drape blankets over them to form the fort's shape.
Clothes Pins or Clips: Secure blankets and sheets in place. They help keep everything from falling apart.
String or Rope: Useful for tying parts of the fort together. Can also be used to hang blankets.
Flashlights or Lanterns: Light up the inside of the fort. Make it cozy and fun.
Books or Heavy Objects: Weigh down the edges of blankets to keep them from slipping.
Decorations: Add personal touches like fairy lights, stuffed animals, or posters to make the fort unique.
Snacks and Drinks: Keep energy levels up while enjoying time inside the fort.
Toys and Games: Bring in board games, cards, or favorite toys to play with inside the fort.
Skill Level and Time Required
Skill Level: Beginner
Time Required: 1-2 hours
Steps:
- Gather Materials: Blankets, pillows, chairs, and clothespins.
- Set Up Base: Arrange chairs or furniture to create a frame.
- Drape Blankets: Cover the frame with blankets, securing with clothespins.
- Add Comfort: Place pillows and cushions inside for seating.
- Decorate: Add fairy lights or toys for extra fun.
Step-by-Step Instructions
Gather Materials
- Blankets or sheets
- Pillows
- Chairs or furniture
- Clothespins or clips
- String or rope
- Flashlight or fairy lights
Choose a Location
- Find a space with enough room
- Ensure it’s safe and free of obstacles
Set Up the Base
- Arrange chairs or furniture to form the fort's frame
- Place them in a square or rectangle shape
Drape Blankets
- Cover the frame with blankets or sheets
- Use clothespins or clips to secure the blankets in place
Create an Entrance
- Leave a gap or use a lighter blanket for easy access
- Ensure it’s wide enough to crawl through
Add Pillows
- Place pillows inside for comfort
- Use them to create seating or lounging areas
Secure the Roof
- Tie string or rope between furniture pieces to support the roof
- Ensure the roof is stable and won’t collapse
Decorate Inside
- Add fairy lights or a flashlight for lighting
- Bring in books, toys, or snacks for entertainment
Test Stability
- Gently push on the fort to check if it’s secure
- Make adjustments if needed
Enjoy Your Fort
- Crawl inside and have fun
- Invite friends or family to join
Tips and Tricks for Building
Use sturdy materials like blankets, sheets, and pillows. Secure corners with heavy books or furniture to keep the fort stable. Create a strong base using chairs or a table. Add lights like fairy lights or flashlights for a cozy feel. Use clothespins or clips to hold blankets together.
Common mistakes include using flimsy materials that collapse easily, not securing the corners well, and making the entrance too small. Avoid using items that can tip over easily.
For alternatives, try using a large cardboard box or a pop-up tent. Instead of blankets, use a large tarp or old curtains. For lighting, consider battery-operated lanterns or glow sticks.
Estimating the Cost
Wooden Pallets: $50-$100 (free if you can find discarded ones)
Nails and Screws: $10-$20
Hammer: $10-$15
Saw: $15-$30
Sandpaper: $5-$10
Paint: $20-$40 (optional)
Paintbrushes: $5-$10
Tarp or Fabric: $10-$25
Rope: $5-$15
Cushions and Blankets: $20-$50 (use old ones to save money)
Total Cost: $150-$315
Budget-Friendly Alternatives:
- Use recycled wood instead of buying new.
- Borrow tools from friends or family.
- Use old sheets or blankets instead of buying new fabric.
- Skip painting if not necessary.
Variations and Customizations
Materials: Instead of using traditional blankets and pillows, try sheets, tarps, or even cardboard boxes. For a more permanent structure, consider using PVC pipes or wooden planks.
Colors: Use fabric dye to color your sheets and blankets. Add string lights or LED strips for a magical touch. Paint cardboard boxes with bright colors or patterns.
Styles: Create a medieval castle with cardboard and paint. Build a space station using silver tarps and glow-in-the-dark stars. Make a tropical hut with bamboo sticks and grass mats.
Themes: Design a pirate ship with a sail and treasure chest. Construct a princess castle with pink fabrics and fairy lights. Build a jungle fort with green sheets and stuffed animals.
Accessories: Add cushions and bean bags for comfort. Use clip-on fans for ventilation. Include storage bins for toys and books. Add a small table for snacks or games.
Entrances: Create a drawbridge with cardboard and string. Use a curtain for a secret entrance. Make a tunnel with connected boxes or fabric.
Windows: Cut out window shapes in cardboard walls. Use plastic wrap for a see-through effect. Add curtains for a cozy feel.
Roofs: Use an umbrella for a quick roof. Drape a large sheet over a clothesline. Create a slanted roof with cardboard and tape.
Floors: Lay down rugs or blankets for comfort. Use foam mats for a soft surface. Add a tarp for outdoor forts.
Lighting: Hang lanterns or fairy lights. Use battery-operated candles for a warm glow. Add a flashlight for reading.
Doors: Make a flap door with fabric. Use a cardboard door with hinges. Create a beaded curtain for a fun entrance.
Sustainability Tips
Cardboard boxes make excellent walls. They are sturdy, easy to cut, and often free from local stores. Old sheets or blankets can serve as roofs or walls. They are lightweight and can be easily draped over furniture or other supports.
Wooden pallets can be repurposed for a strong frame. They are often available for free from warehouses or stores. PVC pipes are lightweight and can be used to create a flexible structure. They are reusable and can be easily disassembled.
Rope or twine can help secure parts of the fort together. They are biodegradable and can be reused for other projects. Clothespins or binder clips can hold fabric in place without causing damage. They are reusable and easy to find.
Recycled plastic bottles can be cut and used as connectors or decorative elements. They reduce waste and add a unique touch. Old tires can be used as a base or seating inside the fort. They are durable and can be painted for a fun look.
Natural elements like branches or leaves can add an outdoor feel to the fort. They are readily available and biodegradable. Reclaimed wood from old furniture or construction sites can be used for a sturdy frame. It reduces waste and adds character.
Paint or markers can be used to decorate the fort. Choose eco-friendly, non-toxic options to keep it safe and sustainable. Solar-powered lights can illuminate the fort at night. They are energy-efficient and add a magical touch.
Your Fort Awaits
Building your own fort is a blast. You’ve got the basics down: gather materials, plan your design, and start constructing. Remember, creativity is key. Use blankets, chairs, and whatever else you can find. Don’t stress about making it perfect. The fun is in the process. Invite friends or family to join in. Share ideas, work together, and enjoy the experience. Once your fort is up, fill it with comfy pillows, snacks, and maybe a flashlight for late-night stories. Take pride in what you’ve built. It’s not just a fort; it’s your own little world. So, next time you’re bored, grab some sheets and start building. You’ll create not just a structure but memories that last. Happy fort building!
How do I choose the best location for my fort?
Look for a flat area with enough space. Avoid spots with lots of rocks or roots. If indoors, pick a room with furniture you can use for support.
What materials do I need?
You’ll need blankets, pillows, chairs, and clothespins. For outdoor forts, sticks, leaves, and tarps work well. Get creative with what you have!
How do I make my fort sturdy?
Use heavy books or weights to anchor blankets. For outdoor forts, tie sticks together with rope or string. Make sure everything is secure.
Can I add decorations?
Absolutely! Use fairy lights, posters, and stuffed animals. Personalize it with your favorite toys or books. Make it cozy and fun!
How long does it take to build a fort?
It depends on the size and complexity. A simple fort might take 30 minutes, while a more elaborate one could take a few hours. Enjoy the process!
Is it safe to sleep in my fort?
Yes, if it’s stable and comfortable. Make sure there’s enough ventilation and no heavy objects that could fall. Always check with an adult first.
Can I build a fort with friends?
Definitely! Building with friends can make it more fun and creative. Just make sure everyone has a role and works together.