
Home>Create & Decorate>DIY & Crafts>DIY Powder Coating Oven: Step-by-Step Guide
DIY & Crafts
DIY Powder Coating Oven: Step-by-Step Guide
Published: February 28, 2024

Content Creator specializing in woodworking and interior transformations. Caegan's guides motivate readers to undertake their own projects, while his custom furniture adds a personal touch.
Learn how to build a DIY powder coating oven with our step-by-step guide. Perfect for DIY & Crafts enthusiasts looking to upgrade their projects.
(Many of the links in this article redirect to a specific reviewed product. Your purchase of these products through affiliate links helps to generate commission for Twigandthistle.com, at no extra cost. Learn more)
Introduction
Powder coating is a popular method for applying a durable and attractive finish to metal objects, from car parts to home decor. While professional powder coating services are widely available, many enthusiasts and DIYers prefer to set up their own powder coating oven to customize their projects and save on costs. Building a DIY powder coating oven can be a rewarding and cost-effective endeavor, allowing you to achieve professional-quality results from the comfort of your own workshop.
In this comprehensive guide, we will walk you through the step-by-step process of constructing a powder coating oven, from gathering the necessary materials and tools to testing the final product. Whether you're a seasoned DIY enthusiast or a newcomer to the world of powder coating, this guide will equip you with the knowledge and confidence to embark on this exciting project.
By following our detailed instructions and tips, you'll be able to create a functional and efficient powder coating oven that meets your specific needs and budget. From designing the oven frame to wiring the control panel, each stage of the construction process will be explained in a clear and accessible manner, ensuring that you can tackle this project with ease.
As you embark on this DIY journey, keep in mind that safety is paramount. Working with electrical components and high temperatures requires caution and attention to detail. Throughout this guide, we will emphasize the importance of safety measures and provide recommendations for protective gear and best practices.
Whether you're looking to powder coat automotive parts, metal furniture, or custom creations, having your own powder coating oven opens up a world of possibilities for personalization and creativity. With the right guidance and a can-do attitude, you'll soon be on your way to mastering the art of powder coating and enjoying the satisfaction of seeing your projects come to life with a professional finish.
Now, let's dive into the exciting world of DIY powder coating ovens and begin the journey toward creating your very own custom workspace for achieving stunning powder-coated results.
Materials and Tools Needed
Before embarking on the construction of your DIY powder coating oven, it's essential to gather all the necessary materials and tools to ensure a smooth and efficient building process. Here's a comprehensive list of the items you'll need to acquire:
Materials:
-
Steel Frame: Begin with a sturdy steel frame that will serve as the foundation of your powder coating oven. The frame should be robust enough to support the heating elements and insulation while withstanding high temperatures.
-
Heating Elements: Select high-quality heating elements designed for industrial or commercial use. These elements will be responsible for generating the heat required for the powder coating process.
-
Insulation Material: Choose an appropriate insulation material to line the interior of the oven. Ceramic fiber insulation is a popular choice due to its ability to withstand extreme temperatures and provide efficient heat retention.
-
Sheet Metal: Acquire sheet metal to construct the exterior panels of the oven. The sheet metal should be durable and heat-resistant to ensure the longevity of the oven.
-
Thermostat and Control Panel: Invest in a reliable thermostat and control panel to regulate the temperature inside the oven. These components are crucial for maintaining consistent heat levels during the powder coating process.
-
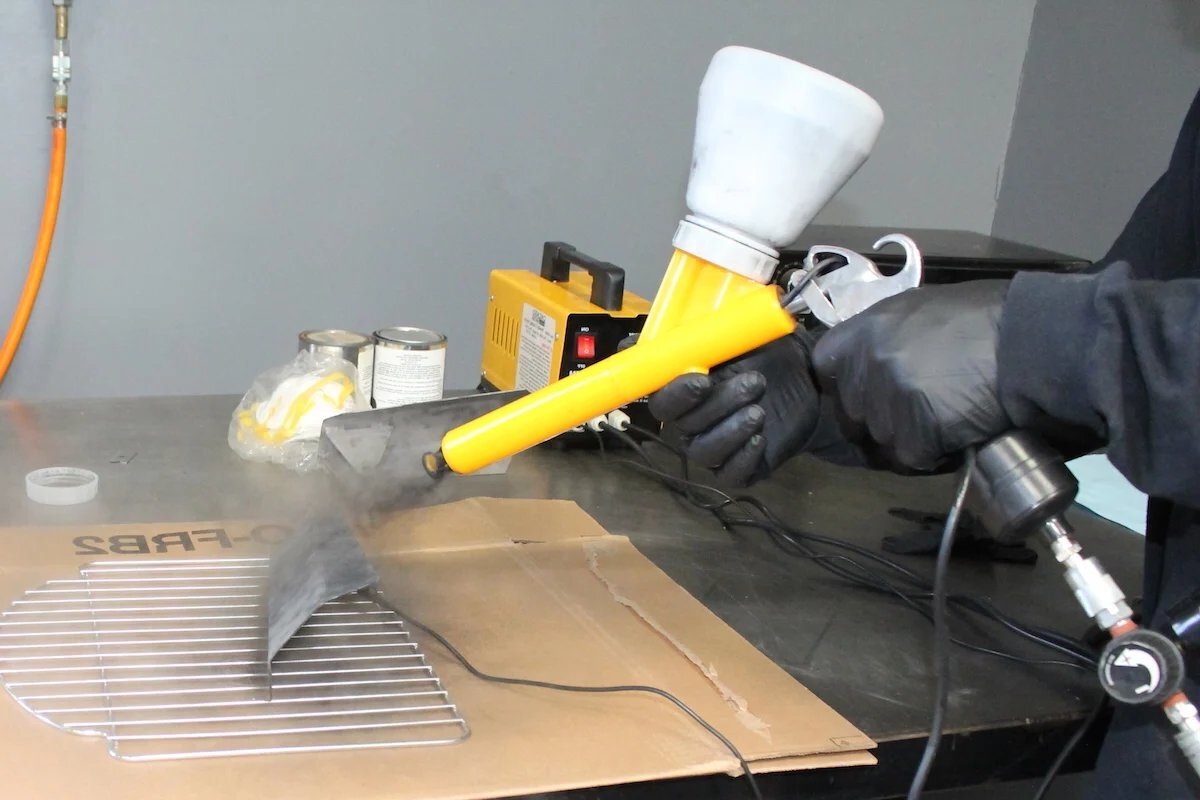
Powder Coating Gun and Powder: If you don't already have these items, you'll need a powder coating gun and the desired powder coating material for applying the finish to your projects.
-
Fasteners and Hardware: Stock up on various fasteners, such as bolts, nuts, and screws, as well as other hardware necessary for assembling the components of the oven.
-
High-Temperature Paint: Consider obtaining high-temperature paint to coat the exterior of the oven, providing an additional layer of protection and a polished finish.
Tools:
-
Welder: A welding machine will be essential for joining the steel frame and assembling the structural components of the oven.
-
Angle Grinder: Use an angle grinder to cut and shape the steel frame and sheet metal with precision.
-
Drill and Bits: Have a drill and a selection of drill bits on hand for creating holes in the metal components and attaching fasteners.
-
Screwdriver and Wrench Set: A set of screwdrivers and wrenches will be indispensable for securing fasteners and assembling the various parts of the oven.
-
Insulation Cutter: If working with ceramic fiber insulation, an insulation cutter will facilitate the precise cutting and fitting of the insulation material.
-
Electrical Tools: Ensure you have electrical tools such as wire cutters, wire strippers, and crimping tools for the installation of the heating elements and wiring of the control panel.
By acquiring these materials and tools, you'll be well-prepared to commence the construction of your DIY powder coating oven. With everything in place, you can proceed to the next phase of the project, which involves building the oven frame and laying the groundwork for the installation of heating elements and insulation.
Building the Oven Frame
The construction of the oven frame forms the structural backbone of your DIY powder coating oven, providing stability and support for the heating elements and insulation. Here's a detailed walkthrough of the steps involved in building the oven frame:
Step 1: Design and Measurements
Begin by designing the dimensions of the oven frame based on the size of the projects you intend to powder coat. Consider the internal space required for accommodating various items while ensuring that the frame is robust and stable. Take precise measurements to determine the length, width, and height of the frame, keeping in mind the thickness of the steel material to be used.
Step 2: Steel Selection and Cutting
Select high-quality steel beams or square tubing for constructing the frame. Opt for a material with sufficient strength to withstand the weight of the heating elements and insulation. Using an angle grinder equipped with a metal-cutting disc, carefully cut the steel components according to the measured dimensions. Ensure precise and clean cuts to facilitate accurate assembly.
Step 3: Welding the Frame
With the cut steel pieces prepared, use a welding machine to join the components and assemble the frame structure. Employ welding techniques such as MIG or TIG welding to create strong and durable connections. Pay close attention to the alignment and squareness of the frame to ensure a stable and uniform structure. Weld all joints securely to guarantee the integrity of the frame.
Step 4: Reinforcement and Bracing
To enhance the stability and rigidity of the frame, consider adding reinforcement and bracing at key points. This may involve welding additional steel supports or diagonal braces to prevent any potential warping or distortion under the heat and weight of the oven components. Reinforcement will contribute to the longevity and reliability of the oven frame.
Step 5: Mounting Points for Components
As you finalize the construction of the frame, incorporate designated mounting points for the heating elements, control panel, and insulation. These mounting points should be strategically positioned to facilitate the seamless installation of the essential components, ensuring a secure and well-integrated assembly.
By meticulously following these steps, you'll successfully build a robust and well-structured oven frame that forms the foundation of your DIY powder coating oven. With the frame in place, you'll be ready to progress to the next stages of installing the heating elements, adding insulation, and wiring the control panel, bringing you closer to the completion of your custom powder coating workspace.
Installing the Heating Elements
The installation of heating elements is a critical phase in the construction of a DIY powder coating oven, as these components are responsible for generating and maintaining the high temperatures required for the powder curing process. Proper installation of the heating elements ensures consistent and efficient heat distribution within the oven, ultimately contributing to the quality and durability of the powder-coated finish. Here's a detailed guide on the step-by-step process of installing the heating elements:
Step 1: Positioning and Layout
Begin by determining the optimal placement of the heating elements within the oven. Consider factors such as heat distribution, accessibility for maintenance, and clearance from other components. Lay out the positioning of the elements based on the internal dimensions of the oven, ensuring even coverage of heat throughout the workspace. Take into account the recommended spacing and orientation of the heating elements to achieve uniform heating.
Step 2: Mounting and Securing
Once the positioning is established, proceed to mount the heating elements onto the interior surfaces of the oven frame. Utilize appropriate mounting brackets or fixtures to secure the elements in place, ensuring they are firmly anchored and resistant to movement or vibration. Employ high-temperature-resistant fasteners and hardware to withstand the extreme heat generated during operation. Thoroughly inspect the mounting to verify the stability and integrity of the installed heating elements.
Step 3: Electrical Connection
With the heating elements securely mounted, focus on the electrical connection to power the elements. Adhere to electrical safety standards and guidelines when wiring the elements to the control panel. Use high-temperature-rated wiring and connectors to withstand the heat generated during operation. Ensure that the electrical connections are properly insulated and protected to prevent any risk of short circuits or electrical hazards.
Step 4: Testing and Calibration
Before proceeding further, conduct a comprehensive test of the installed heating elements to verify their functionality and heat output. Power up the elements and monitor their performance, ensuring that they reach and maintain the desired temperature levels. Calibrate the control panel settings to regulate the heat output of the elements accurately. This testing phase is crucial for identifying and addressing any potential issues or discrepancies in the heating element operation.
By meticulously following these steps, you'll successfully install the heating elements in your DIY powder coating oven, setting the stage for the subsequent phases of adding insulation, wiring the control panel, and assembling the oven. The proper installation and functionality of the heating elements are fundamental to achieving consistent and professional-quality powder coating results, making this stage a pivotal aspect of the overall construction process.
Adding Insulation
Insulation plays a crucial role in a DIY powder coating oven, contributing to heat retention, energy efficiency, and overall performance. Proper insulation not only enhances the oven's ability to maintain consistent temperatures but also ensures the safety of the surrounding environment by minimizing heat transfer to the exterior surfaces. Here's a comprehensive guide on the process of adding insulation to your powder coating oven:
Step 1: Selecting the Insulation Material
Begin by selecting a suitable insulation material that can withstand high temperatures and effectively retain heat within the oven. Ceramic fiber insulation is a popular choice due to its exceptional thermal resistance and durability. It is capable of withstanding temperatures well above those typically encountered in powder coating processes, making it an ideal option for lining the interior of the oven.
Step 2: Cutting and Fitting the Insulation
Once the insulation material is chosen, carefully measure and cut it to fit the internal dimensions of the oven frame. Precision is key to ensuring a snug and uniform fit, as any gaps or inconsistencies in the insulation coverage can compromise its effectiveness. Use an insulation cutter or a sharp utility knife to achieve clean and accurate cuts, allowing the insulation to conform seamlessly to the contours of the oven interior.
Step 3: Securing the Insulation
With the insulation pieces cut to size, affix them to the interior surfaces of the oven frame using high-temperature adhesive or specialized fasteners designed for insulation applications. Ensure that the insulation is firmly secured and free from any sagging or displacement, as this can impact its thermal performance. Pay particular attention to areas around the heating elements, corners, and seams, where effective insulation is crucial for heat distribution and retention.
Step 4: Sealing and Encapsulation
To further enhance the insulation's efficacy, consider encapsulating it with a layer of high-temperature-resistant fabric or metal foil. This additional layer serves to contain the insulation material, prevent fiber erosion, and create a barrier against potential particulate emissions. Seal any exposed edges or joints with heat-resistant tape or sealant to fortify the insulation and minimize the risk of heat loss or contamination.
Step 5: Inspection and Optimization
Once the insulation is in place, conduct a thorough inspection to ensure that it covers the entire interior of the oven and adheres securely to the frame. Address any areas of concern or potential gaps by adding supplementary insulation as needed. Optimize the insulation layout to maximize heat retention and minimize thermal conductivity, thereby optimizing the overall efficiency and performance of the powder coating oven.
By meticulously following these steps, you'll effectively add insulation to your DIY powder coating oven, elevating its thermal capabilities and creating an environment conducive to achieving professional-grade powder coating results. The insulation serves as a fundamental component in the construction of the oven, contributing to its functionality, safety, and the quality of the finished powder-coated products.
Wiring the Control Panel
Wiring the control panel is a critical phase in the construction of a DIY powder coating oven, as it involves the integration of electrical components to regulate and monitor the oven's temperature and operation. Proper wiring ensures the safe and efficient functionality of the control panel, allowing for precise temperature control and user-friendly operation. Here's a detailed guide on the step-by-step process of wiring the control panel:
Step 1: Component Layout and Placement
Begin by planning the layout and placement of the control panel components within the oven framework. Position the thermostat, temperature display, power switches, and any additional control elements in a centralized and accessible location. Ensure that the components are strategically arranged for convenient operation and maintenance, taking into account the wiring paths and connections.
Step 2: Electrical Schematic Design
Create a comprehensive electrical schematic that outlines the wiring connections and circuitry of the control panel. This schematic serves as a visual guide for the wiring process, detailing the interconnections between the thermostat, heating elements, power source, and any auxiliary devices. Adhere to standard electrical symbols and conventions to accurately represent the circuit layout and facilitate the subsequent wiring tasks.
Step 3: Wire Selection and Routing
Select high-quality, heat-resistant wires and cables suitable for the electrical demands of the control panel. Choose wires with the appropriate gauge and insulation ratings to withstand the elevated temperatures encountered within the oven. Route the wires along designated pathways, ensuring that they are secured and organized to prevent tangling or interference with other components. Employ cable ties or conduits to manage the wiring neatly and minimize the risk of damage or electrical hazards.
Step 4: Connection and Termination
Carefully connect the wires according to the electrical schematic, following the designated terminal points on the control panel components. Utilize proper crimping or soldering techniques to establish secure and reliable electrical connections. Verify the polarity and continuity of the connections to prevent any potential short circuits or malfunctions. Insulate the exposed wire ends and terminations with heat-resistant materials to safeguard against electrical faults and ensure user safety.
Step 5: Grounding and Safety Measures
Implement effective grounding for the control panel and associated electrical components to mitigate the risk of electrical shock and equipment damage. Connect the grounding conductors to designated grounding points within the oven framework, establishing a robust electrical ground for the entire system. Incorporate safety features such as fuses or circuit breakers to protect against overcurrent conditions and safeguard the control panel from electrical faults.
By meticulously following these steps, you'll successfully wire the control panel of your DIY powder coating oven, establishing a reliable and safe electrical system for regulating the oven's temperature and operation. The proper wiring and integration of the control panel components are essential for ensuring the functionality, precision, and user safety of the powder coating oven, marking a significant milestone in the overall construction process.
Assembling the Oven
With the oven frame constructed, heating elements installed, and insulation in place, the next crucial phase in building your DIY powder coating oven is the assembly process. This pivotal stage involves integrating all the components, finalizing the interior layout, and preparing the oven for testing and operation.
Step 1: Component Integration
Begin by carefully positioning the heating elements within the insulated interior of the oven frame, ensuring that they are securely mounted and aligned for optimal heat distribution. Place the control panel in its designated location, making the necessary electrical connections and ensuring that all wiring is neatly routed and organized. Verify that the thermostat, temperature display, and power switches are accessible and properly oriented for user convenience.
Step 2: Interior Finishing
With the components in place, attend to the interior finishing of the oven. Inspect the insulation to confirm that it is uniformly distributed and effectively encapsulated, addressing any areas of concern or potential gaps. Verify that the interior surfaces are free from debris and obstructions, creating a clean and conducive environment for powder coating processes. Consider applying a reflective coating to the interior surfaces to enhance heat retention and optimize the curing process.
Step 3: Exterior Enclosure
Once the interior assembly is complete, proceed to enclose the exterior of the oven with the selected sheet metal panels. Carefully affix the panels to the steel frame, ensuring a secure and weatherproof enclosure. Utilize high-temperature-resistant fasteners and hardware to withstand the heat generated during operation. Verify that the exterior panels are aligned and sealed to prevent heat loss and maintain the integrity of the oven structure.
Step 4: Final Checks
Conduct a comprehensive inspection of the assembled oven, verifying the integrity of all components, connections, and fastenings. Ensure that the control panel is operational and responsive, allowing for the adjustment of temperature settings and monitoring of the heating elements. Double-check the overall alignment and stability of the oven, addressing any discrepancies or deficiencies in the assembly. Prepare the oven for the testing phase by confirming that all safety measures and precautions are in place.
By meticulously following these steps, you'll successfully assemble your DIY powder coating oven, bringing together all the essential components and finalizing the construction process. The assembled oven represents the culmination of your efforts, setting the stage for testing and fine-tuning its performance. With the assembly complete, you're poised to embark on the exciting phase of testing the oven and witnessing the transformative capabilities of your custom-built powder coating workspace.
Testing the Oven
After the meticulous construction and assembly of your DIY powder coating oven, the crucial phase of testing awaits, marking the moment of truth for your custom-built workspace. Testing the oven is a pivotal step that allows you to evaluate its functionality, performance, and safety measures before embarking on actual powder coating processes. Here's a comprehensive guide on the testing process, ensuring that your oven is primed for professional-grade powder coating results.
Step 1: Pre-Test Inspection
Before initiating the testing phase, conduct a thorough pre-test inspection of the oven. Verify that all electrical connections are secure and properly insulated, minimizing the risk of electrical faults or hazards. Check the control panel for responsiveness and accuracy, ensuring that the thermostat and temperature display function as intended. Inspect the heating elements for any signs of damage or irregularities, addressing any issues that may compromise their performance.
Step 2: Heat-Up Trial
Initiate a heat-up trial to gauge the oven's ability to reach and maintain the desired temperatures. Gradually increase the temperature settings on the control panel, monitoring the heat output and distribution within the oven. Verify that the heating elements operate uniformly and consistently, ensuring that the interior of the oven reaches the intended curing temperatures. This trial serves to validate the functionality of the heating system and identify any potential hot spots or temperature differentials.
Step 3: Temperature Calibration
Conduct a temperature calibration process to align the thermostat and control panel settings with the actual heat levels inside the oven. Utilize a reliable temperature measurement device to verify the accuracy of the displayed and actual temperatures. Make necessary adjustments to the control panel settings to ensure precise temperature regulation, allowing for the consistent curing of powder coatings without overheating or underperforming.
Step 4: Uniformity Assessment
Assess the uniformity of heat distribution within the oven by conducting a series of temperature mapping tests. Place temperature sensors at various locations within the oven and monitor the heat levels to identify any disparities or inconsistencies. This assessment is crucial for ensuring that the powder-coated items receive uniform heat exposure, resulting in consistent and high-quality finishes. Adjust the positioning of the heating elements if needed to optimize heat distribution.
Step 5: Safety Checks
Conduct comprehensive safety checks to validate the integrity of the oven and its components. Ensure that all safety features, such as emergency shutoff mechanisms and overheat protection, are operational and responsive. Verify that the exterior surfaces of the oven remain at safe temperatures during operation, minimizing the risk of accidental burns or heat-related incidents. Address any safety concerns or anomalies to guarantee a secure working environment.
Step 6: Test Run with Sample Projects
Finally, perform a test run with sample projects to simulate actual powder coating processes within the oven. Select a variety of items to be powder coated and subject them to the curing process, monitoring the oven's performance and the quality of the finished coatings. Assess the adhesion, texture, and overall appearance of the powder-coated samples to validate the oven's capability to deliver professional-grade results.
By meticulously conducting these testing procedures, you'll gain confidence in the functionality and reliability of your DIY powder coating oven, ensuring that it meets the standards for safe and effective operation. The testing phase serves as a pivotal validation of your construction efforts, setting the stage for the exciting journey of unleashing your creativity and achieving stunning powder-coated finishes within your custom-built workspace.
Conclusion
In conclusion, the journey of constructing a DIY powder coating oven is a testament to the fusion of craftsmanship, engineering, and creativity. From the initial design and procurement of materials to the meticulous assembly and testing phases, every step in the construction process contributes to the realization of a custom-built workspace tailored for achieving professional-grade powder-coated finishes.
The endeavor of building a powder coating oven transcends the mere construction of a functional appliance; it embodies the spirit of ingenuity and the pursuit of personalized craftsmanship. As DIY enthusiasts and creators, the satisfaction derived from witnessing the transformation of raw materials into immaculately finished products is unparalleled. The DIY powder coating oven becomes a conduit for self-expression, enabling the realization of unique and customized designs with a durable and aesthetically pleasing powder-coated finish.
Throughout the construction journey, emphasis on safety, precision, and attention to detail remains paramount. The integration of high-quality materials, meticulous insulation, and reliable electrical components ensures not only the operational efficiency of the oven but also the safety of its users. The adherence to best practices and safety measures underscores the commitment to creating a workspace that fosters creativity without compromising on user well-being.
As the final pieces of the oven come together, the culmination of the construction process marks the beginning of a new chapter in the pursuit of DIY craftsmanship. The assembled powder coating oven stands as a testament to perseverance, technical skill, and the unwavering dedication to quality. It represents the gateway to a realm of endless possibilities, where automotive parts, metal furnishings, and bespoke creations can be transformed into enduring works of art through the application of custom powder coatings.
In the realm of DIY and crafts, the journey of constructing a powder coating oven serves as a testament to the boundless potential of human ingenuity. It exemplifies the fusion of technical prowess and artistic vision, offering a platform for enthusiasts to unleash their creativity and elevate their projects to new heights of quality and personalization. With the completion of the DIY powder coating oven, a world of exploration and innovation awaits, where every project becomes an opportunity to showcase craftsmanship and individuality through the art of powder coating.