
Home>Create & Decorate>DIY & Crafts>DIY Paint Booth: How To Create Your Own Spray Painting Space
DIY & Crafts
DIY Paint Booth: How To Create Your Own Spray Painting Space
Published: June 2, 2024

Senior Editor in Create & Decorate, Kathryn combines traditional craftsmanship with contemporary trends. Her background in textile design and commitment to sustainable crafts inspire both content and community.
Learn how to build your own DIY paint booth for spray painting projects with our step-by-step guide. Create a dedicated space for your DIY & Crafts endeavors.
(Many of the links in this article redirect to a specific reviewed product. Your purchase of these products through affiliate links helps to generate commission for Twigandthistle.com, at no extra cost. Learn more)
Introduction
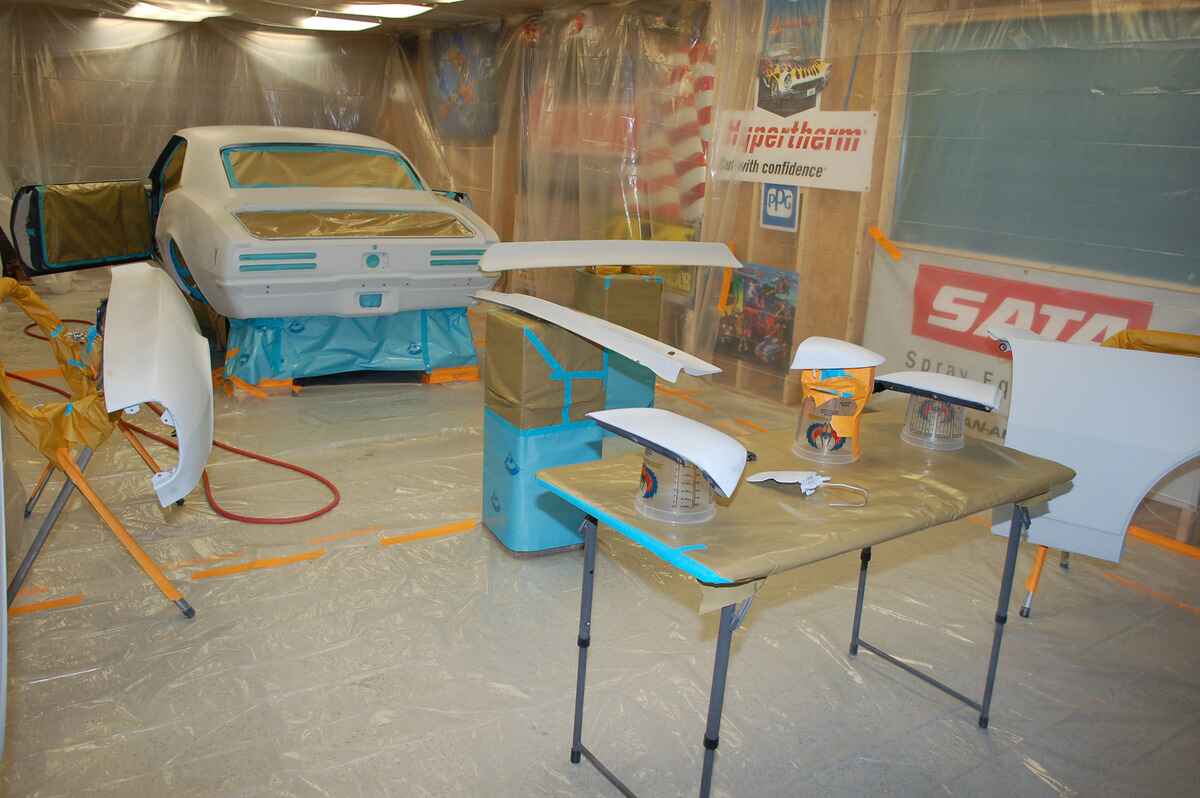
Are you tired of making a mess every time you want to spray paint something? Creating your own DIY paint booth can be the perfect solution. Whether you're working on a small craft project or a larger home improvement task, having a dedicated space for spray painting can make the process much more efficient and enjoyable. In this article, we'll guide you through the steps to create your own spray painting space, from the necessary materials and tools to safety precautions and tips for using your DIY paint booth effectively. Let's dive in and get your DIY paint booth up and running!
Benefits of Creating Your Own Paint Booth
Creating your own DIY paint booth offers a multitude of benefits, making it a worthwhile investment of your time and effort. Here are some of the key advantages:
-
Controlled Environment: With a DIY paint booth, you have the ability to control the environment in which you spray paint. This means you can minimize dust, debris, and other contaminants that can affect the quality of your paint job.
-
Professional Results: By having a dedicated space for spray painting, you can achieve professional-looking results. The controlled environment reduces the likelihood of imperfections in your paint finish, giving your projects a polished and professional appearance.
-
Safety and Health: A DIY paint booth allows you to contain fumes and overspray, creating a safer and healthier workspace. This is especially important when working with aerosol paints or other potentially hazardous materials.
-
Versatility: Whether you're working on small crafts or larger items, having a DIY paint booth gives you the flexibility to tackle a wide range of projects. From furniture and home decor to automotive parts, you can easily adapt the space to suit your needs.
-
Efficiency: With a designated area for spray painting, you can streamline your workflow and complete projects more efficiently. Having all your materials and tools in one place can save time and reduce the hassle of setting up and cleaning up for each painting session.
-
Cost-Effective: Building your own paint booth can be a cost-effective alternative to professional spray painting services. It allows you to take on more projects without the added expense of outsourcing the painting work.
By creating your own DIY paint booth, you can enjoy these benefits while enhancing the quality and efficiency of your spray painting endeavors.
Necessary Materials and Tools
When setting out to create your DIY paint booth, gathering the necessary materials and tools is the first crucial step. Here's a comprehensive list of what you'll need:
Materials:
- PVC Pipes: These will form the frame of your paint booth. Opt for sturdy, lightweight pipes that are easy to work with.
- Plastic Sheeting: Choose durable, flame-retardant plastic sheeting to enclose your booth. Ensure it's large enough to cover the entire frame with some extra for adjustments.
- Duct Tape: This will be used to secure the plastic sheeting to the frame, creating a sealed enclosure.
- Box Fans or Ventilation System: To ensure proper airflow and ventilation within the booth, you'll need box fans or a ventilation system to expel fumes and maintain a safe environment.
- Lighting: Adequate lighting is essential for a well-lit workspace. LED shop lights or similar options work well for illuminating the interior of the booth.
Tools:
- Measuring Tape: Accurate measurements are crucial for constructing a sturdy and well-fitted paint booth.
- PVC Pipe Cutter or Saw: To cut the PVC pipes to the required lengths for the frame.
- Scissors or Utility Knife: These will be used to cut the plastic sheeting to size.
- Drill and Screws: For assembling the PVC pipe frame and securing the plastic sheeting.
- Safety Equipment: Gloves, safety goggles, and a respirator or mask are essential for personal protection during construction and painting.
By ensuring you have all the necessary materials and tools on hand, you'll be well-prepared to move on to the next steps of setting up your DIY paint booth.
Setting Up Your DIY Paint Booth
Now that you have all the materials and tools ready, it's time to start setting up your DIY paint booth. Follow these step-by-step instructions to create a functional and effective spray painting space:
-
Frame Construction: Begin by constructing the frame for your paint booth using the PVC pipes. Measure and cut the pipes to the desired lengths, considering the dimensions of the space where you plan to set up the booth. Assemble the frame according to your design, ensuring it is stable and secure.
-
Enclosure: Once the frame is in place, drape the plastic sheeting over it to create an enclosed space. Use duct tape to secure the sheeting to the frame, ensuring a tight seal around the edges. Pay attention to the entry and exit points, as you'll need a way to enter and exit the booth while maintaining the enclosure's integrity.
-
Ventilation: Proper ventilation is crucial for a DIY paint booth. If using box fans, position them strategically to create airflow within the booth, directing fumes towards an exhaust point. Alternatively, if you have a ventilation system, ensure it is set up to expel fumes safely to the outside environment.
-
Lighting: Install the lighting inside the booth to ensure adequate illumination for your painting projects. LED shop lights are a popular choice for their brightness and energy efficiency. Position the lights to evenly distribute the illumination throughout the booth.
-
Entry and Exit: Create a simple entry and exit system for the booth. This can be achieved by overlapping the plastic sheeting at a designated point, allowing for easy access while maintaining the enclosure's integrity when not in use.
-
Testing: Before using the booth for spray painting, conduct a test run to ensure everything is functioning as intended. Check the ventilation, lighting, and overall stability of the booth to address any potential issues before starting your painting projects.
By following these steps, you can effectively set up your DIY paint booth and create a dedicated space for all your spray painting needs. With the booth in place, you'll be ready to move on to the next phase of utilizing it for your projects.
Safety Precautions and Tips
When it comes to spray painting, safety should always be a top priority. Here are some essential safety precautions and tips to keep in mind when using your DIY paint booth:
-
Ventilation: Ensure that the ventilation system or box fans are functioning properly before starting any painting activities. Adequate airflow helps to remove fumes and overspray from the booth, reducing the risk of inhalation and creating a safer environment.
-
Personal Protective Equipment (PPE): Wear appropriate PPE, including gloves, safety goggles, and a respirator or mask, to protect yourself from potential exposure to paint fumes and particles. These items are essential for safeguarding your eyes, skin, and respiratory system during spray painting.
-
Fire Safety: Keep fire safety in mind when working with aerosol paints or other flammable materials. Avoid smoking or using open flames near the paint booth, and have a fire extinguisher readily available in case of emergencies.
-
Avoid Overcrowding: To maintain a safe and organized workspace, avoid overcrowding the paint booth with excessive materials or equipment. Clear the area of any unnecessary items to prevent tripping hazards and ensure a clear path for movement.
-
Proper Disposal: Dispose of used paint cans, rags, and other painting materials in a safe and responsible manner. Follow local regulations for the disposal of hazardous waste to minimize environmental impact.
-
Cleaning and Maintenance: Regularly clean and maintain your DIY paint booth to ensure its continued effectiveness and safety. Clear away any accumulated overspray, replace filters as needed, and inspect the booth for any signs of wear or damage.
-
Supervision: If children or pets are present in the vicinity of the paint booth, ensure they are supervised at all times. Keep hazardous materials out of reach and maintain a safe distance from the painting area.
By adhering to these safety precautions and tips, you can create a secure and controlled environment for your spray painting activities, minimizing risks and promoting a safe and enjoyable DIY experience.
Using Your DIY Paint Booth for Spray Painting
Now that your DIY paint booth is set up and ready to go, it's time to put it to use for your spray painting projects. Follow these steps to make the most of your newly created spray painting space:
-
Preparation: Before starting any painting, ensure that the items to be painted are clean and free of dust or debris. This helps to achieve a smooth and professional finish. Additionally, gather all the necessary paints, primers, and other materials you'll need for the project.
-
Positioning: Place the items to be painted inside the DIY paint booth, ensuring that there is ample space around each item for easy maneuvering and access. Consider using a turntable or rotating platform to simplify the painting process for 360-degree coverage.
-
Masking and Protection: Use masking tape and plastic sheeting to protect any areas of the items that you don't want to be painted. This includes handles, knobs, or any other non-paintable surfaces. Take the time to properly mask off these areas to achieve clean and precise results.
-
Spray Technique: When applying the paint, maintain a consistent distance between the spray can or paint gun and the surface of the item. Use smooth, overlapping strokes to ensure even coverage and minimize the risk of drips or uneven application. Practice good spray painting techniques to achieve the desired finish.
-
Drying and Curing: After the paint has been applied, allow sufficient time for drying and curing. Depending on the type of paint used, this may involve air drying or baking the items in a designated curing area within the paint booth. Follow the manufacturer's recommendations for optimal drying times.
-
Quality Inspection: Once the painted items have dried, carefully inspect them for any imperfections or areas that may require touch-ups. Address any issues promptly to maintain the quality of the paint finish.
-
Cleanup: After completing the painting process, clean up any overspray or paint residue within the DIY paint booth. Dispose of used materials properly and ensure that the booth is left in a clean and organized state for future use.
By following these steps, you can effectively utilize your DIY paint booth for spray painting, achieving professional results while maximizing the benefits of having a dedicated and controlled painting space.
Maintenance and Upkeep of Your DIY Paint Booth
Maintaining and upkeeping your DIY paint booth is essential to ensure its longevity, effectiveness, and safety. Regular maintenance tasks will help you preserve the functionality of the booth and continue to enjoy its benefits for your spray painting projects. Here are the key aspects of maintaining and upkeeping your DIY paint booth:
Cleaning and Clearing
Regularly clean the interior of the paint booth to remove any overspray, dust, or debris that may have accumulated during painting sessions. Use a soft-bristled brush or a vacuum cleaner to gently clear the surfaces, ensuring that the ventilation openings and fans are free from obstruction. Clearing the booth of any clutter or unused materials also contributes to a safer and more organized workspace.
Filter Replacement
If your DIY paint booth is equipped with filters to capture overspray and contaminants, it's important to monitor their condition and replace them as needed. Over time, filters can become clogged and less effective, impacting the ventilation and air quality within the booth. Follow the manufacturer's recommendations for filter replacement intervals and choose high-quality filters for optimal performance.
Structural Integrity
Periodically inspect the structural integrity of the PVC frame and the plastic sheeting enclosure. Look for any signs of wear, tear, or damage that may compromise the stability of the booth. Ensure that the frame connections are secure, and the plastic sheeting is intact without any tears or holes. Address any issues promptly to maintain the integrity of the booth's construction.
Lighting and Ventilation
Check the lighting fixtures and ventilation system to ensure they are functioning properly. Replace any faulty bulbs or LED tubes to maintain adequate illumination within the booth. Verify that the ventilation fans or system are expelling fumes effectively and that the airflow is consistent. Proper lighting and ventilation are crucial for a safe and productive painting environment.
Safety Equipment
Inspect and replenish your personal protective equipment, including gloves, safety goggles, and respirators. Ensure that these items are in good condition and readily available for use during painting sessions. Additionally, consider having a first aid kit within reach in case of minor accidents or injuries.
Environmental Considerations
Dispose of used paint cans, solvent-soaked rags, and other painting materials in accordance with local regulations. Properly managing and disposing of hazardous waste is essential for environmental responsibility and compliance with legal requirements. By maintaining a clean and environmentally conscious approach, you contribute to a sustainable DIY paint booth setup.
By incorporating these maintenance practices into your routine, you can uphold the functionality and safety of your DIY paint booth, allowing you to continue enjoying its benefits for all your spray painting endeavors. Regular upkeep ensures that your paint booth remains a reliable and efficient space for achieving professional-quality results.
Conclusion
In conclusion, creating your own DIY paint booth can significantly enhance your spray painting experience, offering a controlled environment, professional results, safety, versatility, efficiency, and cost-effectiveness. By following the steps outlined in this guide, from gathering the necessary materials and tools to setting up the booth, adhering to safety precautions, and utilizing it for spray painting, you can elevate the quality and efficiency of your painting projects. Additionally, maintaining and upkeeping your DIY paint booth ensures its longevity and continued effectiveness. With a well-designed and properly maintained paint booth, you can tackle a wide range of projects with confidence, achieving professional-looking results while minimizing the mess and hazards associated with spray painting. Embrace the benefits of having your own dedicated spray painting space and enjoy the satisfaction of creating beautifully finished projects with ease and precision.