
Home>Create & Decorate>DIY & Crafts>DIY Ladder Shelf: Step-by-Step Guide To Building A Stylish Storage Solution
DIY & Crafts
DIY Ladder Shelf: Step-by-Step Guide To Building A Stylish Storage Solution
Published: June 8, 2024

Content Creator specializing in woodworking and interior transformations. Caegan's guides motivate readers to undertake their own projects, while his custom furniture adds a personal touch.
Learn how to build a stylish DIY ladder shelf with our step-by-step guide. Perfect for adding extra storage to your home. Discover more DIY & Crafts projects!
(Many of the links in this article redirect to a specific reviewed product. Your purchase of these products through affiliate links helps to generate commission for Twigandthistle.com, at no extra cost. Learn more)
Introduction
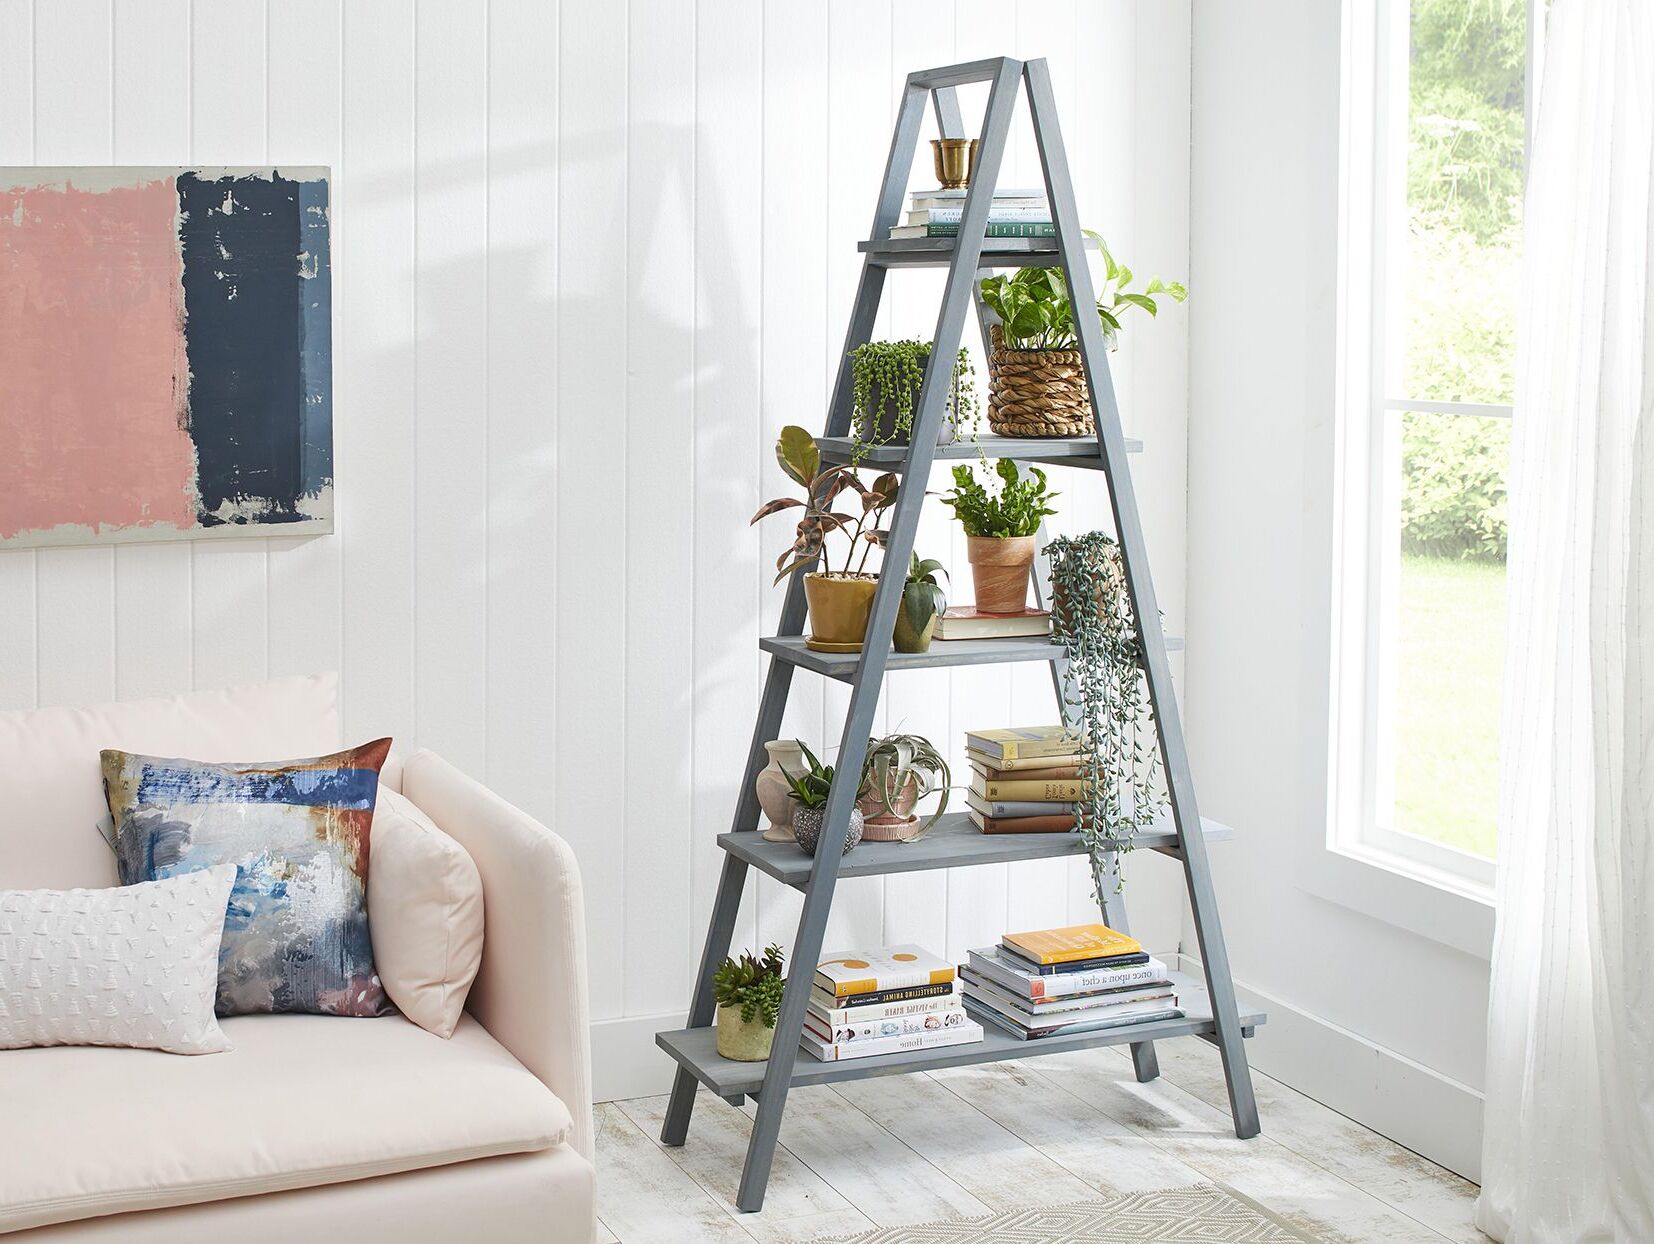
Are you looking to add a touch of style and functionality to your living space? Building a DIY ladder shelf could be the perfect solution for your storage needs. Not only does it provide a practical way to organize and display your belongings, but it also serves as a chic and trendy piece of furniture. In this step-by-step guide, we will walk you through the process of creating your own ladder shelf, allowing you to customize it to fit your space and personal style. Whether you're a seasoned DIY enthusiast or a beginner looking for a fun project, this guide will equip you with the knowledge and confidence to tackle this rewarding endeavor. Let's get started!
Materials and Tools Needed
Materials:
- Wooden Boards: 2×4 lumber for the frame and 1×6 lumber for the shelves.
- Wood Screws: Assorted sizes for securing the frame and shelves.
- Wood Stain or Paint: Choose a finish that complements your decor.
- Wood Glue: For added strength in securing joints.
- Sandpaper: To smooth out rough edges and prepare the wood for finishing.
- Wood Conditioner: Optional, but recommended for staining to ensure an even finish.
- Decorative Hardware: Such as corner braces or decorative knobs for a personalized touch.
Tools:
- Measuring Tape: Essential for accurate dimensions.
- Saw: Circular saw or miter saw for cutting the lumber to size.
- Drill: For creating pilot holes and driving screws.
- Screwdriver: Both manual and electric screwdrivers may be needed.
- Paintbrush or Rag: For applying the wood stain or paint.
- Clamps: To hold the pieces in place during assembly.
- Safety Gear: Including goggles and gloves for protection during cutting and sanding.
Gathering these materials and tools will set you up for a smooth and efficient construction process. Now that you have everything you need, let's move on to the first step of building your DIY ladder shelf.
Step 1: Cutting the Wood
-
Measure and Mark: Begin by measuring and marking the wooden boards according to the desired dimensions for your ladder shelf. Use a measuring tape and a pencil to ensure accuracy.
-
Cut the Frame Pieces: For the frame, cut two longer pieces for the vertical sides and shorter pieces for the horizontal steps. A miter saw or circular saw will be handy for achieving precise cuts.
-
Cut the Shelf Boards: Next, cut the 1×6 lumber into individual shelf boards. The number of shelves will depend on the height of your ladder shelf and your preferred spacing between each shelf.
-
Ensure Precision: Double-check the measurements and make any necessary adjustments before proceeding to the next step. Accuracy in cutting the wood is crucial for a well-constructed and stable ladder shelf.
By following these steps, you will have the necessary wooden pieces prepared for the assembly of your DIY ladder shelf. Now, let's move on to the next phase of the project: sanding and staining the wood.
Step 2: Sanding and Staining
-
Prepare the Surface: Before applying any finish, it's essential to sand the wooden pieces thoroughly to create a smooth and even surface. Start with a coarse-grit sandpaper to remove any rough spots or imperfections, then progress to a finer grit for a polished result.
-
Apply Wood Conditioner (Optional): If you plan to stain the wood, consider applying a wood conditioner to ensure that the stain is absorbed evenly. This step is particularly important when working with softwoods, as it helps prevent blotchiness in the final finish.
-
Stain or Paint the Wood: Once the wood is prepped, it's time to apply the chosen finish. Whether you opt for a rich wood stain or a vibrant paint color, use a paintbrush or rag to apply the finish evenly, following the wood grain for a professional look.
-
Allow for Drying Time: After staining or painting, allow the wood pieces to dry completely according to the manufacturer's instructions. This step is crucial for achieving a durable and long-lasting finish.
-
Optional: Seal the Finish: Depending on the type of finish you've chosen, consider applying a clear sealant to protect the wood and enhance its longevity. This step is particularly important for pieces of furniture that will be exposed to daily wear and tear.
By following these steps, you'll transform the raw wooden pieces into beautifully finished components ready for assembly. The sanding and staining process not only enhances the aesthetic appeal of the ladder shelf but also provides protection against moisture and other environmental factors. Now that the wood is prepped and finished, it's time to move on to the next phase: assembling the frame.
Step 3: Assembling the Frame
-
Lay Out the Pieces: Begin by laying out the cut pieces for the frame in the designated work area. Arrange the vertical and horizontal pieces according to the intended design of your ladder shelf.
-
Create Pilot Holes: Using a drill with a drill bit slightly smaller than the wood screws, create pilot holes where the pieces will be joined. This step helps prevent the wood from splitting when the screws are inserted.
-
Apply Wood Glue: Before securing the pieces with screws, apply wood glue to the joints for added strength and stability. This step is particularly important for ensuring the durability of the ladder shelf.
-
Secure the Joints: With the help of a screwdriver or a power drill, carefully drive the wood screws into the pilot holes to secure the frame pieces together. Ensure that the frame is square and level as you work on this step.
-
Use Clamps (Optional): If needed, use clamps to hold the pieces in place while the wood glue dries. This extra measure can help ensure that the joints are tightly bonded and that the frame maintains its shape.
-
Check for Stability: Once the frame is assembled, check for stability and make any necessary adjustments. A sturdy and well-constructed frame is essential for the overall strength and functionality of the ladder shelf.
By following these steps, you will have successfully assembled the frame of your DIY ladder shelf. With the frame in place, it's time to proceed to the next phase: attaching the shelves.
Step 4: Attaching the Shelves
-
Determine Shelf Placement: Begin by deciding on the spacing and placement of the shelves within the frame. This will depend on your specific storage needs and the overall aesthetic you wish to achieve.
-
Mark the Positions: Use a measuring tape and a pencil to mark the positions where the shelves will be attached. Ensure that the markings are level and evenly spaced for a balanced look.
-
Create Support Ledges: To support the shelves, cut additional pieces of wood to serve as ledges along the inside of the frame. These ledges will provide a stable base for the shelves to rest upon.
-
Secure the Ledges: Using wood glue and screws, attach the ledges to the inside of the frame at the marked positions. Ensure that they are firmly secured and level to provide adequate support for the shelves.
-
Place the Shelves: With the ledges in place, carefully position the shelves on top of them. Double-check the alignment and make any necessary adjustments to ensure that the shelves are level and secure.
-
Attach the Shelves: Once the shelves are in position, use wood screws to secure them to the support ledges. Drive the screws through the underside of the shelves into the ledges, ensuring a strong and stable connection.
-
Reinforce with Wood Glue (Optional): For added stability, consider applying wood glue along the edges of the shelves where they meet the support ledges. This extra measure can further strengthen the bond between the shelves and the frame.
-
Check for Stability: After attaching all the shelves, carefully inspect the ladder shelf for stability and levelness. Make any final adjustments to ensure that the shelves are securely in place and that the overall structure is solid.
By following these steps, you will have successfully attached the shelves to the frame of your DIY ladder shelf. With the shelves securely in place, it's time to move on to the final phase: adding the finishing touches and decorations to complete your stylish storage solution.
Step 5: Final Touches and Decoration
-
Smooth Edges: Before proceeding with the final touches, ensure that all edges and surfaces of the ladder shelf are smooth and free from any rough spots. Use sandpaper to gently sand any areas that may require additional smoothing.
-
Add Decorative Hardware: Consider adding decorative hardware such as corner braces, decorative knobs, or metal accents to enhance the visual appeal of your ladder shelf. These small details can add a touch of personality and style to the overall design.
-
Personalize with Paint or Stain: If you desire a more personalized touch, consider painting or staining the ladder shelf in a color that complements your existing decor. Whether you opt for a bold statement color or a subtle stain, this step allows you to tailor the shelf to your individual style.
-
Incorporate Greenery or Decor: Once the construction and finishing are complete, adorn the shelves with potted plants, framed photos, or decorative items that reflect your taste. This not only adds visual interest but also makes the ladder shelf a functional and aesthetically pleasing part of your space.
-
Ensure Stability and Balance: As you add decorative items, ensure that the weight is distributed evenly across the shelves to maintain stability. Avoid overcrowding any particular shelf, and consider the balance of the overall display.
-
Final Inspection: Take a step back and visually inspect the completed ladder shelf. Ensure that all elements are securely in place and that the overall appearance aligns with your vision for the space.
By following these final steps, you can elevate your DIY ladder shelf from a functional storage solution to a stylish and personalized piece of furniture that enhances the ambiance of your home.
Conclusion
Congratulations on successfully completing your DIY ladder shelf! By following this step-by-step guide, you've not only created a practical storage solution but also added a stylish and customizable piece of furniture to your living space. The process of cutting, sanding, staining, assembling, and decorating has allowed you to exercise your creativity and craftsmanship, resulting in a unique and personalized addition to your home. Whether you've chosen a rustic, modern, or eclectic design, your DIY ladder shelf is a reflection of your individual style and ingenuity. As you admire your handiwork, take pride in the fact that you've not only saved on the cost of a store-bought shelf but also tailored the design to perfectly suit your needs and preferences. With your new ladder shelf in place, you can now enjoy the satisfaction of a successful DIY project and the functional beauty it brings to your home.