
Home>Create & Decorate>DIY & Crafts>DIY CNC Router: Building Your Own Precision Cutting Machine
DIY & Crafts
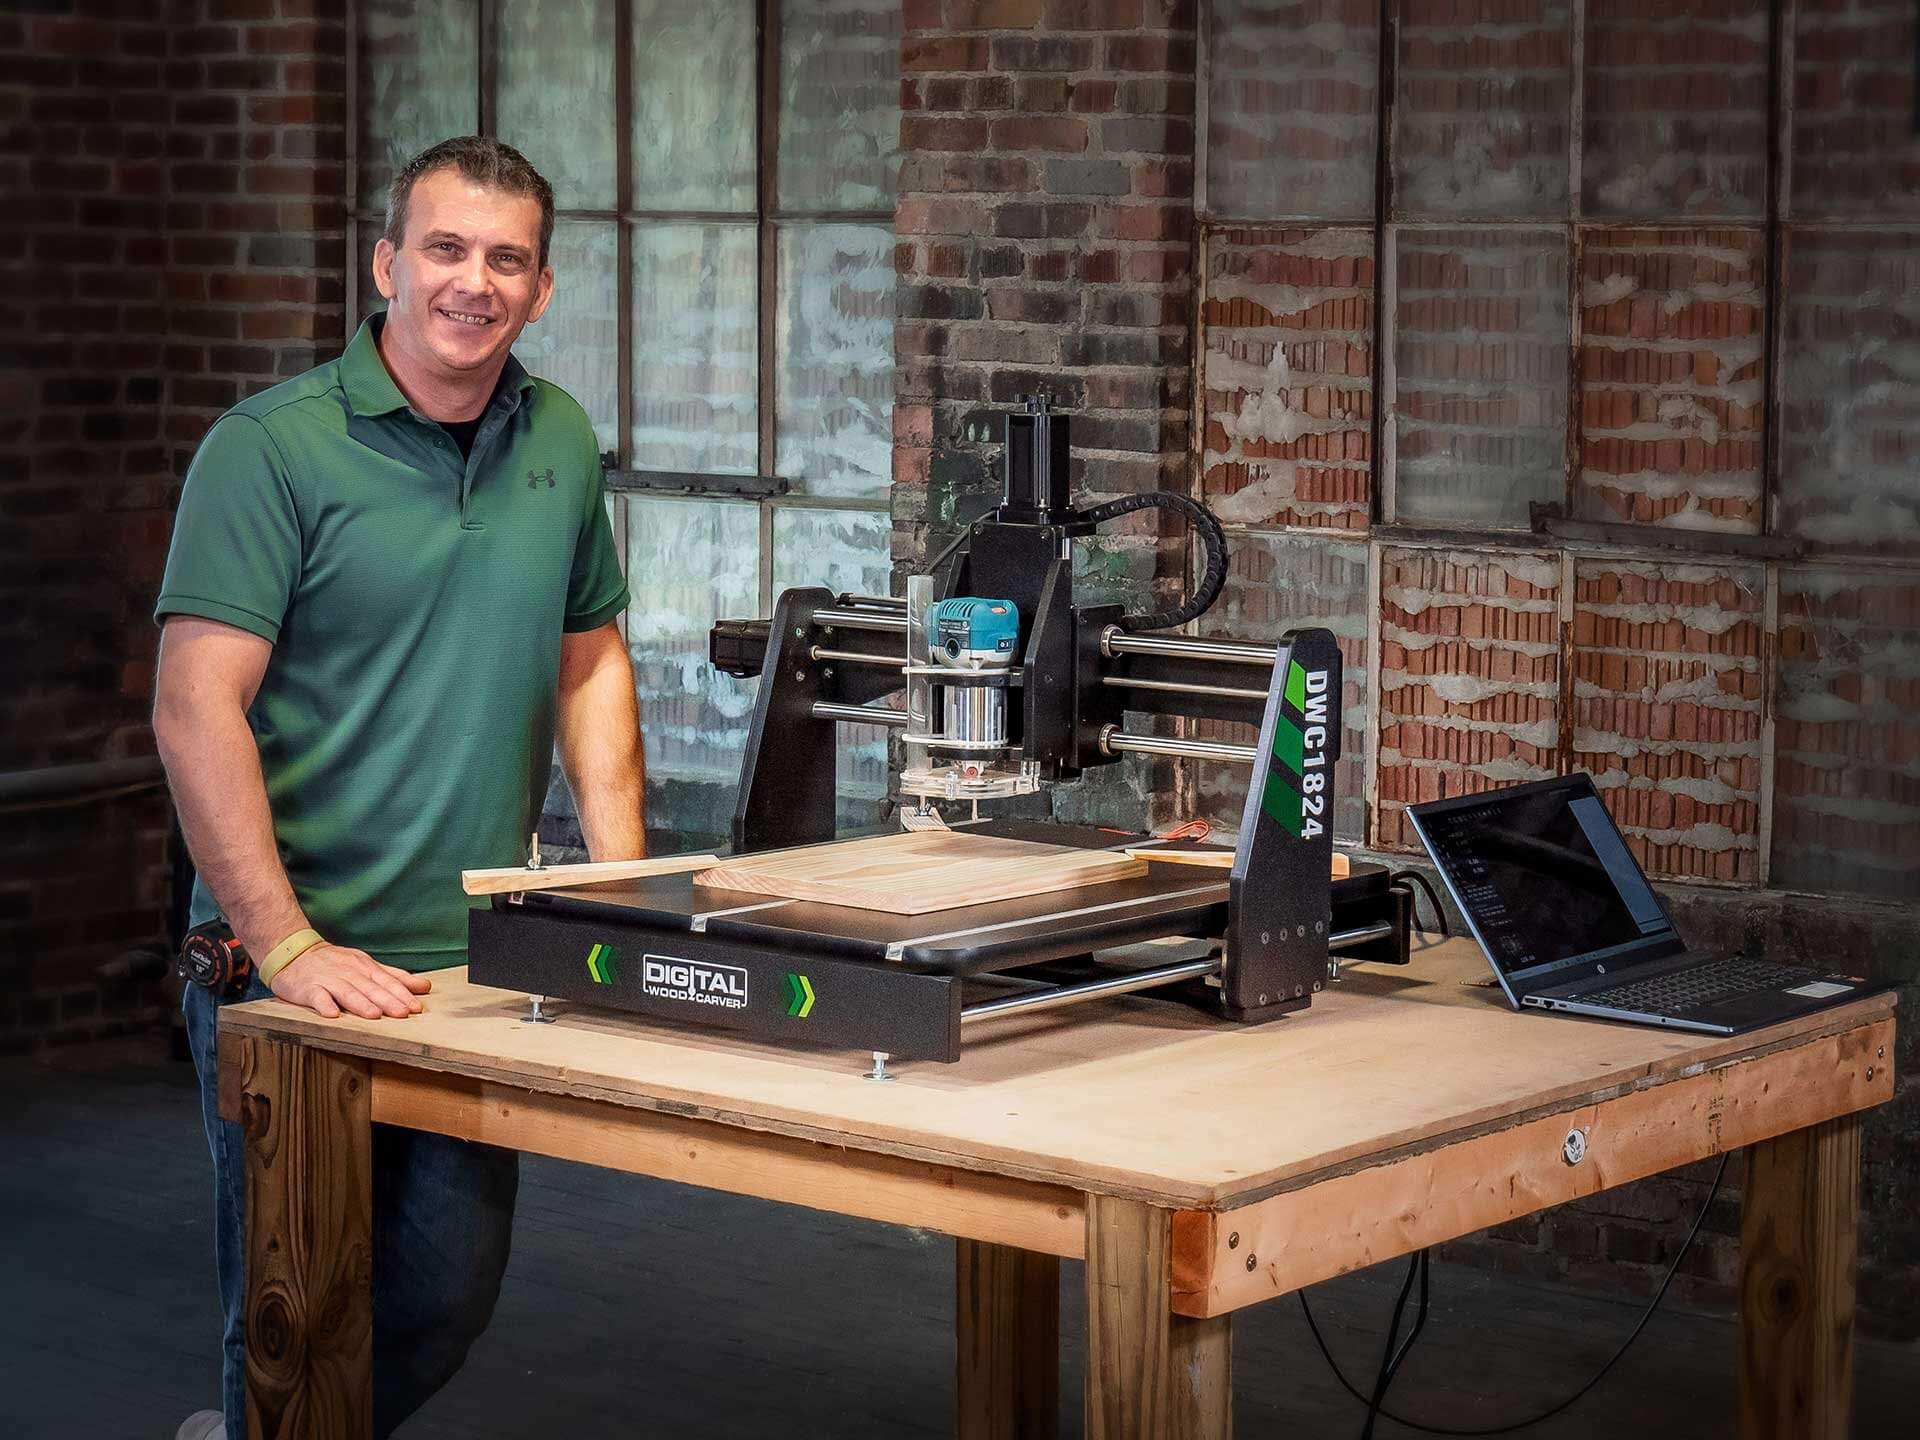
DIY CNC Router: Building Your Own Precision Cutting Machine
Published: May 29, 2024

Senior Editor in Create & Decorate, Kathryn combines traditional craftsmanship with contemporary trends. Her background in textile design and commitment to sustainable crafts inspire both content and community.
Discover how to build your own precision cutting machine with our DIY CNC router guide. Perfect for DIY & Crafts enthusiasts. Start your project today!
(Many of the links in this article redirect to a specific reviewed product. Your purchase of these products through affiliate links helps to generate commission for Twigandthistle.com, at no extra cost. Learn more)
Introduction
Are you a DIY enthusiast looking to take your woodworking or metalworking projects to the next level? Building your own CNC router might just be the perfect project for you. In this guide, we'll walk you through the process of designing, sourcing materials, and assembling your very own precision cutting machine. Whether you're a hobbyist or a professional, a DIY CNC router can open up a world of possibilities for creating intricate and precise designs with ease. Let's dive into the exciting world of CNC technology and get you started on this rewarding DIY journey.
Understanding CNC Technology
CNC stands for Computer Numerical Control, and it refers to the automation of machine tools through the use of computers executing pre-programmed sequences of commands. In the case of a CNC router, this technology allows for precise and complex cutting, carving, and shaping of various materials such as wood, plastic, and metal. The CNC system interprets design specifications and translates them into precise movements of the cutting tool. This level of automation not only ensures accuracy and repeatability but also opens up the possibility of creating intricate designs that would be challenging or impossible to achieve manually.
One of the key components of CNC technology is the CNC controller, which serves as the brain of the system. It processes the design data and generates the corresponding commands to drive the motors and actuators that control the movement of the cutting tool. The design data is typically created using Computer-Aided Design (CAD) software, which allows users to create detailed and precise 2D or 3D models of the desired end product. This design data is then converted into a set of instructions for the CNC controller using Computer-Aided Manufacturing (CAM) software.
The precision and versatility of CNC technology make it a valuable tool for a wide range of applications, including woodworking, metalworking, prototyping, and custom fabrication. Whether you're creating intricate furniture components, custom signage, or precision parts for machinery, a DIY CNC router can significantly expand your capabilities and empower you to bring your creative visions to life with unparalleled accuracy and efficiency.
Designing Your DIY CNC Router
Designing your DIY CNC router is a crucial step that sets the foundation for the entire project. It involves determining the size, specifications, and capabilities of your CNC machine based on your intended applications and available resources. Here are the key considerations to keep in mind when designing your DIY CNC router:
-
Determine the Size and Working Area: The first step in designing your CNC router is to decide on the size of the cutting area. Consider the largest workpieces you plan to machine and ensure that the router's working area accommodates those dimensions. Whether you're aiming to create small intricate designs or large-scale projects, the size of the CNC router will dictate the scope of your future endeavors.
-
Select the Drive System: The drive system of a CNC router determines how the cutting tool moves across the workpiece. Common drive systems include lead screws, ball screws, and rack and pinion setups. Each system has its own advantages and limitations in terms of precision, speed, and cost. Consider the level of precision and speed required for your projects when selecting the drive system for your DIY CNC router.
-
Choose the Cutting Tool: The choice of cutting tool, such as a router spindle or a laser module, depends on the materials you intend to work with and the level of precision required. For woodworking applications, a high-speed router spindle may be suitable, while metalworking may require a more robust spindle or a laser cutting module. Consider the compatibility of the cutting tool with your chosen drive system and the overall design of the CNC router.
-
Plan the Motion Control System: The motion control system of a CNC router consists of motors, linear guides, and other mechanical components that drive the movement of the cutting tool. Selecting the appropriate motors and motion control components is crucial for achieving the desired precision and speed. Whether you opt for stepper motors or servo motors, ensure that they are compatible with the drive system and capable of delivering the required performance.
-
Integrate Safety Features: Safety should be a top priority when designing your DIY CNC router. Incorporate safety features such as emergency stop buttons, protective enclosures, and limit switches to ensure safe operation and minimize the risk of accidents. Additionally, consider the placement of the CNC router within your workspace to optimize accessibility and safety for the operator.
-
Consider Future Upgrades: Anticipate future advancements and upgrades when designing your CNC router. Leave room for expansion and modifications to accommodate additional features or capabilities as your skills and projects evolve. A well-thought-out design will allow for seamless upgrades and enhancements without the need for extensive rework.
By carefully considering these aspects during the design phase, you can lay the groundwork for a robust and functional DIY CNC router that meets your specific requirements and sets the stage for successful construction and operation.
Selecting Materials and Components
Selecting the right materials and components is a critical aspect of building a DIY CNC router that delivers precision and reliability. Here's a detailed look at the key considerations for selecting the materials and components for your project:
Frame Material
The material used for the frame of the CNC router plays a significant role in determining its stability, rigidity, and overall performance. Common options include aluminum extrusions, steel tubing, and welded steel frames. Aluminum extrusions offer a good balance of strength and weight, making them popular for DIY CNC routers. Steel tubing provides exceptional rigidity and durability, but it may add more weight to the overall structure. Consider the trade-offs between material properties, cost, and ease of fabrication when selecting the frame material for your CNC router.
Linear Motion Components
The linear motion components, including linear guides, bearings, and lead screws, are essential for ensuring smooth and precise movement of the cutting tool. Opt for high-quality linear guides and bearings that provide low friction and minimal play to maintain accuracy during operation. When choosing lead screws or ball screws, consider factors such as pitch, backlash, and load capacity to match the requirements of your CNC router design. Investing in reliable linear motion components is crucial for achieving consistent and accurate results in your machining projects.
Motors and Drivers
The selection of motors and drivers directly impacts the speed, precision, and torque capabilities of your DIY CNC router. Stepper motors are commonly used in CNC applications due to their affordability and ease of control, while servo motors offer higher performance and dynamic response. Pair the motors with compatible drivers that provide smooth and precise motion control. Consider the power requirements, step resolution, and acceleration capabilities of the motors and drivers to ensure they align with the demands of your CNC router design.
Spindle or Cutting Tool
The choice of spindle or cutting tool depends on the materials you plan to machine and the desired cutting capabilities. For woodworking applications, a high-speed router spindle with variable speed control may be suitable, while metalworking may require a more robust spindle with higher torque and spindle speed. If you intend to incorporate laser cutting or engraving, select a laser module that is compatible with your CNC router's design and capable of delivering the desired precision and cutting performance.
Electronics and Control System
The electronics and control system of a DIY CNC router encompass components such as the CNC controller, power supply, breakout board, and wiring. Select a reliable CNC controller that supports the required number of axes and provides compatibility with your chosen software for generating toolpaths. Ensure that the power supply can deliver stable and sufficient power to all electrical components, and use high-quality wiring and connectors to maintain signal integrity and minimize electrical noise.
Other Considerations
In addition to the core components mentioned above, consider auxiliary elements such as cooling systems for the spindle, dust collection mechanisms, and safety features like emergency stop switches and limit switches. These additional components contribute to the overall functionality, safety, and longevity of your DIY CNC router.
By carefully evaluating and selecting the materials and components for your DIY CNC router, you can build a robust and reliable machine that meets your specific machining requirements and delivers consistent performance for a wide range of projects.
Building the Frame and Structure
Building the frame and structure of your DIY CNC router is a critical phase that determines the machine's stability, rigidity, and overall performance. Here's a detailed guide on the essential steps and considerations for constructing the frame and structure of your CNC router:
-
Frame Design: Begin by translating your design specifications into a detailed plan for the frame and structure. Consider the dimensions, layout, and assembly process to ensure a precise and robust framework for your CNC router. Whether you opt for aluminum extrusions, steel tubing, or welded frames, adhere to the design parameters to maintain consistency and accuracy throughout the construction process.
-
Material Preparation: Once the frame design is finalized, prepare the materials for construction. Cut the aluminum extrusions or steel tubing to the required lengths using a saw or a specialized cutting tool. Ensure precise and square cuts to facilitate seamless assembly and alignment of the frame components.
-
Assembly Process: Assemble the frame components according to the design plan, using appropriate fasteners and joining methods. T-slot aluminum extrusions offer versatility and ease of assembly, allowing for modular construction and future modifications. Welded steel frames require meticulous welding techniques to ensure structural integrity and stability.
-
Alignment and Squaring: Throughout the assembly process, prioritize alignment and squaring of the frame components. Use precision measuring tools such as squares and levels to verify the accuracy of the frame's geometry. Proper alignment is crucial for maintaining the perpendicularity and parallelism of the frame members, which directly impacts the CNC router's precision and performance.
-
Rigidity Enhancement: Implement reinforcement strategies to enhance the rigidity of the frame and minimize any potential flex or vibration during operation. Bracing elements, gussets, and additional supports can be incorporated strategically to strengthen critical areas of the frame and ensure uniform load distribution.
-
Mounting Surfaces: Create dedicated mounting surfaces for the linear motion components, including the linear guides, bearings, and lead screws. Precision machining or milling may be required to achieve flat and perpendicular mounting surfaces that facilitate smooth and accurate movement of the cutting tool.
-
Integration of Auxiliary Components: Consider the integration of auxiliary components such as the spindle mount, electronics enclosure, and cable management provisions within the frame and structure. These elements contribute to the overall functionality, accessibility, and maintenance of the CNC router.
-
Quality Assurance: Perform thorough quality checks and inspections throughout the frame construction process. Verify the integrity of welds, fastener tightness, and overall structural stability to ensure that the frame meets the required standards for precision and durability.
By meticulously executing the construction of the frame and structure, you can establish a solid foundation for your DIY CNC router, setting the stage for the seamless integration of the remaining components and the realization of a reliable and high-performance precision cutting machine.
Assembling the Electronics
Assembling the electronics of your DIY CNC router is a pivotal stage that demands precision, attention to detail, and a methodical approach. Here's a comprehensive breakdown of the essential steps and considerations for assembling the electronics of your CNC router:
-
CNC Controller Installation: Begin by mounting the CNC controller in a designated enclosure or mounting surface within the CNC router's framework. Ensure that the controller is positioned in a well-ventilated and accessible location, allowing for convenient connectivity and maintenance.
-
Power Supply Integration: Install the power supply unit, ensuring that it delivers stable and sufficient power to all electrical components of the CNC router. Adhere to safety guidelines and best practices for electrical wiring and grounding to minimize the risk of electrical hazards and ensure reliable operation.
-
Motor and Driver Connections: Connect the stepper or servo motors to their respective drivers, following the manufacturer's specifications and wiring diagrams. Pay close attention to the correct wiring of motor phases and driver inputs to prevent potential damage to the motors and ensure proper motion control.
-
Limit Switch and Emergency Stop Setup: Integrate limit switches at strategic locations along the CNC router's axes to establish reference points and prevent over-travel of the cutting tool. Additionally, install an emergency stop switch or button to enable immediate halting of machine operations in case of unforeseen circumstances.
-
Spindle or Tool Control: If your CNC router incorporates a spindle or cutting tool with variable speed or on/off control, wire the spindle control interface to the CNC controller. Ensure that the spindle control system aligns with the specifications of the chosen cutting tool and provides seamless integration with the overall CNC router electronics.
-
Wiring Management and Cable Routing: Organize the wiring harnesses and cables to minimize interference, maintain signal integrity, and facilitate ease of troubleshooting and maintenance. Utilize cable management accessories such as conduits, cable chains, and strain relief components to secure and protect the wiring throughout the CNC router's motion range.
-
Electronics Enclosure and Shielding: If applicable, enclose the electronics within a dedicated enclosure to safeguard them from environmental factors, dust, and debris. Implement shielding measures to mitigate electromagnetic interference and ensure the reliability of signal transmission within the CNC router's electrical system.
-
Testing and Verification: Prior to finalizing the electronics assembly, conduct comprehensive testing and verification procedures to validate the functionality of each electrical component. Verify motor movements, limit switch functionality, spindle control, and overall system responsiveness to identify and address any potential issues or discrepancies.
-
Documentation and Labeling: Document the wiring connections, component placements, and electrical configurations for future reference and troubleshooting. Label the wiring harnesses, connectors, and control interfaces to facilitate easy identification and maintenance of the CNC router electronics.
By meticulously assembling the electronics of your DIY CNC router, you can establish a reliable and efficient electrical system that forms the backbone of precision motion control and automation, paving the way for the successful operation and utilization of your custom-built CNC machine.
Installing the Control Software
Installing the control software is a crucial step in bringing your DIY CNC router to life, as it enables the seamless integration of design data, motion control commands, and machine operation. Here's a comprehensive guide to installing the control software for your CNC router:
-
Software Selection: Begin by selecting the appropriate control software that aligns with the capabilities of your CNC router and your specific machining requirements. Popular options include Mach3, LinuxCNC, and GRBL, each offering unique features and compatibility with different hardware configurations. Consider the user interface, toolpath generation capabilities, and community support when choosing the control software for your DIY CNC router.
-
System Requirements: Verify the system requirements of the chosen control software and ensure that your computer or dedicated control PC meets the necessary specifications. Pay attention to operating system compatibility, processor performance, memory requirements, and available USB or parallel port connections for interfacing with the CNC controller.
-
Installation Process: Follow the installation instructions provided by the control software manufacturer, ensuring that you download the latest stable release or version that is compatible with your CNC router's control system. Install the software on the designated computer or control PC, and configure the necessary settings based on the hardware and motion control components of your CNC router.
-
Driver and Interface Setup: If your CNC router utilizes a parallel port interface for motion control, install the appropriate drivers and configure the parallel port settings within the control software. For USB-based motion control interfaces, follow the manufacturer's instructions for driver installation and interface configuration to establish seamless communication between the control software and the CNC controller.
-
Toolpath Generation and Import: Familiarize yourself with the toolpath generation capabilities of the control software and explore the process of importing design files or generating toolpaths from CAD/CAM software. Ensure that the control software supports the file formats used for creating design data and toolpath instructions, allowing for smooth and accurate translation of design specifications into machine movements.
-
Parameter Configuration: Access the configuration settings within the control software to fine-tune parameters such as motor steps per unit, acceleration profiles, and maximum feed rates to match the specifications of your CNC router's motion control system. Verify the correct assignment of axes, motor directions, and limit switch configurations to ensure accurate and reliable machine operation.
-
Testing and Calibration: After installing the control software and configuring the necessary parameters, conduct thorough testing and calibration procedures to validate the functionality of the CNC router. Verify the motion control responsiveness, axis movements, and toolpath execution to identify any discrepancies or performance issues that require adjustment within the control software.
-
Software Updates and Maintenance: Stay informed about software updates, patches, and maintenance releases for the control software to benefit from performance enhancements, bug fixes, and new features. Regularly update the control software to ensure optimal compatibility and stability for your DIY CNC router's operation.
By following these steps and considerations, you can successfully install the control software for your DIY CNC router, unlocking the full potential of precision motion control, automation, and machining capabilities for your woodworking, metalworking, or custom fabrication projects.
Testing and Calibration
Testing and calibration are essential phases in the commissioning of a DIY CNC router, ensuring that the machine operates with precision, accuracy, and reliability. Here's a detailed breakdown of the testing and calibration procedures for your CNC router:
-
Initial Power-Up: Upon completing the assembly and electronics integration, power up the CNC router and verify the functionality of the control system. Check for any abnormal sounds, vibrations, or unexpected movements that may indicate potential issues with the electrical or mechanical components.
-
Axis Movement Verification: Initiate individual axis movements to confirm that each motor responds correctly to the control commands. Use the control software to jog the CNC router along the X, Y, and Z axes, observing the smoothness and accuracy of motion. Ensure that the motion corresponds to the intended direction and distance input.
-
Homing and Limit Switch Validation: Implement homing routines to establish the reference positions for each axis based on the installed limit switches. Verify that the homing process accurately positions the cutting tool at the predefined reference points, allowing for consistent and repeatable machine zeroing.
-
Toolpath Execution: Load a simple test design or toolpath into the control software and execute the machining operation. Observe the movement of the cutting tool and assess the accuracy of the machined path relative to the intended design. Pay attention to any deviations, irregularities, or unexpected behavior during the toolpath execution.
-
Accuracy Assessment: Utilize precision measuring tools such as calipers, dial indicators, or laser alignment devices to verify the dimensional accuracy and positional repeatability of the CNC router's movements. Measure the machined features against the design specifications to identify any discrepancies and assess the overall accuracy of the machine.
-
Backlash Compensation: Evaluate the presence of backlash in the drive system by performing reversal tests and measuring the resulting play or clearance in the motion components. Implement backlash compensation techniques within the control software to minimize the impact of mechanical play on the CNC router's precision.
-
Acceleration and Velocity Tuning: Fine-tune the acceleration and velocity profiles of the CNC router's motion control system to achieve optimal performance while minimizing vibration, resonance, and mechanical stress. Adjust the motion parameters within the control software to strike a balance between speed and precision based on the specific requirements of your machining projects.
-
Spindle or Tool Performance: If your CNC router incorporates a spindle or cutting tool, assess its performance by varying the spindle speed and observing the resulting cutting quality and surface finish. Verify the compatibility of the spindle control system with the control software and ensure seamless integration for precise tool operation.
-
Repeatability and Error Correction: Execute multiple iterations of the same machining operation to assess the repeatability of the CNC router's movements and identify any cumulative errors or drift. Implement error correction strategies within the control software to compensate for any systematic deviations and maintain consistent machining results.
-
Documentation and Adjustment: Document the results of the testing and calibration procedures, noting any observed discrepancies, adjustments made, and performance improvements. Use the findings to fine-tune the CNC router's parameters, mechanical components, and control software settings to achieve the desired level of precision and reliability.
By rigorously conducting testing and calibration processes, you can ensure that your DIY CNC router operates with the utmost accuracy and consistency, empowering you to tackle a diverse range of projects with confidence and precision.
Tips for Maintenance and Upkeep
Maintaining and upkeeping your DIY CNC router is essential to ensure its longevity, consistent performance, and safe operation. Here are some valuable tips to keep your CNC router in optimal condition:
-
Regular Cleaning: Regularly clean the CNC router to remove dust, debris, and swarf that can accumulate on the frame, linear motion components, and electronics. Use compressed air, brushes, and vacuum systems to prevent the buildup of contaminants that can affect precision and reliability.
-
Lubrication: Implement a scheduled lubrication regimen for the linear guides, bearings, lead screws, and other moving parts of the CNC router. Use appropriate lubricants recommended by the component manufacturers to maintain smooth motion and minimize wear.
-
Electronics Inspection: Periodically inspect the electrical components, wiring harnesses, and connections to identify any signs of wear, damage, or loose connections. Ensure that the electronics enclosure remains clean and free from dust accumulation to prevent potential electrical issues.
-
Spindle Maintenance: If your CNC router incorporates a spindle or cutting tool, follow the manufacturer's guidelines for spindle maintenance, including spindle bearing lubrication, collet cleaning, and tool holder inspection. Proper spindle maintenance is crucial for consistent cutting performance and longevity.
-
Belt and Drive System Checks: Check the tension and condition of belts, pulleys, and drive system components to ensure proper power transmission and motion control. Address any signs of belt wear, stretching, or misalignment to maintain accurate axis movements.
-
Software Updates: Stay informed about software updates for the control software and firmware of the CNC router's electronics. Regularly update the software to benefit from performance enhancements, bug fixes, and new features that can improve the machine's operation.
-
Calibration Verification: Periodically verify the calibration of the CNC router by executing test cuts, measuring the dimensional accuracy of machined features, and assessing the repeatability of machine movements. Make necessary adjustments to maintain precision and accuracy.
-
Dust Collection System Maintenance: If your CNC router is equipped with a dust collection system, ensure that the system remains functional and effectively captures debris during machining operations. Clean or replace filters and clear dust collection pathways to prevent clogging and maintain a clean working environment.
-
Safety Checks: Regularly inspect and test the emergency stop switches, limit switches, and other safety features to ensure their proper functionality. Conduct safety assessments to identify and address any potential hazards or risks associated with the CNC router's operation.
-
Documentation and Records: Maintain detailed records of maintenance activities, adjustments, and performance evaluations for the CNC router. Document any issues encountered, solutions implemented, and notable observations to guide future maintenance efforts and troubleshooting.
By adhering to these maintenance tips and incorporating a proactive approach to upkeep, you can prolong the lifespan of your DIY CNC router, uphold its precision and reliability, and create a safe and efficient machining environment for your projects.
Conclusion
In conclusion, building your own DIY CNC router opens up a world of possibilities for woodworking, metalworking, and custom fabrication projects. By understanding the principles of CNC technology, carefully designing the machine, selecting high-quality materials and components, and meticulously assembling and calibrating the system, you can create a precision cutting machine that empowers you to bring your creative visions to life with unparalleled accuracy and efficiency.
The journey of constructing a DIY CNC router is not only a rewarding technical endeavor but also a gateway to expanding your capabilities as a maker and craftsman. With regular maintenance and adherence to best practices, your CNC router can serve as a reliable and indispensable tool in your workshop, enabling you to tackle a diverse range of projects with confidence and precision. Embrace the exciting world of CNC technology and unleash your creativity with a custom-built CNC router that reflects your ingenuity and craftsmanship.