Home>Outdoors & Camping>BBQ & Grill>How To Build Bbq Island

BBQ & Grill
How To Build Bbq Island
Published: March 6, 2024

Content Creator for Outdoors & Camping, Sophie turns any yard into a sustainable paradise. Her dedication to DIY outdoor projects and volunteer work in community gardens shares joy and knowledge.
Learn how to build a BBQ island and grill area with our step-by-step guide. Create the perfect outdoor cooking space for your backyard BBQs.
(Many of the links in this article redirect to a specific reviewed product. Your purchase of these products through affiliate links helps to generate commission for Twigandthistle.com, at no extra cost. Learn more)
Introduction
So, you've decided to take your outdoor cooking game to the next level by building your very own BBQ island. Congratulations! This project can be a fun and rewarding endeavor that will not only enhance your outdoor living space but also add value to your home. Whether you're a seasoned DIY enthusiast or a novice looking for a new challenge, building a BBQ island is a fantastic way to showcase your creativity and craftsmanship. In this guide, we'll walk you through the step-by-step process of creating your own custom BBQ island, from planning and design to construction and maintenance. Let's fire up those grills and get started!
Read more: DIY BBQ Island Building Guide
Planning Your BBQ Island
Before you roll up your sleeves and dive into the construction phase, it's crucial to start with a solid plan. Here are the essential steps to consider when planning your BBQ island:
-
Assess Your Needs: Determine how you intend to use your BBQ island. Will it primarily serve as a grilling station, or do you want to incorporate additional features such as a sink, storage cabinets, or a mini-fridge? Understanding your specific requirements will guide the design and layout of your island.
-
Set a Budget: Establishing a budget is a fundamental aspect of the planning process. Consider the cost of materials, appliances, and any professional assistance you may require. Having a clear budget in mind will help you make informed decisions and avoid overspending.
-
Obtain Necessary Permits: Depending on your local regulations, you may need to obtain permits before commencing construction. Check with your municipality or homeowners' association to ensure compliance with building codes and zoning requirements.
-
Consider Utilities: If your BBQ island will include a sink, refrigerator, or other electrical components, you'll need to plan for access to water and power sources. Factor in the logistics of connecting these utilities to your outdoor space.
-
Choose a Style: Think about the overall aesthetic you want to achieve. Whether you prefer a sleek, modern design or a rustic, traditional look, selecting a style will help you narrow down your material and color choices.
By carefully considering these aspects during the planning phase, you'll lay a strong foundation for the successful execution of your BBQ island project.
Choosing the Right Location
Selecting the optimal location for your BBQ island is a critical decision that can significantly impact your outdoor cooking experience. Here are some key factors to consider when choosing the right spot for your island:
-
Accessibility: Ensure that the location of your BBQ island allows for easy access from your indoor kitchen and dining area. It should also be conveniently situated in relation to your outdoor seating and entertaining spaces.
-
Ventilation: Position the BBQ island in an area that provides adequate ventilation to disperse smoke and cooking odors. This can help prevent the accumulation of smoke near your home and ensure a more comfortable environment for you and your guests.
-
Safety: Prioritize safety by placing the BBQ island away from any flammable structures, such as wooden decks, overhanging branches, or combustible materials. Maintaining a safe distance from these elements reduces the risk of fire hazards.
-
Shade and Shelter: Consider the exposure to sunlight and weather conditions in the chosen location. If possible, select an area that offers natural shade or consider incorporating a pergola or canopy to provide protection from the elements.
-
Aesthetic Integration: Take into account the visual impact of the BBQ island within your outdoor space. Position it in a way that complements the overall landscape and design of your backyard, creating a harmonious and inviting atmosphere.
By carefully evaluating these factors, you can identify the perfect location for your BBQ island, ensuring both functionality and aesthetic appeal.
Designing Your BBQ Island
When it comes to designing your BBQ island, creativity and practicality go hand in hand. Here are the essential considerations to keep in mind as you embark on the design phase:
-
Layout and Flow: Begin by envisioning the layout of your BBQ island. Consider the workflow and functionality of the space, ensuring that the grill, prep areas, and other features are logically arranged for efficiency and convenience. A well-thought-out layout can streamline your cooking process and enhance the overall user experience.
-
Size and Scale: Determine the appropriate size of your BBQ island based on the available space and your specific needs. Whether you opt for a compact island with essential amenities or a larger, more elaborate setup, striking the right balance between size and functionality is key.
-
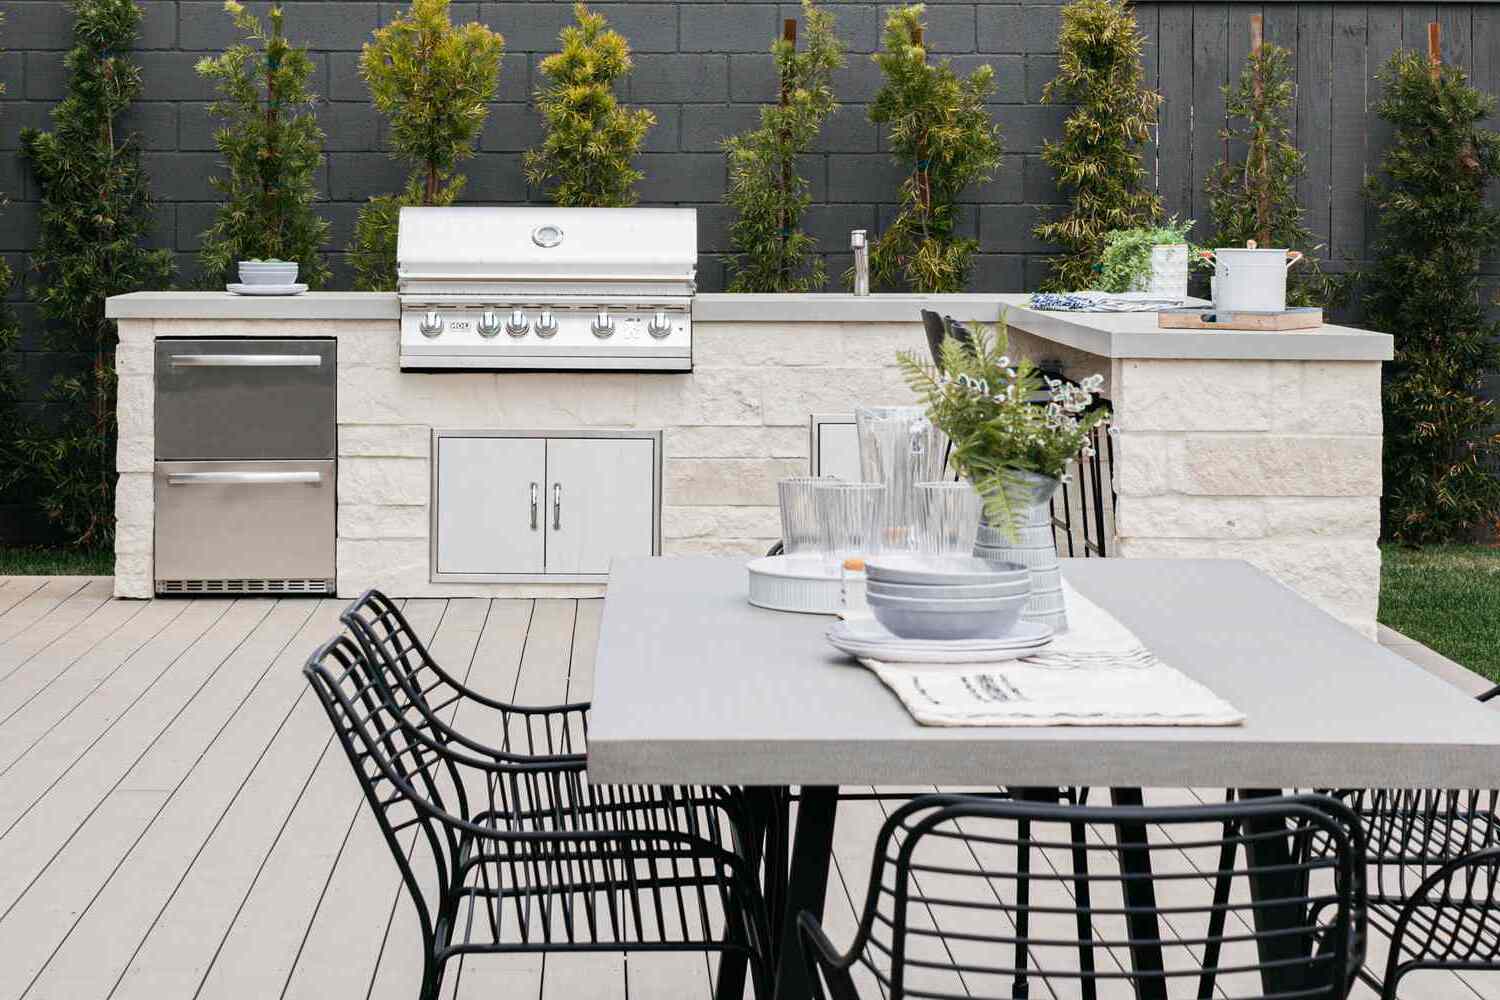
Material Selection: Choose materials that not only complement your outdoor environment but also offer durability and ease of maintenance. Options such as stainless steel, stone, brick, or tile can provide both aesthetic appeal and resilience against the elements, ensuring longevity for your BBQ island.
-
Integration of Features: If you plan to incorporate additional features such as a sink, side burners, storage compartments, or a bar top, carefully integrate these elements into your design. Pay attention to the placement of each feature to maximize utility and visual harmony.
-
Style and Aesthetics: Define the style and aesthetic theme that you want to reflect in your BBQ island. Whether you prefer a sleek, modern look or a more rustic and natural ambiance, aligning the design with your personal taste and the overall outdoor decor will create a cohesive and inviting space.
-
Customization and Personalization: Embrace the opportunity to customize your BBQ island to suit your preferences. Consider unique design elements, such as built-in lighting, decorative tile patterns, or personalized accents, to infuse character and individuality into your island.
By carefully addressing these design aspects, you can create a well-planned and visually appealing BBQ island that seamlessly integrates with your outdoor living space.
Selecting Materials and Appliances
Choosing the right materials and appliances for your BBQ island is a crucial step that directly impacts the functionality, durability, and visual appeal of your outdoor cooking space. Here's a detailed look at the considerations for selecting materials and appliances:
Read more: How To Build A Kitchen Island
Materials for Construction
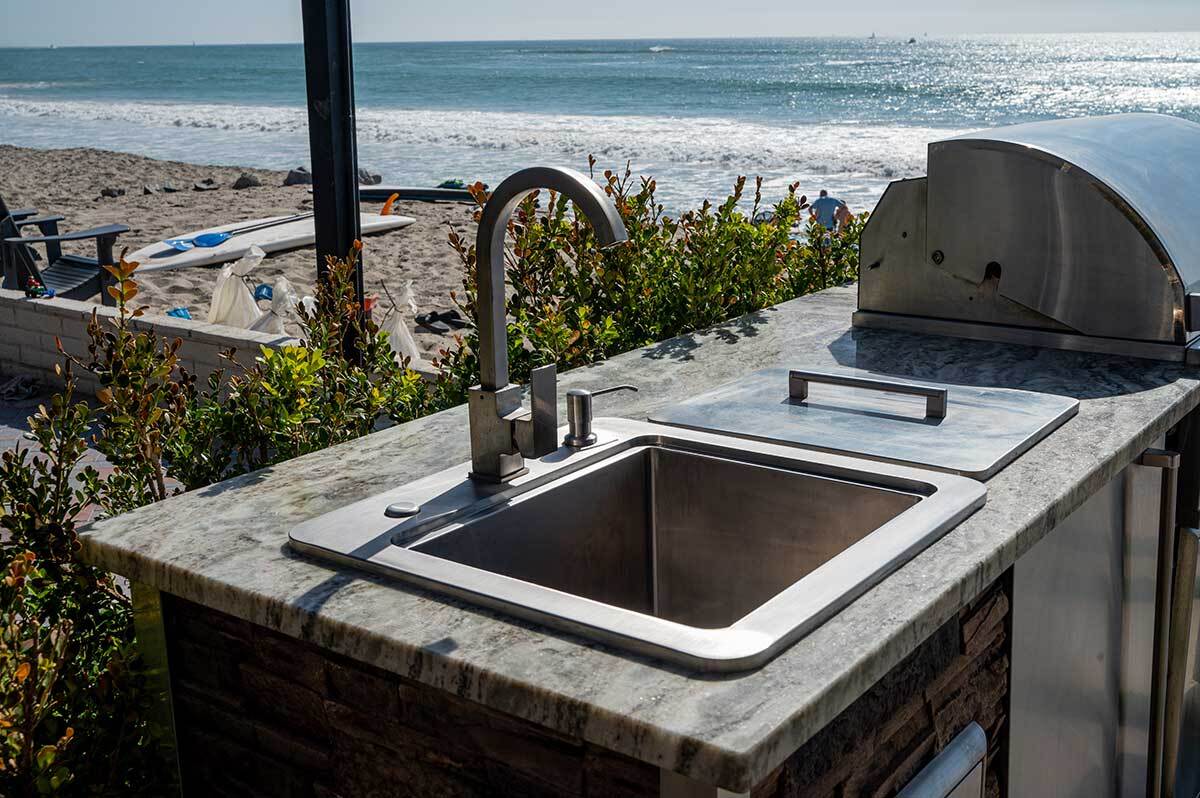
- Countertop Options: Explore various countertop materials such as granite, concrete, tile, or natural stone. Consider factors such as heat resistance, ease of cleaning, and aesthetic compatibility with your outdoor environment.
- Framework and Cladding: Select durable and weather-resistant materials for the framework and cladding of your BBQ island. Options like stainless steel, aluminum, or moisture-resistant wood can provide structural integrity and long-term resilience.
- Facing and Finishing: Choose facing materials that complement your outdoor decor and withstand exposure to the elements. Stone veneer, stucco, or ceramic tiles are popular choices for adding a decorative finish to your island.
Appliances and Fixtures
- Grill Selection: Determine the type and size of the grill that best suits your cooking needs. Whether you prefer a gas, charcoal, or hybrid grill, ensure that it integrates seamlessly into your island design.
- Additional Features: If you plan to include a sink, refrigerator, side burners, or storage drawers, prioritize appliances that are specifically designed for outdoor use. Look for stainless steel or weather-sealed options to ensure longevity in an outdoor setting.
- Lighting and Accessories: Consider incorporating lighting fixtures, such as LED task lights or ambient illumination, to enhance both functionality and ambiance. Additionally, explore accessories such as outdoor-rated faucets, cabinet hardware, and decorative elements to elevate the overall aesthetic of your island.
Integration and Cohesion
- Coordinating Finishes: Ensure that the materials and finishes of your appliances harmonize with the overall design of your BBQ island. Coordinating colors, textures, and styles can create a cohesive and polished look.
- Seamless Integration: Plan the placement and integration of appliances within the island layout to optimize workflow and accessibility. A well-integrated design ensures that each component contributes to the efficiency and visual appeal of the space.
By carefully selecting materials and appliances that align with your design vision and functional requirements, you can create a well-equipped and visually captivating BBQ island that enhances your outdoor culinary experiences.
Building the Foundation
The foundation of your BBQ island serves as the backbone of the entire structure, providing stability and support for the various components. Here's a comprehensive guide to building a solid foundation for your BBQ island:
-
Site Preparation: Begin by clearing and leveling the area where your BBQ island will be situated. Remove any debris, rocks, or vegetation, and use a shovel and a level to ensure a flat and even surface. Proper site preparation is essential for laying a stable foundation.
-
Concrete Footings: To establish a sturdy base, dig holes for concrete footings at strategic points along the perimeter of the island. The size and depth of the footings will depend on the dimensions and weight-bearing requirements of your island. Consult local building codes to determine the appropriate specifications for the footings.
-
Rebar Reinforcement: Once the footings are in place, insert rebar into the holes to reinforce the concrete. This reinforcement enhances the strength and load-bearing capacity of the footings, ensuring long-term stability for your BBQ island.
-
Formwork Construction: Construct formwork to outline the shape and dimensions of the island's foundation. Use sturdy lumber or plywood to create the forms, ensuring that they are securely braced and aligned to contain the concrete during pouring.
-
Concrete Pouring: With the formwork in place, it's time to pour the concrete for the foundation. Prepare a high-quality concrete mix and carefully pour it into the formwork, ensuring even distribution and consolidation. Use a screed board to level the concrete surface and eliminate any air pockets.
-
Curing and Drying: Allow the concrete to cure and dry according to the manufacturer's recommendations. This process is crucial for the concrete to achieve its full strength and durability. Protect the freshly poured foundation from excessive moisture and temperature fluctuations during the curing period.
-
Anchor Placement: If your BBQ island will include a grill or other heavy appliances, consider embedding anchor bolts or threaded inserts into the concrete foundation during the pouring phase. These anchors will provide secure attachment points for the island's frame and countertop supports.
By following these steps, you can establish a robust and reliable foundation for your BBQ island, setting the stage for the subsequent phases of construction. A well-built foundation ensures the structural integrity and longevity of your outdoor culinary centerpiece.
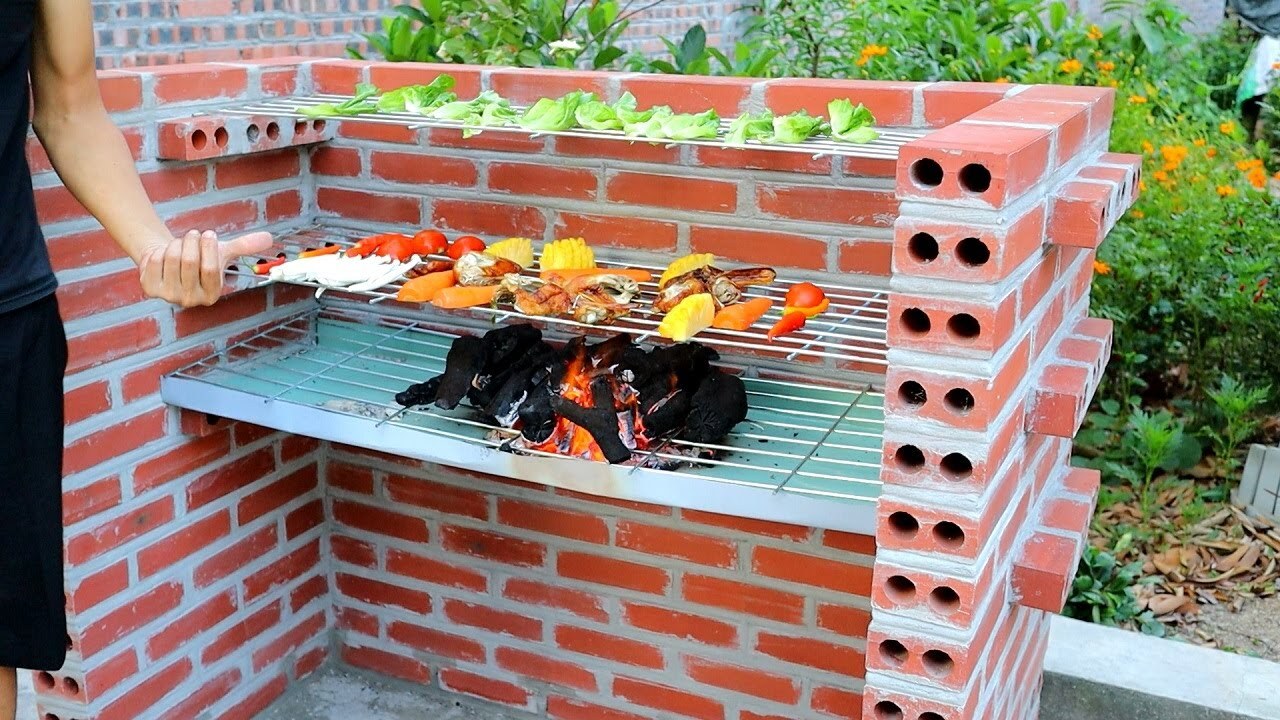
Read more: How To Build A Brick Bbq With Chimney
Constructing the Frame
Constructing the frame of your BBQ island is a pivotal phase that lays the groundwork for the overall structure and functionality. Here's a detailed breakdown of the essential steps involved in building the frame:
-
Lumber Selection: Begin by selecting high-quality, weather-resistant lumber for constructing the frame of your BBQ island. Pressure-treated wood or cedar are popular choices due to their durability and ability to withstand outdoor conditions.
-
Frame Design: Based on your island's design and layout, create a detailed plan for the frame structure. Consider the dimensions, support requirements for appliances and countertops, and any additional features such as storage compartments or bar seating.
-
Cutting and Assembly: Use precise measurements to cut the lumber according to the predetermined dimensions. Assemble the frame components, including vertical supports, horizontal beams, and cross bracing, ensuring a sturdy and level framework.
-
Fastening and Joinery: Employ appropriate fastening techniques such as exterior-grade screws, galvanized nails, or structural connectors to securely join the frame elements. Utilize corner braces and reinforcement to enhance the stability and load-bearing capacity of the frame.
-
Appliance Integration: If your BBQ island will accommodate built-in appliances such as a grill or sink, ensure that the frame includes designated spaces and supports for these fixtures. Verify the compatibility of the frame layout with the intended appliance placements.
-
Countertop Support: Incorporate strategic reinforcement within the frame to support the weight of the chosen countertop material. Consider the load distribution and ensure that the frame can adequately bear the weight of the countertop and any added accessories.
-
Leveling and Alignment: Use a level and shims to ensure that the frame is perfectly level and aligned. This step is crucial for the proper installation of countertops, facing materials, and other finishing elements.
-
Weatherproofing: Apply a weatherproof sealant or exterior-grade paint to the frame components to protect them from moisture, UV exposure, and insect damage. Proper weatherproofing enhances the longevity and resilience of the frame against outdoor elements.
By meticulously executing the construction of the frame, you establish a robust and reliable skeleton for your BBQ island, setting the stage for the subsequent phases of assembly and customization. A well-constructed frame forms the backbone of your outdoor culinary oasis, ensuring structural integrity and longevity for years to come.
Installing Countertops and Surfaces
Installing the countertops and surfaces is a pivotal phase that adds functionality, visual appeal, and a polished finish to your BBQ island. Here's a comprehensive guide to the essential steps involved in the installation process:
-
Preparation and Measurement: Begin by carefully measuring the dimensions of the countertop and surface areas to ensure accurate cuts and a precise fit. Take into account any openings for built-in appliances, sinks, or other fixtures, and mark the cutting lines accordingly.
-
Material Selection: Choose the appropriate material for your countertops and surfaces based on your design preferences, durability requirements, and maintenance considerations. Options such as granite, concrete, tile, or natural stone offer a blend of aesthetic appeal and resilience in outdoor settings.
-
Cutting and Fabrication: If custom cuts or shaping are required for the countertops and surfaces, use specialized tools and techniques to achieve precise and clean edges. Whether you're working with stone, tile, or other materials, employ the appropriate cutting and fabrication methods to create the desired shapes and dimensions.
-
Placement and Alignment: Carefully position the prepared countertops and surfaces onto the designated areas of the island. Ensure that the edges align seamlessly with the frame and that any cutouts for appliances or fixtures are accurately positioned for a snug fit.
-
Securing and Adhering: Depending on the material and design of the countertops, use suitable adhesives, fasteners, or mounting brackets to secure them to the frame. Follow manufacturer recommendations for adhesive application and curing times to ensure a strong and lasting bond.
-
Sealing and Finishing: Apply a high-quality sealant or finishing treatment to the installed countertops and surfaces to protect them from moisture, stains, and UV exposure. Proper sealing enhances the longevity and resilience of the materials, preserving their appearance and structural integrity.
-
Grout and Joint Finishing: If your chosen surfaces involve tile or stone, carefully apply grout to fill the joints and create a uniform, clean finish. Use a grout float to press the grout into the joints and remove any excess material for a smooth and polished appearance.
-
Edge Detailing: Consider adding edge detailing to the countertops for a refined and customized look. Options such as bullnose, beveled, or mitered edges can enhance the aesthetic appeal and tactile experience of the surfaces.
By meticulously following these steps, you can achieve a professional and visually stunning installation of countertops and surfaces for your BBQ island. The careful attention to detail and precision in this phase will contribute to the overall functionality and aesthetic charm of your outdoor culinary haven.
Adding Finishing Touches
Adding the finishing touches to your BBQ island is the crowning phase that elevates the visual appeal, functionality, and overall ambiance of your outdoor culinary space. Here's a comprehensive guide to the essential steps involved in adding those final, defining details:
-
Decorative Facing: Enhance the aesthetic charm of your BBQ island by applying decorative facing materials such as stone veneer, stucco, or ceramic tiles. Carefully adhere these materials to the exterior surfaces of the island, creating a cohesive and visually captivating finish.
-
Customized Accents: Infuse character and individuality into your island by incorporating customized accents such as decorative tile patterns, mosaic designs, or personalized motifs. These unique touches add a personal flair and artistic dimension to your outdoor cooking oasis.
-
Built-in Lighting: Illuminate your BBQ island with strategically placed lighting fixtures to enhance both functionality and ambiance. Consider installing LED task lights for practical workspace illumination and ambient lighting to create a warm and inviting atmosphere during evening gatherings.
-
Outdoor-rated Fixtures: Ensure that all fixtures and hardware integrated into your BBQ island are designed for outdoor use and can withstand exposure to the elements. From cabinet hardware to faucets and handles, opt for durable, weather-resistant options that complement the overall design.
-
Bar Seating and Accessories: If your island includes a bar top or seating area, consider adding bar stools, comfortable cushions, and tabletop accessories to create a welcoming and sociable space for dining and entertaining.
-
Weatherproofing and Sealing: Apply a weatherproof sealant or protective coating to all exterior surfaces of the island to safeguard against moisture, UV exposure, and environmental wear. Proper weatherproofing enhances the longevity and resilience of the finishing materials.
-
Landscaping Integration: Integrate landscaping elements such as potted plants, shrubs, or decorative rocks around the perimeter of the BBQ island to seamlessly blend it with the surrounding outdoor environment. This integration creates a harmonious and inviting outdoor living space.
-
Personalized Signage or Artwork: Consider adding personalized signage, outdoor artwork, or decorative plaques to further personalize and embellish your BBQ island. These creative touches can reflect your unique style and add a touch of personality to the space.
By meticulously attending to these finishing touches, you can transform your BBQ island into a captivating and functional focal point of your outdoor living area. The thoughtful integration of these details adds depth, character, and a sense of completion to your custom-built culinary haven.
Maintenance and Care Tips
Maintaining your BBQ island is essential for preserving its functionality, appearance, and longevity. Here are some valuable maintenance and care tips to ensure that your outdoor culinary oasis remains in top condition:
-
Regular Cleaning: Establish a routine for cleaning the surfaces, countertops, and appliances of your BBQ island. Use mild soap, water, and non-abrasive cleaning tools to remove grease, food residue, and environmental debris. Regular cleaning prevents the buildup of grime and maintains the pristine appearance of your outdoor kitchen.
-
Seasonal Inspections: Conduct seasonal inspections of the structural components, framework, and surfaces of your BBQ island. Look for signs of wear, water damage, or deterioration, and address any issues promptly to prevent further damage.
-
Weather Protection: During inclement weather or extended periods of non-use, protect your BBQ island with weatherproof covers or tarps. This safeguarding measure shields the surfaces, appliances, and framework from moisture, UV exposure, and debris, extending their lifespan.
-
Appliance Maintenance: Follow the manufacturer's guidelines for maintaining and servicing built-in appliances such as grills, refrigerators, and sinks. Regularly inspect and clean these appliances, and address any mechanical issues promptly to ensure optimal performance.
-
Sealant Renewal: Periodically inspect the sealant and finishing treatments applied to the surfaces and countertops of your BBQ island. Reapply sealants as needed to maintain protection against moisture, stains, and UV damage, preserving the integrity of the materials.
-
Pest Prevention: Implement measures to deter pests and critters from nesting or foraging around your BBQ island. Seal any gaps or openings in the framework, and consider using natural repellents or deterrents to safeguard against unwanted intrusions.
-
Landscape Maintenance: If your BBQ island is integrated with landscaping elements, maintain the surrounding vegetation, hardscaping, and decorative features. Regular upkeep of the outdoor environment ensures a cohesive and inviting setting for your culinary space.
-
Grill Grate Care: Clean and maintain the grill grates regularly to prevent rust, corrosion, and flavor transfer. Use grill brushes, food-safe cleaners, and appropriate seasoning techniques to preserve the quality and performance of the grates.
-
Surface Protection: Use cutting boards, trivets, and heat-resistant mats to protect the surfaces and countertops from scratches, heat damage, and stains. These protective accessories help maintain the pristine condition of the materials.
-
Professional Maintenance: Consider scheduling periodic professional inspections and maintenance services for your BBQ island. Qualified technicians can assess the structural integrity, electrical components, and overall functionality, addressing any maintenance needs with expertise.
By adhering to these maintenance and care tips, you can uphold the beauty, functionality, and durability of your BBQ island, ensuring that it continues to be a cherished centerpiece of your outdoor living space for years to come.

