
Home>Home & Furniture>Doors & Windows>How to Build an Indoor Window Planter Box
Doors & Windows
How to Build an Indoor Window Planter Box
Published: August 16, 2024
Learn how to build an indoor window planter box with our step-by-step guide. Perfect for adding greenery to your home, this DIY project is simple and rewarding.
(Many of the links in this article redirect to a specific reviewed product. Your purchase of these products through affiliate links helps to generate commission for Twigandthistle.com, at no extra cost. Learn more)
Creating an indoor window planter box can brighten up your living space and bring nature closer to you. Growing plants indoors can improve air quality, boost your mood, and add a touch of green to your home. Building your own planter box is a fun and fulfilling DIY project you can complete over a weekend. With simple tools and materials, you can create a custom planter box that fits perfectly on your windowsill. This guide will walk you through each step, ensuring you have all the information needed to make your indoor garden thrive.
Getting Ready for Your Project
Gather Materials: Get wood planks, screws, nails, a hammer, a saw, a measuring tape, a drill, wood glue, sandpaper, paint or stain, and a plastic liner.
Measure the Window: Measure the width and height of the window where the planter box will go. This ensures the box fits perfectly.
Cut the Wood: Use the saw to cut the wood planks to the desired size. You'll need pieces for the front, back, sides, and bottom of the box.
Sand the Edges: Sand all edges of the wood pieces to remove splinters and rough spots. This makes the box safer to handle and gives it a smooth finish.
Assemble the Box: Use wood glue and screws to attach the front, back, and side pieces together. Then, attach the bottom piece. Make sure everything is aligned properly.
Drill Drainage Holes: Drill small holes in the bottom of the box for water drainage. This prevents water from pooling and damaging the plants.
Paint or Stain: Apply paint or stain to the box to protect the wood and give it a finished look. Let it dry completely.
Install the Plastic Liner: Place a plastic liner inside the box to protect the wood from moisture. Cut it to fit and secure it with staples or glue.
Set Up the Workspace: Choose a well-ventilated area with plenty of light. Lay down a drop cloth to protect the floor from paint or wood shavings.
Wear Safety Gear: Put on safety goggles and gloves to protect your eyes and hands while cutting, sanding, and assembling the wood.
Check Tools: Ensure all tools are in good working condition. Dull blades or faulty equipment can cause accidents.
Plan the Layout: Before starting, visualize where each piece will go. This helps avoid mistakes during assembly.
Gathering Materials and Tools
- Wood Planks: Used for constructing the box. Choose cedar or pine for durability.
- Measuring Tape: Ensures accurate measurements for cutting wood.
- Saw: Cuts the wood planks to the required dimensions.
- Drill: Makes holes for screws and drainage.
- Screws: Holds the wooden pieces together securely.
- Screwdriver: Tightens screws into the wood.
- Sandpaper: Smooths rough edges on the wood.
- Wood Glue: Adds extra strength to joints.
- Paint or Stain: Protects the wood and adds a decorative touch.
- Paintbrush: Applies paint or stain evenly.
- Plastic Liner: Prevents water from damaging the wood.
- Potting Soil: Fills the planter box for planting.
- Plants: Adds greenery to your indoor space.
- Safety Goggles: Protects eyes while cutting and drilling.
- Work Gloves: Keeps hands safe from splinters and sharp tools.
Skill Level and Time Commitment
Skill Level: Intermediate
Time Required: 3-4 hours
Steps:
- Measure and Cut Wood: 30 minutes
- Assemble Box: 1 hour
- Sand and Paint: 1 hour
- Install Brackets: 30 minutes
- Add Soil and Plants: 30 minutes
Instructions for Building Your Planter Box
Gather Materials:
- Wooden boards (cut to size)
- Screws
- Drill
- Measuring tape
- Sandpaper
- Wood glue
- Paint or wood stain
- Paintbrush
- Plastic liner (optional)
Measure and Cut Wood:
- Measure the window width.
- Cut two boards for the front and back.
- Cut two shorter boards for the sides.
- Cut one board for the bottom.
Sand the Edges:
- Smooth all edges using sandpaper to avoid splinters.
Assemble the Box:
- Apply wood glue to the edges of the side boards.
- Attach the side boards to the front and back boards.
- Secure with screws using a drill.
Attach the Bottom:
- Apply wood glue to the bottom edges of the assembled frame.
- Place the bottom board and secure it with screws.
Paint or Stain:
- Apply paint or wood stain to the planter box.
- Allow it to dry completely.
Add Plastic Liner (Optional):
- Line the inside with a plastic liner to protect the wood from water damage.
Install the Planter Box:
- Place the planter box on the window sill.
- Ensure it fits securely.
Add Soil and Plants:
- Fill the box with potting soil.
- Plant your chosen indoor plants.
Helpful Tips and Tricks
Measure your window space accurately before starting. Use a level to ensure your planter box sits straight. Choose lightweight materials like pine or cedar to avoid putting too much weight on your window frame. Seal the wood with a waterproof sealant to prevent water damage. Drill drainage holes in the bottom to avoid waterlogging your plants. Line the inside with plastic to protect the wood further. Attach brackets securely to support the weight of the soil and plants.
Common mistakes include forgetting drainage holes, which can drown your plants. Skipping the waterproof sealant can lead to wood rot. Using heavy materials can damage your window frame. Not measuring accurately can result in a poor fit.
For materials, consider using recycled wood for an eco-friendly option. Instead of plastic liners, you can use heavy-duty garbage bags. If you don't have brackets, you can use sturdy L-brackets from any hardware store.
Estimating the Cost
Wood: $20-$30 for pine or cedar boards. Screws/Nails: $5-$10. Wood Glue: $5. Sandpaper: $3-$5. Paint/Stain: $10-$15. Plastic Liner: $5-$10. Drill: $30-$50 (if you don't have one). Saw: $20-$40 (if you don't have one). Measuring Tape: $5-$10. Paintbrushes: $3-$5.
Total Cost: $106-$180.
Budget-Friendly Alternatives:
- Use reclaimed wood or pallets: Free or very cheap.
- Borrow tools from friends or neighbors.
- Use leftover paint from other projects.
- Skip the plastic liner and use old plastic bags.
Different Ways to Customize
Materials: Instead of wood, try metal or plastic for a modern look. Reclaimed wood gives a rustic feel. Ceramic or terracotta can add a touch of elegance.
Colors: Paint the box in bright colors like yellow or turquoise for a cheerful vibe. Use earth tones like brown or green for a natural look. Metallic paints like gold or silver can make it stand out.
Styles: Add decorative trim or molding for a classic style. Use stencils or decals to create patterns or designs. Attach small hooks on the sides for hanging tools or decorations.
Liners: Use plastic liners to protect the wood from water damage. Coconut fiber liners can add a natural touch. Fabric liners with fun patterns can add a pop of color.
Drainage: Drill holes at the bottom for drainage. Place small stones or gravel at the bottom to help with water flow. Use a self-watering system for low maintenance.
Mounting: Attach brackets to mount it on the wall. Use suction cups for a temporary setup. Hang it with ropes or chains for a floating effect.
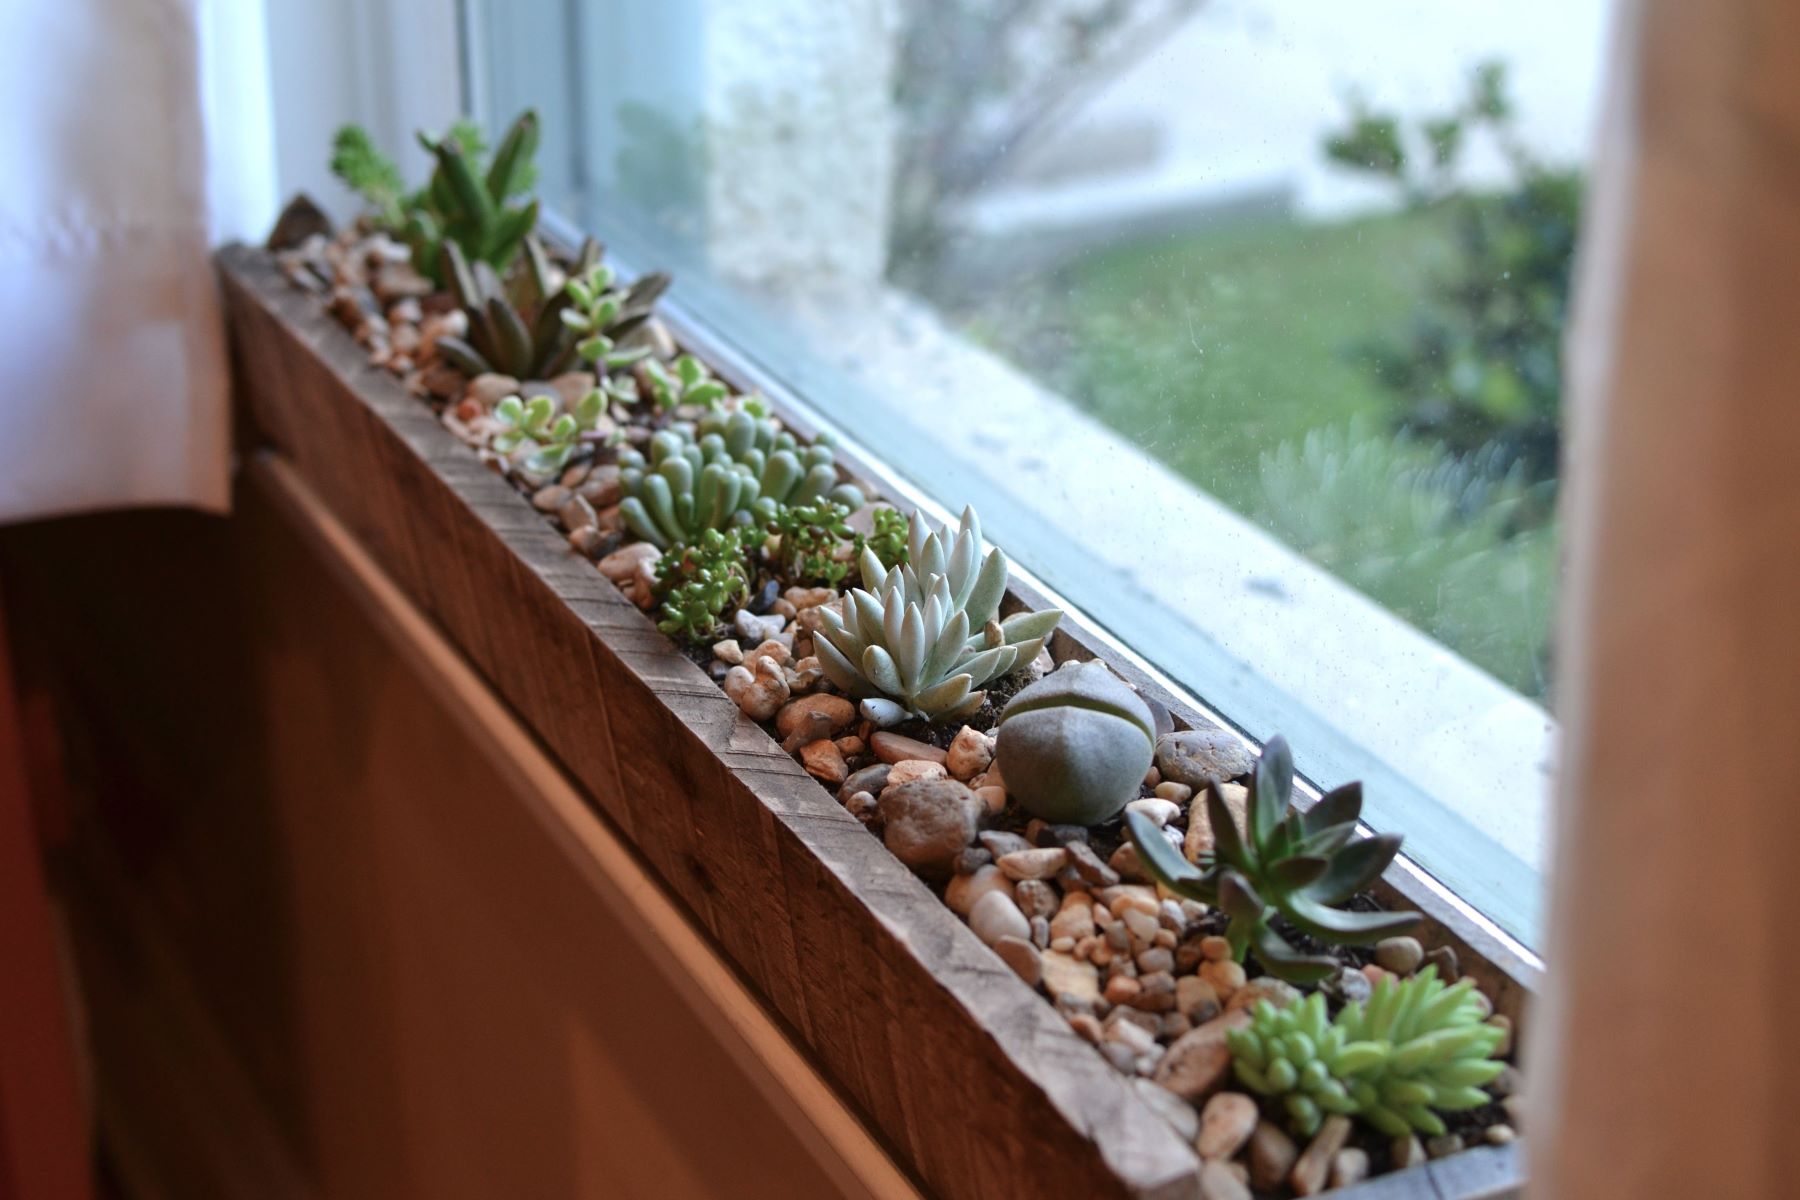
Plants: Choose succulents for low maintenance. Use herbs for a functional kitchen garden. Mix flowering plants for a colorful display.
Extras: Add LED lights for a glowing effect at night. Place small figurines or decorative stones among the plants. Attach a nameplate or label for each plant type.
Eco-Friendly Ideas
Reclaimed wood is a great choice for building an indoor window planter box. Look for old pallets or leftover wood from other projects. Sand it down to remove splinters and give it a smooth finish.
Recycled plastic containers can serve as liners for your planter box. This helps keep the wood from getting too wet and extends its life.
Use natural stains or paints to finish the wood. These are less harmful to the environment and safer for indoor use.
For the soil, consider using compost made from kitchen scraps. This reduces waste and provides rich nutrients for your plants.
Upcycled materials like old metal brackets or handles can add a unique touch to your planter box. These items can often be found at thrift stores or garage sales.
When choosing plants, opt for native species or those that thrive indoors. They require less water and care, making them more sustainable.
Finally, use LED grow lights if your window doesn’t get enough natural light. They are energy-efficient and last longer than traditional bulbs.
Your Green Oasis Awaits
You've got all the steps to build your own indoor window planter box. From gathering materials to the final touches, each part is crucial. Remember to measure twice, cut once. Sanding down rough edges ensures a smooth finish. When assembling, use wood glue and screws for a sturdy build. Adding a drainage system keeps your plants healthy. Paint or stain the box to match your decor. Finally, choose the right plants for your space. Herbs, succulents, or small flowers can thrive indoors. Regular watering and sunlight are key. With a bit of effort, you’ll have a beautiful, functional addition to your home. Enjoy the process, and happy planting!
How do I choose the right materials for my indoor window planter box?
Pick wood like cedar or pine, which resist moisture. You can also use plastic or metal if you prefer. Just make sure it's sturdy and lightweight.
What tools will I need to build the planter box?
You'll need a saw, hammer, nails, measuring tape, drill, and screws. A screwdriver and sandpaper will also come in handy.
How do I measure the space for the planter box?
Measure the width and height of your window. Leave a bit of extra space on each side so the box fits comfortably. Don't forget to measure the depth for the soil and plants.
Should I add drainage holes to my planter box?
Yes, definitely! Drill a few small holes in the bottom to let excess water escape. This prevents root rot and keeps your plants healthy.
What type of soil should I use?
Use potting soil that's light and well-draining. Avoid garden soil, which can be too heavy and compact for indoor plants.
How do I secure the planter box to the window?
Use brackets or hooks to attach the box to the window frame. Make sure they're strong enough to hold the weight of the soil and plants.
Can I paint or stain my planter box?
Absolutely! Paint or stain the wood to match your decor. Just use a non-toxic finish so it doesn't harm your plants.