
Home>Create & Decorate>DIY & Crafts>How To Do A Balloon Arch
DIY & Crafts
How To Do A Balloon Arch
Published: February 23, 2024

Content Creator specializing in woodworking and interior transformations. Caegan's guides motivate readers to undertake their own projects, while his custom furniture adds a personal touch.
Learn how to create a stunning balloon arch with our easy DIY tutorial. Perfect for parties, weddings, and special events. Get inspired and get crafting!
(Many of the links in this article redirect to a specific reviewed product. Your purchase of these products through affiliate links helps to generate commission for Twigandthistle.com, at no extra cost. Learn more)
Introduction
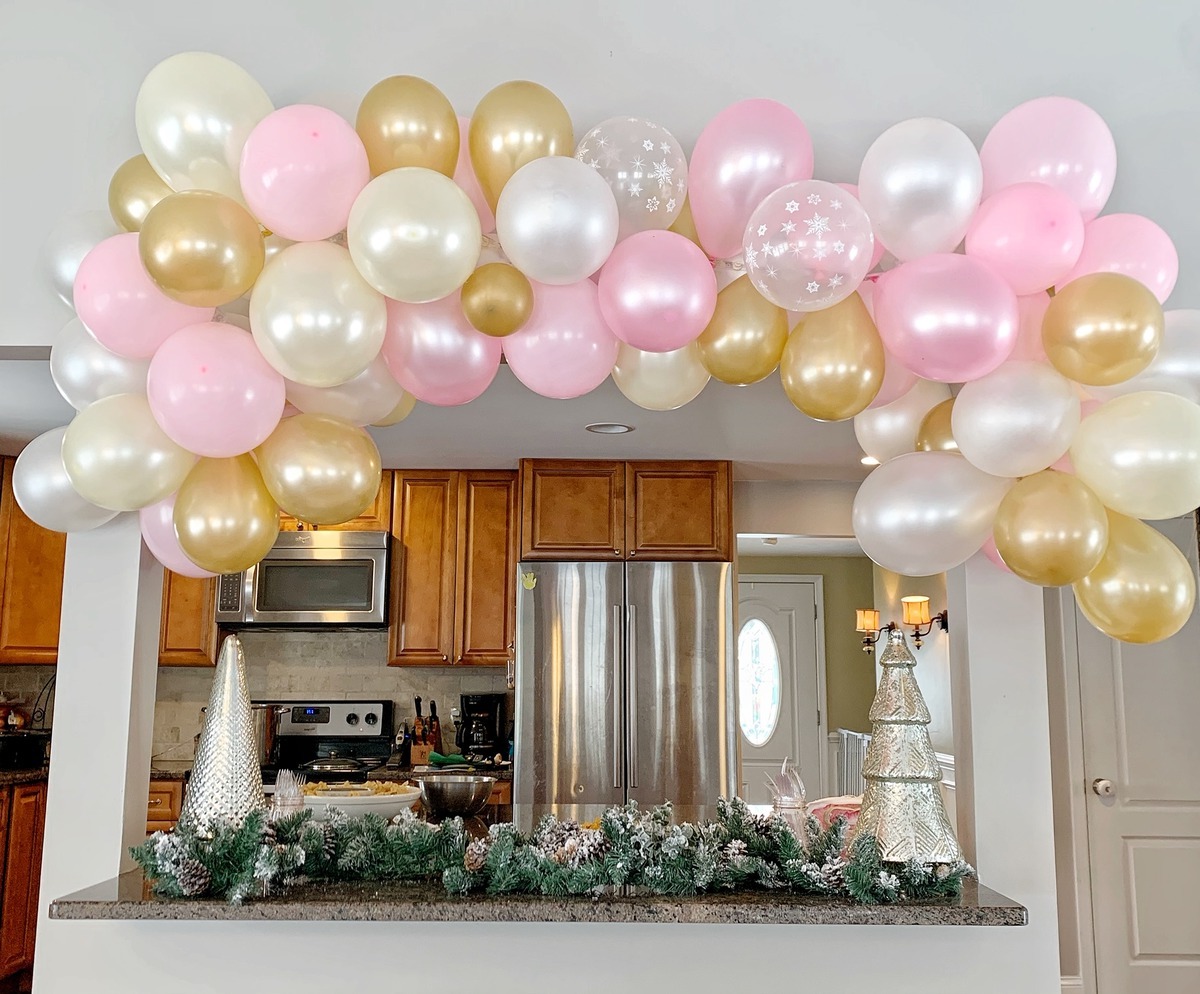
Creating a stunning balloon arch can instantly elevate the ambiance of any event, whether it's a birthday party, wedding, or baby shower. The whimsical and vibrant nature of balloon arches adds a touch of joy and festivity to the surroundings, making them a popular choice for decorations. Whether you're a seasoned DIY enthusiast or a novice crafter, crafting a balloon arch is an enjoyable and rewarding endeavor that allows you to unleash your creativity.
In this comprehensive guide, we will walk you through the step-by-step process of creating a captivating balloon arch that will leave your guests in awe. From selecting the right materials to assembling the arch with precision, you'll gain valuable insights and practical tips to ensure your balloon arch turns out picture-perfect.
Get ready to embark on a delightful journey of crafting as we delve into the art of creating a mesmerizing balloon arch. With a handful of balloons, a dash of creativity, and a sprinkle of determination, you'll soon be on your way to crafting a stunning centerpiece that will be the talk of the party. So, roll up your sleeves and let's dive into the wonderful world of balloon arches!
Materials Needed
To embark on your balloon arch crafting journey, you'll need a few essential materials to bring your vision to life. Here's a comprehensive list of the items you'll require:
-
Balloons: The star of the show! Opt for a variety of colors to match your event's theme and create a visually captivating arch. It's advisable to have an assortment of sizes to add depth and dimension to your creation.
-
Balloon Pump: A trusty balloon pump will be your best friend during the inflation process. It saves time and effort, ensuring that your balloons are uniformly inflated for a polished look.
-
Fishing Line or Balloon Decorating Strip: This will serve as the framework for your balloon arch. The fishing line provides a nearly invisible base, while the balloon decorating strip offers evenly spaced holes to secure the balloons effortlessly.
-
Balloon Garland Kit (Optional): If you prefer a hassle-free approach, a balloon garland kit can be a convenient choice. These kits often include decorating strip, glue dots, and other accessories to streamline the assembly process.
-
Command Hooks or Balloon Arch Stand: Depending on your venue and preferences, you may need command hooks to hang the arch or a balloon arch stand to support its structure.
-
Decorative Accents (Optional): Consider incorporating greenery, flowers, or ribbons to embellish your balloon arch and add a personalized touch.
-
Scissors: A pair of sharp scissors will come in handy for trimming the fishing line or balloon decorating strip to the desired length.
-
Adhesive Hooks or Tape: If you're using a balloon decorating strip, adhesive hooks or tape will be essential for securing the strip in place.
-
Ladder or Step Stool: For larger arches, having a stable ladder or step stool will facilitate reaching higher points during the installation process.
Gathering these materials will set the stage for a seamless and enjoyable balloon arch crafting experience. With the right tools at your disposal, you're well-equipped to embark on the exciting journey of bringing your balloon arch vision to life.
Step 1: Determine the Size and Shape of Your Arch
The first and foremost step in creating a captivating balloon arch is to envision the size and shape that will best complement your event space. Whether you're aiming for a grand, sweeping arch or a more modest and understated design, the dimensions of your arch will set the stage for the entire crafting process.
Consider the location where the arch will be displayed. Will it adorn the entrance, frame the dessert table, or serve as a stunning backdrop for photographs? Understanding the placement of the arch will guide your decision on the appropriate size and shape. For instance, a larger venue may accommodate a more expansive arch, while a smaller space might call for a compact and intricately designed arch to make a statement without overwhelming the surroundings.
Next, contemplate the shape of the arch. Will it be a classic half-circle arch, a whimsical spiral design, or a unique organic shape that mirrors the fluidity of nature? The shape of your arch can infuse personality and charm into your event decor, so take the time to explore various options that resonate with your creative vision.
Additionally, consider the color scheme and theme of your event. The arch should harmonize with the overall aesthetic, whether it's a vibrant and eclectic mix of colors for a birthday celebration or a sophisticated blend of pastels for a baby shower. The size and shape of the arch should align seamlessly with the event's theme, creating a cohesive and visually striking ambiance.
To aid in visualizing the arch, you can use a measuring tape or rope to outline the intended size and shape on the floor or wall. This hands-on approach allows you to assess the proportions and make any necessary adjustments before diving into the assembly process.
By meticulously determining the size and shape of your balloon arch, you lay the groundwork for a visually stunning and harmonious creation that will captivate your guests and leave a lasting impression. With a clear vision in mind, you're ready to proceed to the next exhilarating phase of bringing your balloon arch to life.
Step 2: Inflate the Balloons
Inflating the balloons is a pivotal step in the creation of a breathtaking balloon arch. It's essential to approach this process with precision and care to ensure that your arch exudes a polished and professional appearance. Here's a detailed walkthrough of how to inflate the balloons effectively:
Selecting the Right Balloons
Begin by selecting an assortment of high-quality balloons in varying sizes and colors. Opt for durable latex balloons that can withstand the inflation process without easily popping. The colors should align with your event's theme, allowing you to curate a visually captivating palette that harmonizes with the overall decor.
Utilizing a Balloon Pump
A reliable balloon pump is a game-changer when it comes to inflating a large quantity of balloons efficiently. It not only expedites the process but also ensures uniform inflation, resulting in a cohesive and professional-looking arch. Insert the nozzle of the pump into the balloon's opening and steadily inflate it to the desired size, taking care not to overinflate and risk the balloon bursting.
Achieving Consistent Sizes
Consistency is key when inflating the balloons. Aim to maintain a uniform size across the balloons to create a visually appealing arch. Using a measuring tool or template can help ensure that each balloon is inflated to the same dimensions, contributing to a polished and symmetrical overall look.
Incorporating Different Sizes
To add depth and dimension to your balloon arch, incorporate balloons of varying sizes. This creates visual interest and texture, elevating the arch from a simple arrangement to a dynamic and eye-catching focal point. Experiment with different size combinations to achieve a balanced and visually appealing composition.
Preparing an Ample Supply
As you inflate the balloons, it's prudent to prepare an ample supply to accommodate any unexpected pops or defects. Having extra balloons on hand ensures that you can seamlessly replace any flawed balloons without disrupting the assembly process, allowing for a smooth and uninterrupted crafting experience.
By meticulously inflating the balloons with attention to detail and consistency, you set the stage for a visually stunning and professionally executed balloon arch. With the balloons ready to take center stage, you're poised to embark on the next phase of assembling the arch with finesse and creativity.
Step 3: Create the Base of the Arch
The base of the balloon arch serves as the foundation upon which the entire structure rests, providing stability and structure to the captivating display of balloons. To create a sturdy and reliable base, follow these steps to ensure a seamless and visually striking arch:
Option 1: Fishing Line Method
-
Measure and Cut the Fishing Line: Begin by measuring the desired length of the balloon arch and carefully cut the fishing line to the appropriate size. It's advisable to add extra length to account for securing the arch and accommodating any adjustments during the assembly process.
-
Secure the Fishing Line: Utilize adhesive hooks or tape to affix the fishing line to the designated area where the arch will be displayed. Ensure that the line is taut and positioned at the desired height and angle, providing a clear framework for attaching the balloons.
-
Determine the Balloon Placement: Plan the arrangement of the balloons along the fishing line, considering the color scheme, size variations, and spacing to achieve a balanced and visually appealing composition.
-
Attach the Balloons: Carefully tie the inflated balloons to the fishing line, ensuring a snug and secure fit. Maintain a consistent pattern and spacing as you progress along the line, adjusting the positioning of the balloons to achieve the desired shape and fullness of the arch.
-
Add Decorative Accents (Optional): For an extra touch of elegance, consider incorporating decorative accents such as greenery, flowers, or ribbons into the base of the arch. These embellishments can enhance the overall aesthetic and infuse a personalized charm into the display.
Option 2: Balloon Decorating Strip Method
-
Prepare the Balloon Decorating Strip: If using a balloon decorating strip, carefully unravel the strip and identify the evenly spaced holes designed for securing the balloons. The pre-determined spacing simplifies the attachment process and ensures uniformity in the arrangement.
-
Secure the Strip in Place: Affix the balloon decorating strip using adhesive hooks or tape, ensuring that it is positioned at the desired height and curvature for the arch. The strip serves as a convenient guide for attaching the balloons, streamlining the assembly process.
-
Attach the Balloons: Insert the knotted ends of the inflated balloons into the designated holes on the decorating strip, securing them in place with a gentle twist. As you progress along the strip, maintain a consistent pattern and distribution of balloons to achieve a balanced and visually captivating arch.
By meticulously creating a sturdy and visually appealing base for your balloon arch, you establish a solid foundation for the subsequent steps of assembling the arch with finesse and creativity. With the base in place, the arch is poised to take shape and become a mesmerizing centerpiece that will enchant and delight all who behold it.
Step 4: Attach the Balloons to the Base
With the base of the balloon arch meticulously prepared, it's time to embark on the exhilarating process of attaching the inflated balloons to create a visually captivating and harmonious display. This step requires precision, creativity, and a keen eye for detail to ensure that the arch takes shape seamlessly and exudes a polished and professional appearance.
If you've opted for the fishing line method, carefully tie the knotted ends of the inflated balloons to the fishing line, ensuring a snug and secure fit. As you progress along the line, maintain a consistent pattern and spacing, adjusting the positioning of the balloons to achieve the desired shape and fullness of the arch. The arrangement of the balloons should reflect your envisioned design, with attention to color distribution, size variations, and overall symmetry.
Alternatively, if you've chosen the balloon decorating strip method, insert the knotted ends of the inflated balloons into the designated holes on the strip, securing them in place with a gentle twist. As you work along the strip, maintain a balanced distribution of balloons, ensuring that they are snugly positioned to create a cohesive and visually captivating arch. The evenly spaced holes on the decorating strip facilitate a streamlined attachment process, allowing for a polished and professional-looking result.
Throughout the attachment process, step back periodically to assess the evolving arch from different angles, ensuring that the distribution of colors, sizes, and shapes aligns with your creative vision. Make any necessary adjustments to maintain symmetry and balance, fine-tuning the arrangement to achieve a visually striking and harmonious composition.
As you meticulously attach the balloons to the base, infuse your creativity and personal touch into the process, allowing the arch to come to life with vibrant colors and dynamic shapes. With each balloon carefully positioned, the arch gradually transforms into a captivating centerpiece that embodies the essence of your event's theme and ambiance.
By skillfully attaching the balloons to the base, you breathe life into the arch, transforming it from a framework of fishing line or decorating strip into a mesmerizing display that will enchant and delight all who encounter it. With this pivotal step completed, the arch is poised to become the focal point of your event, radiating joy and festivity throughout the celebration.
Step 5: Add Additional Layers
As you progress in the assembly of your balloon arch, the addition of extra layers plays a pivotal role in elevating the visual impact and dimensionality of the arch. This step allows you to infuse depth and texture into the display, transforming it from a simple arrangement into a dynamic and eye-catching centerpiece that commands attention.
To begin, assess the existing arrangement of balloons and identify areas where additional layers can enhance the overall aesthetic. Consider incorporating balloons of varying sizes, colors, and textures to introduce visual interest and create a sense of movement within the arch. By strategically layering the balloons, you can achieve a multi-dimensional effect that captivates the eye and adds a touch of whimsy to the display.
Experiment with different placement patterns, such as staggering the balloons to create a cascading effect or clustering them to form focal points along the arch. This creative exploration allows you to tailor the layers to suit your event's theme and ambiance, infusing personality and charm into the composition.
As you add the extra layers, pay attention to the distribution of colors and sizes, ensuring a harmonious balance that complements the overall design. The interplay of hues and shapes contributes to a visually captivating display that exudes vibrancy and elegance.
Furthermore, consider incorporating decorative elements such as greenery, flowers, or ribbons into the additional layers to embellish the arch and infuse a personalized touch. These accents can accentuate the theme of the event and add a delightful flourish to the overall composition.
Throughout this process, step back periodically to assess the evolving layers from different angles, ensuring that the distribution and arrangement align with your creative vision. Make any necessary adjustments to maintain symmetry and balance, fine-tuning the layers to achieve a visually striking and harmonious composition.
By skillfully adding additional layers to the balloon arch, you breathe life into the display, transforming it into a captivating centerpiece that embodies the essence of your event's theme and ambiance. With each layer thoughtfully integrated, the arch evolves into a mesmerizing focal point that radiates joy and festivity throughout the celebration.
Step 6: Secure the Arch
Securing the balloon arch is a crucial step that ensures its stability and longevity throughout the event. By firmly anchoring the arch in place, you can mitigate the risk of unexpected shifts or disruptions, allowing the captivating display to stand tall and proud as a focal point of the celebration.
Option 1: Utilizing Command Hooks
If you've opted for the fishing line method to create the arch, command hooks offer a convenient and reliable solution for securing the ends of the fishing line. Affix the command hooks to the designated areas where the arch will be displayed, ensuring that they are positioned at the appropriate height and angle to support the arch. Gently loop and secure the ends of the fishing line onto the hooks, ensuring a taut and secure fit. This method provides a nearly invisible means of support, allowing the arch to take center stage without obtrusive fixtures detracting from its visual appeal.
Option 2: Balloon Arch Stand
For larger or freestanding arches, a balloon arch stand serves as a sturdy and versatile support structure. Assemble the stand according to the manufacturer's instructions, ensuring that it is positioned at the desired location for the arch. Carefully drape and secure the fishing line or balloon decorating strip onto the stand, ensuring that it is taut and securely fastened. The stand provides a reliable foundation for the arch, allowing it to command attention and admiration without the need for attachment to walls or other fixtures.
Option 3: Adhesive Tape or Hooks
In instances where command hooks are not suitable, adhesive tape or hooks can serve as an alternative method for securing the arch. Ensure that the adhesive is compatible with the surface where it will be applied, providing a strong and reliable hold without causing damage. Carefully affix the tape or hooks to the designated areas, allowing for a secure attachment that supports the arch without compromising its visual appeal.
By securing the arch with precision and care, you ensure that it remains a steadfast and enchanting centerpiece throughout the event, captivating guests and infusing the surroundings with joy and festivity. With the arch firmly anchored in place, you can revel in the delight of witnessing your creation take its rightful place as a stunning and enduring symbol of celebration.
Conclusion
As you reach the culmination of your balloon arch crafting journey, take a moment to revel in the fulfillment of bringing a captivating vision to life. The creation of a mesmerizing balloon arch is not merely a decorative endeavor; it is a testament to your creativity, dedication, and the joyous spirit that infuses every celebration. With each meticulously placed balloon and thoughtful arrangement, you have woven a tapestry of color and elegance that will leave a lasting impression on all who encounter it.
The process of crafting a balloon arch transcends the mere assembly of balloons; it is a symphony of creativity and precision, where each element harmonizes to form a breathtaking display. From the meticulous selection of colors and sizes to the strategic placement of balloons, every decision contributes to the creation of a visually captivating centerpiece that embodies the essence of your event.
As you reflect on the journey of crafting the balloon arch, remember the moments of inspiration and the joy of witnessing your vision take shape. The careful determination of the arch's size and shape, the meticulous inflation of balloons, and the artful arrangement of layers have all culminated in a display that radiates joy and festivity. The addition of decorative accents and the secure anchoring of the arch serve as testaments to your commitment to creating a seamless and enchanting experience for all who partake in the celebration.
The balloon arch, now poised to take its place as a focal point of the event, stands as a testament to your creativity and craftsmanship. It embodies the spirit of festivity and serves as a visual symphony that harmonizes with the ambiance of the occasion. As guests encounter the arch, they will be greeted by a vibrant and dynamic display that encapsulates the essence of the celebration, leaving an indelible mark on their memories.
In conclusion, the creation of a balloon arch is a testament to the transformative power of creativity and the joy that emanates from crafting something truly remarkable. As you witness the arch take its place amidst the celebration, take pride in the knowledge that your creation has added a touch of magic and elegance to the event, leaving an enduring impression that lingers long after the festivities have concluded.