
Home>Create & Decorate>DIY & Crafts>How To Build A Log Cabin From Trees
DIY & Crafts
How To Build A Log Cabin From Trees
Published: May 23, 2024

Content Creator specializing in woodworking and interior transformations. Caegan's guides motivate readers to undertake their own projects, while his custom furniture adds a personal touch.
Learn how to build a log cabin from trees with our DIY & Crafts guide. Get step-by-step instructions for creating your own rustic retreat.
(Many of the links in this article redirect to a specific reviewed product. Your purchase of these products through affiliate links helps to generate commission for Twigandthistle.com, at no extra cost. Learn more)
Introduction
So, you've always dreamed of having your own cozy log cabin nestled in the woods, but you're not sure where to start? Building a log cabin from trees may seem like a daunting task, but with the right guidance and a bit of elbow grease, it's definitely achievable. In this guide, we'll walk you through the step-by-step process of turning trees into your very own rustic retreat. Whether you're a seasoned DIY enthusiast or a first-time builder, we've got you covered. Let's roll up our sleeves and get started on this exciting journey to creating your own log cabin!
Selecting and Harvesting Trees
-
Choose the Right Trees: When selecting trees for your log cabin, it's crucial to pick the right type of wood. Look for straight, healthy trees with a minimum diameter of 12 inches. Ideal species for log cabins include pine, cedar, and spruce due to their durability and resistance to decay.
-
Sustainable Harvesting: Before you start felling trees, ensure that you have the necessary permits and are adhering to local regulations. It's important to practice sustainable forestry by selectively harvesting trees and leaving the surrounding ecosystem undisturbed.
-
Timing is Key: The best time to harvest trees for log cabin construction is during the dormant season, typically late autumn or winter. During this time, the sap content is lower, which reduces the risk of insect infestation and fungal growth in the logs.
-
Proper Felling Techniques: When it comes to felling the trees, safety should be your top priority. Use proper felling techniques, such as the open-face notch and back-cut method, to ensure a controlled and safe tree removal process.
-
Transporting the Logs: Once the trees are felled, it's time to transport the logs to your building site. Depending on the distance and terrain, you may need specialized equipment such as a log skidder or a team of draft animals to haul the logs.
By carefully selecting and harvesting the right trees, you'll lay a solid foundation for the construction of your log cabin. Now that you have your logs ready, it's time to move on to the next phase of the building process.
Preparing the Logs
-
Debarking the Logs: The first step in preparing the logs for construction is to debark them. This can be done using a drawknife or a bark spud to strip away the outer bark. Removing the bark not only enhances the visual appeal of the logs but also prevents moisture retention, which can lead to rot.
-
Squaring the Logs: To ensure a snug fit and stable construction, it's essential to square the logs. This involves removing the rounded edges to create flat surfaces that will stack neatly on top of each other. A chainsaw or an adze can be used to achieve this, but precision is key to maintaining uniformity in log size.
-
Drying the Logs: Green logs, freshly cut from the tree, contain a high moisture content. To prevent excessive shrinkage and settling of the cabin, it's crucial to allow the logs to dry properly. This can be achieved by air-drying the logs for at least six months to a year, depending on the climate and humidity levels.
-
Treating the Logs: To protect the logs from insect infestation, rot, and decay, it's advisable to apply a wood preservative or borate treatment. This step is especially important if you're using softwood species. Borate treatments can be brushed or sprayed onto the logs, providing long-term protection against wood-damaging organisms.
-
Notching the Logs: Notching is the process of creating interlocking joints at the ends of the logs to ensure stability and structural integrity. There are various notching techniques, such as saddle notches and dovetail notches, each with its unique advantages. Precision and attention to detail are crucial in achieving tightly fitting corners.
-
Sealing the Joints: Once the logs are stacked, it's essential to seal the joints to prevent air and water infiltration. Chinking, a flexible sealant, is traditionally used to fill the gaps between the logs. This not only enhances the cabin's insulation but also adds to its rustic charm.
By meticulously preparing the logs, you'll lay the groundwork for a sturdy and enduring log cabin. With the logs ready for construction, it's time to move on to the next phase of the building process.
Building the Foundation
-
Site Preparation: Before laying the foundation for your log cabin, it's crucial to prepare the building site. Clear the area of any vegetation, rocks, and debris. Ensure that the ground is level and compacted to provide a stable base for the foundation.
-
Foundation Types: There are several options for log cabin foundations, including concrete slab, pier and beam, and crawl space. The choice of foundation type depends on factors such as soil composition, local building codes, and the cabin's design. A concrete slab foundation is a popular choice for its durability and resistance to moisture.
-
Excavation and Footings: If you opt for a concrete slab foundation, excavation is necessary to create a level surface for the slab. Footings are then poured along the perimeter of the cabin to provide support and prevent settling. Properly designed footings are essential for distributing the weight of the cabin evenly.
-
Formwork and Reinforcement: Formwork, typically made of wood or metal, is used to contain the concrete during the pouring process. Reinforcement, such as rebar or wire mesh, is added to the concrete to enhance its strength and prevent cracking. Careful attention to detail during this stage is crucial for a solid foundation.
-
Concrete Pouring: Once the formwork is in place and the reinforcement is set, it's time to pour the concrete. A concrete mixer or truck may be used to deliver the concrete to the site. The concrete is then leveled and smoothed to create a uniform surface for the cabin's base.
-
Curing and Drying: After the concrete is poured, it undergoes a curing process to reach its maximum strength. Proper curing involves keeping the concrete moist and at a consistent temperature for a specified period. This step is essential for preventing cracks and ensuring the longevity of the foundation.
-
Anchor Bolts and Sill Plates: Anchor bolts are embedded in the concrete to secure the sill plates, which serve as the base for the log walls. The placement of anchor bolts is critical, as they provide a connection point between the foundation and the cabin's structure.
Building a solid foundation sets the stage for the rest of the log cabin construction. With the foundation in place, you're ready to move on to the next exciting phase of assembling the walls.
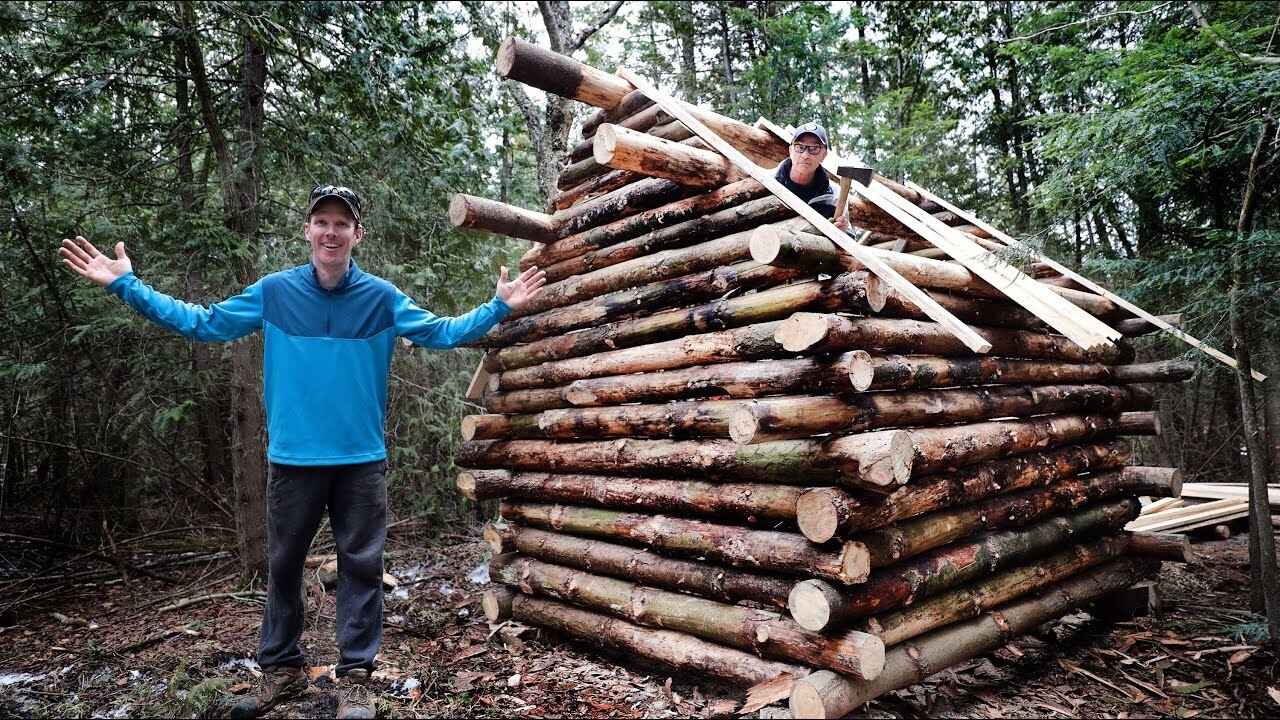
Assembling the Walls
-
Laying the First Course: The first step in assembling the walls of your log cabin is laying the initial course of logs. This course serves as the foundation for the entire structure. Carefully position and level the logs, ensuring that they are securely anchored to the sill plates. The precision of this initial layer is crucial, as it sets the alignment for the rest of the walls.
-
Stacking and Interlocking: As you continue to stack the logs, it's essential to interlock the corners using the appropriate notching technique. Whether you opt for saddle notches, dovetail notches, or another method, the goal is to create tight, secure joints that provide structural stability. Take your time to ensure a snug fit, as this will contribute to the overall strength of the walls.
-
Door and Window Openings: As you reach the desired height for door and window openings, carefully plan and create the necessary gaps in the log walls. Properly framing these openings is essential for accommodating doors and windows while maintaining the structural integrity of the walls. Precision and attention to detail are crucial in this phase to ensure a seamless transition between the log walls and the openings.
-
Installing Headers and Sills: Headers and sills are essential components for supporting the weight of the logs and distributing it around door and window openings. These structural elements help maintain the integrity of the walls while accommodating architectural features. Proper installation of headers and sills is crucial for ensuring the stability and longevity of the log cabin.
-
Securing the Walls: As the walls reach their full height, it's important to secure them in place. This can be achieved by adding temporary bracing to prevent shifting during construction. Additionally, securing the walls to the foundation using anchor bolts or other fastening methods is crucial for withstanding external forces and maintaining the overall stability of the structure.
-
Applying Insulation and Sealants: Once the walls are assembled, consider adding insulation between the logs to enhance the cabin's energy efficiency. Chinking, a flexible sealant, can be applied to fill any remaining gaps between the logs, providing both insulation and a rustic aesthetic. Proper insulation and sealing contribute to the comfort and longevity of the log cabin.
-
Preparing for the Roof: With the walls assembled, it's time to prepare for the installation of the roof. Ensure that the walls are structurally sound and properly aligned to support the weight of the roof. This includes verifying that the walls are plumb and the corners are square, providing a solid foundation for the next phase of construction.
Assembling the walls of your log cabin is a significant milestone in the construction process. With the walls in place, you're one step closer to realizing your dream of a cozy retreat in the woods.
Installing the Roof
-
Roof Design and Materials: Before installing the roof, it's essential to decide on the design and materials that best suit your log cabin. Common options for log cabin roofs include gable, hip, and shed designs. Additionally, the choice of roofing materials, such as shingles, metal, or wood shakes, will impact the cabin's aesthetic and durability.
-
Structural Support: Ensure that the walls are structurally sound and capable of supporting the weight of the roof. Properly aligned and secured walls are crucial for the successful installation of the roof. Additionally, consider adding collar ties or ridge beams to provide additional support and prevent the walls from spreading under the roof's weight.
-
Laying the Roof Decking: The first step in installing the roof is laying the decking, which serves as the base for the roof covering. Oriented strand board (OSB) or plywood are commonly used for roof decking. Carefully measure and cut the decking to fit the dimensions of the roof, ensuring a snug and secure fit.
-
Weatherproofing: Prior to installing the roofing material, it's important to apply a weatherproof barrier, such as roofing felt or synthetic underlayment, to the decking. This barrier provides an additional layer of protection against moisture and helps prevent water infiltration into the cabin.
-
Installing the Roofing Material: Whether you opt for shingles, metal panels, or wood shakes, the installation process will vary. Follow the manufacturer's guidelines for the specific roofing material you've chosen. Pay close attention to the overlap and fastening requirements to ensure a watertight and durable roof.
-
Flashing and Ventilation: Proper flashing around roof penetrations, such as chimneys and vents, is essential for preventing water intrusion. Additionally, ensure adequate ventilation in the attic space to prevent moisture buildup and maintain a comfortable interior environment.
-
Finishing Touches: Once the roofing material is in place, consider adding decorative elements such as fascia, soffit, and trim to enhance the visual appeal of the roof. These finishing touches not only contribute to the cabin's aesthetics but also provide protection against the elements.
-
Roof Inspection: After the roof is installed, conduct a thorough inspection to ensure that it is structurally sound and free of any defects. Look for signs of improper installation, such as loose shingles or inadequate flashing, and address any issues promptly to prevent potential water damage.
Installing the roof is a critical phase in completing your log cabin construction. With the roof in place, your cabin will be one step closer to providing the shelter and comfort you've envisioned.
Finishing Touches
Once the roofing material is in place, it's time to focus on the finishing touches that will not only enhance the visual appeal of the roof but also provide additional protection against the elements. Here are the essential steps to consider during this phase:
-
Fascia Installation: The fascia board is installed along the lower edge of the roof to provide a clean, finished look and to support the bottom row of roof tiles or shingles. It also helps to protect the roof and the interior of the cabin from water damage by preventing water from seeping into the eaves.
-
Soffit Ventilation: Soffit vents are crucial for allowing air to flow into the attic space, promoting proper ventilation and preventing moisture buildup. Installing soffit vents also helps regulate the temperature in the attic, contributing to energy efficiency and preventing potential issues such as ice dams and mold growth.
-
Trim and Molding: Adding decorative trim and molding around the edges of the roof can elevate the overall aesthetic of the cabin. Trim not only provides a polished look but also serves as a protective barrier against water and pests, helping to extend the lifespan of the roof.
-
Gutter Installation: Installing gutters and downspouts is essential for directing rainwater away from the cabin's foundation and preventing erosion. Properly installed gutters help to protect the exterior walls and landscaping, contributing to the overall maintenance and longevity of the log cabin.
-
Painting or Staining: Depending on the desired look and level of protection, you may choose to paint or stain the exterior of the cabin. Quality exterior paint or stain not only enhances the visual appeal of the cabin but also provides a protective barrier against UV rays, moisture, and wood-damaging organisms.
-
Sealing and Caulking: Inspect the roof for any gaps, cracks, or areas that may require sealing or caulking. Properly sealing around roof penetrations, such as vents and chimneys, helps prevent water infiltration and ensures a watertight roof.
-
Final Inspection: Once the finishing touches are complete, conduct a thorough inspection of the entire roof to ensure that all elements are properly installed and functioning as intended. Address any issues promptly to maintain the integrity and longevity of the roof.
By paying attention to these finishing touches, you'll not only enhance the visual appeal of your log cabin but also ensure that it is well-protected against the elements, providing a comfortable and durable retreat for years to come.
Conclusion
Congratulations! You've successfully navigated the intricate process of building a log cabin from trees. From selecting and harvesting the right trees to assembling the walls and installing the roof, each step has brought you closer to realizing your dream retreat in the woods. By meticulously preparing the logs, laying a solid foundation, and adding the finishing touches, you've not only created a cozy haven but also embarked on a journey that celebrates craftsmanship and self-sufficiency. As you stand back and admire the fruits of your labor, take pride in the enduring beauty and resilience of your handcrafted log cabin. Whether it's a weekend getaway or a permanent residence, your log cabin stands as a testament to your dedication and passion for creating a home that harmonizes with nature. So, grab a cup of coffee, cozy up by the fireplace, and savor the tranquility of your very own log cabin – a timeless sanctuary crafted from the heart.