Home>Create & Decorate>DIY & Crafts>Cabin In The Woods: A DIY Guide To Building Your Dream Retreat

DIY & Crafts
Cabin In The Woods: A DIY Guide To Building Your Dream Retreat
Published: May 23, 2024

Content Creator specializing in woodworking and interior transformations. Caegan's guides motivate readers to undertake their own projects, while his custom furniture adds a personal touch.
Discover the ultimate DIY guide to building your dream retreat with our expert tips and tricks. Unleash your creativity and craft the perfect cabin in the woods. Ideal for DIY & Crafts enthusiasts!
(Many of the links in this article redirect to a specific reviewed product. Your purchase of these products through affiliate links helps to generate commission for Twigandthistle.com, at no extra cost. Learn more)
Introduction
So, you've been dreaming of escaping the hustle and bustle of city life and building your very own cabin in the woods? Well, you're in for an exciting journey! Building a cabin is not just about constructing a structure; it's about creating a retreat, a place where you can unwind, connect with nature, and make lasting memories with family and friends. In this DIY guide, we'll walk you through the essential steps to help you bring your dream retreat to life. From choosing the perfect location to adding the finishing touches, we've got you covered. Let's roll up our sleeves and get started on this adventure!
Read more: DIY Outdoor Bathroom Renovation Guide
Choosing the Perfect Location
When it comes to building your dream cabin, the location is everything. Here are some essential factors to consider when choosing the perfect spot for your retreat:
-
Scenic Views: Look for a location that offers breathtaking views of the surrounding natural landscape. Whether it's a serene lake, majestic mountains, or lush forests, the scenery will be a key part of your cabin experience.
-
Accessibility: Consider how accessible the location is, especially during different seasons. You'll want to ensure that you can reach your cabin easily, whether it's for a weekend getaway or an extended stay.
-
Privacy: One of the appeals of a cabin in the woods is the sense of seclusion and privacy. Choose a location that offers a peaceful and private setting, allowing you to escape from the hustle and bustle of everyday life.
-
Natural Resources: Take into account the availability of natural resources such as water, wood, and sunlight. These resources will not only enhance the sustainability of your cabin but also contribute to the overall experience of living in harmony with nature.
-
Local Regulations: Before settling on a location, familiarize yourself with local building codes and regulations. Ensure that the area allows for the construction of a cabin and that you comply with any necessary permits and restrictions.
By carefully considering these factors, you can select a location that sets the stage for your ideal cabin retreat. Once you've found the perfect spot, you'll be one step closer to turning your dream into a reality.
Designing Your Cabin
Designing your cabin is where your vision starts to take shape. It's the stage where you can let your creativity run wild while also considering practical elements. Here are some key aspects to focus on when designing your cabin:
-
Layout and Floor Plan: Begin by envisioning the layout and floor plan of your cabin. Consider the number of rooms, their sizes, and the overall flow of the space. Do you want an open-concept design or separate cozy rooms? Sketching out a rough floor plan can help you visualize the spatial arrangement.
-
Architectural Style: Decide on the architectural style that resonates with your vision. Whether it's a classic log cabin, a modern A-frame design, or a rustic cottage, the architectural style will set the tone for your retreat.
-
Functional Spaces: Think about the functionality of each space. How will the kitchen, living area, bedrooms, and bathrooms be organized? Designing functional spaces ensures that your cabin not only looks great but also serves your practical needs.
-
Natural Light and Views: Incorporate ample windows and consider the orientation of the cabin to maximize natural light and capture scenic views. The connection to the surrounding nature is a defining feature of a cabin in the woods.
-
Storage and Utility: Plan for adequate storage space and consider utility needs such as water, electricity, and heating. Efficient storage and utility planning contribute to the comfort and convenience of your cabin.
-
Personal Touches: Infuse your personality into the design. Whether it's a cozy fireplace, a spacious deck for stargazing, or a reading nook with a view, adding personal touches will make your cabin feel like a true reflection of your tastes and preferences.
By carefully considering these design elements, you can create a cabin that not only looks stunning but also aligns with your lifestyle and preferences. The design phase sets the stage for the construction process, bringing you one step closer to realizing your dream retreat.
Selecting Materials and Tools
Selecting the right materials and tools is crucial for the success of your cabin-building project. From the foundation to the finishing touches, each component requires careful consideration to ensure durability, aesthetics, and functionality. Here's a detailed look at the essential materials and tools you'll need for your DIY cabin construction:
Foundation Materials:
- Concrete: For a sturdy foundation, concrete is often the material of choice. It provides stability and durability, especially in areas with varying soil conditions.
- Gravel: Used for drainage and as a base for the concrete foundation, gravel helps to prevent moisture-related issues.
Read more: DIY Enchanted Forest Bedroom Ideas
Framing Materials:
- Lumber: Select high-quality, pressure-treated lumber for the structural framing of your cabin. It's essential for the integrity and longevity of the building.
- Fasteners: Nails, screws, and bolts are essential for securing the framing components together. Opt for corrosion-resistant fasteners to withstand outdoor conditions.
Exterior Finishes:
- Siding: Choose a durable and weather-resistant siding material such as cedar, pine, or engineered wood. The siding not only protects the cabin but also contributes to its aesthetic appeal.
- Roofing Materials: Consider options like asphalt shingles, metal roofing, or cedar shakes based on your desired look and climate considerations.
Interior Finishes:
- Insulation: Proper insulation is vital for maintaining a comfortable interior climate. Select insulation materials that provide both thermal and sound insulation properties.
- Interior Paneling: Whether it's wood, drywall, or other paneling materials, the interior finish adds warmth and character to your cabin's living spaces.
Essential Tools:
- Circular Saw: Ideal for cutting lumber and other materials with precision.
- Hammer and Nails: Basic tools for securing framing components and other structural elements.
- Power Drill: Essential for driving screws and drilling holes during construction.
- Level and Square: These tools are crucial for ensuring accurate and square installations throughout the building process.
- Ladder: A sturdy ladder is necessary for reaching elevated areas during construction and finishing work.
By carefully selecting high-quality materials and having the right tools at your disposal, you can lay a solid foundation and build a cabin that stands the test of time. The combination of durable materials and reliable tools sets the stage for a successful DIY cabin construction project.
Read more: DIY Farmhouse Bedroom Makeover
Building the Foundation
The foundation of your cabin is the bedrock on which the entire structure rests, providing stability and support. Here's a detailed guide to building a strong and reliable foundation for your dream retreat:
-
Site Preparation: Begin by clearing the chosen site of any vegetation, rocks, or debris. Level the ground to create a uniform base for the foundation. Proper site preparation is essential for ensuring a solid and stable foundation.
-
Excavation: Excavate the area to the depth required for your foundation design. This may involve digging trenches for concrete footings or creating a slab foundation. The depth of the excavation will depend on the local building codes and the specific requirements of your cabin design.
-
Footings and Piers: If you're opting for a traditional foundation with footings, pour concrete into the excavated trenches to create a solid base for the cabin walls. For a pier foundation, concrete piers are installed at strategic points to support the structure. Ensure that the footings and piers are level and properly aligned.
-
Concrete Pouring: Once the footings and piers are in place, it's time to pour the concrete for the foundation. Use high-quality concrete mix and reinforce it with steel rebar for added strength. Smooth the surface of the concrete to create a level and even foundation.
-
Curing and Drying: Allow the concrete to cure and dry according to the manufacturer's recommendations. This process is crucial for the concrete to achieve its full strength and stability. Proper curing ensures that the foundation can support the weight of the cabin without settling or cracking.
-
Moisture Protection: To prevent moisture-related issues, consider applying a waterproofing membrane or sealant to the exterior of the foundation. This extra layer of protection helps to safeguard the foundation against water infiltration and potential damage.
-
Inspection and Compliance: Once the foundation is in place, have it inspected to ensure that it meets the local building codes and regulations. Compliance with building standards is essential for the structural integrity and safety of your cabin.
Building a solid foundation sets the stage for the rest of the construction process, providing a secure base for your cabin in the woods. With careful planning and attention to detail, you can create a foundation that withstands the test of time and supports your dream retreat for years to come.
Constructing the Frame
Constructing the frame of your cabin is a pivotal phase that shapes the structural integrity and overall appearance of your retreat. Here's a comprehensive guide to the essential steps involved in framing your cabin:
-
Laying Out the Sill Plates: Begin by laying out the sill plates on top of the foundation, ensuring that they are level and properly aligned. The sill plates serve as the base for the frame and provide a secure connection to the foundation.
-
Installing Floor Joists: Once the sill plates are in place, install the floor joists to create the framework for the cabin's flooring. Properly spaced and secured floor joists are essential for a stable and level floor structure.
-
Erecting Wall Frames: With the flooring in place, it's time to erect the wall frames. Whether you're using traditional stick framing or prefabricated wall panels, ensure that the frames are plumb, square, and securely anchored to the floor and each other.
-
Adding Structural Support: Incorporate structural support elements such as beams, headers, and bracing to reinforce the frame and distribute the weight of the structure. These components play a crucial role in ensuring the stability and strength of the cabin.
-
Installing Roof Trusses or Rafters: Depending on your cabin design, install roof trusses or rafters to create the framework for the roof structure. Properly aligned and securely fastened trusses or rafters are essential for a durable and weather-resistant roof.
-
Securing Sheathing and Subflooring: Once the frame is in place, secure sheathing to the exterior walls and subflooring to the interior floor joists. These components provide additional structural support and serve as the base for exterior finishes and interior flooring.
-
Window and Door Openings: Frame openings for windows and doors, ensuring that they are properly sized and positioned within the wall frames. The precise framing of openings is crucial for the installation of windows and doors at a later stage.
-
Structural Integrity Check: Conduct a thorough check of the frame to ensure that it meets the structural requirements and building codes. Address any issues related to alignment, bracing, or support to guarantee the stability and safety of the frame.
By following these steps and paying close attention to the details of frame construction, you can establish a solid and reliable framework for your cabin. The frame not only forms the skeleton of the structure but also sets the stage for the next phases of construction, bringing you closer to the realization of your dream retreat.
Installing Windows and Doors
Installing windows and doors is a crucial step in the construction of your cabin, as it not only enhances the aesthetics but also contributes to the functionality and comfort of the interior space. Here's a detailed guide to the essential steps involved in installing windows and doors for your dream retreat:
-
Window Placement: Begin by determining the placement of windows to maximize natural light and capture scenic views. Consider the orientation of the cabin and the surrounding landscape to strategically position the windows for optimal daylight and ventilation.
-
Door Selection: Choose doors that complement the architectural style of your cabin while providing security and energy efficiency. Whether it's a classic wooden door, a rustic barn-style door, or a modern glass door, select options that align with your design vision and practical needs.
-
Prepping Openings: Prepare the wall openings for the installation of windows and doors. Ensure that the openings are properly framed and sized according to the specifications of the selected windows and doors. The framing should provide adequate support and a secure fit for the fixtures.
-
Weatherproofing: Prior to installation, apply weatherproofing materials around the window and door openings to create a barrier against moisture infiltration. Proper weatherproofing helps to prevent water damage and ensures the longevity of the windows and doors.
-
Installing Windows: Carefully place the windows into the prepared openings, ensuring a snug and level fit. Secure the windows in place using appropriate fasteners and seal the perimeter with weather-resistant caulking to prevent air and water leaks.
-
Hanging Doors: Install the doors using the manufacturer's recommended hardware and installation instructions. Pay attention to proper alignment and ensure that the doors open and close smoothly. Properly insulate around the door frame to enhance energy efficiency and indoor comfort.
-
Hardware and Finishing Touches: Attach the necessary hardware such as handles, locks, and hinges to the installed windows and doors. Test the functionality of the hardware to ensure smooth operation and secure closure. Add finishing touches such as trim and molding to enhance the visual appeal of the fixtures.
-
Sealing and Insulation: Apply additional sealing and insulation around the installed windows and doors to eliminate drafts and enhance thermal efficiency. Proper insulation contributes to a comfortable interior climate and energy savings.
By following these steps and paying attention to the details of window and door installation, you can create a welcoming and functional interior space within your cabin. The proper placement and installation of windows and doors not only enhance the aesthetic appeal but also contribute to the overall comfort and livability of your dream retreat.
Roofing and Insulation
The roofing and insulation of your cabin play a critical role in providing protection from the elements and maintaining a comfortable interior environment. Here's a comprehensive guide to the essential steps involved in roofing and insulating your dream retreat:
Read more: Basement Bedroom DIY: Step-by-Step Guide
Roofing Materials Selection
- Choose roofing materials that not only complement the architectural style of your cabin but also provide durability and weather resistance. Options such as asphalt shingles, metal roofing, or cedar shakes offer varying aesthetics and performance characteristics.
- Consider the climate and local weather conditions when selecting roofing materials. Ensure that the chosen materials are capable of withstanding rain, snow, wind, and UV exposure to provide long-term protection for your cabin.
Roofing Installation Process
- Begin by preparing the roof deck, ensuring that it is structurally sound and free of any debris. Proper roof deck preparation is essential for the secure installation of roofing materials.
- Install underlayment to provide an additional layer of protection against moisture infiltration. The underlayment acts as a barrier between the roofing materials and the roof deck, enhancing weather resistance.
- Carefully lay and secure the chosen roofing materials according to the manufacturer's guidelines. Pay attention to proper fastening and overlapping to create a watertight and durable roof surface.
Insulation Planning and Installation
- Evaluate the insulation needs of your cabin based on the local climate and desired energy efficiency. Proper insulation helps to regulate indoor temperatures and reduce heating and cooling costs.
- Select insulation materials that offer both thermal and sound insulation properties. Options such as fiberglass, foam board, or spray foam insulation provide varying levels of performance and installation flexibility.
- Install insulation in the walls, roof, and floor of the cabin to create a well-insulated envelope. Properly installed insulation contributes to a comfortable and energy-efficient interior space.
Ventilation Considerations
- Incorporate ventilation elements such as soffit vents, ridge vents, or gable vents to ensure proper air circulation in the attic space. Adequate ventilation helps to prevent moisture buildup and maintain the integrity of the roofing materials.
- Proper ventilation also contributes to the longevity of the roof structure by reducing the risk of issues such as ice dams and mold growth.
Read more: DIY Rustic Bathroom Ideas
Sealing and Weatherproofing
- Seal around roof penetrations such as chimneys, vents, and skylights to prevent air and water leaks. Proper sealing enhances the weather resistance of the roof and contributes to the overall energy efficiency of the cabin.
- Inspect the roof for any potential areas of water infiltration and address them promptly. Maintaining a watertight roof surface is essential for protecting the interior of the cabin from water damage.
By following these steps and paying close attention to the details of roofing and insulation, you can create a well-protected and comfortable living space within your cabin. The combination of durable roofing materials and effective insulation sets the stage for a cozy and energy-efficient retreat in the heart of the woods.
Interior Design and Finishing Touches
The interior design and finishing touches of your cabin are where you can truly infuse your personal style and create a welcoming and cozy atmosphere. From selecting the right finishes to adding decorative elements, every detail contributes to the overall ambiance of your dream retreat. Here's a detailed guide to the essential steps involved in interior design and finishing touches for your cabin:
Flooring and Wall Finishes
- Choose flooring materials that not only complement the rustic charm of a cabin but also offer durability and easy maintenance. Options such as hardwood, laminate, or natural stone provide a timeless and practical foundation for your interior spaces.
- Consider wall finishes that add warmth and character to the cabin's interior. Whether it's wood paneling, shiplap, or textured wallpaper, the right wall finishes can create a cozy and inviting atmosphere.
Cabinetry and Countertops
- Select cabinetry that balances functionality with aesthetics. Whether it's classic wood cabinets, sleek modern designs, or open shelving, the cabinetry sets the tone for the kitchen and storage spaces.
- Choose countertops that not only provide ample workspace but also enhance the visual appeal of the kitchen and bathroom. Options such as granite, quartz, or butcher block offer varying aesthetics and performance characteristics.
Read more: How To Build A Small Cabin
Lighting and Fixtures
- Plan for adequate lighting throughout the cabin, considering both natural light and artificial lighting sources. Incorporate a mix of ambient, task, and accent lighting to create a well-lit and inviting interior.
- Select fixtures that complement the overall design theme of your cabin. Whether it's rustic pendant lights, vintage-inspired sconces, or modern ceiling fans, the fixtures add personality and functionality to the living spaces.
Furnishings and Decor
- Choose furnishings that prioritize comfort and functionality while reflecting your personal style. Whether it's a cozy sectional sofa, a farmhouse dining table, or vintage-inspired accent pieces, the right furnishings can transform the interior spaces.
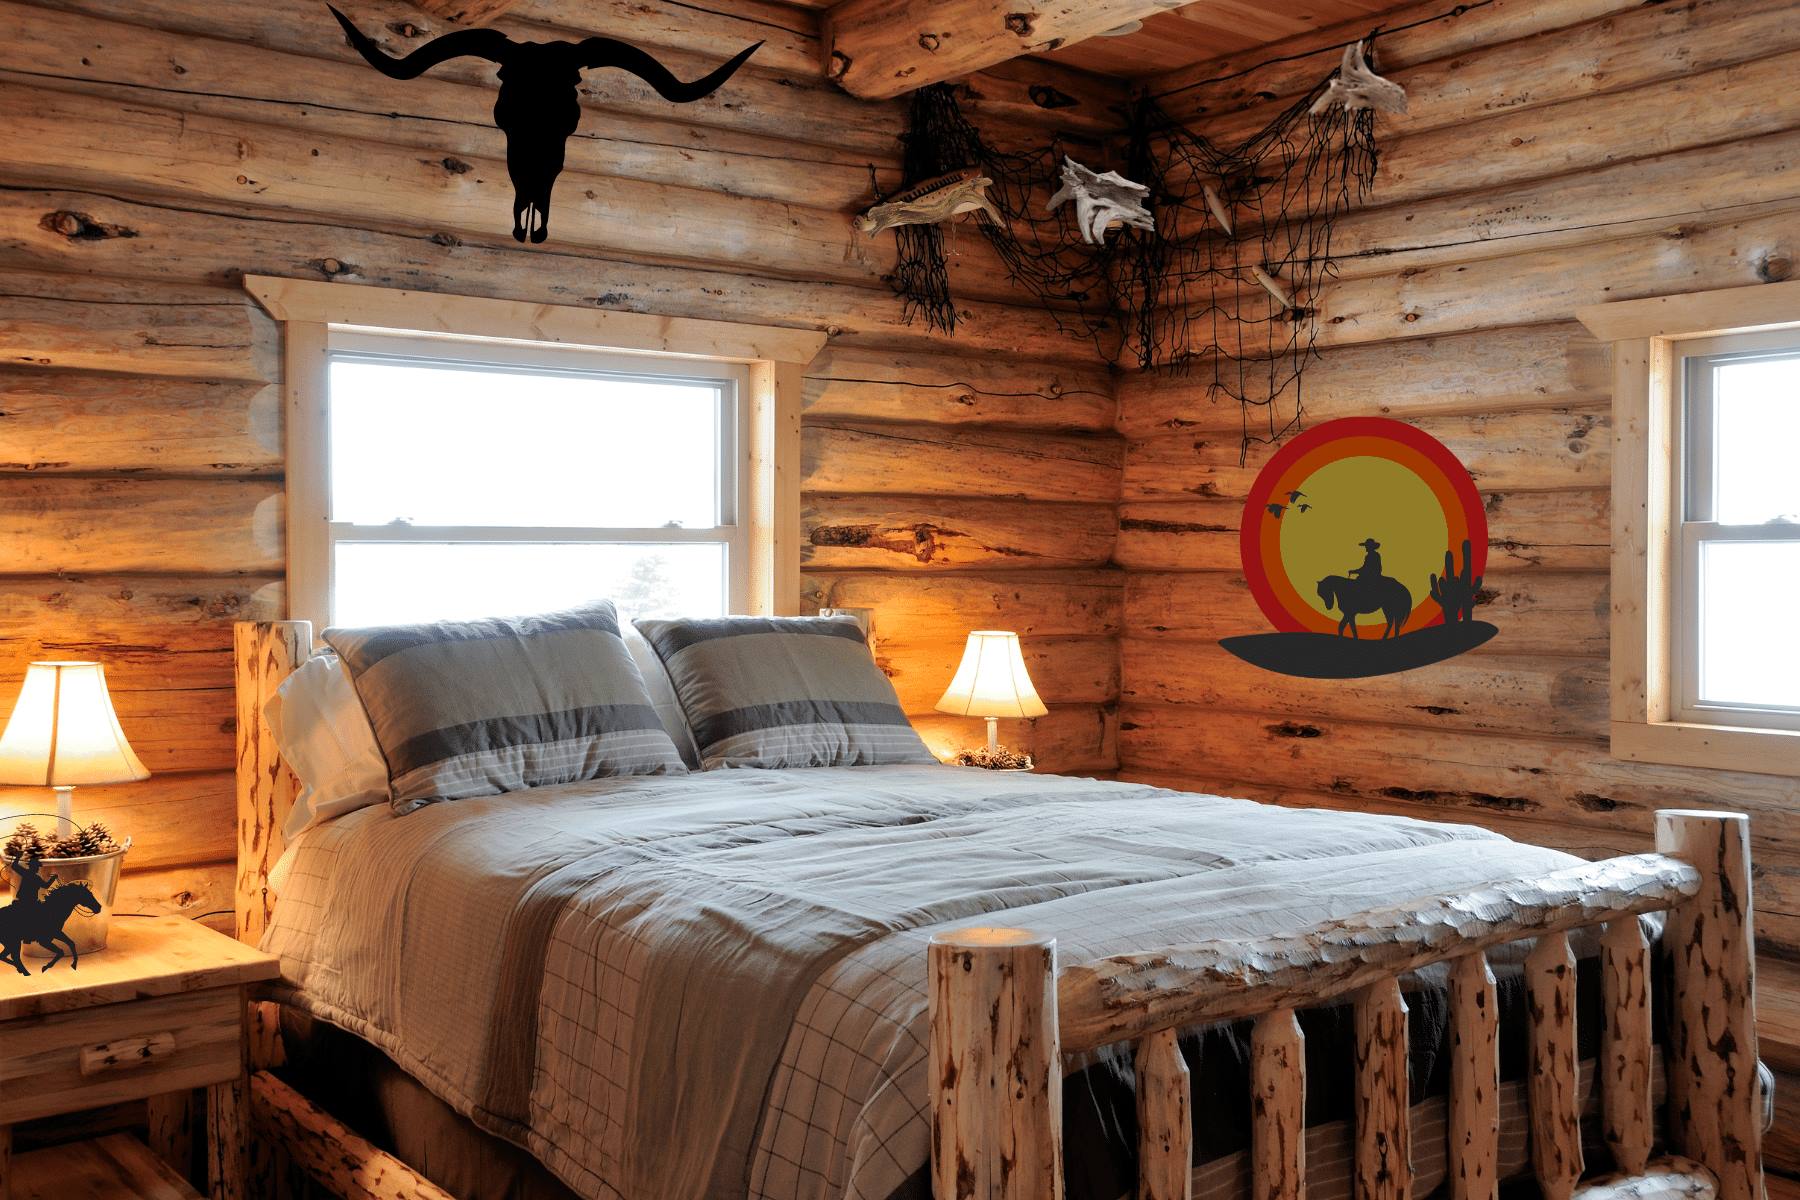
- Add decorative elements such as throw pillows, area rugs, and wall art to infuse color and texture into the cabin's interior. Personal touches such as family photos, heirlooms, and souvenirs can add a sense of nostalgia and warmth to the space.
Heating and Comfort
- Consider the heating needs of your cabin, especially if you plan to use it during colder seasons. Options such as wood-burning stoves, electric fireplaces, or radiant floor heating can provide both warmth and ambiance.
- Enhance the comfort of the interior spaces with cozy textiles such as blankets, curtains, and upholstered furniture. Creating inviting nooks and reading corners adds to the overall comfort and relaxation of the cabin.
By paying attention to these interior design and finishing touches, you can create a welcoming and personalized interior space within your cabin. The thoughtful selection of finishes, furnishings, and decorative elements contributes to the overall charm and livability of your dream retreat in the woods.
Creating a Cozy Outdoor Space
Designing a cozy outdoor space around your cabin is essential for embracing the natural beauty of the surroundings and creating a welcoming environment for relaxation and social gatherings. Here's a detailed guide to transforming the outdoor area into a cozy retreat:
Outdoor Seating and Gathering Areas
- Select comfortable and durable outdoor furniture such as Adirondack chairs, hammocks, or a rustic picnic table to create inviting seating and gathering areas.
- Arrange the furniture to encourage conversation and relaxation, taking advantage of scenic views and natural focal points around the cabin.
Fire Pit or Outdoor Fireplace
- Install a fire pit or outdoor fireplace to provide warmth, ambiance, and a focal point for evening gatherings. Whether it's a traditional stone fire pit or a modern gas fireplace, the addition of a fire feature enhances the cozy atmosphere.
Lighting and Ambiance
- Incorporate outdoor lighting to extend the usability of the space into the evening hours. Options such as string lights, lanterns, or solar-powered pathway lights add a warm and inviting glow to the outdoor area.
- Consider adding candles, torches, or a portable Bluetooth speaker to enhance the ambiance and create a cozy outdoor atmosphere.
Landscaping and Natural Elements
- Enhance the outdoor space with landscaping elements such as native plants, flower beds, and potted greenery. The addition of natural elements softens the surroundings and adds to the overall charm of the outdoor area.
- Incorporate natural features such as a small garden, a water feature, or a natural stone pathway to create points of interest and a connection to the surrounding environment.
Read more: DIY: Building a Solid Wood Door
Shelter and Shade
- Provide shelter and shade with options such as a pergola, a retractable awning, or a canopy to protect from the sun and light rain. Creating shaded areas allows for comfortable outdoor enjoyment even during warmer days.
Outdoor Cooking and Dining
- Consider adding an outdoor kitchen or a designated grilling area to expand the culinary experience beyond the cabin's interior. A simple grill, a prep station, and a dining area create opportunities for outdoor dining and entertaining.
Cozy Nooks and Relaxation Spaces
- Create cozy nooks and relaxation spaces with elements such as a hammock, a swing, or a reading corner. These secluded spots offer opportunities for solitude and quiet reflection amidst the natural surroundings.
By incorporating these elements and paying attention to the details of outdoor design, you can create a cozy and inviting outdoor space that complements the charm and comfort of your cabin. The outdoor area becomes an extension of the cabin's interior, providing a seamless transition between indoor and outdoor living while embracing the beauty of the natural surroundings.
Conclusion
Congratulations on embarking on the journey of building your dream cabin in the woods! As you've navigated through the essential steps of choosing the perfect location, designing the cabin, selecting materials and tools, and bringing your vision to life, you've embraced the spirit of DIY and home improvement. The process of creating a retreat in the heart of nature is not just about construction; it's about crafting a space where you can unwind, connect with the outdoors, and make lasting memories.
By carefully considering the location, design, materials, and finishing touches, you've laid the foundation for a cozy and inviting retreat that reflects your personal style and embraces the natural beauty of the surroundings. From the sturdy foundation to the thoughtful interior design, every detail contributes to the charm and livability of your dream cabin.
As you put the finishing touches on your cabin and prepare to enjoy the fruits of your labor, remember that the journey doesn't end with construction. Your cabin in the woods is a place where you can create new experiences, host gatherings with loved ones, and find solace in the tranquility of nature. Whether it's a weekend getaway or a permanent residence, your cabin represents a space where you can escape the hustle and bustle of everyday life and reconnect with what truly matters.
As you take a moment to admire the results of your hard work, remember that the true essence of a cabin in the woods lies in the memories you'll create and the experiences you'll cherish. So, as you open the doors to your dream retreat, may it be a place of warmth, comfort, and joy for years to come. Cheers to your DIY accomplishment and the beginning of a new chapter in your cabin adventure!

