
Home>Create & Decorate>DIY & Crafts>Easy DIY Corn Hole Plans: Step-by-Step Guide To Building Your Own Corn Hole Game
DIY & Crafts
Easy DIY Corn Hole Plans: Step-by-Step Guide To Building Your Own Corn Hole Game
Published: June 6, 2024

Content Creator specializing in woodworking and interior transformations. Caegan's guides motivate readers to undertake their own projects, while his custom furniture adds a personal touch.
Discover step-by-step DIY plans for building your own corn hole game. Perfect for DIY & Crafts enthusiasts looking for a fun and easy project.
(Many of the links in this article redirect to a specific reviewed product. Your purchase of these products through affiliate links helps to generate commission for Twigandthistle.com, at no extra cost. Learn more)
Introduction
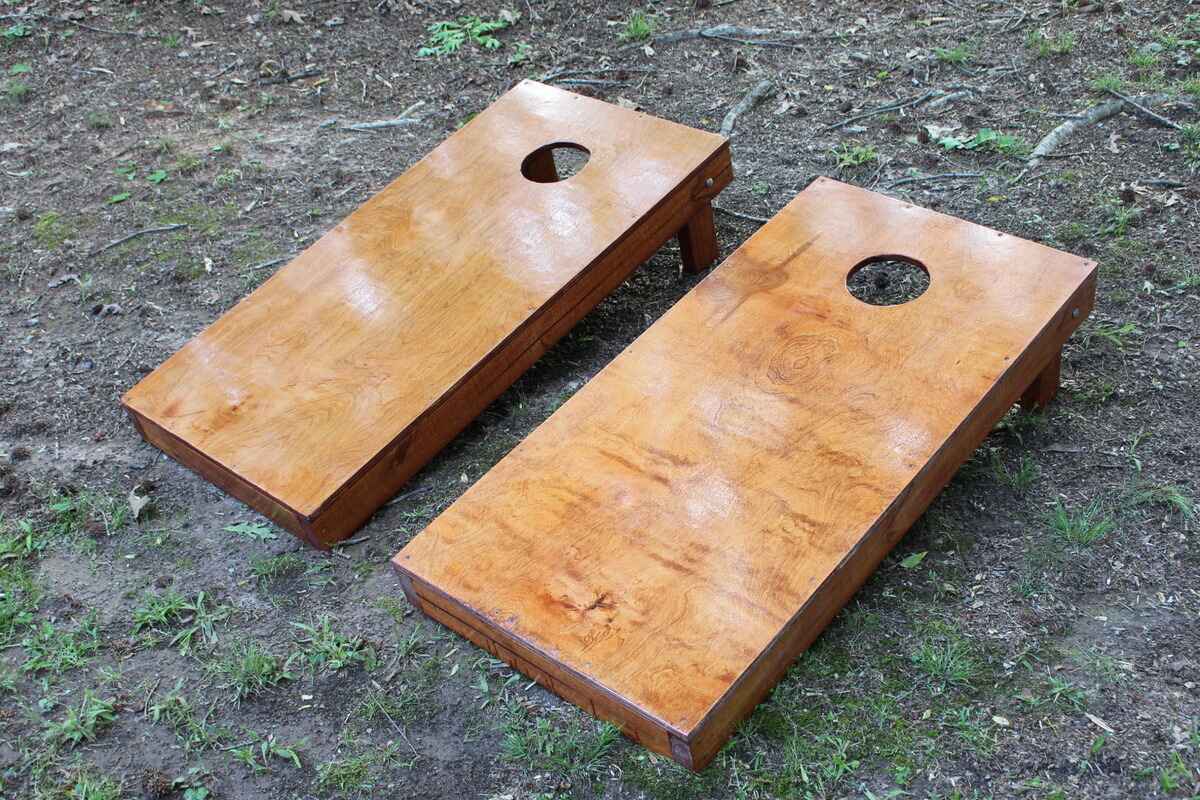
Are you looking for a fun and entertaining game to add to your backyard or next outdoor gathering? Look no further than DIY corn hole! Building your own corn hole game is a fantastic way to add a personal touch to your outdoor entertainment. Whether it's for family gatherings, barbecues, or tailgating parties, a homemade corn hole set can provide hours of enjoyment for everyone. In this guide, we will walk you through the step-by-step process of creating your very own corn hole boards and bags. So, grab your tools and let's get started on this exciting DIY project!
Materials and Tools Needed
Before diving into the construction process, it's essential to gather all the necessary materials and tools. Here's what you'll need to get started:
Materials:
- Two 2×4 plywood sheets: These will serve as the playing surface for your corn hole boards.
- Four 2×4 boards: These will be used to construct the frame and legs of the corn hole boards.
- Wood screws: You'll need these to secure the frame and legs to the plywood.
- Wood glue: This will help reinforce the joints and ensure the durability of your corn hole boards.
- Sanding paper: To smooth out any rough edges and surfaces.
- Paint and primer: Choose your favorite colors to customize the look of your corn hole boards.
- Polyurethane: This will protect the wood and paint from outdoor elements.
Tools:
- Circular saw or jigsaw: For cutting the plywood and 2×4 boards to the desired dimensions.
- Drill with screwdriver bits: To drive in the wood screws and assemble the boards.
- Measuring tape and pencil: For marking and measuring the wood before cutting.
- Sandpaper block or electric sander: To smooth out the wood surfaces.
- Paintbrushes and rollers: For applying the paint and primer to the boards.
- Sewing machine or needle and thread: If you plan to sew your own corn hole bags.
With these materials and tools at your disposal, you're all set to embark on the journey of creating your very own corn hole game set.
Step 1: Cutting the Plywood
The first step in building your DIY corn hole boards is to cut the plywood to the appropriate dimensions. Start by measuring and marking two 2×4 plywood sheets to a standard size of 24×48 inches. Use a measuring tape and pencil to ensure accurate markings. Once the measurements are in place, carefully use a circular saw or jigsaw to cut along the marked lines. It's crucial to maintain straight and precise cuts to achieve uniform corn hole boards. Take your time and exercise caution when using the cutting tools to ensure a smooth and accurate finish.
After cutting the plywood sheets to size, you should be left with two identical pieces that will serve as the playing surface for your corn hole boards. These plywood sheets will be the foundation for the rest of the construction process, so it's essential to ensure that they are cut to the correct dimensions. With the plywood cut and ready, you're now prepared to move on to the next step of assembling the corn hole boards.
Step 2: Assembling the Corn Hole Boards
With the plywood sheets cut to size, it's time to move on to assembling the corn hole boards. Begin by laying the two 2×4 plywood sheets on a flat surface, ensuring that they are aligned and positioned parallel to each other. Next, take the four 2×4 boards and cut them to create the frame for the corn hole boards. You'll need two boards cut to 48 inches in length and two boards cut to 21 inches in length.
Once the frame pieces are cut, position them along the edges of the plywood sheets to form a border. Use wood glue and wood screws to secure the frame pieces to the plywood, ensuring a sturdy and durable attachment. It's important to pre-drill holes before inserting the screws to prevent the wood from splitting.
After the frame is securely attached, the next step is to create the corn hole cutout. Measure and mark the center of each board, 9 inches down from the top, and 12 inches in from each side. Use a compass or a round object to trace a 6-inch diameter circle at the marked position. Carefully cut out the circles using a jigsaw, following the traced lines.
With the corn hole cutouts complete, your corn hole boards are now taking shape. The assembly process is a critical stage in ensuring that the boards are structurally sound and ready for the next steps in the construction process. Once the boards are assembled, you can proceed to the next phase of building the corn hole frame.
Now that the corn hole boards are assembled, you're one step closer to completing your DIY corn hole set. The assembly process sets the foundation for the structural integrity of the boards, ensuring that they are ready for the next stages of construction. With the boards taking shape, it's time to move on to the next step of building the corn hole frame.
Step 3: Building the Corn Hole Frame
After assembling the corn hole boards, the next crucial step is to build the corn hole frame. The frame provides stability and support to the boards, ensuring a sturdy playing surface for the game. To begin, you'll need the four 2×4 boards that were previously cut to 48 inches in length. These will serve as the sides of the frame.
Position the 48-inch boards along the edges of the plywood sheets, ensuring that they are flush with the outer edges. Use wood glue and wood screws to attach the boards to the sides of the plywood, creating a secure and robust frame. It's essential to drive the screws in at regular intervals to ensure that the frame is firmly connected to the boards.
Once the 48-inch boards are attached, it's time to add the 21-inch boards to complete the frame. Position the 21-inch boards between the longer boards, creating a border around the entire perimeter of the plywood sheets. Secure these boards in place using wood glue and wood screws, ensuring that they are evenly spaced and aligned with the longer boards.
With the frame fully assembled, the corn hole boards are now structurally sound and ready for the next phase of the construction process. The frame provides the necessary support and reinforcement to the boards, ensuring that they can withstand the rigors of gameplay and outdoor conditions. With the frame in place, you're one step closer to completing your DIY corn hole set.
Step 4: Attaching the Legs
Attaching the legs is a crucial step in completing your DIY corn hole set. The legs provide stability and elevation to the corn hole boards, creating the optimal playing experience. To begin, you'll need four 2×4 boards cut to the desired length for the legs. A common recommendation is to cut the legs to 12 inches in length, providing a suitable height for the boards.
Position the boards at the back of the corn hole boards, ensuring that they are evenly spaced and aligned with the bottom edge. Use wood screws to attach the legs to the back of the boards, creating a secure connection that can withstand the pressure of gameplay. It's important to drive the screws in at an angle to ensure that the legs are firmly attached and provide stable support.
Once the legs are securely attached, flip the corn hole boards over to test the stability and balance. The legs should provide a firm foundation, allowing the boards to stand upright without wobbling or tipping over. If necessary, make any adjustments to ensure that the boards are level and stable when placed on the ground.
With the legs in place, your DIY corn hole set is nearing completion. The addition of the legs ensures that the corn hole boards are elevated to the appropriate height for gameplay, creating an enjoyable experience for players of all ages. With the legs attached, you're ready to move on to the next phase of the construction process.
Step 5: Sanding and Painting
After the construction of the corn hole boards is complete, the next step is to sand and paint the boards to achieve a professional and polished look. Start by using sandpaper to smooth out any rough edges, surfaces, and imperfections on the boards. Focus on the frame, plywood, and the corn hole cutouts to ensure a consistent and even texture. It's essential to pay attention to detail during the sanding process to create a flawless finish.
Once the boards are thoroughly sanded and free of any rough spots, it's time to apply a coat of primer. The primer will help the paint adhere to the surface and provide a uniform base for the paint color. Use a paintbrush or roller to apply the primer evenly across the entire surface of the boards, ensuring complete coverage. Allow the primer to dry according to the manufacturer's instructions before proceeding to the next step.
With the primer dried, it's time to add a pop of color to your corn hole boards. Choose your favorite paint colors to customize the look of the boards. Whether it's a solid color, a vibrant pattern, or a team logo, the painting process allows for creativity and personalization. Use a paintbrush or roller to apply the paint evenly, ensuring smooth and consistent coverage. Multiple coats may be necessary to achieve the desired color intensity, so be patient and allow each coat to dry before applying the next.
Once the paint has dried, consider adding a protective layer of polyurethane to the boards. The polyurethane will safeguard the paint and wood from outdoor elements, ensuring the longevity and durability of your corn hole boards. Apply the polyurethane using a paintbrush or roller, and allow it to dry completely before handling the boards.
Sanding and painting the corn hole boards is a crucial step in the construction process, as it not only enhances the visual appeal of the boards but also protects them from wear and tear. With the sanding and painting complete, your DIY corn hole set is now ready for the final touches.
Step 6: Adding the Corn Hole Bags
Adding the corn hole bags is the final step in completing your DIY corn hole set. These bags are essential for gameplay, providing players with the equipment needed to score points and enjoy the game. To begin, you'll need to gather the necessary materials for creating the corn hole bags. This includes durable fabric, such as duck cloth or canvas, in two different colors for each team, as well as sewing supplies such as a sewing machine or needle and thread.
Start by cutting the fabric into squares measuring approximately 7×7 inches. You'll need eight squares for each set of corn hole bags, with four squares in each color. Once the squares are cut, pair them up with one square of each color to create four sets of matching pairs.
Next, place two squares of the same color together, with the patterned sides facing inward. Sew three of the edges together, leaving one edge open for filling. Repeat this process for the remaining pairs of fabric squares, ensuring that the seams are secure and durable.
After sewing the edges, carefully turn the bags inside out to reveal the patterned sides. This will create a neat and polished appearance for the corn hole bags. Once turned inside out, fill each bag with approximately 2 cups of whole kernel corn, making sure to distribute the corn evenly to create balanced and consistent bags.
With the bags filled, fold the raw edges of the open side inward and sew it closed to seal the bags. It's essential to create a secure closure to prevent the corn from spilling during gameplay. Once all the bags are filled and sealed, give them a final inspection to ensure that they are well-constructed and ready for use.
Now that the corn hole bags are complete, your DIY corn hole set is fully equipped and ready for gameplay. The addition of the corn hole bags adds the finishing touch to your homemade corn hole set, allowing you to enjoy hours of outdoor fun with family and friends. With the bags added, your DIY corn hole set is now ready to be put to the test in friendly competitions and gatherings.
Conclusion
Congratulations! You've successfully completed the journey of building your very own DIY corn hole set. From cutting the plywood to assembling the boards, building the frame, attaching the legs, sanding and painting, to adding the corn hole bags, each step has brought you closer to creating a fun and entertaining game for your outdoor gatherings. Your dedication and craftsmanship have resulted in a personalized corn hole set that reflects your creativity and DIY spirit.
As you prepare to showcase your new corn hole set, remember that the joy of DIY projects lies not only in the final product but also in the process of creation. Embrace the satisfaction of seeing your vision come to life and the anticipation of the fun-filled moments that await with your homemade corn hole set. Whether it's a friendly game with family, a backyard barbecue, or a tailgating event, your DIY corn hole set is sure to be a hit and bring smiles to everyone who plays.
So, gather your friends and family, set up your new corn hole boards, and let the games begin! Enjoy the laughter, friendly competition, and unforgettable memories that your DIY corn hole set will bring to your outdoor gatherings. With your newfound DIY skills and the pride of creating something special, you're now ready to take on more exciting projects and continue adding your personal touch to your home and leisure activities. Cheers to your DIY success and the endless enjoyment that your homemade corn hole set will bring!