
Home>Create & Decorate>DIY & Crafts>DIY Kiln: How To Build Your Own Pottery Oven At Home
DIY & Crafts
DIY Kiln: How To Build Your Own Pottery Oven At Home
Published: June 13, 2024

Senior Editor in Create & Decorate, Kathryn combines traditional craftsmanship with contemporary trends. Her background in textile design and commitment to sustainable crafts inspire both content and community.
Learn how to create your own pottery kiln at home with our step-by-step DIY guide. Perfect for craft enthusiasts and pottery lovers.
(Many of the links in this article redirect to a specific reviewed product. Your purchase of these products through affiliate links helps to generate commission for Twigandthistle.com, at no extra cost. Learn more)
Introduction
So, you've been bitten by the pottery bug and you're ready to take your craft to the next level. Building your own DIY kiln can be a rewarding and cost-effective way to fire your pottery creations at home. Whether you're a seasoned potter or just starting out, having your own kiln gives you the freedom to experiment with different firing techniques and expand your creative horizons. In this guide, we'll walk you through the step-by-step process of building your very own pottery oven right in your backyard. Let's get our hands dirty and dive into the world of kiln building!
Materials Needed
To build your own DIY kiln, you'll need the following materials:
- Firebricks: These are the primary building blocks of your kiln. They can withstand high temperatures and are essential for constructing the kiln chamber.
- Kiln shelf: This will serve as the base for your pottery pieces during firing. Make sure to choose a kiln shelf that fits the size of your kiln.
- Heating element: You'll need a heating element to generate the high temperatures required for firing your pottery. Kanthal wire is a popular choice for this purpose.
- Insulating materials: Insulation is crucial for maintaining high temperatures within the kiln. Ceramic fiber blanket and refractory cement are commonly used for insulation.
- Metal stand: This will provide support for your kiln and elevate it off the ground to prevent heat damage.
- Thermostat and pyrometer: These instruments are essential for monitoring and controlling the temperature inside the kiln during firing.
- Ventilation system: Proper ventilation is important for releasing any fumes or gases produced during firing. A vent and fan system will help maintain a safe environment.
- Safety gear: When working with high temperatures, it's crucial to have protective gear such as heat-resistant gloves, goggles, and a respirator.
Gathering these materials will set you on the right path to constructing your very own DIY kiln for pottery firing.
Building the Kiln Structure
-
Lay the Foundation: Start by selecting a suitable location for your kiln. Clear the area and create a level foundation using bricks or concrete blocks. This foundation will provide stability for the kiln structure.
-
Assemble the Base: Place the firebricks or refractory bricks on the foundation to form the base of the kiln. Ensure that the bricks are arranged in a sturdy and stable manner, creating a solid platform for the rest of the kiln construction.
-
Build the Walls: Using firebricks, construct the walls of the kiln, stacking the bricks layer by layer. Leave an opening for the kiln door and build the walls to the desired height, ensuring that they are securely bonded together with refractory cement.
-
Create the Arch: For the kiln chamber, form an arch using firebricks to create the curved ceiling of the kiln. This arched design helps distribute heat evenly within the kiln during firing.
-
Install the Kiln Shelf: Once the kiln structure is in place, carefully position the kiln shelf on top of the bricks inside the kiln. The kiln shelf should be level and stable, providing a flat surface for loading pottery pieces.
-
Secure the Structure: As you progress, periodically check the stability and alignment of the kiln structure. Use additional refractory cement to reinforce any weak points and ensure the overall integrity of the kiln.
-
Create the Door Opening: The kiln door opening should be carefully designed and constructed to allow easy access to the kiln chamber while maintaining a tight seal during firing. Use firebricks and refractory cement to frame the door opening securely.
By following these steps, you can successfully build the fundamental structure of your DIY kiln, setting the stage for the next phases of the construction process.
Installing the Heating Element
-
Prepare the Wiring: Before installing the heating element, ensure that you have the necessary wiring and electrical components. Kanthal wire is a popular choice for the heating element due to its ability to withstand high temperatures. Plan the layout for the wiring, ensuring that it covers the entire interior of the kiln chamber evenly.
-
Position the Heating Element: Carefully position the Kanthal wire inside the kiln, wrapping it around the walls in a coil pattern. The goal is to create a consistent distribution of heat throughout the kiln chamber. Secure the ends of the wire to prevent any movement during firing.
-
Connect the Wiring: Once the heating element is in place, connect the Kanthal wire to the appropriate power source using high-temperature-resistant wiring. It's essential to follow electrical safety guidelines and, if necessary, consult a professional to ensure the wiring is correctly installed.
-
Test the Heating Element: Before proceeding further, conduct a test to ensure that the heating element is functioning correctly. Gradually increase the power to the heating element while monitoring the temperature inside the kiln. This test will help identify any issues with the wiring or heating element before the insulation is added.
-
Secure the Heating Element: After successful testing, secure the heating element in its position using suitable fixtures or brackets. This step is crucial to prevent any movement or displacement of the heating element during the firing process.
-
Integrate Temperature Control: If your DIY kiln includes a temperature control system, integrate it with the heating element wiring. This will allow you to monitor and adjust the temperature inside the kiln according to the specific requirements of your pottery firing process.
By following these steps, you can effectively install the heating element in your DIY kiln, paving the way for the next phase of adding insulation to ensure optimal heat retention during firing.
Adding Insulation
-
Prepare the Insulating Materials: Before adding insulation to your DIY kiln, gather the necessary materials, including ceramic fiber blanket and refractory cement. These materials are designed to withstand high temperatures and provide effective insulation for the kiln.
-
Line the Kiln Walls: Begin by lining the interior walls of the kiln with the ceramic fiber blanket. Cut the blanket to fit the dimensions of the kiln and secure it in place using refractory cement. Ensure that the entire interior surface of the kiln is covered with the insulating blanket to minimize heat loss.
-
Insulate the Kiln Door: Pay special attention to insulating the kiln door to prevent heat from escaping. Apply a layer of ceramic fiber blanket to the inside of the door and use refractory cement to secure it in place. This step is crucial for maintaining consistent temperatures during firing.
-
Seal Gaps and Joints: Inspect the kiln for any gaps or joints where heat could escape. Use additional ceramic fiber blanket and refractory cement to seal these areas, ensuring that the kiln is effectively insulated and capable of retaining high temperatures.
-
Protect the Heating Element: As you add insulation, take care to protect the heating element from direct contact with the insulating materials. Use heat-resistant barriers or fixtures to create a buffer between the heating element and the insulation, preventing damage or interference with its function.
-
Double-Check Insulation Coverage: Once the insulation is in place, double-check the coverage to confirm that the entire interior of the kiln, including the walls, ceiling, and floor, is effectively insulated. Proper insulation is essential for achieving and maintaining the high temperatures required for pottery firing.
-
Allow for Curing Time: After applying the refractory cement and insulating materials, allow sufficient time for curing as per the manufacturer's recommendations. This curing process ensures that the insulation forms a durable and heat-resistant barrier within the kiln.
By following these steps, you can effectively add insulation to your DIY kiln, creating an environment that retains heat efficiently and optimizes the firing process for your pottery creations.
Testing and Using Your DIY Kiln
-
Initial Test Run: Before using your DIY kiln for pottery firing, conduct an initial test run to ensure that all components are functioning properly. Gradually increase the temperature inside the kiln while monitoring the heating element and the overall performance. This test run allows you to identify any potential issues and make adjustments before proceeding to actual pottery firing.
-
Temperature Calibration: Use a reliable pyrometer to accurately measure the temperature inside the kiln during the test run. This calibration process helps you understand the heating patterns and ensures that the kiln reaches the desired firing temperatures for your pottery.
-
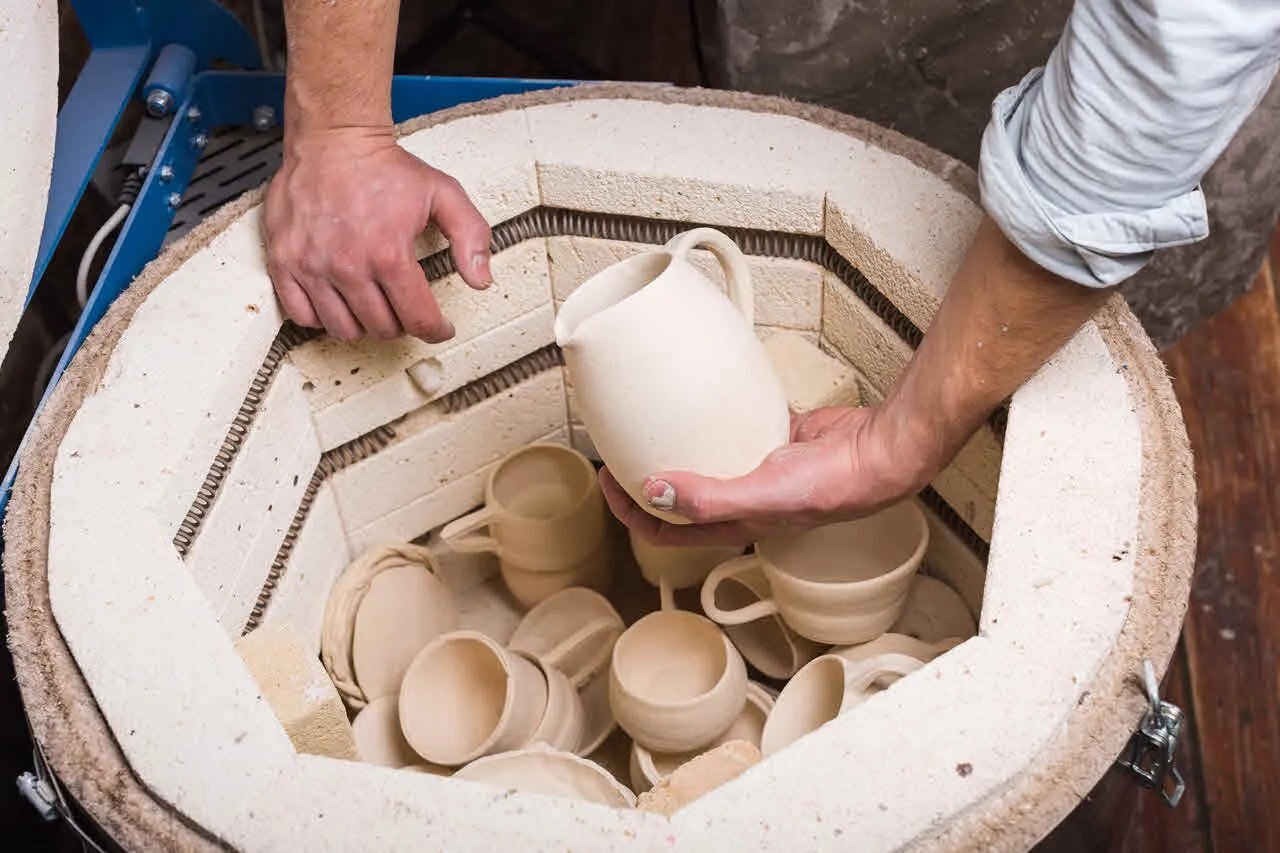
Firing Your Pottery: Once the initial test run is successful and the kiln is calibrated, you can proceed with firing your pottery. Load your pottery pieces onto the kiln shelf, ensuring that they are positioned to allow for even heat distribution. Close the kiln door securely to create a controlled firing environment.
-
Monitoring the Firing Process: Throughout the firing process, it's essential to monitor the temperature inside the kiln using the pyrometer and maintain a consistent firing environment. Depending on the type of pottery and glazes being fired, follow the recommended temperature ramping and hold times for each firing cycle.
-
Cooling and Unloading: After the firing process is complete, allow the kiln to cool gradually to prevent thermal shock to your pottery pieces. Once the kiln reaches a safe temperature for unloading, carefully remove your pottery creations and inspect them for the desired results.
-
Fine-Tuning and Adjustments: As you gain experience with using your DIY kiln, you may need to fine-tune the firing process and make adjustments to achieve specific pottery effects. Keep detailed records of your firing cycles and outcomes to guide future firings and enhance your pottery techniques.
-
Regular Maintenance and Cleaning: After each use, perform regular maintenance on your DIY kiln, including cleaning the kiln interior, inspecting the heating element, and ensuring that all components are in good working condition. This proactive approach helps prolong the life of your kiln and ensures consistent firing results.
By following these steps, you can effectively test and use your DIY kiln for pottery firing, unlocking the potential to create unique and personalized pottery pieces right in the comfort of your own home.
Safety Precautions
When working with a DIY kiln for pottery firing, it's crucial to prioritize safety at every stage of the process. Here are essential safety precautions to keep in mind:
-
Protective Gear: Always wear heat-resistant gloves, goggles, and a respirator when handling the kiln, especially during loading and unloading pottery pieces. These protective measures help safeguard against potential heat exposure and airborne particles.
-
Electrical Safety: If your DIY kiln involves wiring and electrical components, ensure that all electrical connections are made securely and follow proper wiring guidelines. If you're not experienced with electrical work, consider consulting a professional to handle the wiring and connections.
-
Ventilation: Proper ventilation is essential to prevent the buildup of fumes and gases inside the kiln during firing. Install a vent and fan system to ensure adequate airflow and release any byproducts of the firing process.
-
Fire Safety: Keep a fire extinguisher nearby in case of emergencies. Additionally, maintain a clear and fire-safe area around the kiln to minimize the risk of accidental fires.
-
Temperature Monitoring: Use a reliable pyrometer to monitor the temperature inside the kiln during firing. This allows you to ensure that the kiln operates within safe temperature ranges and prevents overheating.
-
Kiln Placement: Position the DIY kiln in a well-ventilated and fire-resistant area, away from flammable materials and structures. This placement helps mitigate the risk of accidental fires and ensures a safe environment for pottery firing.
-
Regular Inspections: Periodically inspect the kiln, heating element, and wiring for any signs of wear, damage, or malfunction. Address any issues promptly to maintain the safety and functionality of the DIY kiln.
By adhering to these safety precautions, you can create a safe and controlled environment for pottery firing with your DIY kiln, allowing you to enjoy the creative process with peace of mind.
Conclusion
Building your own DIY kiln for pottery firing opens up a world of creative possibilities right in the comfort of your own home. By following the step-by-step process outlined in this guide, you can construct a functional and efficient pottery oven that allows you to explore various firing techniques and unleash your artistic vision. From assembling the kiln structure to installing the heating element and adding insulation, each phase of the construction process contributes to creating a reliable and versatile kiln for your pottery endeavors.
With the right materials, careful planning, and a focus on safety, you can embark on the journey of building and using your DIY kiln with confidence. Whether you're a hobbyist potter or a dedicated ceramic artist, having a DIY kiln at your disposal empowers you to experiment with different clay bodies, glazes, and firing methods, ultimately enhancing your pottery skills and producing unique, handcrafted pieces.
As you venture into the world of pottery firing with your DIY kiln, remember to prioritize safety, regular maintenance, and continuous learning. Keep refining your firing techniques, exploring new pottery designs, and honing your craft with each firing cycle. Your DIY kiln is not just a tool for pottery firing; it's a gateway to self-expression, creativity, and the joy of bringing your artistic visions to life through the transformative power of fire and clay.
So, roll up your sleeves, gather your materials, and let your DIY kiln become the heart of your pottery journey, igniting your passion for creating beautiful and meaningful ceramic art right at home. Embrace the art of kiln building and pottery firing, and let your imagination take flight in the fiery embrace of your very own DIY kiln.