
Home>Organize & Storage>Closet Organization>DIY Closet Playhouse: Transform Your Space
Closet Organization
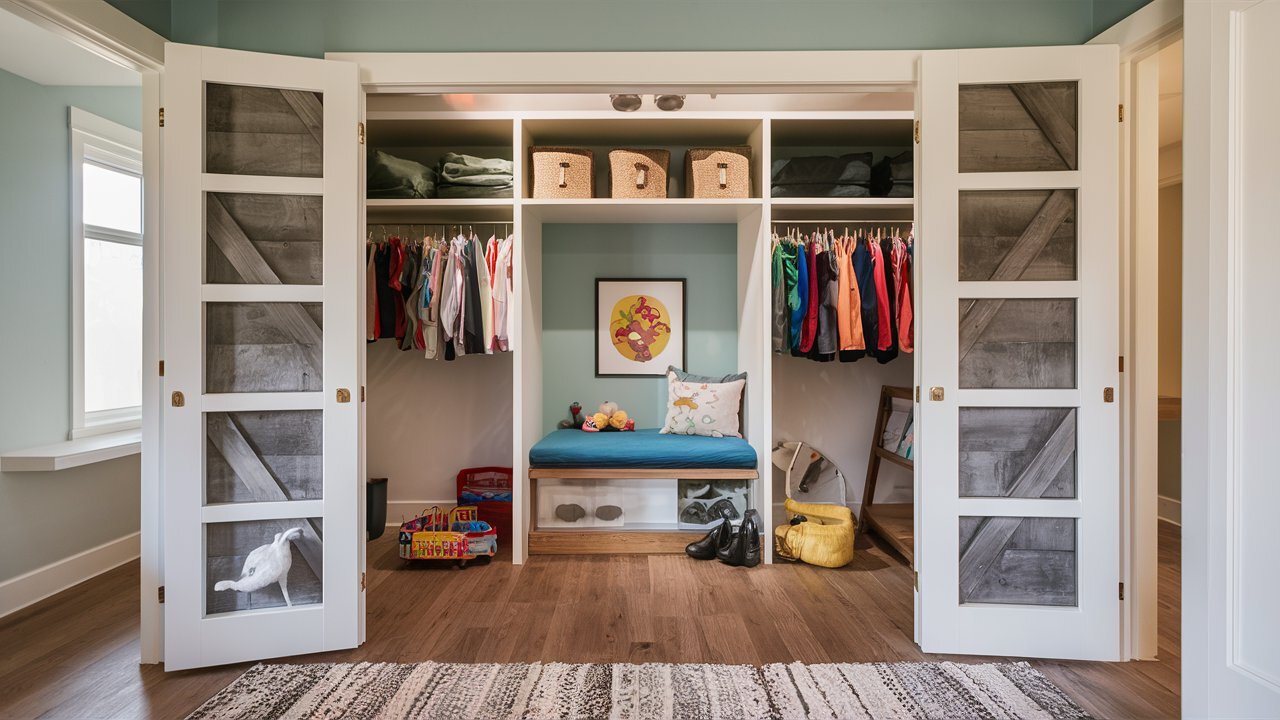
DIY Closet Playhouse: Transform Your Space
Published: September 2, 2024
Transform your closet into a magical playhouse with our DIY guide. Discover creative ideas, step-by-step instructions, and tips for maximizing space and fun!
(Many of the links in this article redirect to a specific reviewed product. Your purchase of these products through affiliate links helps to generate commission for Twigandthistle.com, at no extra cost. Learn more)
Transforming a closet into a playhouse can be exciting. Kids love having a special place to call their own, and creating one doesn't have to be complicated. With some creativity, basic tools, and a bit of effort, you can turn an underused space into a magical retreat for children. This project can be as simple or elaborate as desired, and the possibilities are endless. Whether it’s a hideaway for reading, playing, or even napping, a closet playhouse can provide hours of fun. Ready to get started? Here’s how you can make this dream space a reality.
Getting Ready for Your DIY Project
Measure the Closet: Use a tape measure to get the dimensions of the closet. Write down the height, width, and depth.
Clear Out the Space: Remove all items from the closet. Take out shelves, rods, and any other fixtures.
Clean Thoroughly: Vacuum the floor and wipe down walls. Ensure the space is free of dust and debris.
Plan the Layout: Sketch a simple plan of where you want different elements like seating, storage, and play areas.
Gather Materials: Collect all necessary supplies such as paint, brushes, wood, screws, and decorations. Make sure everything is ready before starting.
Set Up a Workspace: Designate an area outside the closet for cutting wood, painting, and assembling parts. Keep tools organized and within reach.
Safety Gear: Wear safety goggles, gloves, and a dust mask. Make sure the area is well-ventilated if using paint or adhesives.
Check for Hazards: Ensure there are no exposed wires or sharp objects. Cover outlets and secure any loose fixtures.
Lighting: Plan for adequate lighting inside the playhouse. Consider battery-operated LED lights if there’s no electrical outlet.
Ventilation: Make sure the closet has proper airflow. If needed, install a small fan or keep the door slightly open.
Test Stability: Before finalizing, test the stability of any built-in furniture or shelves. Ensure everything is secure and safe for use.
Gathering Materials and Tools
- Plywood Sheets: Used for building walls, shelves, and other structures inside the playhouse.
- Paint: Adds color and personality to the playhouse. Choose non-toxic, child-safe paint.
- Paint Brushes/Rollers: Essential for applying paint evenly on surfaces.
- Screws and Nails: Fasten plywood sheets and other materials securely.
- Screwdriver/Drill: Drives screws into place. A drill speeds up the process.
- Hammer: Drives nails into wood and other materials.
- Measuring Tape: Ensures accurate measurements for cutting and fitting materials.
- Saw: Cuts plywood and other materials to the desired size.
- Sandpaper: Smooths rough edges on wood for a safe, finished look.
- Level: Ensures shelves and other structures are even.
- Pencil: Marks measurements and cutting lines on materials.
- Decorative Items: Adds fun elements like curtains, cushions, or fairy lights.
- Safety Gear: Includes gloves, goggles, and a dust mask to protect while working.
Skill Level and Time Commitment
Skill Level: Intermediate
Time Required: 1-2 weekends
- Planning and Design: 2-3 hours
- Clearing Out the Closet: 1-2 hours
- Painting and Decorating: 4-6 hours
- Building Shelves and Seating: 4-5 hours
- Adding Final Touches: 2-3 hours
Detailed Step-by-Step Guide
Clear Out the Closet
- Remove all items from the closet.
- Clean the space thoroughly.
Measure the Space
- Measure the height, width, and depth of the closet.
- Note these measurements for future steps.
Plan the Layout
- Decide where to place the playhouse elements like seating, shelves, and decorations.
- Sketch a simple layout on paper.
Paint the Walls
- Choose a fun color or theme for the walls.
- Apply primer if needed, then paint the walls.
Install Flooring
- Add a soft rug or carpet tiles for comfort.
- Ensure the flooring fits snugly within the closet dimensions.
Add Shelving
- Install shelves at child-friendly heights.
- Use brackets and screws to secure them.
Create Seating
- Place a small bench or cushions for seating.
- Ensure they fit comfortably within the space.
Decorate
- Hang pictures, fairy lights, or other decorations.
- Add toys, books, and other play items.
Install a Curtain or Door
- Hang a curtain rod and curtain for privacy.
- Alternatively, install a child-friendly door.
Safety Check
- Ensure all items are securely fastened.
- Remove any sharp objects or hazards.
Enjoy the Playhouse
- Let your child explore and enjoy their new play space.
Helpful Tips and Tricks
Plan the Layout: Measure the closet space. Sketch a simple design. Include areas for seating, storage, and play.
Use Lightweight Materials: Opt for plywood or MDF for shelves and seating. These materials are sturdy yet easy to cut and handle.
Paint and Decorate: Choose bright colors to make the space inviting. Use removable wall decals for easy updates.
Add Lighting: Install battery-operated LED lights. They are safe and easy to install without wiring.
Soft Flooring: Use foam mats or a small rug. These options are comfortable and easy to clean.
Storage Solutions: Incorporate bins and baskets for toys and books. Label them for easy organization.
Safety First: Ensure all materials are non-toxic. Secure heavy items to walls to prevent tipping.
Common Mistakes to Avoid:
- Overloading Shelves: Keep weight limits in mind to avoid sagging.
- Ignoring Ventilation: Ensure the closet has proper airflow to prevent stuffiness.
- Skipping Measurements: Always double-check measurements to avoid fitting issues.
Alternatives for Materials or Methods:
- Instead of plywood, use plastic storage units for a quicker setup.
- Replace foam mats with carpet tiles for a more permanent solution.
- Use clip-on lights if battery-operated LEDs are unavailable.
Estimating the Costs
Plywood: $50-$100 for 4-6 sheets, depending on quality.
Paint: $20-$40 for a gallon, depending on brand and color.
Paintbrushes/Rollers: $10-$20 for a set.
Screws/Nails: $5-$10 for a box.
Wood Glue: $5-$10 for a bottle.
Sandpaper: $5-$10 for a pack.
Decorative Items: $20-$50 for curtains, pillows, and lights.
Tools: If you don't have basic tools like a screwdriver, hammer, saw, and drill, budget around $100-$150 for a starter set.
Budget-Friendly Alternatives:
- Use recycled wood or pallets instead of new plywood.
- Opt for sample paint cans or leftover paint from other projects.
- Look for second-hand tools at garage sales or online marketplaces.
- Use old sheets or fabric scraps for curtains and pillows.
Total estimated cost: $115-$390, depending on materials and tools you already have.
Creative Variations and Customizations
Alternative Materials: Instead of wood, use PVC pipes for the frame. They are lightweight and easy to assemble. For the walls, consider fabric panels or cardboard. These materials are budget-friendly and can be easily replaced.
Colors: Paint the playhouse in bright, cheerful colors like yellow, blue, or pink. Use chalkboard paint on one wall for drawing and writing. Add glow-in-the-dark paint for a magical nighttime effect.
Styles: Create a themed playhouse. For a castle theme, add turrets and battlements using foam or cardboard. For a space theme, use metallic colors and add star decals. A cottage theme can include flower boxes and a thatched roof made from straw or raffia.
Furniture: Add a small table and chairs for tea parties or homework. Use bean bags or floor cushions for a cozy reading nook. Install shelves for books and toys.
Lighting: String fairy lights around the interior for a soft glow. Use battery-operated lanterns or clip-on reading lights for focused lighting. Consider a small chandelier for a touch of elegance.
Windows and Doors: Cut out window openings and add curtains for a homey feel. Use hinged doors or fabric flaps for easy access. Add a mail slot for pretend play.
Flooring: Use foam mats for a soft, safe surface. Consider carpet tiles for easy cleaning and replacement. Add a rug for extra comfort and style.
Storage: Install baskets or bins under the seating area for toy storage. Use hanging organizers on the walls for books and art supplies. Add a pegboard for hanging tools and accessories.
Decorations: Personalize the space with posters, stickers, or wall decals. Hang artwork created by the kids. Add mirrors to make the space feel larger.
Safety: Ensure all materials are non-toxic and child-safe. Secure heavy items to prevent tipping. Use soft edges on furniture to avoid injuries.
Eco-Friendly Sustainability Tips
Use reclaimed wood for the playhouse frame. Old pallets or leftover planks work well. Recycled cardboard can create walls or partitions. Paint with eco-friendly, non-toxic paint to keep the air clean. Fabric scraps make great curtains or cushions. Repurpose old furniture pieces like small shelves or drawers for storage. LED lights save energy and last longer. For flooring, consider bamboo or cork, both sustainable options. Use second-hand toys and decorations to fill the space.
Your Closet Playhouse Awaits
Building a DIY closet playhouse is a fun project that brings joy to both kids and adults. With some basic tools and a bit of creativity, you can turn an ordinary closet into a magical space. Remember to use sturdy materials for safety and add personal touches to make it unique. Whether it’s a reading nook, a mini theater, or a secret hideout, this playhouse will spark imagination. Don’t forget to involve the kids in the process; they’ll love helping out and seeing their ideas come to life. Once finished, you’ll have a cozy, special place that’s perfect for playtime or quiet moments. So grab your tools, gather your materials, and start transforming that closet into a wonderland. Happy building!
How do I start transforming my closet into a playhouse?
First, clear out the closet completely. Measure the dimensions so you know what space you're working with. Then, plan your design, thinking about what your kids will enjoy most.
What materials will I need?
You'll need paint, wallpaper, or stickers for the walls. Get some shelves, cushions, and maybe a small table or chairs. Don’t forget lighting and some fun decorations like fairy lights or posters.
How long does it take to complete?
Depending on the size and complexity, it can take a weekend or a few days. Painting and drying time might take the longest, but the rest is just assembly and decorating.
Can I do this on a budget?
Absolutely! Use leftover paint, second-hand furniture, and DIY decorations. You can find lots of affordable items at thrift stores or even repurpose things you already have at home.
Is it safe for kids?
Yes, just make sure to use non-toxic paint and secure any shelves or furniture to the walls. Avoid small decorations that could be a choking hazard and ensure there's good ventilation.
How can I make it more fun?
Add themes like a pirate ship, princess castle, or space station. Use props like costumes, toys, and books that fit the theme. Incorporate interactive elements like chalkboard walls or a small reading nook.
What if my closet is too small?
Even a small closet can become a cozy nook. Use vertical space with shelves and keep the design simple. Sometimes, less space makes it feel more like a secret hideaway!