
Home>Home & Furniture>Kitchen>How to Build a Stylish DIY Range Hood Cover
Kitchen
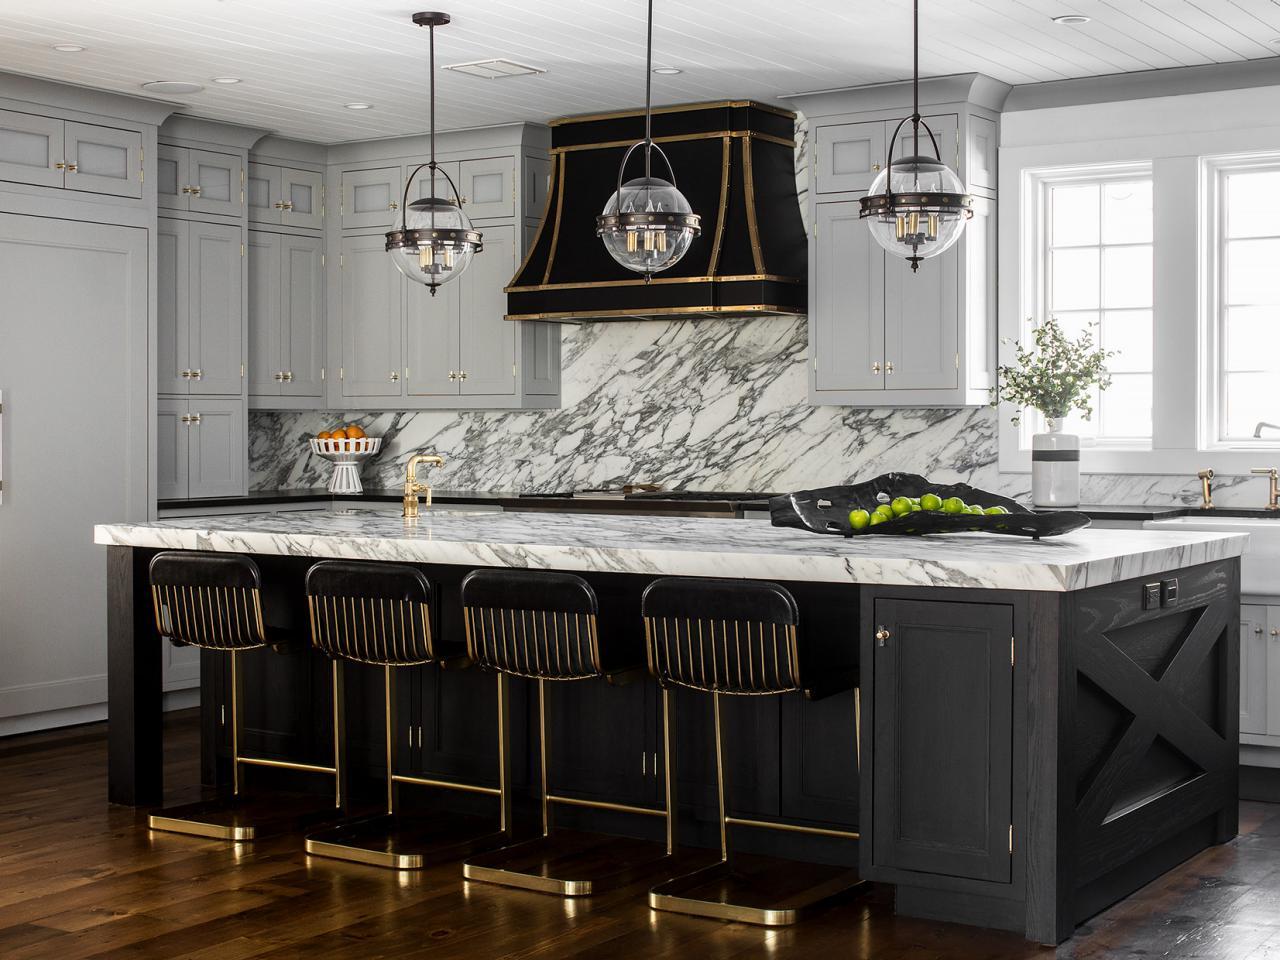
How to Build a Stylish DIY Range Hood Cover
Published: August 1, 2024
Learn how to build a stylish DIY range hood cover with our step-by-step guide. Transform your kitchen with this easy and budget-friendly project. Perfect for any home!
(Many of the links in this article redirect to a specific reviewed product. Your purchase of these products through affiliate links helps to generate commission for Twigandthistle.com, at no extra cost. Learn more)
Adding a stylish DIY range hood cover can transform your kitchen, making it look polished and personalized. Whether you aim for a farmhouse, modern, or rustic vibe, building a range hood cover is easier than you might think. With some basic tools and supplies, you can create a custom look that suits your space perfectly. This project not only enhances the aesthetic appeal but also provides a functional upgrade. Ready to take on this fun and practical home improvement task? Let's dive into the steps to create your own beautiful range hood cover.
Getting Ready for Your Project
Measure Your Space: Use a tape measure to get the exact dimensions of your range hood. Write down the width, height, and depth.
Gather Materials: Collect wood, screws, nails, paint, and any decorative trim. Make sure you have enough for the entire project.
Safety Gear: Wear safety goggles, gloves, and a dust mask. These protect your eyes, hands, and lungs from debris and dust.
Clear the Workspace: Remove any items from your kitchen counter. Ensure you have enough room to work comfortably.
Turn Off Power: Switch off the power to your range hood. This prevents any electrical accidents while working.
Cut the Wood: Use a saw to cut the wood pieces according to your measurements. Sand the edges to make them smooth.
Pre-drill Holes: Drill holes in the wood pieces where you will insert screws. This helps prevent the wood from splitting.
Assemble the Frame: Use screws and nails to put together the frame of your range hood cover. Make sure it fits snugly over your existing range hood.
Paint or Stain: Apply paint or stain to the wood. Let it dry completely before moving on to the next step.
Attach Decorative Trim: Use a nail gun or hammer to attach any decorative trim to the frame. This adds a stylish touch to your range hood cover.
Install the Cover: Carefully place the assembled cover over your range hood. Secure it with screws to ensure it stays in place.
Test the Range Hood: Turn the power back on and test the range hood to make sure it works properly.
Gathering Materials and Tools
Materials:
- Plywood: Forms the main structure of the range hood cover. Choose a high-quality, smooth plywood.
- Wood Trim: Adds decorative elements and hides plywood edges.
- Wood Screws: Secures the plywood pieces together.
- Wood Glue: Provides additional bonding strength.
- Sandpaper: Smooths rough edges and surfaces.
- Primer and Paint: Gives the cover a finished look and protects the wood.
- Caulk: Fills gaps and seams for a seamless appearance.
- Painter’s Tape: Protects areas from paint and helps create clean lines.
Tools:
- Measuring Tape: Ensures accurate measurements for cutting plywood and trim.
- Circular Saw: Cuts plywood to the required dimensions.
- Miter Saw: Cuts wood trim at precise angles.
- Drill: Makes holes for screws and drives them into place.
- Clamps: Holds pieces together while glue dries.
- Paintbrushes or Rollers: Applies primer and paint evenly.
- Caulking Gun: Dispenses caulk smoothly.
- Sanding Block or Electric Sander: Speeds up the sanding process.
These materials and tools will help you create a stylish, functional range hood cover for your kitchen.
Skill Level and Time Commitment
Skill Level: Intermediate
Time Required: 6-8 hours
- Gather Materials: 1 hour
- Measure and Cut Wood: 2 hours
- Assemble Frame: 1.5 hours
- Attach Cover Panels: 1 hour
- Sand and Paint: 1.5 hours
Important Keywords: Intermediate, 6-8 hours, Gather Materials, Measure and Cut Wood, Assemble Frame, Attach Cover Panels, Sand and Paint
Detailed Step-by-Step Guide
Gather Materials and Tools
- Plywood sheets
- Wood screws
- Wood glue
- Sandpaper
- Paint or stain
- Measuring tape
- Circular saw
- Drill
- Level
- Clamps
Measure Your Range Hood
- Measure the width, height, and depth of the existing range hood.
- Add a few inches to each measurement for the cover to fit over the hood.
Cut Plywood Pieces
- Cut two side panels according to the height and depth measurements.
- Cut a front panel matching the width and height.
- Cut a top panel to fit the width and depth.
Assemble the Frame
- Attach the side panels to the front panel using wood glue and screws.
- Use clamps to hold pieces together while the glue dries.
- Attach the top panel to the assembled frame.
Sand the Edges
- Sand all edges and surfaces to remove rough spots.
- Ensure smoothness for painting or staining.
Paint or Stain
- Apply paint or stain to the assembled cover.
- Allow it to dry completely before proceeding.
Install the Cover
- Place the cover over the existing range hood.
- Use a level to ensure it is straight.
- Secure the cover to the wall or cabinets with screws.
Finishing Touches
- Touch up any paint or stain as needed.
- Clean up any dust or debris from the installation process.
Helpful Tips and Tricks
Measure Twice, Cut Once: Always double-check measurements before cutting materials. This saves time and prevents waste.
Use Quality Materials: Opt for high-quality wood or plywood. It ensures durability and a polished look.
Pre-drill Holes: Pre-drilling prevents wood from splitting and makes assembly easier.
Sand Edges Smooth: Sand all edges for a professional finish. It also helps paint or stain adhere better.
Paint or Stain Before Assembly: Painting or staining pieces before assembly can make the process cleaner and easier.
Use a Level: Ensure everything is level during installation. This avoids a crooked final product.
Secure Properly: Use strong brackets or screws to secure the hood cover to the wall. Safety first!
Ventilation: Make sure the range hood cover doesn’t block ventilation. Proper airflow is crucial.
Common Mistakes to Avoid:
Skipping Measurements: Not measuring accurately can lead to gaps or misalignment.
Ignoring Ventilation: Blocking the vent can cause kitchen odors and smoke to linger.
Using Weak Materials: Cheap materials may not hold up over time, leading to sagging or damage.
Alternatives for Materials or Methods:
Reclaimed Wood: Gives a rustic look and is eco-friendly.
Metal Sheets: For a modern, industrial style.
Peel-and-Stick Veneer: Easy to apply and gives a wood-like finish without the hassle of staining or painting.
Ready-Made Kits: If building from scratch seems daunting, consider a ready-made kit that you can customize.
Estimating the Cost
Materials:
- Plywood: $30-$50
- Trim/Molding: $20-$40
- Wood Screws: $5-$10
- Wood Glue: $5-$10
- Paint or Stain: $10-$20
- Sandpaper: $5
Tools:
- Circular Saw: $50-$100 (or borrow)
- Drill: $30-$60 (or borrow)
- Paintbrushes: $5-$10
- Measuring Tape: $5-$10
- Level: $10-$20
Total Cost: $175-$335
Budget-Friendly Alternatives:
- Plywood: Use reclaimed wood or MDF, $20-$30
- Trim/Molding: Use basic trim, $10-$20
- Paint or Stain: Use leftover paint, $0
- Circular Saw: Rent from a hardware store, $10-$20
- Drill: Borrow from a friend, $0
Total Budget-Friendly Cost: $80-$150
Creative Variations and Customizations
Materials: Instead of using wood, consider metal for a sleek, modern look. Stainless steel or copper can add an industrial or rustic touch. For a more budget-friendly option, use plywood and paint it to mimic more expensive materials.
Colors: Paint the hood cover to match your kitchen's color scheme. White or black offers a classic look, while bold colors like navy blue or emerald green can make it a focal point. For a more natural look, use a wood stain to highlight the grain.
Styles: Add trim or molding to give the hood cover a more traditional or ornate appearance. For a farmhouse style, consider adding shiplap or reclaimed wood. If you prefer a minimalist look, keep the design simple with clean lines and no additional embellishments.
Finishes: Use a matte finish for a contemporary feel or a glossy finish for a more polished look. Distressed finishes can add a vintage or shabby chic vibe.
Hardware: Incorporate decorative brackets or corbels for added support and style. Use matching hardware like handles or knobs to tie in with your kitchen cabinets.
Lighting: Install under-cabinet lighting beneath the hood cover to illuminate the stovetop. LED strips or puck lights work well and add a functional yet stylish element.
Ventilation: Ensure proper ventilation by integrating a vent insert that matches the style of the cover. Choose a hidden vent for a seamless look or an exposed vent for an industrial touch.
Texture: Add texture by using beadboard, wainscoting, or tiles on the surface of the hood cover. This can create visual interest and complement other elements in your kitchen.
Personal Touches: Customize with stencils, decals, or hand-painted designs to make the range hood cover uniquely yours. Adding a monogram or family crest can also personalize the piece.
Eco-Friendly Tips
Reclaimed Wood: Use old barn wood or pallets. Sand and stain them for a rustic look.
Bamboo: A fast-growing, renewable resource. It’s strong and stylish.
Low-VOC Paint: Choose paints with low volatile organic compounds. They’re better for indoor air quality.
Recycled Metal: Look for scrap metal at salvage yards. It can add an industrial touch.
Eco-Friendly Adhesives: Use glues that are non-toxic and biodegradable.
Natural Finishes: Opt for beeswax or linseed oil instead of chemical sealants.
Energy-Efficient Lighting: Install LED lights under the hood. They use less energy and last longer.
Recycled Glass Tiles: Use them for a decorative backsplash. They’re made from post-consumer glass.
Salvaged Hardware: Find knobs and handles at thrift stores or antique shops. They add character and reduce waste.
Insulation: Use recycled denim or wool insulation to reduce noise and improve energy efficiency.
Your Kitchen's New Focal Point
Building a DIY range hood cover can be a rewarding project. You've transformed a functional appliance into a stylish focal point. With some basic tools, materials, and a bit of patience, you can achieve a custom look that fits your kitchen's style. Remember, the key is to measure carefully, cut precisely, and take your time with the finishing touches. Whether you choose to paint, stain, or leave the wood natural, your new range hood cover will add character and charm to your space. Plus, you'll have the satisfaction of knowing you built it yourself. So, grab those tools, get creative, and enjoy your new kitchen centerpiece. Happy building!
What materials do I need to build a DIY range hood cover?
You’ll need plywood, wood glue, screws, paint or stain, sandpaper, and brackets. Optional items include trim for added style and caulk for sealing gaps.
How long does it take to build a range hood cover?
Typically, it takes about a weekend. This includes time for cutting, assembling, sanding, painting, and drying.
Do I need any special tools?
Basic tools like a saw, drill, measuring tape, level, and paintbrush should suffice. A miter saw and nail gun can make the job easier but aren’t necessary.
Can I customize the design?
Absolutely! You can add trim, choose different paint colors, or even incorporate decorative elements to match your kitchen’s style.
Is it safe to build my own range hood cover?
Yes, as long as you follow safety guidelines and ensure the cover is securely attached. Make sure it doesn’t interfere with the ventilation system.
How do I attach the range hood cover to the wall?
Use brackets and screws to secure the cover to the wall. Ensure it’s level and properly anchored to studs for stability.
Can I install a light in my range hood cover?
Yes, you can add a light fixture. Just make sure it’s heat-resistant and properly wired. Consult an electrician if you’re unsure about the wiring.
What kind of finish should I use?
Use a heat-resistant paint or stain. A semi-gloss or gloss finish is easier to clean, which is ideal for a kitchen environment.