
Home>Home & Furniture>Garage & Basement>DIY Basement Sauna Guide
Garage & Basement
DIY Basement Sauna Guide
Published: August 31, 2024
Transform your basement into a relaxing retreat with our DIY Basement Sauna Guide. Step-by-step instructions, essential tips, and expert advice for a perfect home sauna.
(Many of the links in this article redirect to a specific reviewed product. Your purchase of these products through affiliate links helps to generate commission for Twigandthistle.com, at no extra cost. Learn more)
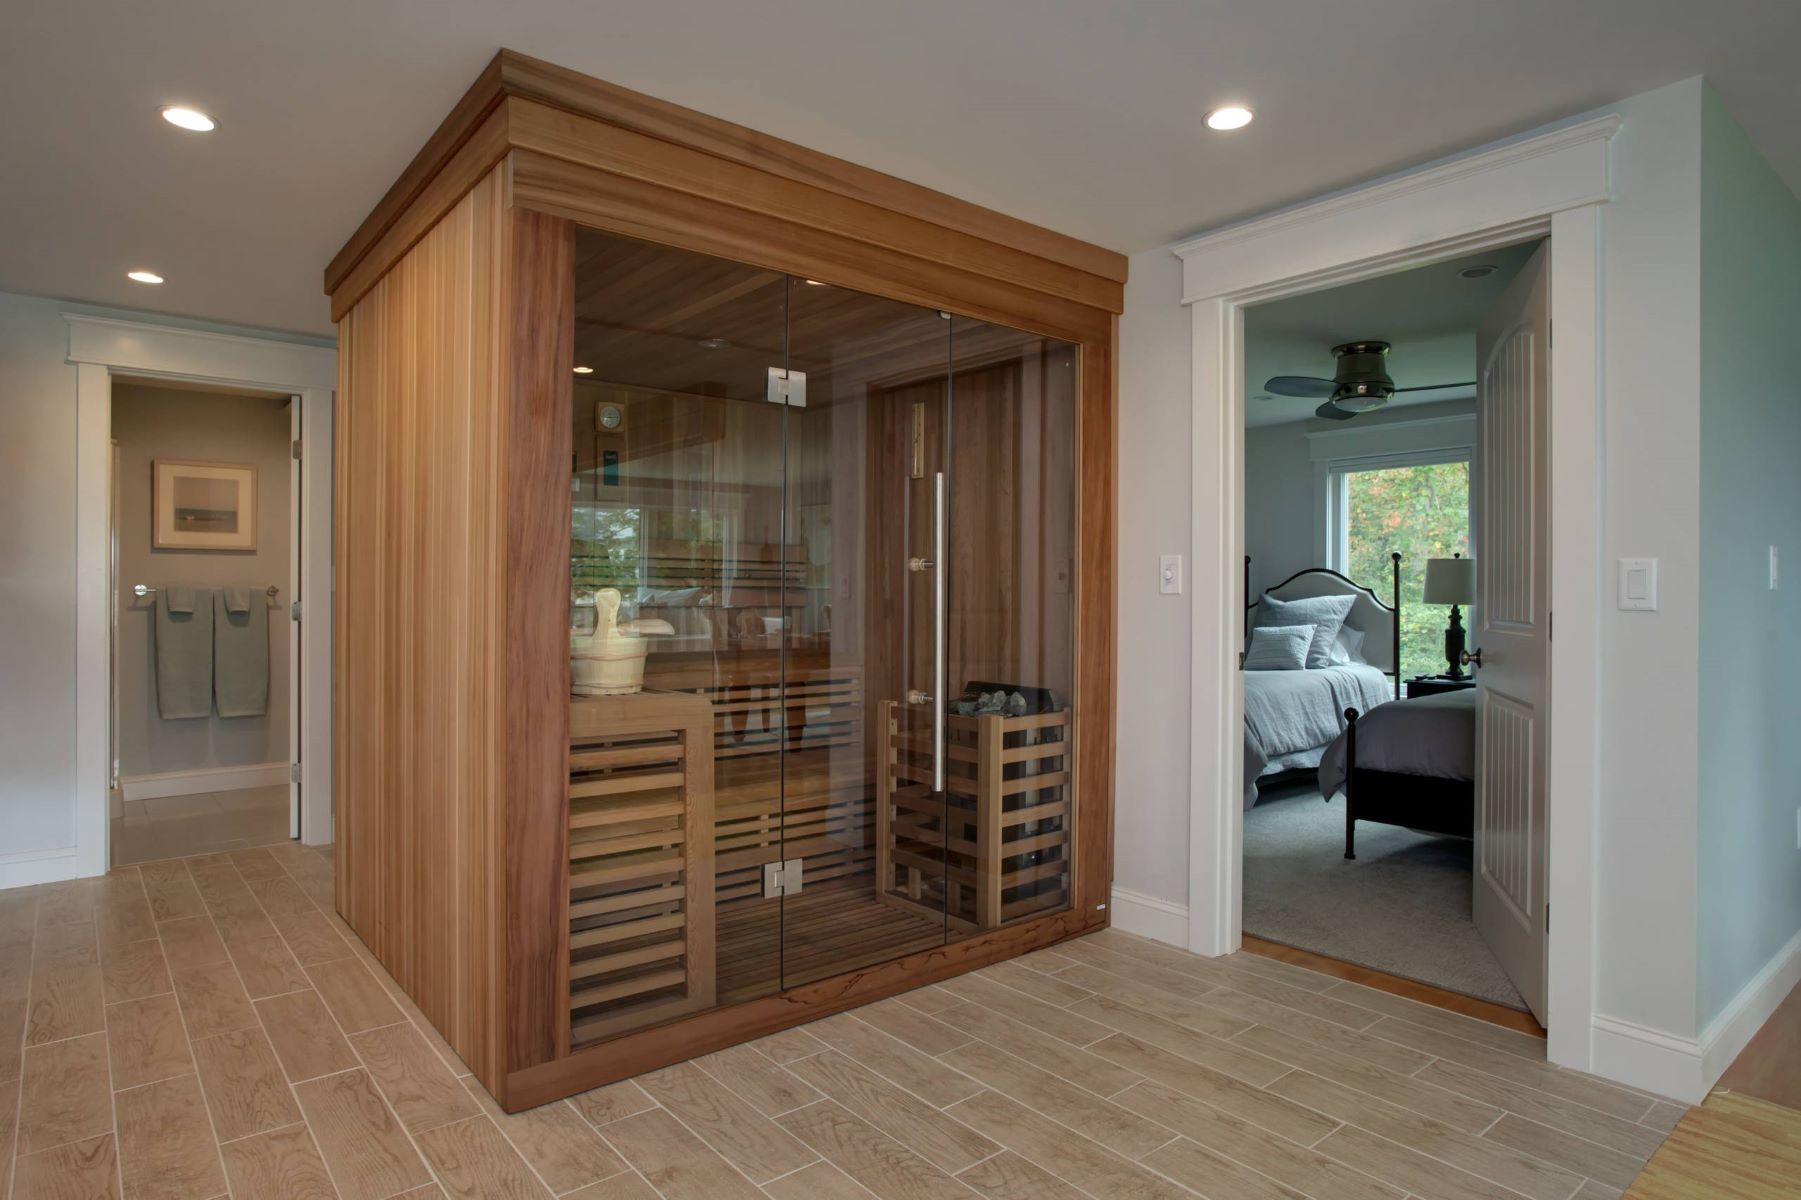
Thinking about adding a unique twist to your home? Building a DIY basement sauna can be a fun, rewarding project. It not only provides a cozy spot to relax but also adds value to your property. Whether you're looking for a place to unwind after a long day or aiming to create a spa-like experience, a basement sauna is an excellent choice. By tackling this project yourself, you can customize every detail to suit your preferences and budget. Let’s dive into the basics of creating your own basement sauna, from planning and materials to installation tips.
Getting Ready for Your Project
Plan the Layout: Measure the basement area where the sauna will go. Sketch a simple floor plan showing where benches, heater, and door will be.
Check Local Codes: Research local building codes and permits. Some areas have specific rules for home saunas.
Gather Materials: Collect all necessary materials like insulation, wood panels, sauna heater, ventilation system, and moisture barrier.
Set Up Workspace: Clear the basement area. Ensure there's enough room to move around and store materials. Lay down a tarp to protect the floor.
Safety Gear: Wear safety goggles, gloves, and dust mask. Keep a first aid kit nearby.
Electrical Work: Hire a licensed electrician to install wiring for the sauna heater. Ensure the electrical system can handle the load.
Ventilation: Plan for proper ventilation. Saunas need fresh air intake and exhaust vents to function correctly.
Moisture Protection: Install a moisture barrier on walls and ceiling to prevent mold. Use a vapor barrier to keep moisture from seeping into the basement structure.
Insulation: Insulate the walls and ceiling to retain heat. Use sauna-specific insulation for best results.
Frame the Sauna: Build the frame using 2x4 lumber. Ensure the structure is sturdy and level.
Install Electrical Components: After framing, have the electrician install the heater and any lighting.
Paneling: Attach wood panels to the interior walls and ceiling. Use tongue-and-groove boards for a tight fit.
Benches and Door: Build and install benches. Ensure they are sturdy and comfortable. Install the sauna door, making sure it seals properly.
Test Run: Before using, do a test run to check for any issues with heating or ventilation. Make adjustments as needed.
What You Need to Get Started
- Wood Panels: Cedar or hemlock are great choices. They resist moisture and have a pleasant aroma.
- Insulation: Use fiberglass or foam board to keep the heat in.
- Vapor Barrier: Plastic sheeting prevents moisture from escaping.
- Sauna Heater: Electric or wood-burning, depending on your preference.
- Thermometer and Hygrometer: Measure temperature and humidity levels.
- Sauna Stones: Place on the heater for steam when water is poured.
- Sauna Door: A pre-hung door with a glass window works well.
- Benches: Cedar or hemlock benches for seating.
- Lighting: Moisture-resistant lights for a safe, relaxing atmosphere.
- Ventilation System: Ensures fresh air circulation.
- Nails and Screws: Stainless steel or galvanized to prevent rust.
- Hammer and Screwdriver: For assembling the structure.
- Saw: Circular or hand saw for cutting wood panels.
- Measuring Tape: Ensure accurate measurements.
- Level: Keep everything straight and even.
- Drill: For making holes and driving screws.
- Safety Gear: Gloves, goggles, and a mask for protection.
These materials and tools will help you build a functional, cozy basement sauna.
How Much Time and Skill You Need
Skill Level: Advanced
Time Required: 3-5 days
- Planning and Design: 4-6 hours
- Framing and Insulation: 8-10 hours
- Electrical Work: 6-8 hours
- Installing Sauna Heater: 2-3 hours
- Finishing Touches: 4-6 hours
Important Keywords: Advanced, 3-5 days, Planning, Design, Framing, Insulation, Electrical Work, Sauna Heater, Finishing Touches
Follow These Steps
Plan Your Space
- Measure the area where you want to build the sauna.
- Sketch a basic layout, including door placement and bench locations.
Gather Materials
- Wood: Cedar or spruce for walls and benches.
- Insulation: Fiberglass or foam board.
- Vapor Barrier: Aluminum foil or special sauna foil.
- Sauna Heater: Electric or wood-burning.
- Fasteners: Nails, screws, and brackets.
Prepare the Area
- Clear the basement space.
- Ensure proper ventilation and moisture control.
- Install a floor drain if necessary.
Frame the Sauna
- Build the frame using 2x4 lumber.
- Include spaces for door and ventilation.
Insulate the Walls
- Place insulation between the studs.
- Cover insulation with a vapor barrier.
Install Electrical Wiring
- Run wiring for the sauna heater and any lighting.
- Follow local electrical codes or hire a professional.
Panel the Interior
- Attach wood paneling to the walls and ceiling.
- Use stainless steel nails to prevent rust.
Build the Benches
- Construct benches using the same wood as the walls.
- Ensure sturdy support and comfortable height.
Install the Heater
- Follow manufacturer instructions for mounting.
- Ensure proper clearance from walls and benches.
Add Finishing Touches
- Install a sauna door with a glass window.
- Add accessories like a thermometer, hygrometer, and light fixtures.
Test the Sauna
- Turn on the heater and let the sauna reach the desired temperature.
- Check for any issues with ventilation or heating.
Enjoy Your Sauna
- Invite family and friends to experience your new basement sauna.
Helpful Tips and Tricks
Plan the Layout: Measure your basement space carefully. Ensure you have enough room for the sauna and a small changing area.
Ventilation: Proper ventilation is crucial. Install vents to allow fresh air in and hot air out. This prevents mold and keeps the air fresh.
Insulation: Use high-quality insulation to keep heat in. Fiberglass or foam board insulation works well. Seal all gaps to prevent heat loss.
Moisture Barrier: Install a moisture barrier behind the walls to protect against dampness. Plastic sheeting or foil works well.
Wood Choice: Use cedar or hemlock for the sauna interior. These woods resist moisture and heat well, plus they smell great.
Heater Selection: Choose between an electric or wood-burning heater. Electric heaters are easier to install, while wood-burning ones offer a traditional feel.
Electrical Work: If using an electric heater, ensure your basement's electrical system can handle the load. Hire a professional if unsure.
Lighting: Use sauna-safe lighting. LED lights are a good choice as they produce less heat and are energy-efficient.
Seating: Build comfortable benches using the same wood as the walls. Ensure they are sturdy and can support weight.
Door Installation: Install a sauna door that seals well to keep heat in. Glass doors are popular as they add a modern touch.
Thermometer and Hygrometer: Install these to monitor temperature and humidity levels. This helps maintain a comfortable environment.
Common Mistakes to Avoid:
- Skipping Ventilation: Poor ventilation can lead to mold and unpleasant odors.
- Ignoring Electrical Load: Overloading your electrical system can be dangerous.
- Using Incorrect Wood: Some woods can warp or release harmful chemicals when heated.
- Poor Insulation: Inadequate insulation leads to heat loss and higher energy bills.
Material Alternatives:
- Insulation: Use mineral wool instead of fiberglass for better soundproofing.
- Heater: Consider an infrared heater for a more energy-efficient option.
- Moisture Barrier: Use specialized sauna foil instead of plastic sheeting for better heat reflection.
How Much Will It Cost?
Wood: Cedar is popular for saunas. Expect to spend around $1,000 for enough cedar to cover a small basement sauna.
Insulation: Proper insulation is key. Fiberglass insulation costs about $100 for a small space.
Vapor Barrier: A roll of vapor barrier costs around $50.
Sauna Heater: Electric heaters are common. Prices range from $300 to $1,000 depending on size and quality.
Benches: Cedar benches can cost about $200.
Lighting: Sauna-safe lights cost around $50 each. You might need two.
Door: A sauna door costs about $300.
Ventilation: Proper vents cost around $50.
Tools: Basic tools like a saw, hammer, and drill might cost around $200 if you don't already have them.
Total Cost: Expect to spend between $2,250 and $3,000.
Budget-Friendly Alternatives:
- Use pine instead of cedar to save on wood costs.
- Consider a DIY heater kit which can be cheaper.
- Look for second-hand tools or borrow from friends.
Ways to Customize Your Sauna
Wood Choices: Instead of traditional cedar, try hemlock or pine. These woods offer different looks and smells.
Heater Types: Use an electric heater for easy installation or a wood-burning stove for a rustic feel.
Lighting: Install LED strip lights for a modern touch or vintage-style lanterns for a cozy vibe.
Seating: Build bench seats with backrests for comfort or use reclining chairs for a spa-like experience.
Flooring: Use tile for easy cleaning or cork for a softer, warmer feel.
Walls: Paint the walls with heat-resistant paint in calming colors like blue or green.
Accessories: Add a salt wall for health benefits or a sound system for relaxation music.
Doors: Choose a glass door for a modern look or a wooden door for a traditional feel.
Aromatherapy: Install a diffuser for essential oils or use a herb basket for natural scents.
Windows: Add small windows for natural light or use frosted glass for privacy.
Eco-Friendly Tips for Your Build
Reclaimed wood is a great choice for sauna benches and walls. It adds a rustic look while reducing waste. Cork flooring is another eco-friendly option. It’s renewable, durable, and provides good insulation.
Use natural insulation materials like sheep's wool or recycled denim. These options are sustainable and effective at keeping heat in.
For the sauna heater, consider a wood-burning stove. It uses renewable resources and can be more energy-efficient than electric heaters.
Low-VOC paints and finishes are essential. They release fewer harmful chemicals, making the air healthier.
Install LED lighting. They use less energy and last longer than traditional bulbs.
Repurpose old towels and linens for sauna use. They can serve as seat covers or be used for cleaning.
Finally, ensure proper ventilation. Use recycled or repurposed vents and fans to maintain air quality without buying new materials.
Enjoy Your New Sauna
Building your own basement sauna can be a rewarding project. You've learned how to choose the right materials, install insulation, and set up ventilation. Now, it's time to enjoy the fruits of your labor. Relax in the warmth, knowing you created this cozy retreat with your own hands. Remember to maintain it regularly, checking for any signs of wear or moisture issues. Invite friends or family over to share in the experience. Your new sauna isn't just a place to unwind; it's a testament to your hard work and dedication. So, grab a towel, turn up the heat, and let the stress melt away. Enjoy every moment in your homemade haven.
How much space do I need for a basement sauna?
You’ll need at least 4x4 feet for a small sauna. Bigger is better if you want more room to stretch out or add benches.
What materials should I use?
Use cedar or hemlock for the walls and benches. These woods handle heat and moisture well without warping.
Do I need special electrical work?
Yes, you’ll need a dedicated 240V circuit for the heater. Hire a licensed electrician to handle this safely.
How do I insulate the sauna?
Use foil-faced insulation to keep the heat in. Cover it with a vapor barrier before adding the wood paneling.
Can I install a sauna heater myself?
You can, but follow the manufacturer’s instructions closely. If you’re not comfortable, get a pro to help.
What kind of ventilation is required?
Proper ventilation is crucial. Install an intake vent near the floor and an exhaust vent near the ceiling to keep air circulating.
How do I maintain my basement sauna?
Wipe down surfaces after each use to prevent mold. Periodically check for any signs of wear or damage.