
Home>Home & Furniture>Doors & Windows>How to Make Self-Watering Window Boxes
Doors & Windows
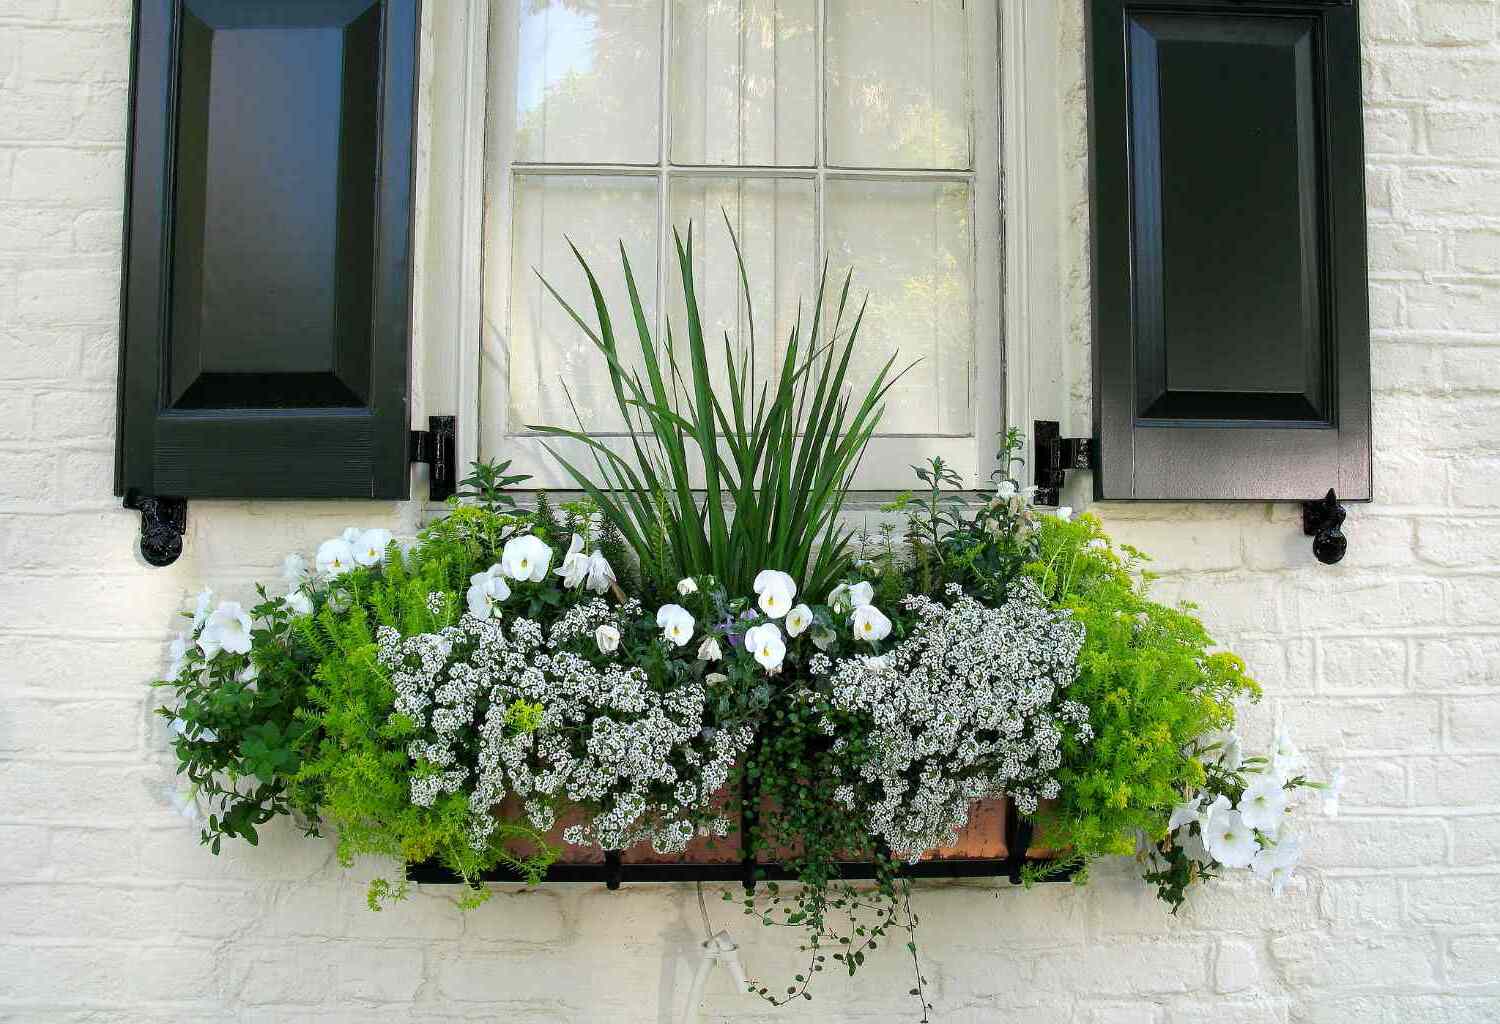
How to Make Self-Watering Window Boxes
Published: August 23, 2024
Learn how to create self-watering window boxes with our step-by-step guide. Save time and keep your plants healthy with this easy DIY gardening project.
(Many of the links in this article redirect to a specific reviewed product. Your purchase of these products through affiliate links helps to generate commission for Twigandthistle.com, at no extra cost. Learn more)
Ever wished your plants could water themselves? Self-watering window boxes are the answer. These boxes are perfect for busy folks who love gardening but struggle to keep up with daily watering. With a bit of DIY magic, you can create a system that keeps plants hydrated without constant attention. It's easier than you think and saves time. Plus, your plants will thrive with a steady water supply. Ready to give your green thumb a boost? Let's learn how to make your own self-watering window boxes!
Getting Ready for Your Project
- Gather Materials: Get a window box, plastic bottle, soil, plants, and a drill.
- Safety First: Wear gloves and safety glasses when using tools.
- Workspace Setup: Find a flat, stable surface like a workbench or table. Lay down newspaper or a tarp to catch dirt.
- Drill Holes: Drill small holes in the bottom of the plastic bottle for water drainage.
- Cut Bottle: Cut the top off the bottle, leaving enough height to hold water.
- Place Bottle: Position the bottle in the window box, bottom side down.
- Add Soil: Fill the box with soil, covering the bottle but leaving the top open.
- Plant: Place your plants in the soil, ensuring roots are covered.
- Water: Fill the bottle with water. The soil will absorb water through the holes, keeping plants hydrated.
What You Need: Materials and Tools
Materials:
- Window Box: A container to hold the soil and plants.
- Plastic Bottle: Used to create the water reservoir.
- Cotton Rope: Acts as a wick to draw water from the reservoir to the soil.
- Potting Soil: Provides nutrients and support for the plants.
- Plants: Your choice of flowers, herbs, or small vegetables.
Tools:
- Drill: Makes holes in the plastic bottle and window box.
- Scissors: Cuts the cotton rope to the desired length.
- Marker: Marks where to drill holes.
- Measuring Tape: Ensures accurate measurements for cutting and drilling.
- Screwdriver: Tightens any screws needed to secure parts together.
Skill Level and Time Commitment
Skill Level: Intermediate
Time Required: 3-4 hours
- Gather Materials: 30 minutes
- Measure and Cut Wood: 45 minutes
- Assemble Box: 1 hour
- Install Watering System: 45 minutes
- Paint/Stain: 30 minutes
- Drying Time: 1 hour (can vary)
How to Build Self-Watering Window Boxes
Gather Materials:
- Window box
- Plastic bottle (1-liter or larger)
- Potting soil
- Plants or seeds
- Drill
- Scissors
- String or wicking material
Prepare the Bottle:
- Clean the plastic bottle thoroughly.
- Cut the bottle in half using scissors.
- Drill a small hole in the bottle cap.
Create the Wick:
- Cut a piece of string or wicking material about 6 inches long.
- Thread the wick through the hole in the bottle cap, leaving half inside and half outside.
Assemble the Water Reservoir:
- Place the top half of the bottle (with the cap and wick) upside down inside the bottom half.
- Ensure the wick hangs down into the bottom half, which will hold water.
Prepare the Window Box:
- Drill a few drainage holes in the bottom of the window box.
- Place the bottle reservoir in one corner of the window box.
Add Soil:
- Fill the window box with potting soil, covering the bottle reservoir.
- Ensure the wick is buried in the soil.
Plant:
- Plant your chosen plants or seeds in the soil.
- Water the soil lightly to help the plants settle.
Fill the Reservoir:
- Pour water into the bottom half of the bottle reservoir.
- The wick will draw water up to the soil, keeping it moist.
Maintain:
- Check the water level in the reservoir regularly.
- Refill as needed to ensure plants stay hydrated.
Helpful Tips and Tricks
Choose the Right Container: Use a plastic or ceramic container. These materials retain moisture better than terracotta.
Add a Reservoir: Place a plastic bottle or PVC pipe at the bottom of the container. This will hold extra water.
Use Wicking Material: Insert a cotton rope or strip of fabric from the reservoir to the soil. This will help draw water up to the roots.
Drill Overflow Holes: Make small holes on the side of the container, just above the reservoir. This prevents overwatering.
Use Quality Potting Mix: Choose a lightweight mix that retains moisture but drains well. Avoid garden soil, which can compact and block water flow.
Mulch the Surface: Add a layer of mulch on top of the soil. This reduces evaporation and keeps the soil moist longer.
Check Water Levels: Regularly check the reservoir and refill as needed. This ensures plants always have access to water.
Common Mistakes to Avoid:
Overfilling the Reservoir: Too much water can drown plant roots. Use overflow holes to prevent this.
Using the Wrong Soil: Heavy soil can block water flow. Stick to a good potting mix.
Ignoring Plant Needs: Different plants have different water needs. Adjust the watering schedule accordingly.
Alternatives for Materials or Methods:
Reservoir Options: Instead of a plastic bottle, use a small bucket or storage container.
Wicking Material: Instead of cotton rope, try using nylon rope or old t-shirt strips.
Container Choices: If plastic or ceramic isn't available, use a wooden box lined with plastic to prevent water leakage.
Estimating the Cost
Materials:
- Window Box: $20-$50 each
- Plastic Bottles: Free (recycled) or $5 for a pack
- Potting Soil: $10-$15 per bag
- Plants: $3-$10 each
- Wicking Material: $5-$10 (cotton rope or fabric)
- Water Reservoir: $10-$20 (plastic container or tray)
Tools:
- Drill: $30-$50 (or borrow one)
- Scissors: $5-$10
- Measuring Tape: $5-$10
Total Cost: $88-$175
Budget-Friendly Alternatives:
- Reuse old containers for water reservoirs
- Recycle plastic bottles for wicking material
- Borrow tools from friends or neighbors
- Use seeds instead of plants: $1-$3 per packet
Different Ways to Customize
Materials: Instead of plastic containers, use ceramic pots or wooden boxes. These give a different look and feel. For the wicking material, try cotton rope or felt strips instead of synthetic wicks.
Colors: Paint the boxes in bright colors like yellow, red, or blue for a cheerful vibe. For a more natural look, use earth tones like brown, green, or beige. You can also use chalk paint for a rustic, matte finish.
Styles: Add decorative trim or molding to the edges of the boxes for a more polished look. Attach decorative brackets or hooks to hang the boxes instead of placing them directly on the window sill. Use stencils to create patterns or designs on the boxes.
Plants: Choose succulents or herbs for a low-maintenance option. For a splash of color, plant flowering plants like petunias or marigolds. Mix and match different types of plants for a varied look.
Water Reservoir: Instead of a plastic bottle, use a glass jar or a metal can for the water reservoir. This can add a unique touch and make the setup more visually appealing.
Drainage: Drill extra holes in the bottom of the boxes for better drainage. Place small stones or pebbles at the bottom to help with water flow and prevent root rot.
Mounting: Use suction cups or magnetic strips to mount the boxes on metal window frames. For a more permanent solution, install brackets or shelves to hold the boxes securely.
Labels: Add chalkboard labels or wooden tags to identify the plants. This can be both functional and decorative.
Lighting: Attach solar-powered lights or fairy lights to the boxes for a magical evening look. This can also help the plants grow better if they need more light.
Seasonal Themes: Decorate the boxes according to the season. Use pumpkins and gourds for fall, snowflakes and pinecones for winter, flowers and butterflies for spring, and seashells and starfish for summer.
Eco-Friendly Suggestions
Materials:
- Recycled plastic bottles: Use old soda or water bottles as reservoirs.
- Wooden crates: Repurpose old wooden crates or pallets for the box structure.
- Cotton fabric: Use old t-shirts or towels for the wicking system.
- Organic soil: Choose soil free from chemicals.
- Rainwater: Collect rainwater for filling the reservoirs.
Methods:
- Cut bottles: Cut the tops off plastic bottles. These will act as water reservoirs.
- Drill holes: Drill small holes in the bottle caps for water to seep through.
- Attach fabric: Insert strips of cotton fabric through the bottle caps. These will wick water up to the soil.
- Place bottles: Position the bottles upside down in the bottom of the wooden crate.
- Add soil: Fill the crate with organic soil, covering the bottles and fabric strips.
- Plant seeds: Plant your seeds or seedlings in the soil.
- Fill reservoirs: Pour rainwater into the bottles to keep the soil moist.
This method reduces waste by reusing materials and conserves water through efficient self-watering.
Your Green Thumb Just Got Greener
Self-watering window boxes are a game-changer for plant lovers. They save time, conserve water, and keep plants healthy. With a few materials and some elbow grease, you can create a system that ensures your plants get the right amount of moisture. No more worrying about overwatering or forgetting to water. Plus, they look great and add a touch of green to your home. So, grab those tools, follow the steps, and enjoy a thriving garden right outside your window. Happy planting!
How do self-watering window boxes work?
Self-watering window boxes have a reservoir at the bottom that holds water. Plants draw water up through capillary action, keeping the soil moist without constant watering.
What materials do I need to make one?
You'll need a window box, a plastic container for the reservoir, potting soil, plants, and some tools like a drill and scissors.
How often do I need to refill the reservoir?
It depends on the weather and the plants. Generally, you might need to refill it every 1-2 weeks. Check the water level regularly to ensure it doesn't run dry.
Can I use any type of plants?
Most herbs, flowers, and vegetables do well in self-watering boxes. Just make sure they have similar water needs.
How do I prevent overwatering?
The reservoir system helps prevent overwatering by allowing plants to take up only what they need. Ensure the drainage holes are clear to avoid waterlogging.
Is it difficult to set up?
Not at all! With basic tools and a bit of time, you can set up a self-watering window box in an afternoon. It's a great DIY project for beginners.