
Home>Home & Furniture>Doors & Windows>How to Build a DIY Garage Door Awning
Doors & Windows
How to Build a DIY Garage Door Awning
Published: September 14, 2024
Learn how to build a DIY garage door awning with our step-by-step guide. Enhance your home's curb appeal and protect your garage from the elements.
(Many of the links in this article redirect to a specific reviewed product. Your purchase of these products through affiliate links helps to generate commission for Twigandthistle.com, at no extra cost. Learn more)
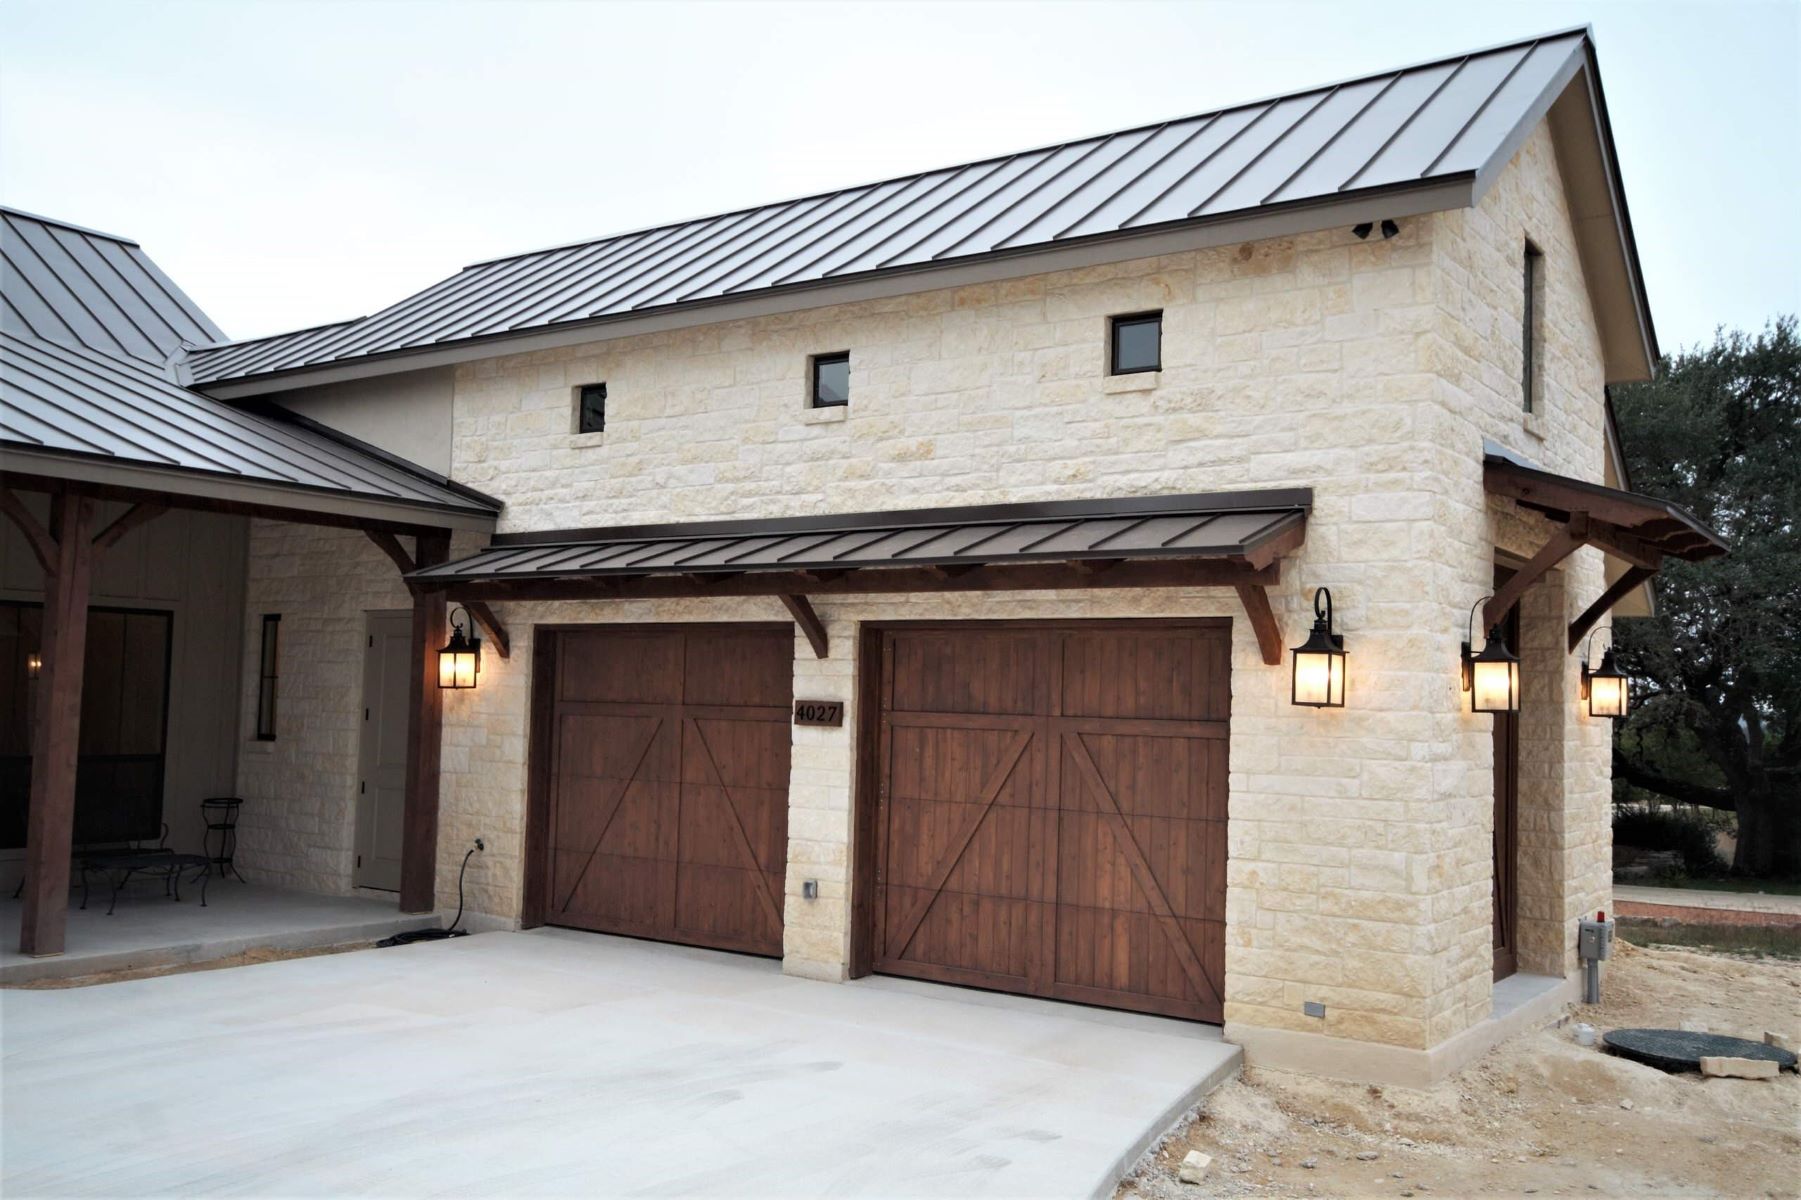
Want to add some shade or protect your garage door from the elements? Building your own garage door awning is a great project. It’s not as hard as it sounds and can save you some money. All you need are basic tools, materials, and a bit of time. Plus, it’s a fun way to improve your home’s curb appeal. Whether you’re new to DIY or have tackled projects before, this guide will help you step by step. Let’s get those tools ready and make something awesome for your garage!
Getting Ready for Your Project
Measure the Area: Use a tape measure to get the exact dimensions of the space above your garage door. Write down the width and height.
Gather Materials: Collect all necessary materials like wood, screws, brackets, and a waterproof covering. Make sure everything is weather-resistant.
Safety Gear: Wear safety goggles, gloves, and a dust mask. Keep a first aid kit nearby.
Clear the Workspace: Remove any obstacles around the garage door. Ensure you have enough room to move freely.
Set Up Tools: Arrange tools like a drill, saw, hammer, and ladder within easy reach. Check that all tools are in good working condition.
Check the Weather: Plan to work on a day with good weather. Avoid rainy or extremely windy days.
Mark the Wall: Use a pencil to mark where the brackets will go. Double-check measurements to ensure accuracy.
Pre-Drill Holes: Drill pilot holes for the screws. This makes it easier to attach the brackets later.
Cut the Wood: Measure and cut the wood pieces according to your design. Sand down rough edges to prevent splinters.
Assemble the Frame: Put together the frame on the ground before attaching it to the wall. This helps ensure everything fits properly.
Test Fit: Hold the frame up to the wall to make sure it aligns with your marks. Adjust if necessary.
Secure the Brackets: Attach the brackets to the wall using heavy-duty screws. Make sure they are level and securely fastened.
Attach the Frame: Lift the frame and secure it to the brackets. Double-check that everything is level.
Add the Covering: Attach the waterproof covering to the frame. Make sure it is tightly secured to prevent leaks.
Final Check: Inspect the entire structure for stability. Tighten any loose screws and make any final adjustments.
Materials and Tools Checklist
- Lumber: Use pressure-treated wood for durability. Common sizes include 2x4s and 4x4s.
- Plywood: Provides a solid base for the awning. Choose exterior-grade plywood.
- Galvanized Screws: Resistant to rust, ideal for outdoor projects.
- Metal Brackets: Support the structure and ensure stability.
- Roofing Material: Options include metal sheets, shingles, or polycarbonate panels.
- Paint or Stain: Protects wood from weather and adds a finished look.
- Measuring Tape: Ensures accurate measurements for cutting and assembly.
- Circular Saw: Cuts lumber and plywood to the required sizes.
- Drill: Used for making holes and driving screws.
- Level: Ensures the awning is even and properly aligned.
- Hammer: Useful for driving nails and securing parts.
- Safety Gear: Includes gloves, safety glasses, and ear protection.
- Ladder: Necessary for reaching higher areas during installation.
- Caulk and Caulking Gun: Seals gaps to prevent water leakage.
- Pencil: Marks measurements and cutting lines on materials.
Required Skills and Time Commitment
Skill Level: Intermediate
Estimated Time Required: 6-8 hours
- Gather Materials: 1 hour
- Measure and Cut Wood: 1-2 hours
- Assemble Frame: 1-2 hours
- Attach Awning to Garage: 1 hour
- Paint or Stain: 1-2 hours
Detailed Step-by-Step Guide
Gather Materials and Tools
- Lumber (2x4s and 4x4s)
- Plywood
- Galvanized screws
- Metal brackets
- Corrugated metal sheets
- Drill
- Saw
- Measuring tape
- Level
- Ladder
- Safety gear (gloves, goggles)
Measure and Cut Lumber
- Measure the width of the garage door.
- Cut two 2x4s to match this width.
- Cut four 4x4 posts to desired height for the awning.
Build the Frame
- Attach the 2x4s to the top of the 4x4 posts using metal brackets.
- Ensure the frame is level before securing.
Attach Plywood
- Cut plywood to fit the frame.
- Secure plywood to the frame using galvanized screws.
Install Corrugated Metal Sheets
- Cut metal sheets to fit the plywood.
- Attach metal sheets to plywood using screws.
Mount the Awning
- Position the awning above the garage door.
- Secure the awning to the garage wall using metal brackets and screws.
- Ensure the awning is level and stable.
Seal and Paint
- Apply sealant to all joints to prevent water leakage.
- Paint or stain the wood to protect against weather.
Final Check
- Inspect the awning for stability.
- Make any necessary adjustments to ensure safety.
Helpful Tips and Tricks
Measure Twice, Cut Once: Always double-check measurements before cutting materials. This ensures everything fits perfectly.
Use Treated Lumber: For outdoor projects, use pressure-treated wood to prevent rot and insect damage.
Pre-drill Holes: Pre-drill holes for screws to avoid splitting the wood.
Level and Square: Ensure the frame is level and square before securing it. This prevents future alignment issues.
Weatherproofing: Apply a weatherproof sealant or paint to protect the awning from the elements.
Secure Anchors: Use heavy-duty anchors to attach the awning to the garage wall. This ensures stability and safety.
Angle for Drainage: Build the awning with a slight angle to allow water to run off, preventing pooling.
Use a Tarp or Polycarbonate Sheets: For the roof, consider using a durable tarp or polycarbonate sheets. Both materials are weather-resistant and easy to install.
Safety Gear: Always wear safety goggles, gloves, and a dust mask when cutting or drilling.
Common Mistakes to Avoid:
Incorrect Measurements: Misjudging measurements can lead to wasted materials and a poor fit.
Ignoring Permits: Some areas require permits for exterior structures. Check local regulations before starting.
Weak Fasteners: Using insufficient fasteners can make the awning unstable. Opt for heavy-duty screws and bolts.
Skipping Weatherproofing: Failing to weatherproof can lead to premature wear and damage.
Alternatives for Materials or Methods:
Metal Frame: Instead of wood, consider using a metal frame for added durability.
Canvas Cover: A canvas cover can be an alternative to polycarbonate sheets, offering a different aesthetic.
Adjustable Brackets: Use adjustable brackets for easier installation and future adjustments.
Solar Panels: Incorporate solar panels into the awning for an eco-friendly energy source.
Budgeting Your Project
Lumber: $50-$100. You need 2x4s and plywood.
Brackets and Screws: $20-$30. Metal brackets for support and screws to hold everything together.
Paint or Stain: $15-$25. Protects the wood from weather.
Waterproof Fabric or Roofing Material: $30-$60. Keeps rain off.
Saw: $30-$50. A hand saw or circular saw for cutting wood.
Drill: $40-$60. For making holes and driving screws.
Measuring Tape: $5-$10. Ensures accurate cuts.
Level: $10-$15. Keeps everything straight.
Safety Gear: $10-$20. Gloves and goggles for protection.
Total Cost: $210-$370.
Budget-Friendly Alternatives:
- Use recycled wood or pallets: Free or very cheap.
- Borrow tools from friends or neighbors.
- Use leftover paint from other projects.
- Look for discounted fabric or roofing material at local stores.
Creative Variations and Customizations
Materials: Instead of using wood, try metal or PVC pipes for a more modern look. Corrugated metal sheets can replace traditional shingles for a sleek, industrial style. Polycarbonate panels offer a lightweight, durable option that lets light through.
Colors: Paint the awning in bold colors like red or blue to make it stand out. For a more subtle look, use neutral tones like beige or gray. Stain the wood to highlight its natural grain, giving it a rustic charm.
Styles: Go for a classic gable design if you want something traditional. For a contemporary feel, try a flat roof or slanted design. Add decorative brackets or corbels for an extra touch of elegance.
Covering: Use fabric for a softer, more flexible covering. Canvas or outdoor fabric can be easily replaced and come in various patterns. Retractable awnings offer versatility, allowing you to extend or retract the cover as needed.
Lighting: Install LED strip lights underneath for a modern touch. Solar-powered lights can be an eco-friendly option. String lights add a cozy, inviting atmosphere.
Additional Features: Add side panels for extra protection from the elements. Gutters can help manage rainwater runoff. Planter boxes attached to the sides can add greenery and life to the structure.
Eco-Friendly Building Tips
Reclaimed wood can be a great choice for the frame. Look for old pallets or leftover lumber from other projects. Bamboo is another eco-friendly option because it grows quickly and is very strong.
For the covering, consider using recycled metal sheets or reclaimed corrugated plastic. These materials are durable and can often be found at salvage yards.
Natural stains or low-VOC paints can be used to finish the wood. These options are better for the environment and safer for you to work with.
When attaching the awning, use recycled hardware if possible. Old screws, bolts, and brackets can often be reused from other projects or found at second-hand stores.
Solar-powered lights can be added to the awning for illumination. This reduces energy consumption and adds a sustainable touch to your project.
By choosing these materials and methods, you can build a functional, eco-friendly garage door awning.
Your DIY Awning is Ready
You've done it! Your DIY garage door awning is complete. With some basic tools, a bit of patience, and a can-do attitude, you've added a functional and stylish feature to your home. This project not only saves money but also gives a sense of accomplishment. Remember, the key to any DIY project is planning and taking your time. If you ever feel stuck, don't hesitate to ask for help or look up additional resources. Enjoy the shade and protection your new awning provides. Now, every time you pull into your driveway, you'll be greeted by your own handiwork. Happy DIY-ing!
What materials do I need to build a garage door awning?
You'll need wood, metal brackets, screws, anchors, paint or stain, and fabric or corrugated metal for the cover. A saw, drill, and measuring tape will also come in handy.
How do I measure for the awning?
Measure the width of your garage door, then add a few inches on each side for extra coverage. Decide how far out you want the awning to extend from the wall.
Can I install it by myself?
Yes, but having a helper makes it easier, especially when lifting and securing the frame. Safety first!
How do I attach the awning to the garage?
Use metal brackets and screws to secure the frame to the wall above the garage door. Make sure to use anchors if attaching to brick or concrete.
What type of cover should I use?
You can use fabric, corrugated metal, or even polycarbonate sheets. Each has its own benefits, like durability or ease of installation.
How do I maintain the awning?
Regularly check for loose screws and brackets. Clean the cover with mild soap and water to remove dirt and debris.
How long will it take to build?
Depending on your skill level, it could take a weekend to complete. Plan for a few hours each day to measure, cut, assemble, and install.