
Home>Home & Furniture>Doors & Windows>How to Build a Cozy Bay Window Seat with IKEA Products
Doors & Windows
How to Build a Cozy Bay Window Seat with IKEA Products
Published: August 9, 2024
Discover how to create a cozy bay window seat using IKEA products. Follow our step-by-step guide to transform your space into a comfortable and stylish nook.
(Many of the links in this article redirect to a specific reviewed product. Your purchase of these products through affiliate links helps to generate commission for Twigandthistle.com, at no extra cost. Learn more)
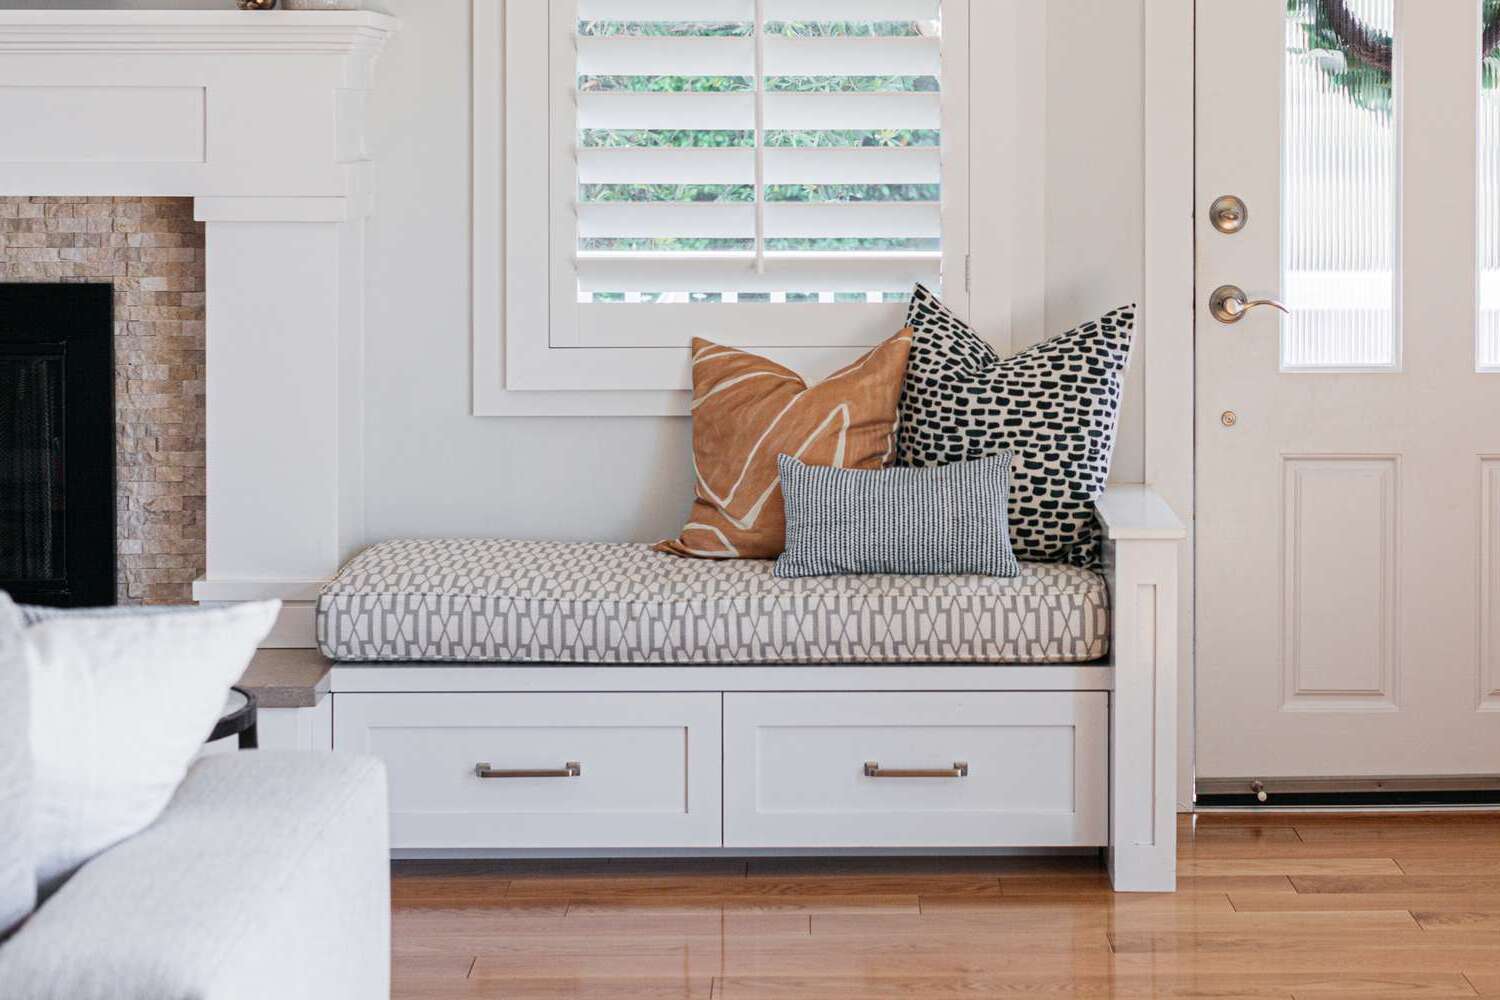
Thinking of a cozy spot to read or enjoy a cup of tea? A bay window seat can be the perfect addition. With a few IKEA products, you can create a charming and functional space that adds character to your home. This project isn't just for experienced DIYers; even beginners can tackle it with ease. We'll guide you step by step, making sure you have all the details needed to get started. By the end, you'll have a comfy nook ready for relaxation, all thanks to some clever IKEA hacks. Ready to transform that unused window space? Let's begin!
Getting Ready for Your Bay Window Seat Project
Measure the Space: Use a tape measure to get the exact dimensions of your bay window area. Write down the width, depth, and height.
Choose IKEA Products: Select IKEA items like cabinets, cushions, and storage boxes that fit your measurements. Ensure they match your room’s style.
Gather Tools: Collect necessary tools like a screwdriver, drill, level, measuring tape, and a pencil. Have safety gear like gloves and safety glasses ready.
Clear the Area: Remove any furniture or items near the bay window. Sweep or vacuum the space to ensure a clean working area.
Check for Power Outlets: Ensure there are no power outlets or cables where you plan to install the seat. If there are, consider their placement in your design.
Prepare the Workspace: Lay down a drop cloth or old sheet to protect the floor. Set up a sturdy table or workbench for assembling the IKEA products.
Read Instructions: Go through the IKEA assembly instructions for each product. Make sure you understand the steps before starting.
Safety Tips: Always wear safety glasses when drilling or cutting. Keep your workspace well-lit and ventilated. Store tools safely when not in use.
Pre-assemble Parts: If possible, pre-assemble parts of the IKEA products in a different area. This makes final assembly easier and quicker.
Mark the Wall: Use a pencil to mark where the seat will be attached to the wall. Ensure marks are level and aligned with your measurements.
Double-check Measurements: Before drilling or attaching anything, double-check all measurements to avoid mistakes.
Plan for Storage: If your seat includes storage, decide how you will organize items. Consider adding baskets or bins for a tidy look.
Materials and Tools Needed for Your Cozy Nook
IKEA Storage Units: These will form the base of the window seat. Choose units that fit the dimensions of your bay window.
Cushions: For comfort, select cushions that match the size of the storage units. IKEA offers a variety of options.
Plywood: Use this to create a sturdy top for the seat. Ensure it’s cut to the exact size of the storage units.
Foam Padding: Adds extra comfort to the seat. Cut it to match the plywood dimensions.
Fabric: Choose a durable fabric to cover the foam padding. This will give the seat a finished look.
Screws and Brackets: Secure the plywood to the storage units using screws and brackets. This ensures stability.
Measuring Tape: Essential for accurate measurements of the window area and materials.
Saw: Needed to cut the plywood and foam padding to the correct size.
Staple Gun: Use this to attach the fabric to the foam and plywood.
Drill: Required for making holes and securing screws.
Sandpaper: Smooth out any rough edges on the plywood.
Paint or Stain: Optional, but can be used to match the plywood to your room’s decor.
Level: Ensures everything is even and properly aligned.
Pencil: For marking measurements and cutting lines.
Safety Gear: Includes gloves, goggles, and a dust mask to protect while cutting and sanding.
Skill Level and Time Required for This DIY
Skill Level: Intermediate
Time Required: Approximately 6-8 hours
Steps:
- Measure the Space: 1 hour
- Purchase IKEA Products: 1-2 hours
- Assemble IKEA Cabinets: 2-3 hours
- Install Cabinets: 1 hour
- Add Cushions and Decor: 1 hour
Step-by-Step Guide to Building a Bay Window Seat
Measure the Space
- Use a tape measure to get the dimensions of your bay window area.
- Write down the width, depth, and height.
Choose IKEA Cabinets
- Select IKEA base cabinets that fit your measurements. METOD or SEKTION cabinets work well.
- Ensure the cabinets' height matches the desired seat height.
Assemble the Cabinets
- Follow IKEA's instructions to put together the cabinets.
- Use a screwdriver and any provided tools.
Position the Cabinets
- Place the assembled cabinets in the bay window area.
- Ensure they are level and aligned.
Secure the Cabinets
- Use brackets to attach the cabinets to the wall for stability.
- Drill pilot holes and screw the brackets into place.
Add a Seat Base
- Cut a piece of plywood to fit the top of the cabinets.
- Secure the plywood to the cabinets with screws.
Cushion the Seat
- Measure the plywood base and cut foam to fit.
- Cover the foam with fabric, using a staple gun to secure it underneath.
Decorate
- Add throw pillows and a cozy blanket.
- Place decorative items on the window sill.
Enjoy Your New Seat
- Sit back and relax in your new cozy bay window seat.
Tips and Tricks for a Perfect Bay Window Seat
Measure your bay window area carefully. Accurate measurements ensure a perfect fit. Use IKEA kitchen cabinets as the base. They are sturdy and come in various sizes. Secure the cabinets to the wall for stability.
Add a plywood top to create a seat. Cut it to match the cabinet dimensions. Sand the edges to avoid splinters. Use foam padding and fabric to make a comfortable cushion. Staple the fabric tightly around the foam and plywood.
Install hinges on the plywood top if you want storage inside the cabinets. This makes it easy to lift the seat and access the space below. Paint or stain the cabinets to match your room decor.
Common mistakes to avoid: Not measuring correctly, which can lead to gaps or an uneven seat. Using thin plywood, which can sag over time. Forgetting to secure the cabinets, making the seat unstable.
Alternatives: Instead of kitchen cabinets, use IKEA bookshelves for a different look. For the cushion, consider using a pre-made bench cushion if DIY isn't your thing.
Estimating the Cost of Your Bay Window Seat
Materials:
- IKEA Kallax Shelving Unit (x2): $70 each, total $140
- IKEA Kallax Insert with Door (x4): $15 each, total $60
- Foam Cushion: $50
- Fabric for Cushion Cover: $20
- Wood for Trim and Base: $30
- Paint or Stain: $15
- Screws and Nails: $10
Tools:
- Drill: $40
- Screwdriver Set: $15
- Measuring Tape: $5
- Saw: $30
- Paintbrushes: $10
- Staple Gun: $15
Total Cost:
- Materials: $325
- Tools: $115
Grand Total: $440
Budget-Friendly Alternatives:
- Second-hand Shelving Units: $50 each, total $100
- DIY Cushion with Old Pillows: $0
- Repurpose Old Fabric: $0
- Borrow Tools from Friends or Family: $0
Adjusted Total Cost: $140
Creative Variations and Customizations
Alternative Materials: Instead of using IKEA cabinets, try using wooden crates or repurposed bookshelves. These can add a rustic or vintage feel. For the seat cushion, consider using memory foam or recycled foam for added comfort.
Colors: Paint the cabinets in pastel shades for a soft, cozy look. For a modern touch, use bold colors like navy blue or emerald green. If you prefer a minimalist style, stick to neutral tones like white, beige, or gray.
Styles: Add decorative molding to the edges of the seat for a more elegant look. Use fabric with patterns like stripes, florals, or geometric designs for the cushion cover. For a bohemian vibe, incorporate macramé pillows and woven throws.
Storage Options: Install pull-out drawers or baskets under the seat for hidden storage. Use open shelves to display books, plants, or decorative items. Add hooks on the sides for hanging blankets or bags.
Lighting: Attach LED strip lights under the seat for a cozy glow. Place a floor lamp or table lamp nearby for additional lighting. Consider installing a reading light on the wall for nighttime reading.
Accessories: Add throw pillows in various sizes and textures for extra comfort. Use a plush rug in front of the seat to create a warm, inviting space. Hang curtains or drapes around the window for added privacy and style.
Eco-Friendly Tips for Your DIY Project
Repurpose old IKEA furniture like bookshelves or cabinets for the base. Use eco-friendly paint or stain to refresh the look. Opt for sustainable wood or bamboo for any additional framing. Choose organic cotton or recycled fabric for cushions and pillows. Add second-hand or vintage accessories to complete the cozy feel. Install energy-efficient windows to enhance the space's sustainability. Consider using natural light as much as possible to reduce electricity use. Incorporate plants to improve air quality and add a touch of nature.
Your Cozy Bay Window Seat Awaits
You've got all the steps to create a cozy bay window seat using IKEA products. From measuring your space to picking the right cushions and storage solutions, everything's laid out. Just gather your tools, follow the instructions, and you'll have a comfy spot in no time.
Remember, the key is to customize it to your liking. Add some throw pillows, maybe a blanket, and you've got a perfect nook for reading or just relaxing. Don't stress if things don't go perfectly; part of the fun is making it your own.
So, roll up your sleeves, get started, and soon you'll be enjoying your new favorite spot in the house. Happy building!
What IKEA products do I need to build a bay window seat?
You'll need a few KALLAX units, some cushions, and fabric for the seat cover. Also, grab some brackets and screws for securing everything.
How do I measure my bay window for the seat?
Measure the width and depth of the bay window area. Make sure to account for any trim or molding that might get in the way.
Can I customize the seat height?
Absolutely! Use different KALLAX unit sizes or add legs to adjust the height. Just make sure it's comfortable for sitting.
How do I secure the KALLAX units together?
Use brackets and screws to attach the units. This keeps them from shifting around. You can also use wood glue for extra stability.
What kind of fabric works best for the seat cover?
Choose a durable and washable fabric. Canvas or upholstery fabric works great. Make sure it matches your room's decor.
How do I make the seat cushion?
Cut a piece of foam to fit the top of the KALLAX units. Cover it with your chosen fabric, using a staple gun to secure it underneath.
Can I add storage to my bay window seat?
Yes! The KALLAX units have built-in cubbies perfect for storage. Use baskets or bins to keep things organized.