
Home>Home & Furniture>Bedroom>Small Closet Organization: DIY Ideas
Bedroom
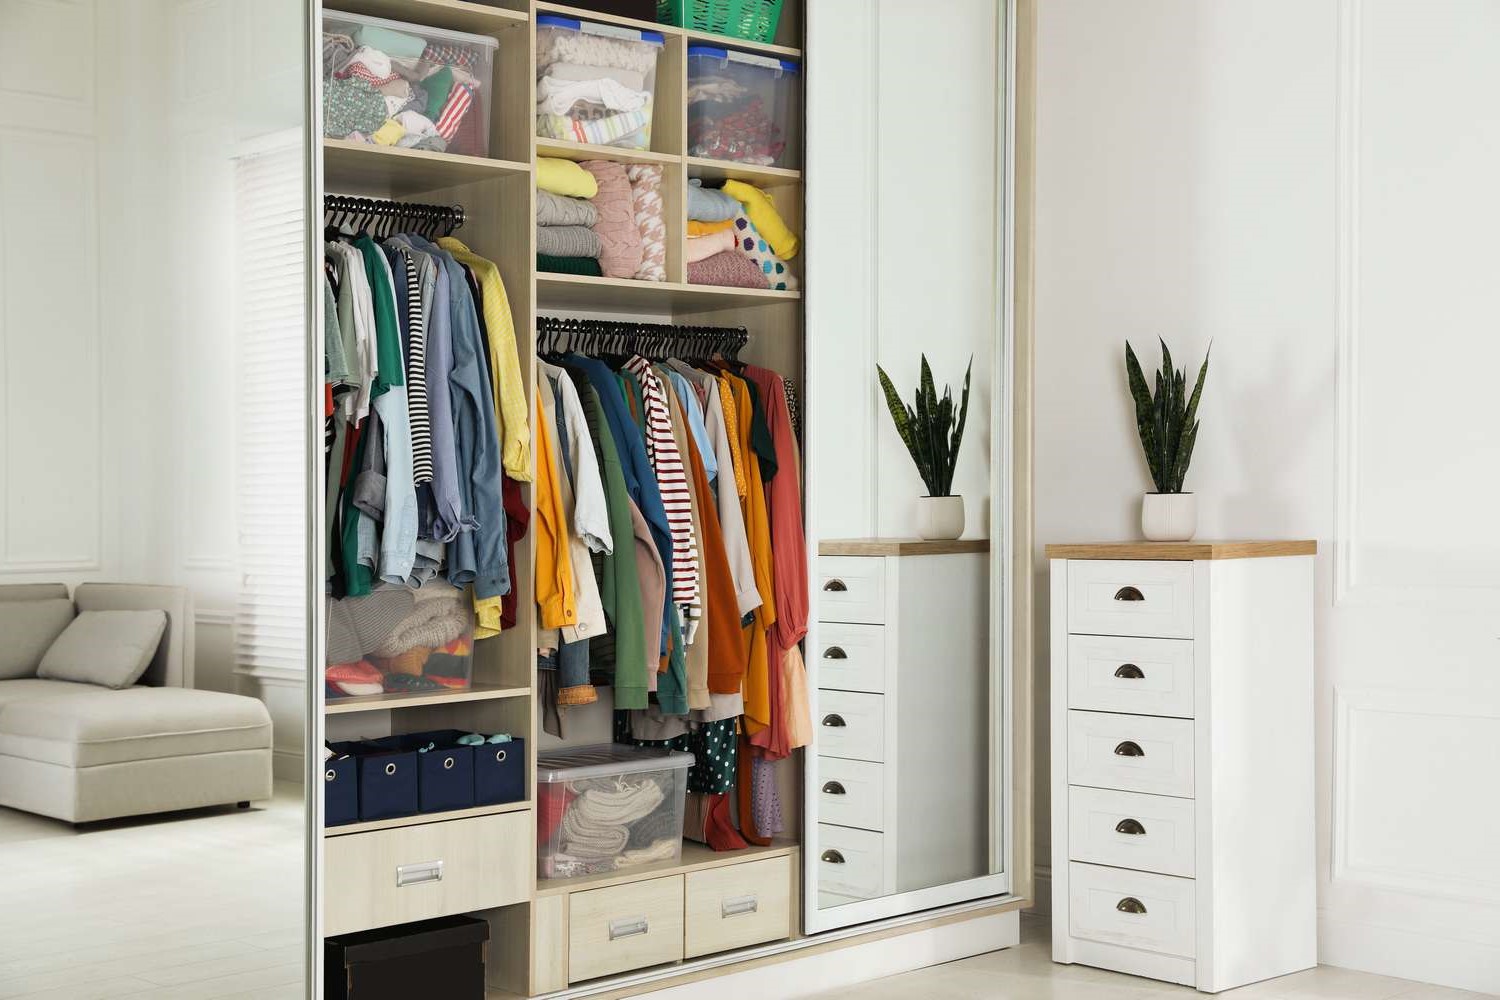
Small Closet Organization: DIY Ideas
Published: July 9, 2024
Discover DIY small closet organization ideas to maximize space and keep your wardrobe tidy. Transform your closet with these practical tips and creative solutions!
(Many of the links in this article redirect to a specific reviewed product. Your purchase of these products through affiliate links helps to generate commission for Twigandthistle.com, at no extra cost. Learn more)
Small closets can feel like a challenge, but with the right DIY ideas, you can maximize space and improve functionality. Organizing a small closet can make your daily routine smoother and keep your clothes, shoes, and accessories easy to find. Whether you're dealing with a tiny bedroom closet, a hall storage space, or a compact entryway, creative solutions can help you make the most of every inch. From clever shelving to smart use of hooks and bins, you'll find that even the smallest spaces can be transformed into organized havens. Let's explore some simple yet effective DIY methods to achieve this.
Getting Ready for Your Project
Empty the Closet: Take everything out. This helps you see what you have and what you need to organize.
Sort Items: Make piles for keep, donate, and trash. This reduces clutter and makes organizing easier.
Clean the Space: Wipe down shelves, vacuum the floor, and dust corners. A clean space makes for a better-organized closet.
Measure the Closet: Get the dimensions of your closet. This helps you know what storage solutions will fit.
Plan Your Layout: Decide where you want to place shelves, bins, and hooks. Sketching a simple layout can help.
Gather Supplies: Collect bins, baskets, hangers, and any tools you need. Having everything ready saves time.
Set Up Your Workspace: Lay out tools and supplies in an easy-to-reach area. This keeps you organized while you work.
Safety Tips: Wear gloves to protect your hands. Use a step stool for high places. Keep tools like hammers and drills away from kids.
Install Storage Solutions: Follow your layout plan. Install shelves, hooks, and rods securely.
Organize Items: Place items back in the closet according to your plan. Use bins for small items and hangers for clothes.
Label Everything: Label bins and shelves. This helps you find things quickly and keeps the closet organized.
Gather Your Supplies
Storage Bins: Use these to group similar items together. They help keep everything neat and easy to find.
Hangers: Choose slim, non-slip hangers to maximize space and keep clothes from falling off.
Shelf Dividers: These keep stacks of clothes or accessories from toppling over. They help maintain order on shelves.
Hooks: Install hooks on walls or doors to hang bags, scarves, or belts. They make use of vertical space.
Over-the-Door Organizers: Perfect for shoes, accessories, or small items. They utilize often-overlooked door space.
Drawer Organizers: These keep small items like socks, underwear, or jewelry sorted and easy to find.
Labels: Label bins, shelves, and drawers to quickly identify where everything belongs. This helps maintain organization.
Measuring Tape: Measure your closet space to ensure everything fits perfectly. Accurate measurements prevent buying items that are too big or small.
Screwdriver: Needed for installing hooks, shelves, or any other hardware. A basic tool for any DIY project.
Drill: Useful for making holes for screws or anchors. It speeds up the installation process.
Level: Ensures shelves and hooks are installed straight. This keeps everything looking neat and professional.
Step Stool: Helps reach higher areas of the closet safely. Essential for installing items or accessing top shelves.
Closet Rod: Adds extra hanging space. Great for doubling up on hanging clothes.
Fabric Bins: Soft storage options for delicate items. They can be placed on shelves or inside drawers.
Vacuum Storage Bags: Compress bulky items like winter coats or blankets. They save space by reducing the volume of stored items.
Skill Level and Time Needed
Skill Level: Beginner
Time Required: 2-4 hours
- Declutter: 30 minutes
- Install Shelves: 1 hour
- Add Hooks: 30 minutes
- Organize Items: 1 hour
- Label Bins: 30 minutes
How to Organize Your Closet
Empty the Closet
- Remove all items.
- Sort them into categories: keep, donate, or discard.
Clean the Space
- Dust shelves.
- Vacuum or sweep the floor.
- Wipe down walls and surfaces.
Measure the Closet
- Measure height, width, and depth.
- Note any odd angles or features.
Plan the Layout
- Sketch a simple design.
- Decide where to place shelves, rods, and bins.
Install Shelving
- Use a level to ensure shelves are straight.
- Secure shelves with brackets or supports.
Add Hanging Rods
- Install rods at different heights for shirts, pants, and dresses.
- Use a stud finder to secure rods to the wall.
Incorporate Storage Bins
- Place bins on shelves for smaller items.
- Label bins for easy identification.
Use Hooks and Racks
- Install hooks on the inside of doors for bags or scarves.
- Add a shoe rack at the bottom.
Organize by Category
- Group similar items together.
- Use dividers for drawers or shelves to keep items separated.
Maintain the System
- Regularly declutter.
- Adjust storage solutions as needed.
Helpful Hints for Success
Use vertical space: Install shelves or hooks higher up to maximize storage.
Double up hangers: Use soda can tabs to hang one hanger from another, doubling your hanging space.
Drawer dividers: Use cardboard or plastic dividers to keep small items like socks and accessories organized.
Over-the-door organizers: Hang shoe or accessory organizers on the inside of the closet door for extra storage.
Clear bins: Store seasonal items in clear bins so you can easily see what's inside without rummaging.
Label everything: Use labels to mark boxes and bins, making it easier to find items quickly.
Common mistakes to avoid: Overloading shelves can cause them to sag or break. Avoid using flimsy hangers that can bend under weight. Don't forget to measure your closet space before buying organizers to ensure they fit.
Alternatives for materials or methods: Instead of buying expensive organizers, repurpose items like old shoe boxes or baskets. Use tension rods to create additional hanging space for scarves or belts.
Budgeting for Your DIY Project
Shelving Units: $50-$100. Look for adjustable wire shelves or wooden shelves.
Hanging Rods: $10-$20. Metal rods are durable and affordable.
Storage Bins: $20-$40. Plastic bins or fabric cubes work well.
Hooks and Hangers: $10-$30. Over-the-door hooks and non-slip hangers are useful.
Drawer Organizers: $15-$25. Plastic or fabric dividers help keep things tidy.
Tools: $30-$50. Basic tools like a drill, screwdriver, and level.
Total Cost: $135-$265.
Budget-Friendly Alternatives:
- Shelving Units: Use sturdy cardboard boxes covered in fabric.
- Hanging Rods: Repurpose a broomstick or curtain rod.
- Storage Bins: Use old shoe boxes or baskets.
- Hooks and Hangers: Use adhesive hooks or make your own from wire.
- Drawer Organizers: Use small cardboard boxes or cut-up cereal boxes.
- Tools: Borrow tools from friends or family.
Personalize Your Closet Space
Shelving: Use wooden planks for a rustic look or metal shelves for a modern touch. Paint them in bright colors to add a pop of fun or stick to neutral tones for a classic feel.
Hanging Rods: Install adjustable rods to maximize space. Opt for brass or copper rods for a chic vibe, or go with stainless steel for a sleek, contemporary look.
Storage Bins: Choose woven baskets for a natural, earthy feel. Use clear plastic bins to easily see contents or fabric bins in various patterns for a personalized touch.
Hooks and Racks: Add decorative hooks for accessories. Use over-the-door racks for shoes or bags. Consider magnetic strips for small metal items like keys or jewelry.
Lighting: Install LED strip lights for a modern glow. Use battery-operated puck lights for easy installation. Choose warm white bulbs for a cozy atmosphere or cool white for a clean, bright look.
Mirrors: Place a full-length mirror on the door to save space. Use mirrored tiles on the back wall to make the closet feel larger. Consider a framed mirror for added style.
Drawer Units: Incorporate stackable drawers for flexibility. Opt for wooden drawers for a traditional look or acrylic drawers for a minimalist approach.
Labels: Use chalkboard labels for a vintage touch. Try color-coded labels to easily identify items. Consider printed labels for a neat, uniform appearance.
Dividers: Add shelf dividers to keep items organized. Use drawer dividers for smaller items like socks or accessories. Try hanging dividers for scarves or ties.
Curtains: Replace closet doors with curtains for easy access. Choose sheer curtains for a light, airy feel or heavy drapes for a more dramatic look.
Eco-Friendly Organization Ideas
Repurpose old wooden crates or wine boxes as storage bins. Sand and paint them for a fresh look.
Use cardboard boxes from deliveries to create drawer dividers. Cut them to size and cover with fabric or decorative paper.
Transform old bed sheets or curtains into hanging organizers. Sew pockets to store shoes, scarves, or accessories.
Recycle glass jars for small items like buttons, pins, or jewelry. Label them for easy access.
Install a second-hand pegboard on the closet door. Hang belts, ties, or necklaces using hooks.
Create shelves from reclaimed wood. Attach brackets to the wall and place the wood on top for extra storage.
Utilize old magazine holders for vertical storage. Store clutches, wallets, or small bags.
Convert an unused ladder into a shoe rack. Lean it against the wall and place shoes on the rungs.
Make drawer pulls from old leather belts. Cut pieces and attach them to drawers for a unique touch.
Hang a fabric shoe organizer on the back of the door. Store not just shoes but also rolled-up t-shirts or accessories.
Your Closet, Your Way
Organizing a small closet doesn't have to be a headache. With some creativity and a few DIY tricks, you can make the most of your space. Use shelves and hooks to maximize vertical storage. Bins and baskets help keep things tidy. Don't forget about door organizers for shoes or accessories. Label everything so you know where stuff goes. Rotate seasonal clothes to keep your closet from overflowing. Remember, it's all about making your space work for you. A well-organized closet saves time and reduces stress. So grab those tools, roll up your sleeves, and get started. Your dream closet is just a few steps away.
How can I maximize space in a small closet?
Use vertical space! Install shelves or hanging organizers. Hooks on the door can hold bags or scarves. Stackable bins are great for shoes or accessories.
What should I do with clothes I rarely wear?
Store seasonal clothes in bins under the bed or on high shelves. Vacuum-sealed bags save space and keep clothes fresh.
Any tips for organizing shoes?
Try a shoe rack or hanging shoe organizer. Clear boxes let you see each pair without digging through piles. Label the boxes for easy access.
How do I keep my closet from getting cluttered again?
Regularly declutter! Every few months, go through your clothes and donate what you don't wear. Keep a donation bag handy for quick toss-ins.
What's the best way to organize accessories?
Use small bins or drawer organizers for jewelry, belts, and ties. Hooks or pegboards can display hats and bags neatly.
How can I make my closet look nicer?
Matching hangers create a uniform look. Add a small light for better visibility. A scented sachet keeps things smelling fresh.
Any hacks for storing bulky items like coats or blankets?
Use vacuum bags to compress bulky items. Store them on high shelves or under the bed. A sturdy hook can hold heavy coats without taking up rod space.