
Home>Home & Furniture>Bedroom>Creative DIY Wall Art Ideas
Bedroom
Creative DIY Wall Art Ideas
Published: July 19, 2024
Discover creative DIY wall art ideas to transform your space. From canvas paintings to unique wall hangings, find inspiration to add a personal touch to your home decor.
(Many of the links in this article redirect to a specific reviewed product. Your purchase of these products through affiliate links helps to generate commission for Twigandthistle.com, at no extra cost. Learn more)
Feeling like your walls need a bit more personality? Adding unique, homemade art can be a fun way to express yourself and make your space truly yours. Whether you enjoy painting, crafting, or repurposing old items, there’s something for every skill level. Plus, creating your own art isn't just about beautifying a room; it's a chance to experiment and get creative. With a little time and effort, you can turn blank walls into captivating displays. Buckle up, and get ready to transform those spaces with some imaginative DIY wall art projects!
Getting Ready for Your Project
Gather Supplies: Collect all materials like paint, brushes, canvas, stencils, and any decorative items. Make sure everything is within reach.
Choose a Design: Decide on the artwork you want to create. Sketch it out on paper first to visualize the final product.
Prepare Workspace: Set up a clean, well-lit area. Lay down newspapers or a drop cloth to protect surfaces from paint spills.
Safety First: Wear old clothes or an apron. Use gloves if working with strong adhesives or chemicals. Ensure proper ventilation if using spray paint.
Clean the Wall: Wipe down the wall where the art will go. Remove dust and dirt to ensure paint or adhesive sticks well.
Measure and Mark: Use a measuring tape to mark the area where the art will be placed. This helps in keeping the design centered and aligned.
Test Colors: Before painting, test colors on a small piece of paper. This ensures you’re happy with the shades and combinations.
Organize Tools: Keep all tools like scissors, rulers, and tape handy. This avoids interruptions during the creative process.
Plan for Drying: Allocate space for your artwork to dry. Ensure it’s out of reach from pets or kids.
Check Lighting: Good lighting is crucial. Make sure your workspace is well-lit to see colors and details clearly.
What You’ll Need
Canvas or Wood Panels: These serve as the base for your artwork. Choose the size that fits your wall space.
Acrylic Paints: Versatile and quick-drying, perfect for vibrant colors and easy layering.
Paint Brushes: Various sizes help with different details. Wide brushes cover large areas, while fine brushes handle intricate designs.
Painter’s Tape: Useful for creating clean lines and geometric patterns.
Stencils: Pre-cut designs that make it easy to add shapes or letters to your art.
Sponges: Great for creating texture or blending colors smoothly.
Palette: A surface to mix your paints. Can be a traditional artist's palette or even a paper plate.
Ruler and Pencil: Essential for measuring and sketching out your design before painting.
Mod Podge or Glue: Used for attaching embellishments like glitter, fabric, or paper cutouts.
Embellishments: Items like beads, buttons, or fabric scraps add a unique touch to your art.
Hanging Hardware: Hooks, nails, or adhesive strips to mount your finished piece on the wall.
Drop Cloth or Old Newspapers: Protect your workspace from paint spills and splatters.
Apron or Old Clothes: Keep your clothes clean while working on your project.
How Much Time and Skill You’ll Need
Skill Level: Beginner
Time Required: 2-4 hours
- Materials Gathering: 30 minutes
- Design Planning: 30 minutes
- Painting/Creating: 1-2 hours
- Drying Time: 1 hour
Important Keywords: Skill Level, Time Required, Beginner, Materials Gathering, Design Planning, Painting, Creating, Drying Time
Follow These Steps
Gather Materials
- Canvas or wood panels
- Paints (acrylic or watercolor)
- Brushes
- Painter's tape
- Stencils
- Glue
- Scissors
- Decorative paper or fabric
- Picture hangers
Choose a Design
- Sketch your idea on paper first.
- Decide on colors and patterns.
Prepare the Surface
- Clean the canvas or wood panel.
- Apply a base coat of paint if needed. Let it dry.
Tape and Stencil
- Use painter's tape to create geometric shapes or patterns.
- Place stencils where you want specific designs.
Paint
- Fill in taped areas or stencils with your chosen colors.
- Use different brush sizes for varied effects.
- Let each layer dry before adding more.
Add Texture
- Glue decorative paper or fabric pieces onto the surface.
- Use textured paint or sponges for added depth.
Remove Tape and Stencils
- Carefully peel off tape and stencils once the paint is dry.
- Touch up any areas if needed.
Final Touches
- Add small details or highlights with a fine brush.
- Sign your artwork.
Frame or Mount
- Attach picture hangers to the back.
- Frame the piece if desired.
Display
- Hang your artwork on the wall.
- Arrange other pieces around it for a gallery effect.
Helpful Hints
Plan your design before starting. Sketch ideas on paper to visualize the final look. Use painter's tape for clean lines when painting geometric shapes. Repurpose old materials like fabric scraps, buttons, or wood pieces for unique textures. Layer different elements such as paint, stencils, and decals to add depth. Mix and match colors but stick to a cohesive palette to avoid clashing.
Common mistakes to avoid include not measuring your wall space accurately, which can lead to designs that are too big or small. Skipping the primer when painting can result in uneven color. Overloading the wall with too many elements can make it look cluttered. Using low-quality materials can make your art look cheap.
Alternatives for materials or methods include using washi tape instead of paint for temporary designs. Fabric wall hangings can be a great alternative to framed art. Printable art from online sources can be a quick and easy option. Vinyl decals offer a clean, professional look without the mess of paint.
Budgeting for Your Art
Canvas: $10-$20 each, depending on size. Acrylic Paints: $15-$30 for a basic set. Brushes: $10 for a variety pack. Painter's Tape: $5. Stencils: $10 for a set. Mod Podge: $8. Picture Hanging Kit: $5.
Total Cost: $63-$88.
Budget-Friendly Alternatives:
- Use cardboard or poster board instead of canvas: $5.
- Craft paints instead of acrylics: $10.
- Old sponges or makeup brushes instead of buying new brushes: Free if you have them.
- Homemade stencils from paper: Free.
- White glue mixed with water instead of Mod Podge: $2.
Budget Total: $22.
Make It Your Own
Alternative Materials: Use wooden pallets instead of canvas for a rustic look. Try metal sheets for an industrial vibe. Fabric scraps can create a soft, textured piece.
Colors: Experiment with bold, bright colors for a lively feel. Use pastels for a calming effect. Monochrome schemes can add a modern touch.
Styles: Create a collage using magazine cutouts or photos. Try abstract painting with splashes and swirls. Use stencils for precise, clean designs.
Themes: Go for a nature theme with leaves, flowers, or animals. Choose a geometric theme with shapes and patterns. Opt for a vintage theme using old maps or retro prints.
Techniques: Use decoupage to layer paper cutouts. Try string art by wrapping thread around nails. Experiment with mixed media by combining paint, fabric, and found objects.
Frames: Use driftwood or reclaimed wood for a natural frame. Try metal piping for an industrial look. Paint old frames in bright colors for a fun twist.
Lighting: Add LED strips behind the art for a backlit effect. Use fairy lights to create a magical glow. Install spotlights to highlight specific areas.
Textures: Incorporate 3D elements like beads or buttons. Use textured paint for a raised effect. Add fabric pieces for a soft touch.
Personalization: Include family photos or personal mementos. Use initials or names for a custom touch. Add quotes or sayings that inspire you.
Eco-Friendly Ideas
Reclaimed Wood: Use old pallets or barn wood to create rustic wall art. Sand and paint them for a fresh look.
Fabric Scraps: Turn leftover fabric into a colorful collage. Stretch pieces over a canvas or frame for a textured piece.
Old Magazines: Cut out interesting images or patterns. Arrange them into a mosaic or collage on a canvas or board.
Bottle Caps: Collect caps from bottles. Paint them and arrange them into a fun design or pattern.
Cardboard: Use cardboard from old boxes. Cut into shapes or letters, then paint or decorate them.
Broken Jewelry: Repurpose old or broken jewelry. Glue pieces onto a canvas to create a sparkling, unique piece.
Cork: Save corks from wine bottles. Cut them in half and arrange them into a pattern or shape on a board.
Old Maps: Use outdated maps. Cut them into shapes or letters, then frame or glue them onto a canvas.
Buttons: Gather buttons from old clothes. Arrange them into a design on a canvas or board.
Plastic Bottles: Cut bottles into shapes. Paint them and arrange them into a 3D wall art piece.
Newspaper: Roll strips of newspaper into coils. Glue them together to form a design or pattern.
Egg Cartons: Cut out the cups from egg cartons. Paint them and arrange them into a floral design.
Tin Cans: Flatten and paint old tin cans. Arrange them into a unique, industrial-style wall art piece.
Old CDs: Break old CDs into pieces. Arrange them into a mosaic on a canvas or board.
Scrap Metal: Use leftover metal pieces. Weld or glue them into a unique, industrial art piece.
Driftwood: Collect driftwood from the beach. Arrange it into a natural, rustic wall art piece.
Paper Rolls: Save toilet paper or paper towel rolls. Cut them into rings and arrange them into a design.
Glass Jars: Paint old glass jars. Hang them on the wall as vases or candle holders.
Shells: Collect shells from the beach. Glue them onto a canvas or board to create a coastal-themed piece.
Old Books: Use pages from old books. Arrange them into a collage or cut them into shapes for a literary-themed art piece.
Your Next DIY Adventure Awaits
Creating DIY wall art isn't just about saving money; it's about adding a personal touch to your space. With a bit of creativity and some basic materials, you can transform any room. Whether you're into painting, crafting, or upcycling, there's a project out there for you. Remember, the key is to have fun and let your imagination run wild. Don't be afraid to experiment with colors, textures, and patterns. Each piece you create will be a unique reflection of your style and personality. So grab those supplies, roll up your sleeves, and get started on your next DIY adventure. Your walls will thank you, and you'll have a blast in the process. Happy crafting!
How can I create abstract wall art at home?
Use acrylic paints on a large canvas. Pour different colors, then tilt the canvas to let the paint flow and mix. Let it dry, and you've got a unique piece!
What materials do I need for a string art project?
You'll need a wooden board, nails, a hammer, and colored string. Outline your design with nails, then wrap the string around them to form patterns.
How do I make a photo collage for my wall?
Print your favorite photos in various sizes. Arrange them on a large piece of poster board or directly on the wall using double-sided tape or photo corners.
Can I use recycled materials for wall art?
Absolutely! Items like old magazines, bottle caps, and scrap fabric can be transformed into beautiful art. Just get creative with how you arrange and attach them.
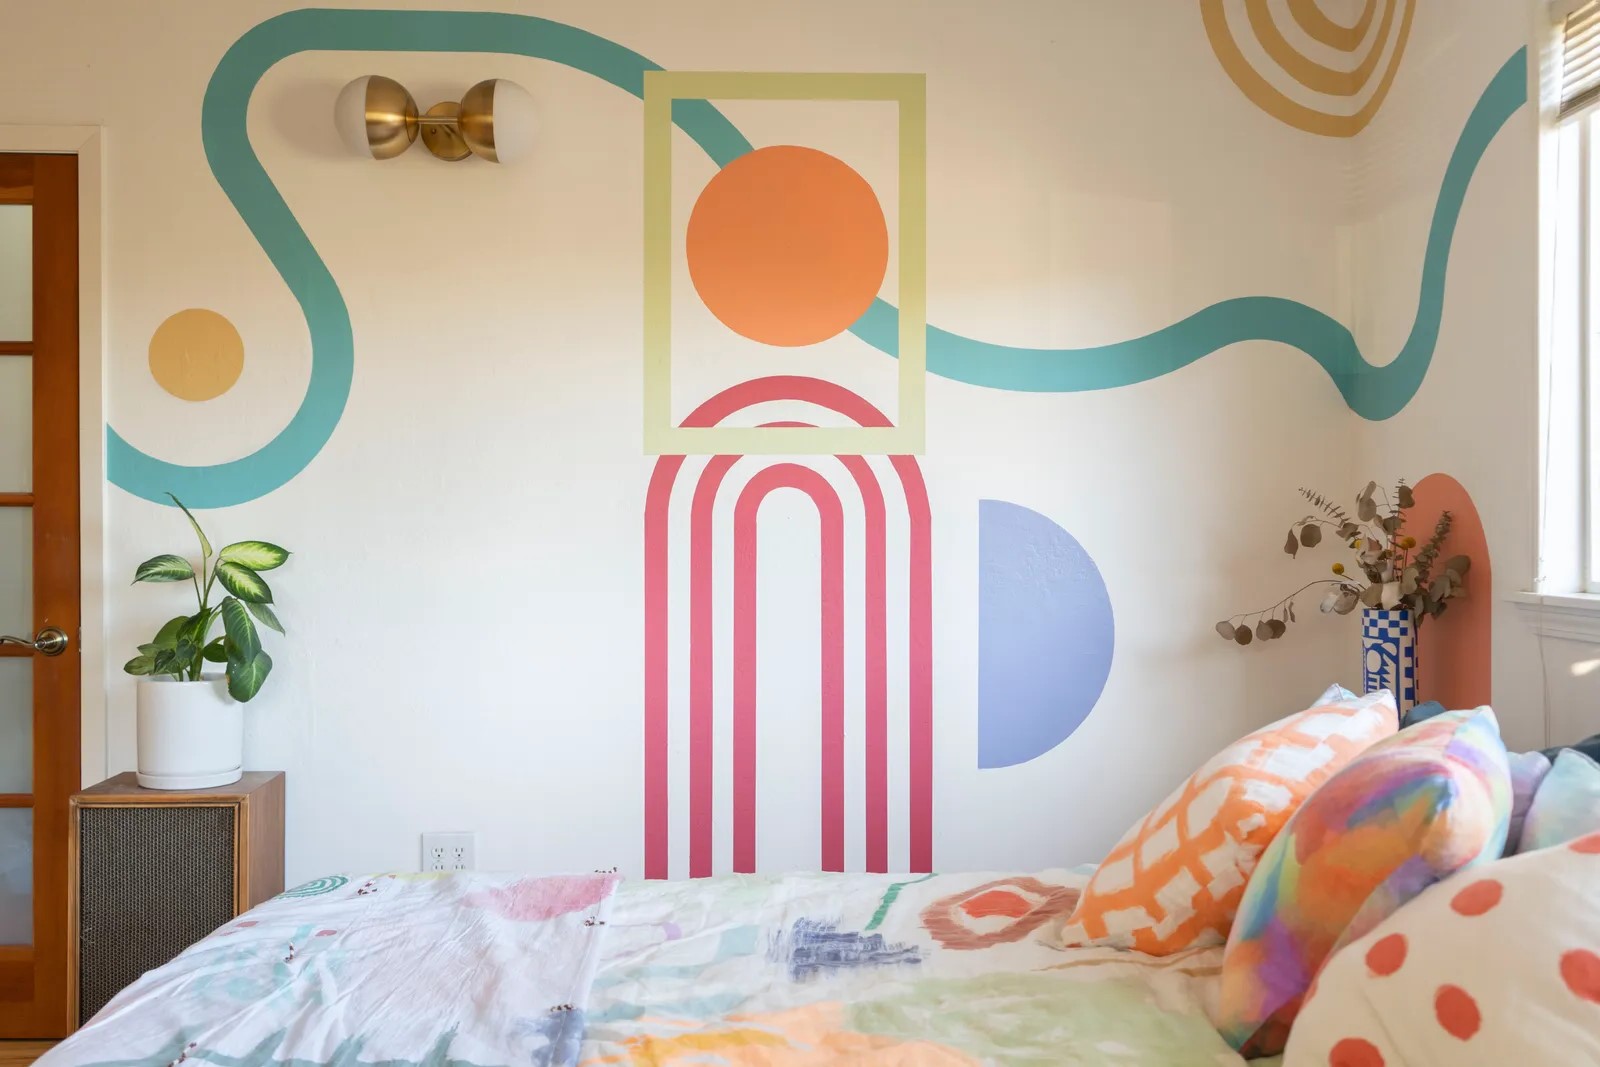
What's an easy way to create geometric wall art?
Use painter's tape to mark off sections on a canvas or wall. Paint each section a different color, then remove the tape to reveal crisp, geometric shapes.
How can I make 3D wall art?
Try using paper or cardboard to cut out shapes. Fold or layer them to create depth, then attach them to a canvas or directly to the wall with glue or tape.
What's a quick way to add texture to wall art?
Mix sand or coffee grounds into your paint before applying it to the canvas. This will give your art a unique, textured finish.