
Home>Home & Furniture>Bathroom>DIY Shiplap Bathroom Renovation
Bathroom
DIY Shiplap Bathroom Renovation
Published: July 16, 2024
Transform your bathroom with a DIY shiplap renovation! Discover step-by-step instructions, tips, and tools needed to create a stylish and modern bathroom space.
(Many of the links in this article redirect to a specific reviewed product. Your purchase of these products through affiliate links helps to generate commission for Twigandthistle.com, at no extra cost. Learn more)
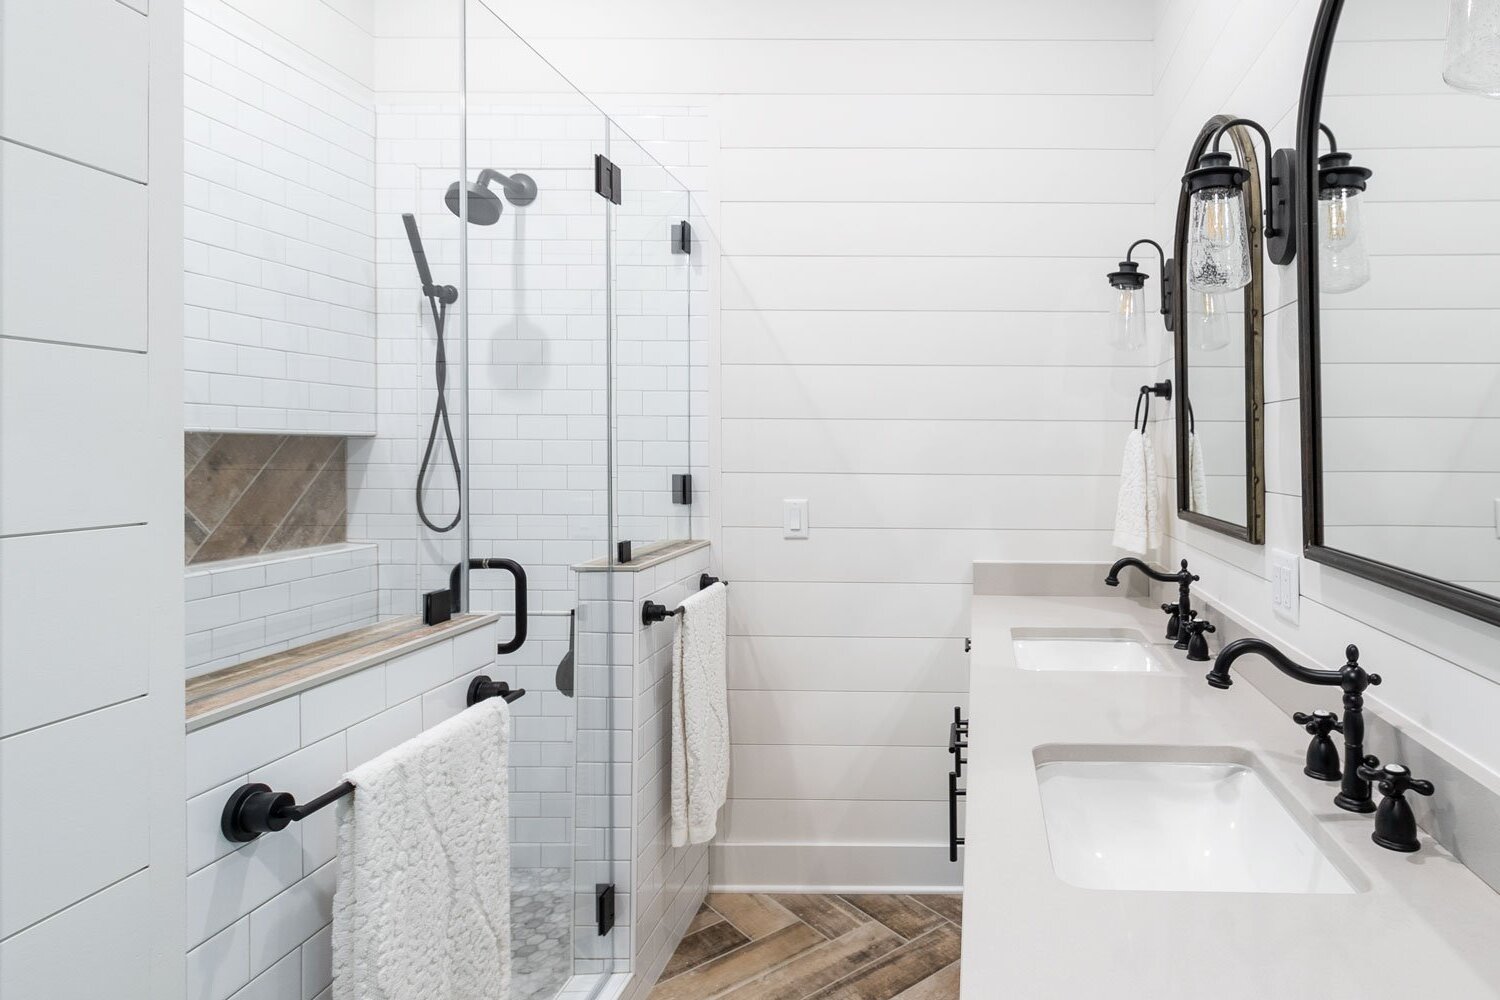
Thinking of giving your bathroom a fresh look? Shiplap might be just the thing you need. This DIY project can transform your space with minimal effort and cost. Shiplap involves installing wooden boards horizontally on your walls, creating a charming, rustic vibe. It's a favorite among home improvement enthusiasts because it's easy to install and adds character. With some basic tools and materials, even beginners can tackle this project. Get ready to learn how to measure, cut, and install shiplap like a pro. Make your bathroom not just functional but also a place with personality. Let’s dive into it!
Getting Ready for Your Project
Gather Materials: Get shiplap boards, measuring tape, level, saw, nails, hammer, caulk, paint, and paintbrushes.
Safety Gear: Wear safety goggles, gloves, and a dust mask. Keep a first aid kit nearby.
Clear the Area: Remove all furniture, decorations, and fixtures from the bathroom. Cover any remaining items with plastic sheets.
Measure the Walls: Use a measuring tape to measure the height and width of the walls. Mark these measurements on the shiplap boards.
Cut the Boards: Use a saw to cut the shiplap boards to the required lengths. Sand the edges to smooth them out.
Locate Studs: Use a stud finder to locate and mark the studs on the wall. This ensures the shiplap boards are securely attached.
Prep the Walls: Clean the walls with a damp cloth to remove dust and grime. Let them dry completely.
Install the Boards: Start at the bottom of the wall. Use a level to ensure the first board is straight. Nail the board into the studs. Continue this process, working your way up the wall.
Fill Gaps: Use caulk to fill any gaps between the boards and around the edges.
Paint: Once the caulk is dry, paint the shiplap boards with your chosen color. Apply multiple coats if necessary.
Clean Up: Remove any protective coverings and clean up the workspace. Reinstall any fixtures and decorations.
Essential Materials and Tools
- Shiplap Boards: These wooden planks create the classic shiplap look. Choose moisture-resistant wood for bathroom use.
- Measuring Tape: Essential for measuring walls and cutting boards to the correct length.
- Level: Ensures your shiplap boards are straight and even.
- Pencil: Used for marking measurements and cutting lines on the boards.
- Saw: A miter saw or circular saw works best for cutting shiplap boards to size.
- Nail Gun: Speeds up the process of attaching boards to the wall. Alternatively, use a hammer and nails.
- Nails: Finishing nails are ideal for securing shiplap boards without leaving noticeable marks.
- Stud Finder: Helps locate wall studs for securely attaching shiplap boards.
- Adhesive: Construction adhesive provides extra hold, especially in moisture-prone areas.
- Caulk: Fills gaps between boards and around edges to prevent moisture from seeping in.
- Paint or Stain: Adds color and protects the wood. Choose a water-resistant variety for bathrooms.
- Paintbrush or Roller: Needed for applying paint or stain evenly on the shiplap boards.
- Sandpaper: Smooths rough edges and surfaces before painting or staining.
- Drop Cloth: Protects floors and fixtures from paint drips and sawdust.
- Safety Gear: Includes safety glasses, ear protection, and a dust mask to protect yourself while cutting and installing shiplap.
Required Skills and Time Commitment
Skill Level: Intermediate
Estimated Time Required: 2-3 days
Preparation: 4-6 hours
- Measure walls
- Purchase materials
- Gather tools
Wall Preparation: 2-4 hours
- Remove fixtures
- Clean walls
- Apply primer
Cutting and Installing Shiplap: 8-12 hours
- Cut boards to size
- Attach boards to walls
- Ensure level alignment
Finishing Touches: 4-6 hours
- Fill nail holes
- Sand rough edges
- Apply paint or sealant
Reinstall Fixtures: 2-3 hours
- Reattach fixtures
- Clean up workspace
Detailed Steps to Follow
Gather Materials:
- Shiplap boards
- Measuring tape
- Level
- Saw
- Nails or screws
- Nail gun or screwdriver
- Stud finder
- Paint or stain
- Sandpaper
Prepare the Walls:
- Remove any existing wall coverings.
- Clean the walls thoroughly.
- Use a stud finder to locate and mark the studs.
Measure and Cut Shiplap:
- Measure the height and width of the wall.
- Cut shiplap boards to fit the wall dimensions using a saw.
Install the First Board:
- Start at the bottom of the wall.
- Use a level to ensure the board is straight.
- Attach the board to the wall using nails or screws, securing it into the studs.
Continue Installing Boards:
- Place the next board above the first, ensuring the groove fits snugly over the tongue of the board below.
- Repeat the process, working your way up the wall.
Cut Around Obstacles:
- Measure and cut boards to fit around outlets, light switches, or other obstacles.
- Use a jigsaw for precise cuts.
Finish the Edges:
- Cut and install trim pieces to cover any gaps at the edges or corners.
- Secure trim with nails or screws.
Sand and Paint:
- Sand the surface of the shiplap to smooth any rough edges.
- Apply paint or stain to the shiplap, allowing it to dry completely.
Clean Up:
- Remove any dust or debris from the work area.
- Reinstall any fixtures or fittings removed during preparation.
Helpful Tips and Tricks
Measure twice, cut once. Always double-check measurements before cutting your shiplap boards. This saves time and materials.
Use a stud finder. Ensure the shiplap boards are securely attached to the wall by nailing them into studs. This prevents sagging or falling.
Paint before installation. Painting shiplap boards before putting them up makes the job easier and cleaner. Touch-ups can be done after installation.
Leave a gap. Use spacers to leave a small gap between each board. This allows for wood expansion and gives a more authentic look.
Seal the edges. Apply a waterproof sealant to the edges of the shiplap boards, especially in a bathroom. This prevents water damage.
Common mistakes to avoid:
Skipping the primer. Always prime the boards before painting to ensure the paint adheres properly and lasts longer.
Ignoring the level. Use a level to ensure each board is straight. Crooked boards can ruin the entire look.
Not acclimating the wood. Let the shiplap boards sit in the bathroom for a few days before installation. This helps the wood adjust to the room's humidity.
Alternatives for materials or methods:
Peel-and-stick shiplap. For a quicker, less messy option, use peel-and-stick shiplap. It’s easier to install and remove.
PVC shiplap. Use PVC shiplap instead of wood. It’s more water-resistant and durable, making it ideal for bathrooms.
Painted drywall. If shiplap feels too complicated, consider painting the drywall with horizontal stripes to mimic the shiplap look.
Estimating the Costs
Shiplap boards: $200-$400 depending on the size of the bathroom.
Paint: $30-$50 for a gallon of quality paint.
Primer: $20-$30 for a gallon.
Nails: $10-$15 for a box.
Caulk: $5-$10 per tube, usually need 2-3 tubes.
Sandpaper: $5-$10 for a pack.
Stud finder: $10-$20 if you don't already have one.
Level: $10-$20.
Saw: $50-$100 for a basic saw, or rent one for about $20 per day.
Measuring tape: $5-$10.
Paintbrushes/rollers: $10-$20.
Drop cloths: $5-$10.
Safety gear: $10-$20 for goggles and gloves.
Budget-friendly alternatives:
Plywood sheets instead of shiplap boards: $100-$200.
Leftover paint from other projects or discounted paint: $10-$20.
Borrow tools from friends or family to save on costs.
Use old sheets or newspapers instead of drop cloths.
Creative Variations and Customizations
Alternative Materials: Instead of traditional wood, try PVC shiplap. It's water-resistant and perfect for bathrooms. Reclaimed wood adds a rustic touch and is eco-friendly. MDF (Medium-Density Fiberboard) is budget-friendly and easy to paint.
Colors: Classic white shiplap brightens the space. For a bold look, use navy blue or charcoal gray. Pastel shades like mint green or soft pink create a calming atmosphere.
Styles: Horizontal shiplap is traditional, but vertical shiplap makes the room look taller. Diagonal shiplap adds a modern twist. Mix widths of boards for a unique, textured look.
Finishes: A matte finish gives a subtle, elegant look. Glossy finishes reflect light, making the bathroom feel larger. Distressed finishes add a vintage charm.
Accents: Add metallic trim for a modern touch. Use decorative molding at the top and bottom for a polished look. Incorporate built-in shelves between shiplap panels for extra storage.
Patterns: Create a chevron pattern for a dynamic look. Use alternating colors for a striped effect. Combine shiplap with tile accents for a mixed-material design.
Eco-Friendly Tips
Reclaimed wood makes an excellent choice for shiplap. Old barns, pallets, or even discarded furniture can provide the wood needed. This not only saves money but also reduces waste.
Bamboo is another eco-friendly option. It grows quickly and regenerates without needing replanting, making it a sustainable material. Bamboo shiplap can give a modern, clean look to your bathroom.
Low-VOC paints and finishes should be used to coat the shiplap. These products emit fewer harmful chemicals, improving indoor air quality.
Recycled insulation can be installed behind the shiplap. Materials like denim or cellulose insulation are made from recycled content and provide good thermal performance.
Natural sealants like beeswax or linseed oil can protect the wood. These options are biodegradable and non-toxic, making them safer for both you and the environment.
LED lighting can be added to highlight the shiplap. LEDs use less energy and last longer than traditional bulbs, reducing both energy consumption and waste.
Water-saving fixtures should be considered for the bathroom. Low-flow faucets, showerheads, and toilets can significantly reduce water usage.
Repurpose old fixtures and hardware. Instead of buying new, consider refurbishing existing items or purchasing second-hand. This reduces the demand for new products and keeps usable items out of landfills.
Compostable or recyclable packaging should be chosen when purchasing materials. This minimizes the environmental impact of packaging waste.
Energy-efficient ventilation can help maintain a healthy bathroom environment. Proper ventilation reduces moisture buildup, preventing mold and mildew without excessive energy use.
Your Bathroom's New Look
You've done it! Your bathroom now boasts a shiplap makeover that adds charm and character. From measuring and cutting to nailing and painting, every step brought you closer to a space that feels both fresh and cozy. Remember, the key to a successful DIY project is patience and attention to detail. You've learned how to handle tools, work with materials, and solve problems on the fly. Now, every time you step into your bathroom, you'll feel a sense of pride knowing you transformed it with your own hands. Enjoy the new look, and don't be afraid to tackle more DIY projects in the future. Happy renovating!
How do I prepare my bathroom walls for shiplap?
First, clean the walls thoroughly. Remove any old wallpaper or peeling paint. Fill in holes or cracks with spackle, then sand the surface smooth. Finally, apply a primer to ensure the shiplap adheres well.
What type of wood should I use for shiplap in a bathroom?
Use moisture-resistant wood like cedar or PVC shiplap. These materials handle humidity better and prevent mold growth. Make sure the wood is treated or sealed to add extra protection.
How do I measure and cut shiplap boards?
Measure the height and width of your walls. Cut the boards to fit using a saw, ensuring each piece is the right length. Remember to account for any outlets or fixtures by cutting notches where needed.
Should I paint or stain the shiplap before or after installation?
It's easier to paint or stain the boards before installation. This way, you can ensure even coverage and avoid messes. Touch up any spots after the boards are up.
How do I attach shiplap to the bathroom walls?
Use a stud finder to locate wall studs. Nail or screw the shiplap boards into the studs for a secure hold. Start from the bottom and work your way up, ensuring each board is level.
Can I install shiplap over existing tile?
Yes, but you'll need to use construction adhesive along with nails or screws. Ensure the tile is clean and dry before applying the adhesive. This method provides a strong bond between the shiplap and tile.
How do I seal the gaps between shiplap boards?
Use caulk to fill in any gaps between the boards. This prevents moisture from seeping behind the shiplap. Choose a paintable caulk if you plan to paint over it for a seamless look.