
Home>Create & Decorate>DIY & Crafts>How To Make A Bar Top
DIY & Crafts
How To Make A Bar Top
Published: May 27, 2024

Content Creator specializing in woodworking and interior transformations. Caegan's guides motivate readers to undertake their own projects, while his custom furniture adds a personal touch.
Learn how to make a stunning DIY bar top with our step-by-step guide. Get creative with our easy crafts and transform your space today!
(Many of the links in this article redirect to a specific reviewed product. Your purchase of these products through affiliate links helps to generate commission for Twigandthistle.com, at no extra cost. Learn more)
Introduction
So, you've decided to take on the challenge of creating your very own bar top. Whether you're looking to spruce up your home bar or add a unique touch to your kitchen, making a bar top can be a rewarding and enjoyable project. In this guide, we'll walk you through the steps to create a stylish and functional bar top that will be the envy of all your friends. From choosing the right materials to adding the final touches, we've got you covered. Let's dive in and get started on this exciting DIY adventure!
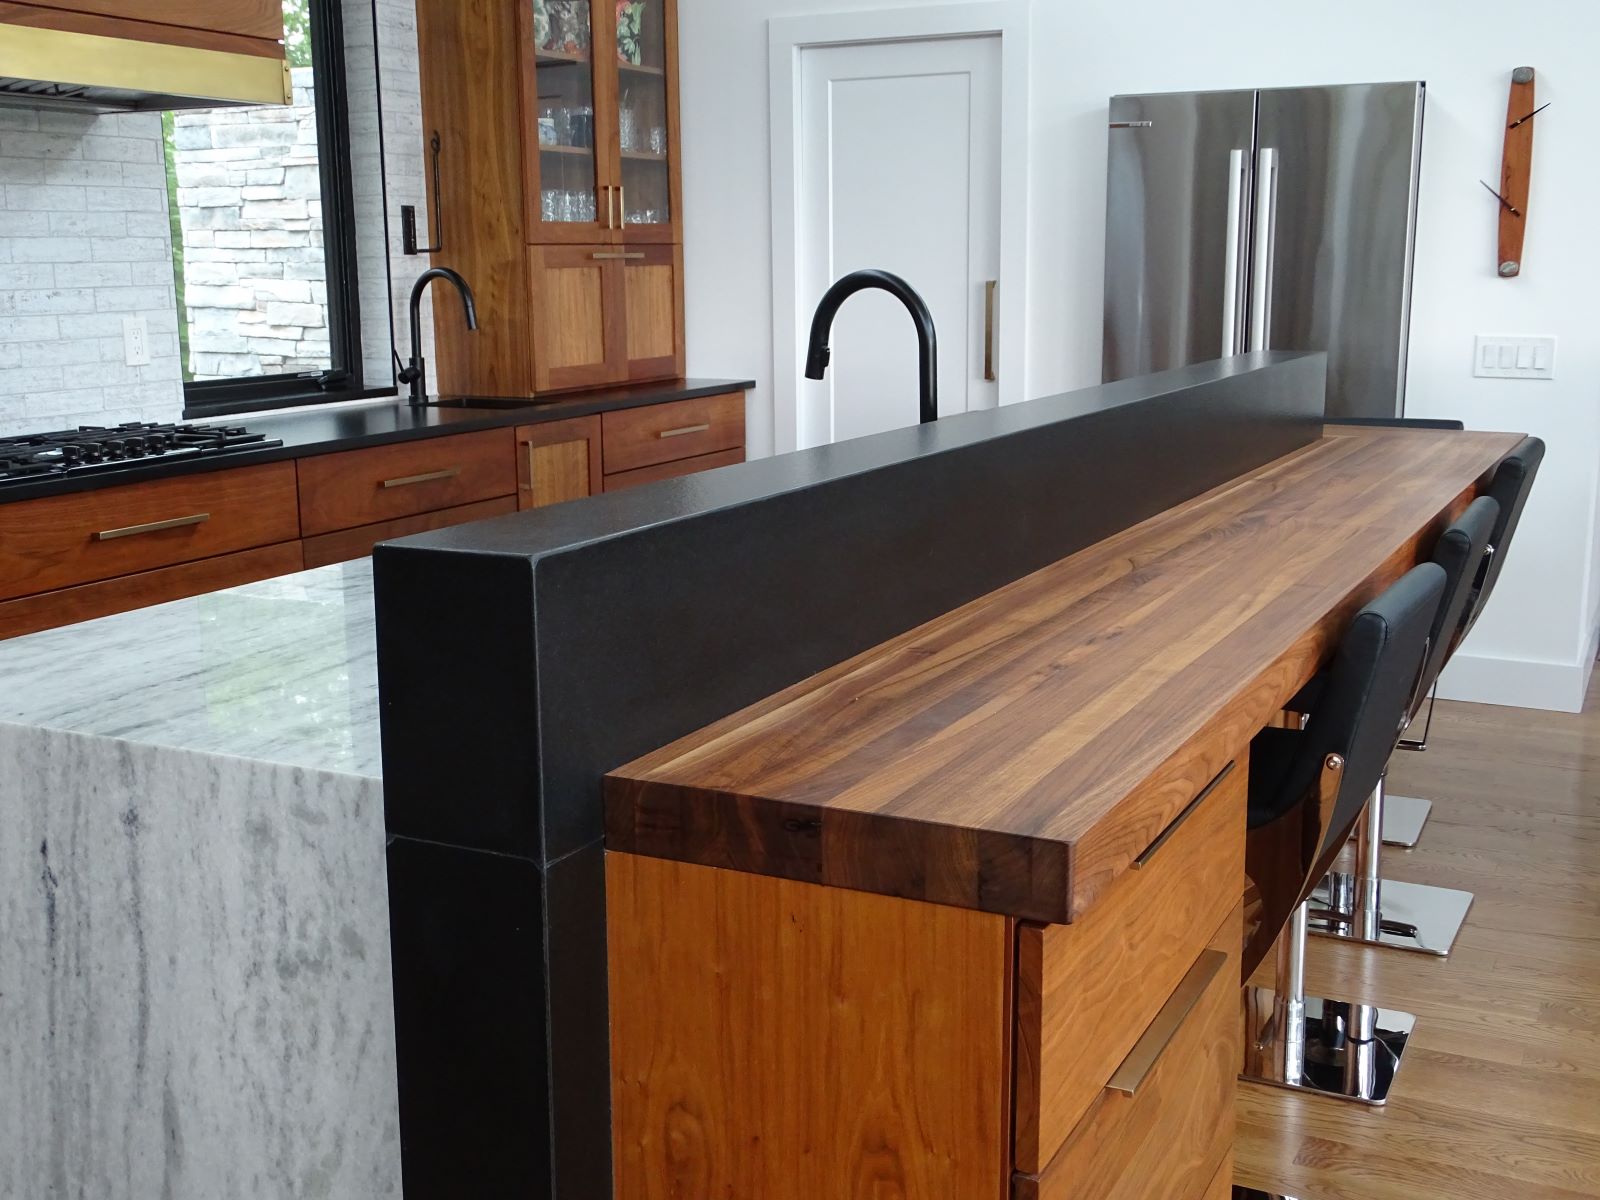
Choosing the Right Materials
When it comes to making a bar top, selecting the right materials is crucial for both the aesthetic appeal and the durability of the finished product. Here are some options to consider:
1. Wood
- Hardwood: Hardwood such as oak, maple, or walnut can provide a classic and timeless look for your bar top. It's durable and can withstand the wear and tear of everyday use.
- Reclaimed Wood: For a more rustic and environmentally friendly option, consider using reclaimed wood. It adds character and charm to your bar top.
2. Stone
- Granite: If you're aiming for a luxurious and elegant feel, granite is an excellent choice. It's durable, heat-resistant, and comes in a variety of colors and patterns.
- Marble: For a sophisticated and upscale look, marble is a popular option. It's important to note that marble requires regular maintenance to keep it looking its best.
3. Laminate
- Laminate Sheets: For a budget-friendly and versatile option, laminate sheets come in a wide range of colors and patterns. They are easy to clean and maintain, making them a practical choice for a bar top.
4. Concrete
- Poured Concrete: If you're aiming for an industrial or modern look, poured concrete can be a unique and customizable option. It can be stained or stamped to create a personalized design.
5. Metal
- Stainless Steel: For a sleek and contemporary bar top, stainless steel is a durable and low-maintenance choice. It's resistant to heat, stains, and water, making it ideal for a busy bar area.
When choosing the right materials for your bar top, consider the overall style of your space, your budget, and the level of maintenance you're willing to commit to. Each material has its own unique characteristics, so be sure to weigh the pros and cons before making your final decision.
Designing Your Bar Top
Designing your bar top is where you can let your creativity shine. The design of your bar top should complement the overall aesthetic of your space while also being functional and practical. Here are some key considerations to keep in mind when designing your bar top:
-
Shape and Size: Determine the shape and size of your bar top based on the available space and your specific needs. Whether you opt for a straight, L-shaped, or curved design, ensure that it allows for comfortable seating and easy access.
-
Edge Profile: The edge profile of your bar top can add a touch of elegance and style. Options such as bullnose, beveled, or ogee edges can enhance the overall look of the bar top.
-
Inset Features: Consider incorporating inset features such as a drink rail, built-in lighting, or a footrest to enhance the functionality and comfort of your bar top.
-
Material Combinations: If you're using multiple materials for your bar top, such as wood and stone, think about how they will blend together seamlessly to create a cohesive and visually appealing design.
-
Color and Finish: Choose a color and finish that complements the existing decor of your space. Whether you prefer a natural wood finish, a bold and vibrant color, or a sleek and polished look, ensure it aligns with your overall design scheme.
-
Personalization: Add a personal touch to your bar top by incorporating custom engravings, inlays, or a unique pattern that reflects your individual style and personality.
By carefully considering these design elements, you can create a bar top that not only looks stunning but also meets your practical needs. Remember, the design phase is your opportunity to bring your vision to life and make your bar top a standout feature in your home.
Preparing the Surface
Before applying the finish to your bar top, it's crucial to properly prepare the surface to ensure a smooth and long-lasting result. Here's a step-by-step guide to preparing the surface for your bar top:
-
Sanding: Begin by sanding the entire surface of the bar top to remove any rough spots, imperfections, or old finish. Use a coarse-grit sandpaper to start, then gradually move to finer-grit sandpaper to achieve a smooth and even surface. Be sure to sand with the grain of the wood to avoid any visible scratches.
-
Filling: Inspect the surface for any cracks, holes, or gaps, and fill them with a high-quality wood filler. Smooth out the filler with a putty knife and allow it to dry completely. Once dry, sand the filled areas to ensure they are level with the rest of the surface.
-
Cleaning: Thoroughly clean the sanded surface to remove any dust, debris, or residue. Use a tack cloth or a damp cloth to wipe down the entire bar top, ensuring it is free from any particles that could affect the finish.
-
Priming (if necessary): If you are working with a material that requires priming, such as bare wood or certain types of laminate, apply a suitable primer according to the manufacturer's instructions. This will help the finish adhere better and provide a more uniform appearance.
-
Sealing (if necessary): For materials like wood or concrete, applying a sealer can help protect the surface from moisture, stains, and other potential damage. Follow the manufacturer's guidelines for the appropriate type of sealer and apply it evenly across the entire bar top.
By taking the time to properly prepare the surface, you'll create a solid foundation for the finish, ensuring that your bar top not only looks great but also stands the test of time. This crucial step sets the stage for the final application of the finish, bringing you one step closer to completing your DIY bar top project.
Applying the Finish
Once the surface of your bar top is meticulously prepared, the next step is to apply the finish. The finish not only enhances the visual appeal of the bar top but also provides protection against moisture, spills, and daily wear and tear. Here's a detailed guide on how to expertly apply the finish to your bar top:
-
Selecting the Finish: Choose a finish that aligns with the material of your bar top and meets your desired level of durability and sheen. Options such as polyurethane, epoxy, varnish, or lacquer offer different levels of protection and aesthetics.
-
Application Tools: Depending on the type of finish you've chosen, gather the appropriate application tools. For brush-on finishes, use high-quality brushes with natural bristles to achieve a smooth and even application. Foam brushes or rollers are suitable for applying certain types of finishes, while spray finishes require a spray gun or aerosol cans.
-
Ventilation and Protection: Ensure adequate ventilation in the workspace to allow for proper air circulation during the application process. Additionally, protect the surrounding areas from potential drips or spills by using drop cloths or masking off adjacent surfaces.
-
First Coat Application: Apply the first coat of finish evenly across the entire bar top, working with the grain of the wood or in a consistent direction. Avoid overloading the surface with finish, as this can lead to drips, bubbles, or uneven drying. Allow the first coat to dry according to the manufacturer's recommended drying time.
-
Sanding Between Coats: For certain finishes, sanding between coats is necessary to achieve a smooth and flawless result. Use fine-grit sandpaper to lightly sand the surface after the first coat has dried, removing any imperfections or raised grain. Wipe away the sanding dust with a tack cloth before applying subsequent coats.
-
Additional Coats: Depending on the type of finish and the level of protection desired, apply additional coats as recommended by the manufacturer. Each coat should be applied methodically and allowed to dry thoroughly before the next coat is added.
-
Final Curing and Buffing: Once the final coat has been applied and has dried completely, allow the finish to cure according to the manufacturer's instructions. Some finishes may require buffing or polishing to achieve the desired sheen and smoothness.
By following these detailed steps, you can ensure that the finish is applied to your bar top with precision and care, resulting in a stunning and resilient surface that will withstand the test of time. The application of the finish brings you one step closer to completing your DIY bar top project, leaving you with a beautiful and functional addition to your home.
Adding the Final Touches
After completing the application of the finish, it's time to add the final touches to your bar top, elevating its visual appeal and functionality. Here are the essential steps to consider when adding those finishing touches:
-
Polishing and Buffing: If your chosen finish requires it, carefully polish and buff the surface of the bar top to achieve the desired sheen and smoothness. This step can enhance the overall look of the bar top and create a professional, high-quality finish.
-
Installing Bar Rail Molding: Consider adding bar rail molding to the edge of your bar top to provide a comfortable and stylish place for guests to rest their arms while enjoying a drink. Bar rail molding comes in various styles and materials, allowing you to customize the look to suit your preferences.
-
Mounting Drink Holders: If you frequently entertain guests, installing drink holders on the bar top can be a convenient and practical addition. These can be mounted directly onto the surface, providing a designated spot for beverages and minimizing the risk of spills.
-
Incorporating Lighting: To create an inviting ambiance, consider incorporating lighting into your bar top. LED strip lights or recessed lighting can be installed underneath the bar overhang or within the bar rail molding, adding a warm and welcoming glow to the space.
-
Personalized Touches: Add a personal touch to your bar top by incorporating custom engravings, inlays, or a unique pattern that reflects your individual style and personality. This can make your bar top truly one-of-a-kind and serve as a conversation piece when entertaining guests.
-
Seating Arrangements: Arrange bar stools or chairs around your newly finished bar top to create a comfortable and inviting space for socializing. Consider the height and style of the seating to ensure it complements the design of the bar top and provides a cohesive look.
By carefully considering these final touches, you can elevate the overall look and functionality of your bar top, creating a space that is not only visually stunning but also practical and inviting. These finishing touches add a layer of sophistication and personalization, making your DIY bar top project truly stand out.