
Home>Create & Decorate>DIY & Crafts>How To Build A Front Porch With Roof
DIY & Crafts
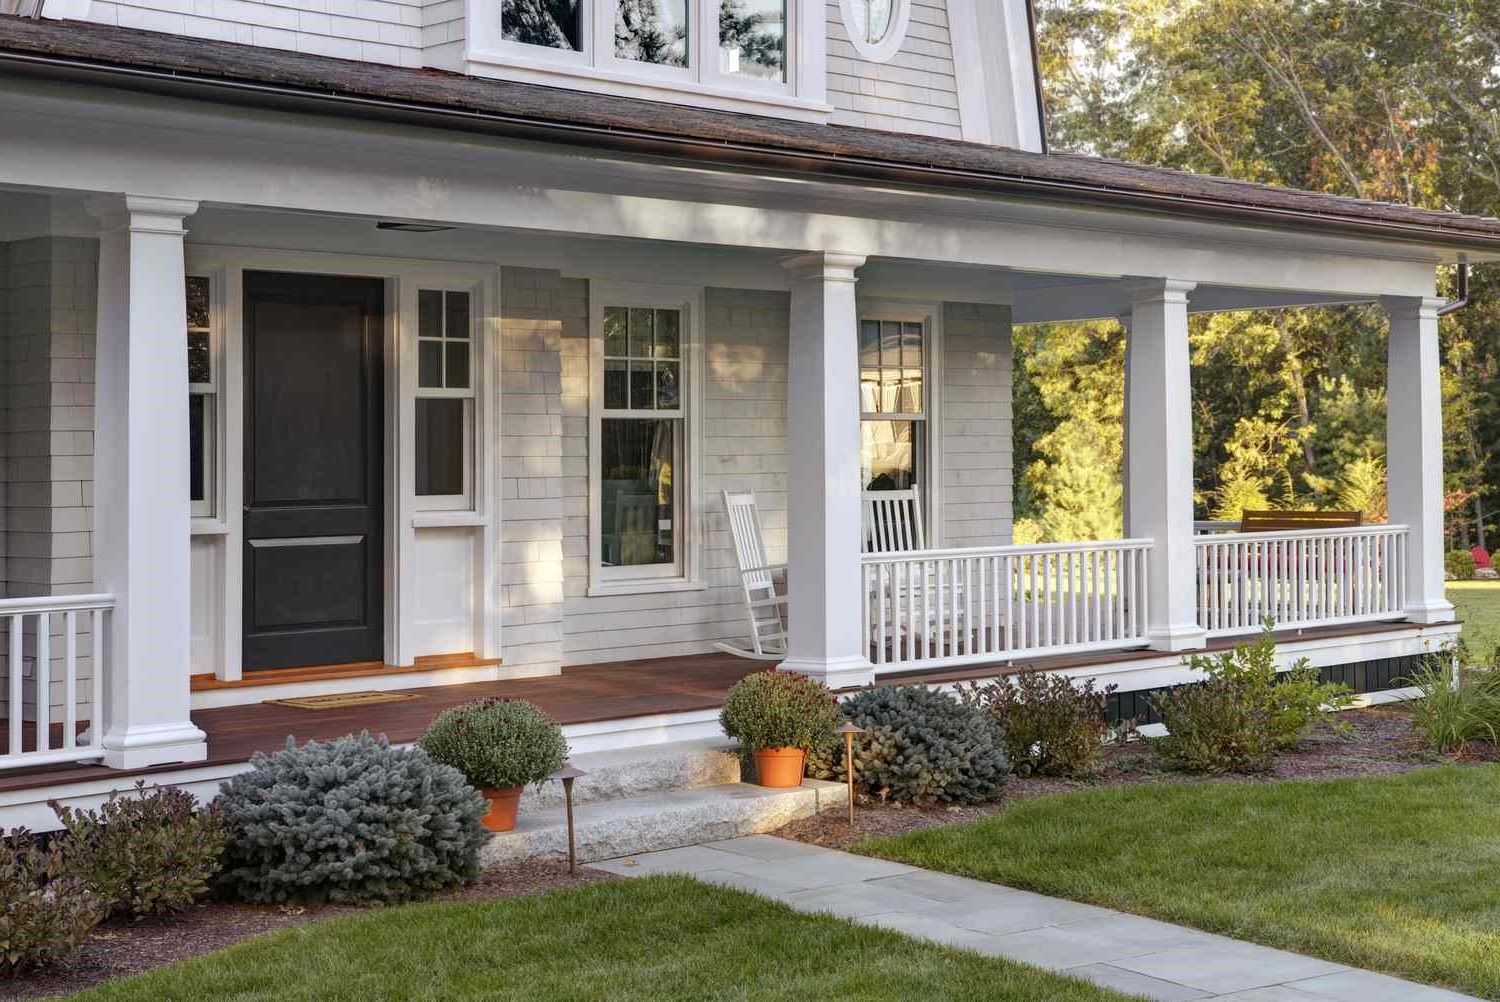
How To Build A Front Porch With Roof
Published: May 21, 2024

Senior Editor in Create & Decorate, Kathryn combines traditional craftsmanship with contemporary trends. Her background in textile design and commitment to sustainable crafts inspire both content and community.
Learn how to build a front porch with a roof in this comprehensive DIY guide. Perfect for DIY & Crafts enthusiasts looking to enhance their home's curb appeal.
(Many of the links in this article redirect to a specific reviewed product. Your purchase of these products through affiliate links helps to generate commission for Twigandthistle.com, at no extra cost. Learn more)
Introduction
So, you've been dreaming about a cozy front porch where you can sip your morning coffee and watch the world go by. Well, you've come to the right place! Building a front porch with a roof can be a rewarding DIY project that not only enhances the curb appeal of your home but also provides a welcoming outdoor space for relaxation and socializing. In this guide, we'll walk you through the step-by-step process of bringing your front porch vision to life. Whether you're a seasoned DIY enthusiast or a novice looking to take on a new challenge, we've got you covered. Let's roll up our sleeves and get started on creating the front porch of your dreams!
Planning and Designing Your Front Porch
Before you grab your hammer and nails, it's crucial to start with a well-thought-out plan for your front porch. Here's how to get started:
-
Assess Your Needs and Wants: Consider how you intend to use the porch. Do you want a small, intimate space or a larger area for entertaining guests? Think about the furniture and accessories you plan to include.
-
Determine the Size and Layout: Measure the available space and decide on the dimensions of your porch. Sketch out a rough layout, keeping in mind the architectural style of your home and the flow of foot traffic.
-
Choose a Roof Style: The roof not only provides protection from the elements but also adds character to your porch. Decide on a roof style that complements your home's design, whether it's a gable, hip, or shed roof.
-
Select Materials: From the flooring to the railing, the materials you choose will impact the porch's aesthetics and durability. Consider options like wood, composite decking, or stone for the flooring, and explore railing designs that match your home's aesthetic.
-
Incorporate Lighting and Electrical Outlets: Think about how you'll illuminate the porch and whether you'll need electrical outlets for devices or lighting fixtures.
-
Consider Permits and Regulations: Check with your local building department to understand any zoning regulations, building codes, or permit requirements for constructing a front porch. Compliance with these regulations is essential to avoid potential issues down the road.
By carefully planning and designing your front porch, you'll set the stage for a successful construction project that meets your needs and enhances the beauty of your home.
Obtaining Necessary Permits and Permissions
Before you start swinging your hammer, it's crucial to ensure that you have all the required permits and permissions in place. Here's what you need to do:
-
Research Local Regulations: Begin by researching the specific regulations and requirements for building a front porch with a roof in your local area. Each municipality may have its own set of rules and guidelines, so it's essential to understand what applies to your property.
-
Contact the Building Department: Reach out to your local building department or municipal office to inquire about the necessary permits for your project. They can provide you with information on the application process, required documentation, and associated fees.
-
Submit Permit Applications: Once you have a clear understanding of the permit requirements, submit the necessary applications to the relevant authorities. This may include providing detailed plans, structural drawings, and other documentation related to your front porch construction.
-
Obtain Approval: After submitting your permit applications, you'll need to wait for approval from the building department. This process may take some time, so it's important to factor in potential delays when planning your project timeline.
-
Adhere to Regulations: Upon receiving the necessary permits, make sure to adhere to the regulations outlined by the building department. This may involve scheduling inspections at various stages of the construction process to ensure compliance with building codes and safety standards.
By obtaining the required permits and permissions before commencing construction, you can avoid potential legal issues and ensure that your front porch project is carried out in accordance with local regulations.
Gathering Materials and Tools
Now that you have a solid plan in place and the necessary permits secured, it's time to gather the materials and tools required for building your front porch with a roof. Here's a comprehensive list to ensure you have everything you need to kick off the construction process:
Materials
-
Lumber: Purchase high-quality pressure-treated lumber for the structural components of the porch, such as the posts, beams, and joists. Consider the dimensions and load-bearing requirements based on your porch design.
-
Decking Material: Depending on your preference, choose the appropriate decking material, whether it's traditional wood planks, composite decking, or other suitable options. Ensure that the material is durable and suitable for outdoor use.
-
Roofing Materials: Select roofing materials that align with the chosen roof style, such as shingles, metal roofing panels, or other roofing options. Consider factors like weather resistance, longevity, and aesthetic appeal.
-
Concrete and Footings: If your porch requires concrete footings, gather the necessary concrete mix, formwork, and reinforcement materials. Ensure compliance with local building codes for footing depth and size.
-
Fasteners and Hardware: Stock up on galvanized or stainless steel fasteners, screws, nails, and other hardware required for assembling the porch frame and securing the roofing materials.
-
Railing Components: If your design includes a railing system, acquire the railing posts, balusters, and railings in the material of your choice, whether it's wood, metal, or composite.
-
Lighting and Electrical Supplies: If you plan to incorporate lighting or electrical outlets, purchase the necessary wiring, fixtures, and electrical components. Consider energy-efficient and weather-resistant options for outdoor use.
-
Finishing Materials: Depending on your design preferences, gather paint, stain, or sealant for finishing the porch components and protecting them from the elements.
Tools
-
Power Tools: Ensure you have a reliable circular saw, drill/driver, and an impact driver for cutting lumber, drilling, and fastening components. Consider having spare batteries and chargers for uninterrupted work.
-
Hand Tools: Stock up on essential hand tools such as a hammer, tape measure, level, framing square, chisels, and a utility knife for precise and accurate construction work.
-
Safety Equipment: Prioritize safety by having personal protective equipment (PPE) including safety glasses, hearing protection, work gloves, and a dust mask. Additionally, consider having a first-aid kit on-site.
-
Lifting and Support Equipment: Depending on the scale of your project, consider renting or purchasing equipment like a wheelbarrow, ladders, and temporary supports to aid in material handling and construction tasks.
-
Roofing Tools: If you're installing the roof yourself, gather roofing-specific tools such as a roofing nail gun, shingle cutter, and a roofing shovel for efficient and precise installation.
By ensuring that you have all the necessary materials and tools at your disposal, you can streamline the construction process and minimize potential delays, allowing you to focus on bringing your front porch vision to life.
Preparing the Site for Construction
Before the actual construction of your front porch begins, it's crucial to prepare the site to ensure a smooth and efficient building process. Here's a detailed breakdown of the steps involved in preparing the site for construction:
-
Clear the Area: Start by clearing the designated area where the front porch will be constructed. Remove any existing structures, debris, vegetation, or obstacles that may impede the construction process. This includes clearing the ground of rocks, roots, and other obstructions to create a clean and level surface for the porch foundation.
-
Mark the Layout: Use marking paint, stakes, and string to outline the exact dimensions and layout of the front porch on the ground. This will serve as a visual guide for the construction process, ensuring that the porch is built according to the planned design and dimensions.
-
Excavation and Grading: If necessary, excavate the area to the required depth for footings and foundation. Use a shovel, digging tools, or a small excavator to remove soil and create a level surface for the porch foundation. Additionally, ensure proper grading to facilitate water drainage away from the porch area.
-
Establish Reference Points: Establish reference points and layout lines to guide the placement of footings, support posts, and the porch frame. Use a tape measure, level, and string to ensure that the layout is accurate and aligned with the planned design.
-
Install Temporary Supports: If your porch design requires temporary supports or bracing during construction, install these supports as per the construction plans. Temporary supports may be necessary to stabilize the porch frame during the building process, especially for larger or more complex porch designs.
-
Inspect Underground Utilities: Before digging for footings or foundation work, contact the relevant utility companies to inspect the site for underground utilities such as gas lines, water pipes, and electrical cables. This step is crucial for safety and to avoid damaging existing utilities during excavation.
-
Prepare Access and Workspace: Ensure that there is adequate access to the construction site for delivery of materials and movement of equipment. Clear pathways and establish a designated workspace for assembling materials, cutting lumber, and staging construction tools.
-
Dispose of Excavated Material: If you've excavated soil or debris during the site preparation, arrange for proper disposal of the excavated material in compliance with local regulations. This may involve hiring a waste removal service or transporting the material to an approved disposal site.
By meticulously preparing the site for construction, you'll create a solid foundation for the subsequent phases of building your front porch. This proactive approach sets the stage for a successful and organized construction process, ultimately leading to the realization of your envisioned front porch with a roof.
Building the Porch Frame
Building the porch frame is a critical phase that forms the structural skeleton of your front porch. Here's a comprehensive guide to constructing the porch frame with precision and attention to detail:
-
Lay Out the Foundation: Begin by positioning and securing the footings or piers according to the layout marked during the site preparation phase. Ensure that the footings are level and properly aligned to support the porch frame.
-
Install Ledger Board: If your porch attaches to the house, install a ledger board to the exterior wall using lag screws or through-bolts. The ledger board provides crucial support for the porch frame and ensures a secure connection to the house.
-
Set the Support Posts: Position and secure the support posts on top of the footings or piers, ensuring that they are plumb and securely anchored. Use post anchors or brackets to attach the posts to the footings for added stability.
-
Frame the Decking: With the support posts in place, begin framing the decking by installing the perimeter joists and inner joists according to the planned layout. Use joist hangers and galvanized fasteners to secure the joists to the support posts and ledger board.
-
Add Stair Framing (If Applicable): If your front porch includes stairs, frame the stair stringers and treads according to the design specifications. Ensure that the stair framing is structurally sound and complies with building codes for safety.
-
Incorporate Bracing and Reinforcement: To enhance the structural integrity of the porch frame, incorporate diagonal bracing and reinforcement where necessary. This may involve adding additional framing members or bracing to support heavy loads and resist lateral forces.
-
Check for Level and Square: Throughout the framing process, regularly check for level, square, and alignment to ensure that the porch frame is accurately constructed. Use a level, framing square, and string lines to verify the precision of the framing components.
-
Consider Railing Support: If your porch design includes a railing system, ensure that the porch frame incorporates adequate support and attachment points for the railing posts and balusters. Reinforce the framing to accommodate the installation of the railing system.
-
Address Drainage and Ventilation: Incorporate proper drainage and ventilation features into the porch frame to prevent water accumulation and promote air circulation. This may involve creating gaps between deck boards for drainage and installing ventilation openings where necessary.
-
Secure Connections and Fasteners: Double-check all connections, fasteners, and hardware used in the porch frame to ensure that they are securely fastened and meet the recommended specifications. Use corrosion-resistant fasteners for outdoor applications to prevent deterioration over time.
By meticulously constructing the porch frame with attention to detail and adherence to structural standards, you'll establish a solid foundation for the subsequent phases of building your front porch. The well-built frame sets the stage for the installation of the roof structure and the completion of your envisioned front porch with a roof.
Installing the Roof Structure
The installation of the roof structure is a pivotal phase in bringing your front porch with a roof to fruition. Here's a detailed guide to executing this crucial step with precision and expertise:
-
Select Roofing Materials: Before commencing the installation, ensure that you have all the necessary roofing materials at hand, including shingles, metal roofing panels, or other roofing options based on your chosen roof style. Verify that the materials are of high quality and suitable for the intended application.
-
Prepare the Roofing Substrate: If your porch frame lacks a solid substrate for the roof, such as plywood or oriented strand board (OSB), install the appropriate sheathing to provide a stable base for the roofing materials. Ensure that the sheathing is securely fastened to the porch frame and complies with local building codes.
-
Install Roofing Underlayment: Prior to laying the roofing material, apply a roofing underlayment to provide an additional layer of protection against water infiltration. The underlayment acts as a barrier that safeguards the porch structure from potential moisture damage.
-
Lay Roofing Materials: Depending on your chosen roofing material, carefully lay and secure the shingles, metal panels, or other roofing components according to the manufacturer's guidelines. Pay close attention to the recommended installation methods and fastening requirements to ensure a durable and weather-resistant roof.
-
Address Roof Ventilation: Incorporate proper ventilation features into the roof structure to promote air circulation and prevent moisture buildup. Install ridge vents, soffit vents, or other ventilation components as per the design and ventilation requirements for the porch roof.
-
Flashings and Edge Details: Pay special attention to the installation of flashings and edge details to ensure watertight seals and protection against water intrusion. Properly installed flashings at roof transitions, valleys, and penetrations are essential for maintaining the integrity of the roof structure.
-
Consider Roof Overhangs: If your porch design includes roof overhangs or eaves, construct and install these components to provide additional protection from the elements and enhance the aesthetic appeal of the porch. Ensure that the overhangs are structurally sound and properly integrated with the roof structure.
-
Secure Roofing Components: Double-check the secure attachment of roofing components, including shingles, fasteners, and flashing details, to ensure that they withstand wind uplift and other environmental factors. Use appropriate fasteners and installation techniques recommended for the specific roofing material.
-
Inspect for Quality and Integrity: Upon completing the roof installation, conduct a thorough inspection of the roof structure to verify the quality of workmanship, proper installation of materials, and compliance with roofing standards. Address any discrepancies or issues to ensure a reliable and long-lasting porch roof.
By meticulously executing the installation of the roof structure, you'll not only provide essential protection for your front porch but also enhance the overall aesthetic and functionality of the outdoor space. A well-installed roof structure sets the stage for adding the finishing touches and bringing your front porch vision to life.
Adding Finishing Touches
As you near the completion of your front porch construction, it's time to focus on adding the finishing touches that will elevate the visual appeal and functionality of the space. Here's a detailed breakdown of the essential steps involved in adding the perfect finishing touches to your front porch:
-
Railing Installation: If your porch design includes a railing system, proceed with the installation of the railing components. Secure the railing posts, attach the balusters, and install the handrails according to the predetermined layout. Ensure that the railing system meets safety requirements and complements the overall design of the porch.
-
Flooring Finishes: Apply the chosen finish to the porch flooring, whether it's staining, painting, or sealing the surface. Ensure that the finish enhances the durability and aesthetics of the flooring while providing protection against outdoor elements.
-
Lighting Fixtures: Install lighting fixtures to illuminate the porch area during the evening hours. Consider options such as wall-mounted sconces, overhead pendant lights, or recessed lighting to create a welcoming ambiance and enhance the functionality of the space.
-
Ceiling Treatment: If your porch features a covered roof, consider adding a ceiling treatment such as beadboard, tongue-and-groove paneling, or other decorative elements to the underside of the roof. This not only adds visual interest but also provides protection from the elements.
-
Decor and Furnishings: Introduce outdoor furniture, decorative elements, and potted plants to personalize the porch space. Select furniture that suits the intended use of the porch, whether it's cozy seating for relaxation or a dining set for outdoor meals.
-
Accessorize with Outdoor Decor: Enhance the visual appeal of the porch by incorporating outdoor decor such as weather-resistant rugs, throw pillows, and decorative accents. Consider adding a doormat, outdoor curtains, or seasonal decorations to infuse personality into the space.
-
Final Inspections: Conduct a comprehensive inspection of the completed porch to ensure that all components are securely installed, finishes are applied uniformly, and lighting fixtures are operational. Address any remaining touch-ups or adjustments to achieve a polished final result.
-
Landscaping and Exterior Integration: Consider the landscaping around the porch area to seamlessly integrate the new addition with the surrounding outdoor space. This may involve planting shrubs, adding flower beds, or creating a transition between the porch and the yard.
By meticulously attending to the finishing touches, you'll transform your front porch into a welcoming and functional outdoor retreat that reflects your personal style and enhances the overall appeal of your home. With the completion of these final details, you can step back and admire the successful realization of your front porch with a roof, ready to be enjoyed for years to come.
Conclusion
Congratulations on successfully completing the construction of your front porch with a roof! By following the step-by-step process outlined in this guide, you've transformed your vision into a tangible and inviting outdoor space. Your new front porch not only enhances the curb appeal of your home but also provides a cozy and functional area for relaxation, socializing, and enjoying the outdoors.
As you reflect on the journey from planning and designing to the meticulous construction of the porch frame, installation of the roof structure, and adding the finishing touches, take pride in the craftsmanship and attention to detail that have gone into creating this valuable addition to your home. Your dedication to obtaining necessary permits, gathering materials and tools, and preparing the site for construction has culminated in the realization of a space that adds both aesthetic and practical value to your property.
As you step onto your newly constructed front porch, take a moment to appreciate the craftsmanship, creativity, and effort that have gone into bringing this project to life. Whether you're sipping your morning coffee, hosting gatherings with friends and family, or simply unwinding in the fresh air, your front porch with a roof stands as a testament to your DIY prowess and your commitment to enhancing your living space.
Now, as you settle into the comfort and charm of your front porch, bask in the satisfaction of a job well done. Your dedication to the construction process has resulted in a space that not only meets your needs but also adds a touch of warmth and hospitality to your home. So, go ahead, kick back, and enjoy the fruits of your labor on your beautifully crafted front porch with a roof.