
Home>Create & Decorate>DIY & Crafts>DIY Wall Addition: Transforming A Finished Room
DIY & Crafts
DIY Wall Addition: Transforming A Finished Room
Published: February 24, 2024

Senior Editor in Create & Decorate, Kathryn combines traditional craftsmanship with contemporary trends. Her background in textile design and commitment to sustainable crafts inspire both content and community.
Discover creative DIY & Crafts ideas for transforming a finished room with our step-by-step wall addition guide. Unlock your home's potential today!
(Many of the links in this article redirect to a specific reviewed product. Your purchase of these products through affiliate links helps to generate commission for Twigandthistle.com, at no extra cost. Learn more)
Introduction
Transforming a finished room with a DIY wall addition can breathe new life into your living space. Whether you're aiming to create a cozy reading nook, a stylish accent wall, or a functional storage area, adding a wall feature can elevate the aesthetics and functionality of the room. This endeavor not only allows you to unleash your creativity but also provides an opportunity to personalize your space according to your unique style and needs.
By embarking on this DIY project, you have the chance to infuse your personality into the room, making it a reflection of your tastes and preferences. The process of adding a wall feature is not only a creative outlet but also a rewarding endeavor that can significantly enhance the ambiance and utility of the space. From rustic wooden shelves to eye-catching wallpaper, the possibilities are endless when it comes to transforming a finished room with a well-chosen wall addition.
In the following sections, we will delve into the essential steps and considerations for this project, guiding you through the process of assessing the space, choosing the right wall addition, preparing the wall, installing the feature, and adding the finishing touches. With careful planning and attention to detail, you can embark on this DIY journey with confidence, knowing that you have the knowledge and guidance to execute the project seamlessly. Let's embark on this creative and transformative journey to elevate your living space with a captivating DIY wall addition.
Assessing the Space
Assessing the space is the crucial first step in the process of adding a wall feature to a finished room. This step involves carefully evaluating the room's layout, existing decor, and the potential impact of the wall addition. By taking the time to assess the space, you can make informed decisions that align with your vision for the room.
Begin by considering the room's purpose and the role the wall addition will play in enhancing that purpose. For instance, if you aim to create a cozy reading nook, you'll want to identify a wall that receives ample natural light and offers a quiet, secluded atmosphere. On the other hand, if you're looking to add a decorative element, you might choose a prominent wall that serves as a focal point in the room.
Next, evaluate the existing color scheme and design elements within the room. Consider how the wall addition can complement or contrast with these elements to achieve a harmonious or striking effect. For instance, if the room features neutral tones, a vibrant accent wall can inject energy and personality into the space. Conversely, if the room already boasts bold colors, a more subdued wall addition might provide balance and visual interest.
Additionally, take measurements of the wall where the feature will be installed. Accurate measurements are essential for selecting the right-sized wall addition and ensuring a seamless installation process. Consider the dimensions of the wall in relation to the size of the feature to achieve a balanced and proportionate look.
Furthermore, assess the structural integrity of the wall. Ensure that the chosen wall can support the weight of the intended feature, especially if it involves shelves, heavy artwork, or other substantial elements. If necessary, consult a professional to assess the wall's suitability for the planned addition and to address any structural concerns.
By thoroughly assessing the space, you can gain a clear understanding of how the wall addition will integrate with the room's layout and aesthetics. This thoughtful approach sets the stage for a successful and visually impactful transformation, ensuring that the chosen feature harmonizes with the existing elements while fulfilling its intended purpose within the room.
Choosing the Right Wall Addition
Selecting the right wall addition is a pivotal decision that can define the ambiance and functionality of the room. With a myriad of options available, ranging from decorative accents to practical storage solutions, choosing the perfect wall feature requires thoughtful consideration and a keen eye for design.
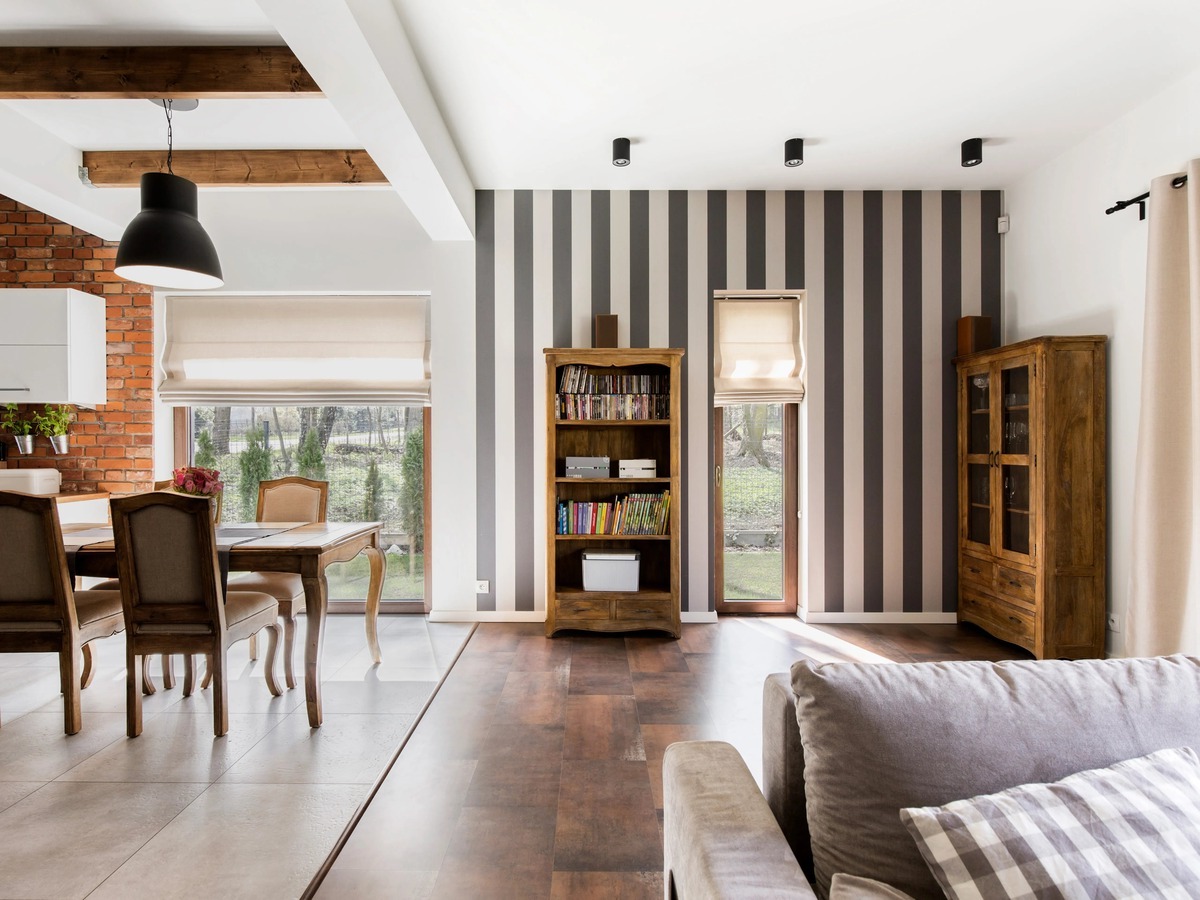
When exploring the possibilities, consider the room's existing decor and the overall aesthetic you wish to achieve. For a minimalist and modern look, sleek floating shelves or geometric wall art can add a touch of sophistication without overwhelming the space. Conversely, if you're aiming for a cozy and rustic atmosphere, reclaimed wood paneling or woven tapestries can infuse warmth and character into the room.
Functionality is another crucial factor to contemplate when selecting a wall addition. If the goal is to optimize storage and organization, consider wall-mounted shelves, cubbies, or a pegboard system to efficiently utilize vertical space while keeping items easily accessible. Alternatively, if the focus is on visual impact, striking wallpaper, a gallery wall, or an oversized mirror can serve as captivating focal points that elevate the room's aesthetic appeal.
Furthermore, take into account the room's dimensions and layout when choosing the right wall addition. For smaller rooms, opt for features that maximize vertical space without encroaching on the limited floor area. In larger rooms, consider bold and expansive wall additions that can command attention and fill the expanse with visual interest.
The material and texture of the wall addition also play a significant role in shaping the room's ambiance. Whether it's the warmth of natural wood, the sleekness of metal accents, or the softness of fabric wall hangings, the chosen material can contribute to the overall tactile and visual experience within the room.
Ultimately, the right wall addition should seamlessly integrate with the room's design while fulfilling a specific purpose, whether it's adding decorative flair, providing functional utility, or a combination of both. By carefully considering the existing decor, functionality, dimensions, and material characteristics, you can confidently select a wall addition that not only enhances the room but also reflects your personal style and vision for the space.
Preparing the Wall
Before embarking on the installation of the chosen wall addition, it is essential to prepare the wall to ensure a smooth and successful transformation. Proper preparation not only facilitates the installation process but also contributes to the longevity and stability of the feature. Here's a comprehensive guide to preparing the wall for your upcoming DIY project.
Clearing the Space
Begin by clearing the area around the wall where the addition will be installed. Remove any furniture, decor, or obstructions to create a clear and unobstructed workspace. This step not only ensures safety during the preparation and installation process but also allows for easy access to the wall surface.
Surface Inspection
Thoroughly inspect the wall surface for any imperfections, such as cracks, holes, or uneven areas. Addressing these issues before installing the wall addition is crucial for achieving a polished and professional result. Fill in any gaps or indentations with spackling compound, and use sandpaper to smooth out the patched areas for a seamless finish.
Cleaning and Priming
Clean the wall surface to remove dust, dirt, and any residues that may affect the adhesion of the wall addition. A mild detergent solution and a soft cloth can effectively remove grime and ensure a clean surface for the installation. Once the wall is clean and dry, apply a primer to promote adhesion and create a uniform surface for the wall addition. The primer also helps to seal the wall, preventing moisture from affecting the feature over time.
Marking and Measuring
Use a level, measuring tape, and pencil to mark the precise location and dimensions of the wall addition. Accurate measurements and markings are crucial for ensuring that the feature is installed straight, level, and centered within the designated space. Take the time to double-check the measurements and markings to avoid errors during the installation phase.
Addressing Electrical and Structural Considerations
If the wall addition involves drilling or mounting, ensure that you are aware of the location of electrical wiring, plumbing, and structural elements within the wall. Exercise caution and, if necessary, consult a professional to identify any potential obstacles or hazards that may impact the installation process.
By meticulously preparing the wall, you set the stage for a seamless and successful installation of the chosen wall addition. This preparatory phase not only ensures a professional and visually appealing result but also contributes to the safety and structural integrity of the room's transformation. With the wall primed, cleaned, and meticulously prepared, you are now ready to proceed with the installation of the feature, bringing your vision for the room to life.
Installing the Wall Addition
With the wall meticulously prepared, you are now ready to embark on the installation of the chosen wall addition, bringing your vision for the room to life. This phase of the project requires precision, attention to detail, and a methodical approach to ensure a seamless and visually impactful result. Here's a comprehensive guide to installing the wall addition, guiding you through each step of the process.
Gather the Necessary Tools and Materials
Before commencing the installation, gather all the essential tools and materials required for the specific type of wall addition you have chosen. This may include a drill, screws, anchors, a level, measuring tape, a stud finder, adhesive, or any specialized hardware or accessories. Ensuring that you have all the necessary items at hand will streamline the installation process and prevent interruptions.
Follow Manufacturer's Instructions
If the wall addition is a prefabricated feature, such as shelves, artwork, or decorative panels, carefully review the manufacturer's instructions before proceeding with the installation. Adhering to the recommended guidelines ensures that the feature is installed correctly and maintains its structural integrity over time. Pay attention to weight limits, recommended installation methods, and any specific considerations outlined by the manufacturer.
Secure Mounting and Anchoring
For wall additions that require mounting or anchoring, such as shelves, heavy artwork, or structural elements, use a stud finder to locate and mark the position of wall studs. Securely anchor the feature to the studs to ensure stability and weight-bearing capacity. If studs are not conveniently located, utilize appropriate anchors and hardware to safely mount the feature to the wall, following the weight specifications and installation guidelines.
Level and Alignment
Maintain a keen focus on ensuring that the wall addition is installed level and aligned with precision. Use a level to verify horizontal and vertical alignment, making adjustments as necessary to achieve a balanced and visually pleasing result. Accurate alignment is essential for creating a professional and polished appearance, especially for features such as shelves, artwork, or decorative panels.
Adhesive Application
If the wall addition involves adhesive application, carefully follow the recommended techniques and application instructions provided by the adhesive manufacturer. Ensure that the wall surface is clean and primed, and apply the adhesive according to the specified method. Exercise caution to avoid excess adhesive and ensure proper adhesion of the feature to the wall.
Finishing Touches
Once the wall addition is securely installed, take a moment to step back and admire the transformation. Evaluate the placement and visual impact of the feature, making any final adjustments to ensure that it aligns with your vision for the room. Consider adding decorative elements, such as accent lighting, plants, or complementary decor, to enhance the overall effect of the wall addition within the space.
By meticulously following these steps and exercising precision throughout the installation process, you can achieve a seamless and visually striking result, elevating the aesthetics and functionality of the room with your carefully chosen wall addition. With the feature securely in place, you have successfully completed the installation phase, bringing your creative vision to fruition and transforming the finished room into a personalized and captivating space.
Finishing Touches
Once the wall addition is securely installed, it's time to focus on the finishing touches that will elevate the overall impact of the feature within the room. This phase allows you to add nuanced details and complementary elements that enhance the visual appeal and functionality of the wall addition, ensuring that it seamlessly integrates with the existing decor and contributes to the room's ambiance.
One effective way to enhance the wall addition is by incorporating accent lighting. Strategically placed lighting can draw attention to the feature, creating a captivating focal point within the room. Whether it's subtle LED strip lights highlighting a gallery wall or a stylish wall sconce illuminating decorative shelves, the right lighting can accentuate the texture, color, and dimension of the wall addition, adding depth and visual interest to the space.
In addition to lighting, consider incorporating decorative elements that harmonize with the style and theme of the wall addition. This could involve arranging potted plants or artfully displaying decorative objects on shelves, creating a cohesive and inviting display. By integrating complementary decor, such as framed artwork, sculptural pieces, or personal mementos, you can infuse the wall addition with personality and charm, making it a reflection of your unique style and interests.
Furthermore, consider the impact of the wall addition on the room's overall functionality. If the feature involves shelves or storage compartments, take the opportunity to organize and display items that not only contribute to the visual appeal but also serve a practical purpose. Thoughtfully arranging books, decorative boxes, or functional items on the shelves can transform the wall addition into a functional and aesthetically pleasing storage solution.
Another aspect of the finishing touches involves evaluating the surrounding space and making any necessary adjustments to ensure that the wall addition harmonizes with the room's layout. This may include repositioning furniture, adjusting the arrangement of decor, or refining the color scheme to create a cohesive and balanced visual composition. By fine-tuning the surrounding elements, you can optimize the impact of the wall addition and create a harmonious flow within the room.
Ultimately, the finishing touches phase provides an opportunity to refine and enhance the visual impact and functionality of the wall addition, ensuring that it seamlessly integrates with the room's design while adding a personalized touch. By carefully considering lighting, decor, functionality, and spatial arrangement, you can elevate the wall addition from a standalone feature to a cohesive and captivating element that enriches the overall ambiance of the room.
Conclusion
In conclusion, the process of transforming a finished room with a DIY wall addition is a rewarding journey that allows you to infuse your living space with creativity, personality, and functionality. By carefully assessing the space, choosing the right wall addition, preparing the wall, installing the feature, and adding the finishing touches, you have the opportunity to elevate the aesthetics and utility of the room while expressing your unique style and vision.
Embarking on this creative endeavor empowers you to reimagine your living space, turning it into a personalized sanctuary that reflects your tastes and preferences. Whether you opt for a decorative accent wall, functional storage shelves, or an eye-catching gallery display, the impact of a well-chosen wall addition extends beyond mere aesthetics, enhancing the overall ambiance and practicality of the room.
Throughout the process, attention to detail and thoughtful consideration of the room's layout, existing decor, and structural considerations are paramount. By meticulously preparing the wall and following precise installation techniques, you can ensure a seamless and visually striking result that seamlessly integrates with the room's design.
The finishing touches phase provides an opportunity to refine the visual impact and functionality of the wall addition, allowing you to add nuanced details, accent lighting, and complementary decor that enhance the overall appeal of the feature. This phase completes the transformation, elevating the wall addition from a standalone element to a cohesive and captivating component that enriches the room's ambiance.
Ultimately, the journey of transforming a finished room with a DIY wall addition is a testament to your creativity and resourcefulness. It enables you to craft a space that is not only visually appealing but also tailored to your specific needs and preferences. As you admire the completed transformation, take pride in the fact that you have successfully infused your living space with a touch of ingenuity and personal flair, creating a room that is truly your own.