
Home>Create & Decorate>DIY & Crafts>DIY Tomato Trellis: A Step-by-Step Guide To Building Your Own Plant Support System
DIY & Crafts
DIY Tomato Trellis: A Step-by-Step Guide To Building Your Own Plant Support System
Published: April 10, 2024

Content Creator specializing in woodworking and interior transformations. Caegan's guides motivate readers to undertake their own projects, while his custom furniture adds a personal touch.
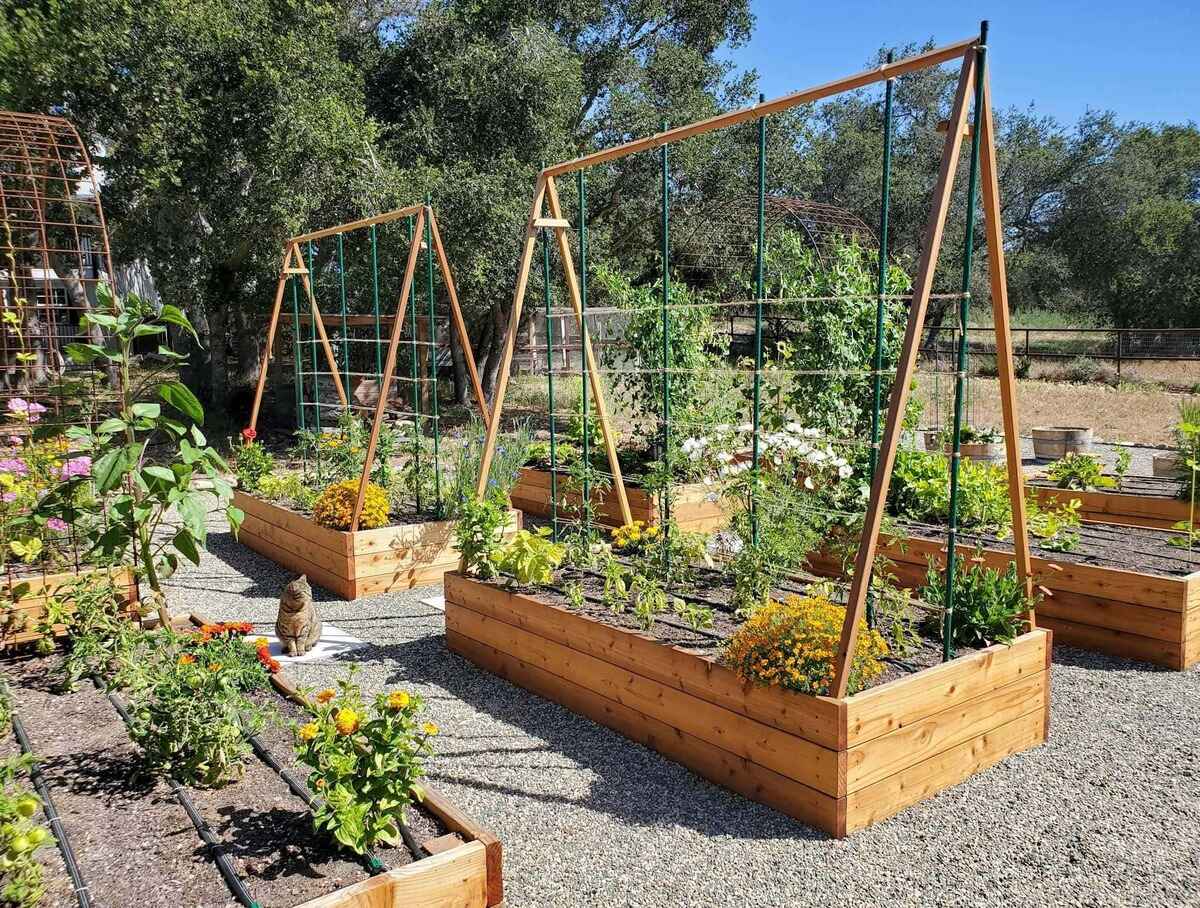
Learn how to build your own DIY tomato trellis with this step-by-step guide. Create a sturdy plant support system for your garden with these easy DIY & Crafts instructions.
(Many of the links in this article redirect to a specific reviewed product. Your purchase of these products through affiliate links helps to generate commission for Twigandthistle.com, at no extra cost. Learn more)
Introduction
Are you looking to maximize your tomato plant's growth and yield? Building a DIY tomato trellis can be a game-changer for your garden. A tomato trellis provides essential support for your plants, keeping them off the ground, promoting better air circulation, and making it easier to harvest ripe tomatoes. In this step-by-step guide, we will walk you through the process of constructing your own tomato trellis, allowing you to enjoy a bountiful harvest of delicious, homegrown tomatoes. Let's get started!
Materials Needed
To build your DIY tomato trellis, you will need the following materials:
- Wooden Posts: These will serve as the main support for your trellis. Opt for durable, weather-resistant wood such as cedar or pressure-treated lumber.
- Galvanized Screws or Nails: These will be used to secure the frame of the trellis together, ensuring stability and longevity.
- Wire or Netting: Choose a strong, durable material that can withstand the weight of growing tomato plants. This will provide the necessary support for the plants as they grow and produce fruit.
- Measuring Tape and Level: These tools will help ensure that your trellis is constructed accurately and stands straight once installed in your garden.
- Saw: You will need a saw to cut the wooden posts to the desired lengths, allowing you to customize the trellis to fit your specific garden space.
- Drill: A drill will be necessary for creating pilot holes and securing the wooden components together.
- Hammer: This will come in handy for driving nails or adjusting the position of the wooden posts during assembly.
- Staple Gun: If you are using netting for your trellis, a staple gun will be essential for attaching the netting securely to the frame.
- Gloves and Safety Glasses: It's important to prioritize safety when working with tools and materials. Gloves and safety glasses will protect your hands and eyes during the construction process.
Gathering these materials before you begin will ensure a smooth and efficient construction process, setting the stage for a successful tomato trellis that will benefit your garden for years to come.
Step 1: Choosing the Right Location
Selecting the ideal location for your tomato trellis is crucial for the success of your plants. Here's how to choose the right spot:
-
Sunlight: Look for a location that receives ample sunlight, as tomatoes thrive in full sun. Aim for at least 6-8 hours of direct sunlight per day to ensure optimal growth and fruit production.
-
Accessibility: Choose a spot that allows easy access for tending to your plants. This includes watering, pruning, and harvesting. Accessibility will make it more convenient for you to care for your tomato plants as they grow.
-
Space: Ensure that the chosen location provides enough space for the tomato plants to grow vertically. The trellis should have ample room for the plants to climb and spread out as they mature.
-
Soil Quality: Assess the soil quality in the area where you plan to install the trellis. Tomatoes thrive in well-draining, fertile soil. If necessary, amend the soil with compost or organic matter to create an optimal growing environment for your plants.
By carefully considering these factors, you can select a location that sets the stage for healthy, productive tomato plants.
Step 2: Gathering and Preparing Materials
Before diving into the construction process, it's essential to gather and prepare all the necessary materials for building your DIY tomato trellis. Here's a detailed breakdown of the steps involved in this crucial phase:
-
Acquire the Materials: Begin by procuring all the materials listed in the previous section. Ensure that the wooden posts are of the appropriate length and thickness, and the wire or netting is strong and durable enough to support the weight of the tomato plants. Double-check that you have all the required tools, such as screws, a drill, a saw, a staple gun, and safety gear.
-
Inspect and Prepare the Wood: Before assembling the trellis, inspect the wooden posts for any defects or damage. Trim off any rough edges and sand down the surfaces to prevent splinters. If necessary, apply a weather-resistant sealant or paint to protect the wood from the elements and extend its lifespan.
-
Measure and Cut the Posts: Use a measuring tape and a saw to cut the wooden posts to the desired lengths. The dimensions will depend on the size of your garden and the specific requirements of your tomato plants. Ensure that the posts are cut accurately and uniformly to maintain the structural integrity of the trellis.
-
Pre-Drill Holes: To prevent the wood from splitting during assembly, use a drill to create pilot holes in the wooden posts where the screws or nails will be inserted. This step is crucial for ensuring a secure and stable frame for your tomato trellis.
-
Prepare the Netting or Wire: If you are using netting for your trellis, cut it to the appropriate size, allowing for some overlap to ensure a secure attachment to the frame. If using wire, ensure that it is taut and free from kinks or bends that could compromise its strength.
By meticulously gathering and preparing the materials for your DIY tomato trellis, you set the stage for a smooth and efficient construction process, ultimately leading to a sturdy and reliable support system for your tomato plants.
Step 3: Building the Frame
Now that you have gathered and prepared all the necessary materials, it's time to embark on the construction of the frame for your DIY tomato trellis. Follow these steps to build a sturdy and reliable support structure for your tomato plants:
-
Positioning the Posts: Begin by positioning the wooden posts in the chosen location for your trellis. Space the posts evenly, ensuring that they are aligned and level. Use a measuring tape and a level to achieve precision in the placement of the posts.
-
Securing the Posts: Once the posts are in position, use a hammer to drive them firmly into the ground. Ensure that the posts are securely anchored, providing a stable foundation for the trellis. If necessary, enlist the help of a second person to hold the posts in place while you secure them.
-
Assembling the Horizontal Supports: With the vertical posts in place, it's time to add the horizontal supports that will connect them. Cut additional pieces of wood to the appropriate length and attach them to the vertical posts using screws or nails. These horizontal supports will add structural stability to the frame, ensuring that it can withstand the weight of the tomato plants as they grow.
-
Creating the Grid Pattern: If you are using netting for your trellis, create a grid pattern by attaching additional pieces of wood horizontally across the frame. This grid will provide anchor points for securing the netting, ensuring that it is evenly supported and can effectively hold the weight of the tomato plants.
-
Securing the Frame: Once the frame is assembled, double-check that all the components are securely fastened. Make any necessary adjustments to ensure that the frame is stable and level. This step is crucial for the overall integrity of the trellis structure.
By following these steps, you can construct a robust and durable frame for your DIY tomato trellis, setting the stage for the next phase of the construction process: attaching the netting or wire to provide essential support for your tomato plants.
Step 4: Attaching the Netting
Attaching the netting to your DIY tomato trellis is a crucial step that provides the essential support structure for your growing tomato plants. Follow these detailed steps to securely attach the netting to the frame:
-
Positioning the Netting: Begin by unrolling the netting and positioning it against the frame of the trellis. Ensure that the netting is taut and free from any tangles or twists. If necessary, have a second person assist you in holding the netting in place while you secure it to the frame.
-
Securing the Netting: Use a staple gun to attach the netting to the wooden frame. Start at one corner of the trellis and work your way across, stapling the netting securely to the frame at regular intervals. Ensure that the netting is evenly tensioned and securely fastened to provide reliable support for the tomato plants as they grow.
-
Creating Individual Sections: If your trellis is large, consider creating individual sections of netting to correspond with each planting area. This will allow for easier maintenance and harvesting, as well as providing additional support for the weight of the plants.
-
Checking for Stability: Once the netting is attached, carefully inspect the entire trellis to ensure that the netting is securely fastened and free from any loose or sagging areas. Make any necessary adjustments to maintain the stability and integrity of the netting, as it will play a crucial role in supporting the growth of your tomato plants.
-
Trimming Excess Netting: After securing the netting, trim any excess material to create a clean and tidy appearance. Be sure to leave a small overlap at the edges to prevent the netting from unraveling or becoming detached from the frame.
By following these steps, you can effectively attach the netting to your DIY tomato trellis, providing the necessary support for your tomato plants as they grow and produce an abundant harvest of delicious, homegrown tomatoes.
Step 5: Installing the Trellis in the Garden
Once the frame of your DIY tomato trellis is constructed and the netting is securely attached, the final step is to install the trellis in your garden. Follow these steps to ensure a successful installation:
-
Positioning the Trellis: Carefully transport the assembled trellis to the designated location in your garden. Enlist the help of a second person if the trellis is large or heavy to ensure safe and efficient placement.
-
Digging Holes for Support: Use a shovel to dig holes for the vertical posts of the trellis. The depth of the holes should allow for the posts to be firmly anchored in the ground, providing stability for the trellis. Ensure that the spacing between the holes matches the dimensions of the trellis frame.
-
Securing the Trellis: With the holes dug, position the trellis in place and carefully lower the vertical posts into the holes. Use a level to ensure that the trellis is straight and upright. Once the trellis is properly aligned, backfill the holes with soil and firmly tamp it down to secure the posts in place.
-
Stabilizing the Trellis: To further stabilize the trellis, consider driving additional stakes into the ground near the base of the trellis and securing them to the frame with screws or wire. This will provide extra support, especially in areas prone to strong winds or inclement weather.
-
Inspecting for Stability: After installation, thoroughly inspect the trellis to ensure that it is securely positioned and free from any wobbling or instability. Make any necessary adjustments to the anchoring and support mechanisms to guarantee the trellis's durability and reliability.
By following these steps, you can effectively install your DIY tomato trellis in the garden, providing the essential support structure for your tomato plants as they grow and thrive. With the trellis in place, you can look forward to a successful tomato harvest and enjoy the benefits of a well-supported and organized garden.
Conclusion
Congratulations! You have successfully completed the construction and installation of your DIY tomato trellis. By following this step-by-step guide, you have created a sturdy and reliable support system for your tomato plants, setting the stage for a bountiful harvest of delicious, homegrown tomatoes. With the trellis in place, your tomato plants will thrive, benefiting from improved air circulation, easier maintenance, and enhanced access to sunlight. As you tend to your well-supported tomato plants, you can look forward to a rewarding gardening experience and the satisfaction of enjoying the fruits of your labor. Embrace the joy of growing your own tomatoes and savor the flavors of freshly picked, vine-ripened produce, knowing that your DIY tomato trellis has played a vital role in their successful growth. Happy gardening!