
Home>Create & Decorate>DIY & Crafts>DIY Outdoor Furniture: Transform Your Patio With These Creative Projects
DIY & Crafts
DIY Outdoor Furniture: Transform Your Patio With These Creative Projects
Published: May 13, 2024

Content Creator specializing in woodworking and interior transformations. Caegan's guides motivate readers to undertake their own projects, while his custom furniture adds a personal touch.
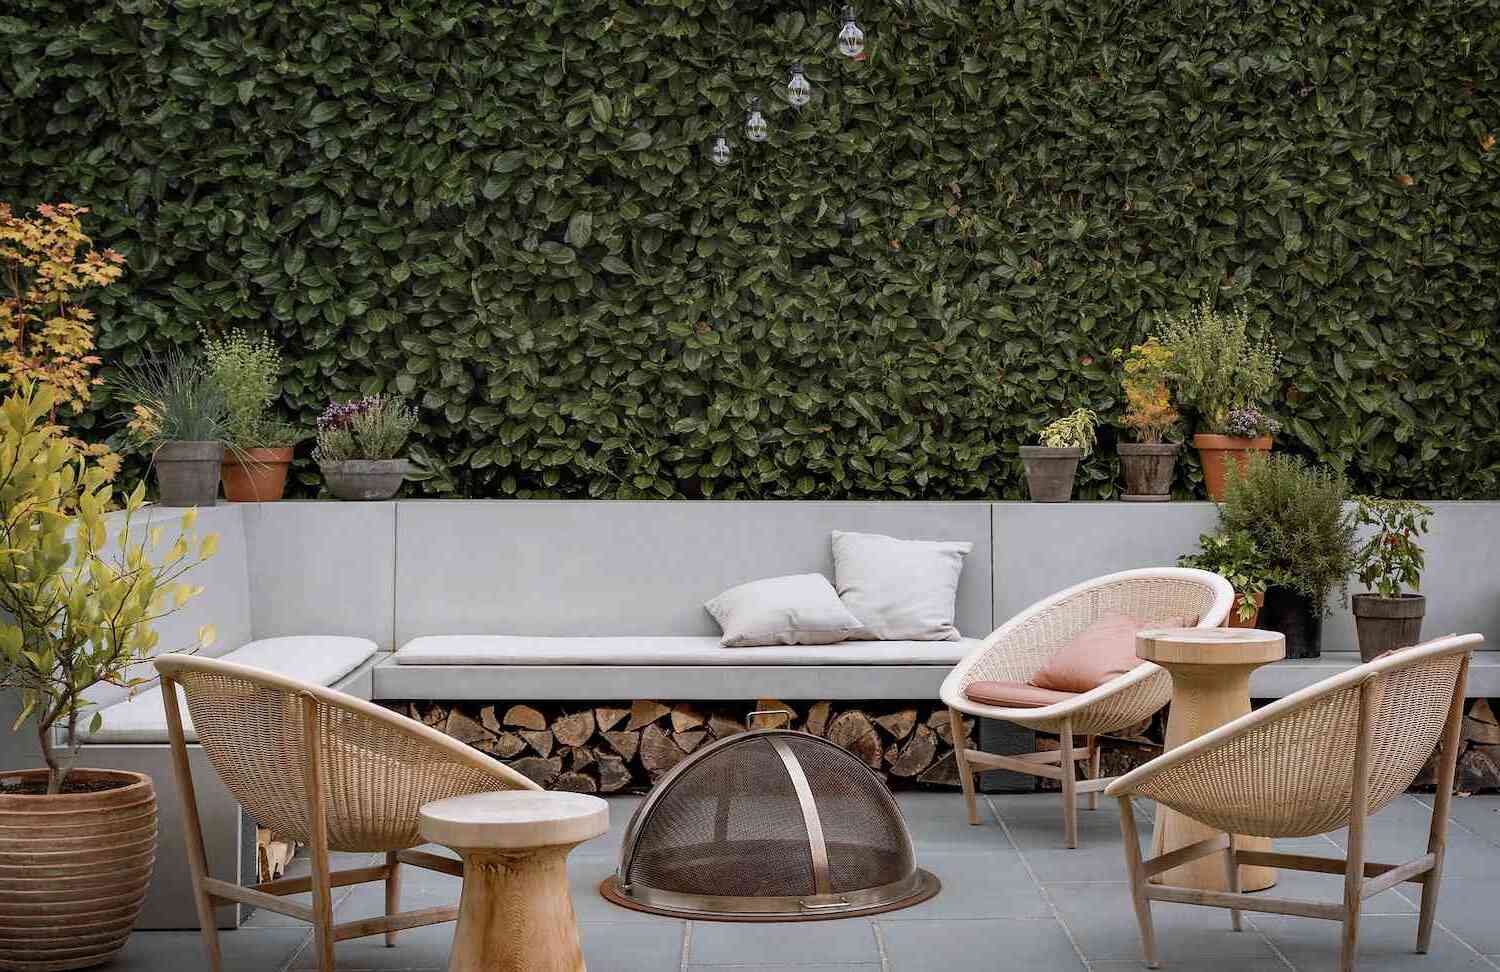
Revamp your outdoor space with these DIY & Crafts projects. Create unique and stylish furniture for your patio with our creative ideas. Transform your backyard into a cozy oasis!
(Many of the links in this article redirect to a specific reviewed product. Your purchase of these products through affiliate links helps to generate commission for Twigandthistle.com, at no extra cost. Learn more)
Introduction
Are you looking to spruce up your outdoor space and create a cozy, inviting atmosphere for relaxing and entertaining? DIY outdoor furniture projects are a fantastic way to add a personal touch to your patio while saving money. Whether you're a seasoned woodworking enthusiast or a beginner looking to dive into the world of DIY, there are plenty of creative projects to choose from. In this article, we'll explore a variety of DIY outdoor furniture ideas that will help you transform your patio into a stylish and functional oasis. From classic wooden Adirondack chairs to custom-built dining tables, there's something for every skill level and design preference. Let's dive in and get inspired to revamp your outdoor living space!
Choosing the Right Materials for Your DIY Outdoor Furniture
When embarking on a DIY outdoor furniture project, selecting the right materials is crucial for ensuring the longevity and durability of your creations. Here are some key considerations to keep in mind when choosing materials for your outdoor furniture:
1. Weather-Resistant Wood
Opt for weather-resistant wood species such as cedar, teak, or redwood. These woods are naturally resistant to rot and decay, making them ideal for outdoor furniture that will be exposed to the elements.
2. Durable Hardware
Invest in high-quality, rust-resistant hardware such as stainless steel or galvanized screws and bolts. This will help prevent corrosion and ensure that your furniture remains sturdy and safe for use.
3. Outdoor-Friendly Finishes
Choose finishes and sealants specifically designed for outdoor use. Look for products that offer UV protection and water resistance to shield your furniture from sun damage and moisture.
4. All-Weather Fabrics
If your project involves cushions or upholstery, opt for outdoor fabrics that are designed to withstand sun exposure and repel water. Sunbrella and other outdoor fabric brands offer a wide range of colors and patterns to suit your design preferences.
5. Recycled Materials
Consider using recycled or reclaimed materials for an eco-friendly and budget-friendly approach to DIY outdoor furniture. Upcycling old wood, metal, or pallets can add a rustic charm to your creations while reducing waste.
By carefully selecting the right materials for your DIY outdoor furniture projects, you can ensure that your creations will stand the test of time and enhance the beauty of your outdoor living space.
Building a Stylish Wooden Adirondack Chair
Building a stylish wooden Adirondack chair is a classic DIY outdoor furniture project that adds both comfort and charm to any patio or backyard. Here's a step-by-step guide to creating your own Adirondack chair:
1. Gather Your Materials
- Wood: Choose a durable, weather-resistant wood such as cedar or teak for longevity.
- Hardware: Select rust-resistant screws, bolts, and washers to ensure the chair's stability.
- Tools: You'll need basic woodworking tools such as a saw, drill, and sander.
2. Cut the Wood
- Use a saw to cut the wood into the necessary pieces according to the chair plans or template you're following. This typically includes the back slats, seat, arms, and legs.
3. Assemble the Chair
- Follow the assembly instructions carefully, ensuring that each piece is securely attached with the appropriate hardware. Pay attention to the angles and measurements to achieve the iconic Adirondack chair silhouette.
4. Sand and Finish
- Smooth out any rough edges and surfaces with a sander, and apply a weather-resistant finish to protect the wood from the elements.
5. Add Comfort
- Consider adding a contoured seat and back for added comfort, and include optional cushions or pillows for a cozy touch.
By following these steps and paying attention to detail, you can create a beautiful and comfortable Adirondack chair that will be the perfect addition to your outdoor seating area. Whether you're enjoying a cup of coffee in the morning or relaxing with a good book in the afternoon, your DIY Adirondack chair will provide a stylish and inviting spot to unwind in the great outdoors.
Creating a Cozy Outdoor Bench with Storage
Creating a cozy outdoor bench with storage is a practical and stylish DIY project that can enhance the functionality of your patio or garden. Here's a detailed guide to help you bring this versatile piece of furniture to life:
1. Plan and Design
Begin by sketching out the design and dimensions of your outdoor bench. Consider incorporating built-in storage compartments beneath the seating area to maximize space and keep outdoor essentials neatly organized.
2. Gather Materials and Tools
For this project, you will need:
- Weather-resistant wood for the bench frame and storage compartments
- Durable outdoor cushions for added comfort
- Hinges, screws, and other hardware for assembly
- Saw, drill, and sander for cutting and finishing the wood
3. Construct the Bench Frame
Start by building the frame of the bench using the selected wood. Ensure that the dimensions are accurate and the structure is sturdy enough to support the weight of both the seating and the storage compartments.
4. Add Storage Compartments
Integrate storage compartments into the bench design by creating hinged lids or sliding panels. These compartments can be used to store outdoor cushions, gardening tools, or other items, keeping them easily accessible yet out of sight.
5. Sand and Finish
Once the bench and storage compartments are assembled, sand the surfaces to remove any rough edges and apply weather-resistant finish to protect the wood from the elements.
6. Install Cushions
To enhance comfort, add outdoor cushions to the seating area. Opt for cushions designed to withstand outdoor conditions, such as those made with water-resistant and UV-resistant materials.
By following these steps, you can create a cozy outdoor bench with built-in storage that not only provides a comfortable seating area but also offers a convenient solution for organizing outdoor essentials. Whether you're hosting a gathering or simply enjoying a quiet moment in your outdoor sanctuary, this DIY bench will be a valuable addition to your outdoor space.
Designing a Custom Outdoor Dining Table
Designing a custom outdoor dining table allows you to create a centerpiece for outdoor gatherings that perfectly suits your space and style. Here's a comprehensive guide to help you craft a stunning and functional dining table for your patio or garden.
1. Determine the Size and Shape
Begin by determining the size and shape of the dining table based on the available space and the number of people you intend to accommodate. Rectangular tables are classic and versatile, while round tables encourage intimate conversations. Consider the dimensions that will provide ample seating and legroom for a comfortable dining experience.
2. Select Suitable Materials
Choose durable and weather-resistant materials for your outdoor dining table. Options include teak, cedar, or metal for the table frame, and materials such as tempered glass, stone, or weather-treated wood for the tabletop. Ensure that the materials can withstand exposure to sunlight, moisture, and varying temperatures.
3. Plan the Table Design
Sketch out the design of the dining table, including the frame, legs, and tabletop. Consider incorporating features such as built-in extensions for adjustable sizing, umbrella holes for shade, or decorative elements that complement your outdoor decor. Pay attention to details such as the table edge profile and any additional features you wish to include.
4. Gather Necessary Materials and Tools
For this project, you will need:
- Weather-resistant wood or metal for the table frame
- Suitable material for the tabletop
- Screws, bolts, and other hardware for assembly
- Tools such as a saw, drill, and sander for cutting and finishing
5. Construct the Table Frame
Begin by constructing the frame of the dining table, ensuring that it is sturdy and level. Follow the design plan carefully, and use appropriate joinery techniques to create a robust and stable base for the tabletop.
6. Build and Install the Tabletop
Cut and assemble the tabletop using the selected material, ensuring that it fits securely onto the frame. If using wood, sand the surface to a smooth finish and apply a weather-resistant sealant or finish to protect it from the elements. For other materials such as glass or stone, ensure that they are securely attached to the frame.
7. Finishing Touches
Add any finishing touches to the dining table, such as decorative elements, umbrella holes, or built-in extensions. Ensure that all hardware is properly installed and that the table is level and stable on the ground.
By following these steps, you can design and build a custom outdoor dining table that serves as a focal point for outdoor entertaining and dining. Whether hosting a festive gathering or enjoying a casual meal al fresco, your custom table will provide a stylish and functional setting for memorable outdoor experiences.
Constructing a Relaxing Hammock Stand
Constructing a relaxing hammock stand is a rewarding DIY project that can bring a touch of leisure and tranquility to your outdoor space. Here's a step-by-step guide to help you create a sturdy and stylish hammock stand for ultimate relaxation:
1. Choose the Right Location
Select a suitable location for your hammock stand, ensuring that there is ample space for the hammock to swing freely without any obstructions. Consider the amount of shade and sunlight in the area to create a comfortable and inviting spot for relaxation.
2. Gather Materials and Tools
For this project, you will need:
- Pressure-treated lumber or cedar for the stand frame
- Galvanized screws and bolts for assembly
- Drill, saw, and measuring tape for cutting and assembling the wood
- Level and post hole digger for ensuring stability
3. Design the Stand
Sketch out the design of the hammock stand, considering the dimensions and structural stability. A typical hammock stand consists of two vertical posts with a horizontal beam connecting them, providing a secure and balanced support for the hammock.
4. Cut and Assemble the Frame
Cut the lumber to the appropriate lengths based on your design, ensuring that the pieces are straight and free from any defects. Assemble the frame by securely attaching the vertical posts to the horizontal beam using galvanized screws and bolts. Use a level to ensure that the stand is perfectly upright and stable.
5. Install Support Braces
To enhance the strength and stability of the hammock stand, consider adding diagonal support braces between the vertical posts and the horizontal beam. These braces will help distribute the weight and forces exerted on the stand, ensuring a safe and secure structure.
6. Finishing Touches
Sand the surfaces of the stand to remove any rough edges and apply a weather-resistant finish to protect the wood from outdoor elements. Consider adding decorative elements or a coat of paint to complement your outdoor decor and add a personal touch to the stand.
7. Hang the Hammock
Once the stand is constructed and finished, carefully hang your hammock between the horizontal beam, ensuring that it is securely attached and balanced. Test the hammock to ensure that it swings freely and comfortably, making any necessary adjustments to the positioning or tension of the hammock.
By following these steps, you can construct a relaxing hammock stand that provides a perfect spot for unwinding and enjoying the serenity of your outdoor space. Whether you're lounging with a good book or simply taking in the beauty of nature, your DIY hammock stand will become a cherished feature of your outdoor oasis.
Upcycling Old Pallets into a Rustic Outdoor Sofa
Upcycling old pallets into a rustic outdoor sofa is a fantastic way to add charm and character to your patio while repurposing materials in an eco-friendly manner. Here's a detailed guide to help you transform discarded pallets into a stylish and comfortable outdoor seating solution.
1. Source and Prepare the Pallets
Begin by sourcing sturdy and intact pallets from local businesses, warehouses, or online marketplaces. Look for pallets that are in good condition, with minimal damage or signs of wear. Once you have obtained the pallets, thoroughly clean and sand them to remove any dirt, splinters, or rough edges. This step is essential for creating a smooth and safe surface for your outdoor sofa.
2. Design the Sofa Structure
Sketch out a design for the outdoor sofa, considering the dimensions and layout of the pallets. You can opt for a simple single-seater design using one pallet, or a larger multi-seater sofa by combining multiple pallets. Consider the arrangement of the pallets to create the desired seating configuration, and plan for the addition of cushions or upholstery for comfort.
3. Assemble the Pallets
Once you have a clear design plan, begin assembling the pallets to form the sofa structure. Use screws and a drill to securely attach the pallets together, ensuring that the joints are stable and the overall structure is robust. Pay attention to the alignment and levelness of the pallets to create a uniform and visually appealing sofa base.
4. Add Back Support and Armrests
To enhance the comfort and functionality of the outdoor sofa, consider adding back support and armrests to the pallet structure. This can be achieved by attaching additional pieces of pallet wood vertically at the back of the sofa and horizontally on the sides to create armrests. Secure these elements firmly to the main pallet structure to provide stability and support.
5. Sand and Finish
Once the pallets are assembled and the additional features are in place, thoroughly sand the surfaces to remove any rough spots or splinters. Apply a weather-resistant finish or paint to protect the wood from outdoor elements and to add a touch of style to the rustic sofa. Consider using a finish that complements the overall aesthetic of your outdoor space.
6. Add Cushions and Upholstery
To complete the transformation of the pallets into a comfortable outdoor sofa, add cushions and upholstery to the seating area. Opt for outdoor-friendly cushions and fabric covers that are designed to withstand exposure to sunlight and moisture. This step not only enhances the comfort of the sofa but also allows you to personalize the look with your choice of colors and patterns.
By following these steps, you can upcycle old pallets into a rustic outdoor sofa that serves as a focal point of relaxation and socializing in your outdoor living space. Whether used for casual lounging, entertaining guests, or enjoying a peaceful moment in the fresh air, your DIY pallet sofa will bring a touch of rustic charm and sustainability to your patio or garden.
Adding a Pop of Color with DIY Painted Patio Furniture
Transforming your outdoor space with a pop of color through DIY painted patio furniture is a fun and creative way to infuse personality and vibrancy into your patio or garden. Whether you're reviving old furniture or customizing new pieces, painting your patio furniture allows you to express your unique style and create a cohesive look for your outdoor oasis. Here's a detailed guide to help you add a burst of color to your outdoor furniture through the art of painting:
1. Selecting the Right Furniture Pieces
Begin by selecting the furniture pieces that you want to paint. This could include chairs, tables, benches, or even planters and decorative accents. Consider the existing color scheme of your outdoor space and choose furniture pieces that will complement or contrast with the surroundings, depending on the look you want to achieve.
2. Preparing the Furniture
Before painting, it's essential to prepare the furniture surfaces to ensure proper adhesion and a smooth finish. Start by cleaning the furniture thoroughly to remove any dirt, dust, or grime. For metal furniture, use a wire brush to remove rust and flaking paint. Sand wooden furniture to create a slightly rough surface that will help the paint adhere better. Once cleaned and sanded, wipe down the furniture with a damp cloth to remove any residue and allow it to dry completely.
3. Choosing the Right Paint
Selecting the right type of paint is crucial for achieving a durable and long-lasting finish on your patio furniture. For metal furniture, opt for a rust-inhibiting metal paint that is suitable for outdoor use. For wooden furniture, choose an exterior-grade paint that offers UV protection and weather resistance. Consider using bold and bright colors to make a statement, or opt for more subdued tones for a sophisticated look.
4. Applying the Paint
Once the furniture is prepped and the paint is selected, it's time to apply the first coat. Use a high-quality paintbrush or a paint sprayer for a smooth and even application. Apply the paint in thin, even coats, allowing each coat to dry completely before applying the next. This will help prevent drips, runs, and uneven coverage. Consider using stencils or painter's tape to create patterns or designs for an added touch of creativity.
5. Adding Personalized Details
After the base coat is applied, consider adding personalized details to the furniture to make it truly unique. This could include hand-painted designs, patterns, or even inspirational quotes. Get creative and let your imagination run wild to infuse your personality into the furniture pieces.
6. Sealing the Paint
Once the paint is dry and you're satisfied with the coverage and design, it's essential to seal the paint to protect it from the elements. Use a clear, weather-resistant sealant or topcoat designed for outdoor use to protect the painted surfaces from UV rays, moisture, and general wear and tear. This final step will help ensure that your painted patio furniture maintains its vibrant appearance for years to come.
By following these steps, you can add a pop of color to your outdoor space with DIY painted patio furniture, creating a visually stunning and personalized environment for relaxation and entertainment. Whether you opt for bold and bright hues or subtle and sophisticated tones, painting your patio furniture allows you to unleash your creativity and make a bold statement in your outdoor living space.
Conclusion: Enjoying Your Newly Transformed Patio
Your newly transformed patio is now a reflection of your creativity and personal style, providing a welcoming and comfortable space for relaxation, socializing, and enjoying the great outdoors. Whether you've added custom-built furniture, upcycled old materials, or infused vibrant colors into your patio decor, the result is a unique and inviting outdoor sanctuary. As you take a moment to bask in the ambiance of your revitalized patio, envision the countless memories that will be made in this rejuvenated space. From leisurely afternoons with a good book to lively gatherings with friends and family, your transformed patio is poised to become the heart of your home during the warmer months. Embrace the satisfaction of knowing that your DIY efforts have not only elevated the aesthetics of your outdoor space but have also created a personalized haven that reflects your individuality. So go ahead, kick back, and savor the fulfillment of enjoying your newly transformed patio.