
Home>Create & Decorate>DIY & Crafts>DIY Outdoor Couch: Create Your Own Cozy Seating For The Outdoors
DIY & Crafts
DIY Outdoor Couch: Create Your Own Cozy Seating For The Outdoors
Published: May 12, 2024

Senior Editor in Create & Decorate, Kathryn combines traditional craftsmanship with contemporary trends. Her background in textile design and commitment to sustainable crafts inspire both content and community.
Create your own cozy outdoor seating with our DIY outdoor couch guide. Perfect for DIY & Crafts enthusiasts looking to spruce up their outdoor space.
(Many of the links in this article redirect to a specific reviewed product. Your purchase of these products through affiliate links helps to generate commission for Twigandthistle.com, at no extra cost. Learn more)
Introduction
Are you looking to spruce up your outdoor space with a cozy seating area that you can enjoy during the warmer months? Creating your own DIY outdoor couch can be a rewarding and budget-friendly project that adds both comfort and style to your backyard or patio. Whether you're a seasoned DIY enthusiast or a beginner looking for a fun project, building your own outdoor couch can be a great way to personalize your outdoor living space and create a comfortable spot for relaxation and entertaining. In this article, we'll guide you through the process of building your own outdoor couch, from gathering the necessary materials to adding the finishing touches. Let's get started on creating your own inviting outdoor retreat!
Materials Needed
Before you dive into building your DIY outdoor couch, it's essential to gather all the necessary materials and tools. Here's a list of what you'll need to get started:
- Lumber: Choose high-quality, weather-resistant lumber such as cedar or redwood for the frame and support of your outdoor couch.
- Screws and Nails: Make sure to have a variety of screws and nails in different sizes to secure the frame and other components together.
- Saw: A saw will be necessary for cutting the lumber to the appropriate lengths for your couch frame.
- Drill: You'll need a drill for making pilot holes and driving screws into the wood.
- Measuring Tape: Accurate measurements are crucial for ensuring that your couch frame is sturdy and well-proportioned.
- Outdoor Cushions: Select comfortable and weather-resistant cushions to provide a cozy seating area for your outdoor couch.
- Pillows: Add a touch of style and extra comfort with decorative outdoor pillows that complement your outdoor decor.
- Paint or Stain: If you want to add a pop of color or protect the wood, consider using outdoor paint or stain to finish your couch.
Gathering these materials beforehand will ensure a smooth and efficient building process, allowing you to focus on the creative and hands-on aspects of constructing your outdoor couch.
Step 1: Building the Frame
The first step in creating your DIY outdoor couch is constructing the frame. Follow these steps to build a sturdy and durable foundation for your seating area:
-
Measure and Cut the Lumber: Begin by measuring and cutting the lumber to the desired dimensions for the frame. Use a saw to ensure precise cuts, and double-check the measurements to guarantee that the frame pieces fit together seamlessly.
-
Assemble the Frame: Once the lumber is cut to size, assemble the frame according to your design plan. Use screws and nails to secure the pieces together, ensuring that the joints are strong and stable. A drill will be essential for driving screws into the wood and creating a secure frame structure.
-
Add Support Braces: To reinforce the frame and provide additional support, consider adding support braces at strategic points. These braces will contribute to the overall stability of the couch, especially if it will accommodate multiple people at once.
-
Check for Level and Stability: As you progress with building the frame, periodically check for levelness and stability. Use a level to ensure that the frame is even and balanced, making any necessary adjustments to prevent wobbling or uneven seating.
By following these steps, you'll establish a solid foundation for your outdoor couch, setting the stage for the next phases of the construction process. Once the frame is in place, you can move on to adding the seat and back support to create a comfortable and inviting seating area for your outdoor space.
Step 2: Adding the Seat and Back Support
With the frame of your DIY outdoor couch in place, the next crucial step is to add the seat and back support to create a comfortable and inviting seating area. Follow these detailed steps to ensure that your outdoor couch provides the comfort and relaxation you desire:
-
Measure and Cut Seat and Back Panels: Begin by measuring and cutting the lumber to create the seat and back panels. The dimensions will depend on the size and design of your couch, so ensure precise measurements to achieve a snug fit within the frame.
-
Attach Seat and Back Panels: Once the panels are cut to size, attach them securely to the frame using screws and nails. Ensure that the panels are level and well-aligned, providing a stable and supportive base for the cushions and pillows.
-
Consider Ergonomics: When positioning the back support panel, consider the ergonomics of seating comfort. The angle and height of the back panel should provide adequate support for relaxation while accommodating a natural and comfortable sitting posture.
-
Reinforce Joints: To enhance the durability of the seat and back support, reinforce the joints where the panels meet the frame. Adding additional screws or braces can strengthen the connections, ensuring that the seating area can withstand regular use and weight.
-
Sand and Smooth Edges: After attaching the seat and back panels, sand down any rough edges or protruding corners to create a smooth and comfortable surface. This step is essential for preventing splinters and ensuring a pleasant seating experience for you and your guests.
By following these steps, you'll establish a supportive and comfortable seating area for your outdoor couch, setting the stage for the final phases of the construction process. Once the seat and back support are in place, you can move on to selecting cushions and pillows to enhance the comfort and style of your DIY outdoor seating.
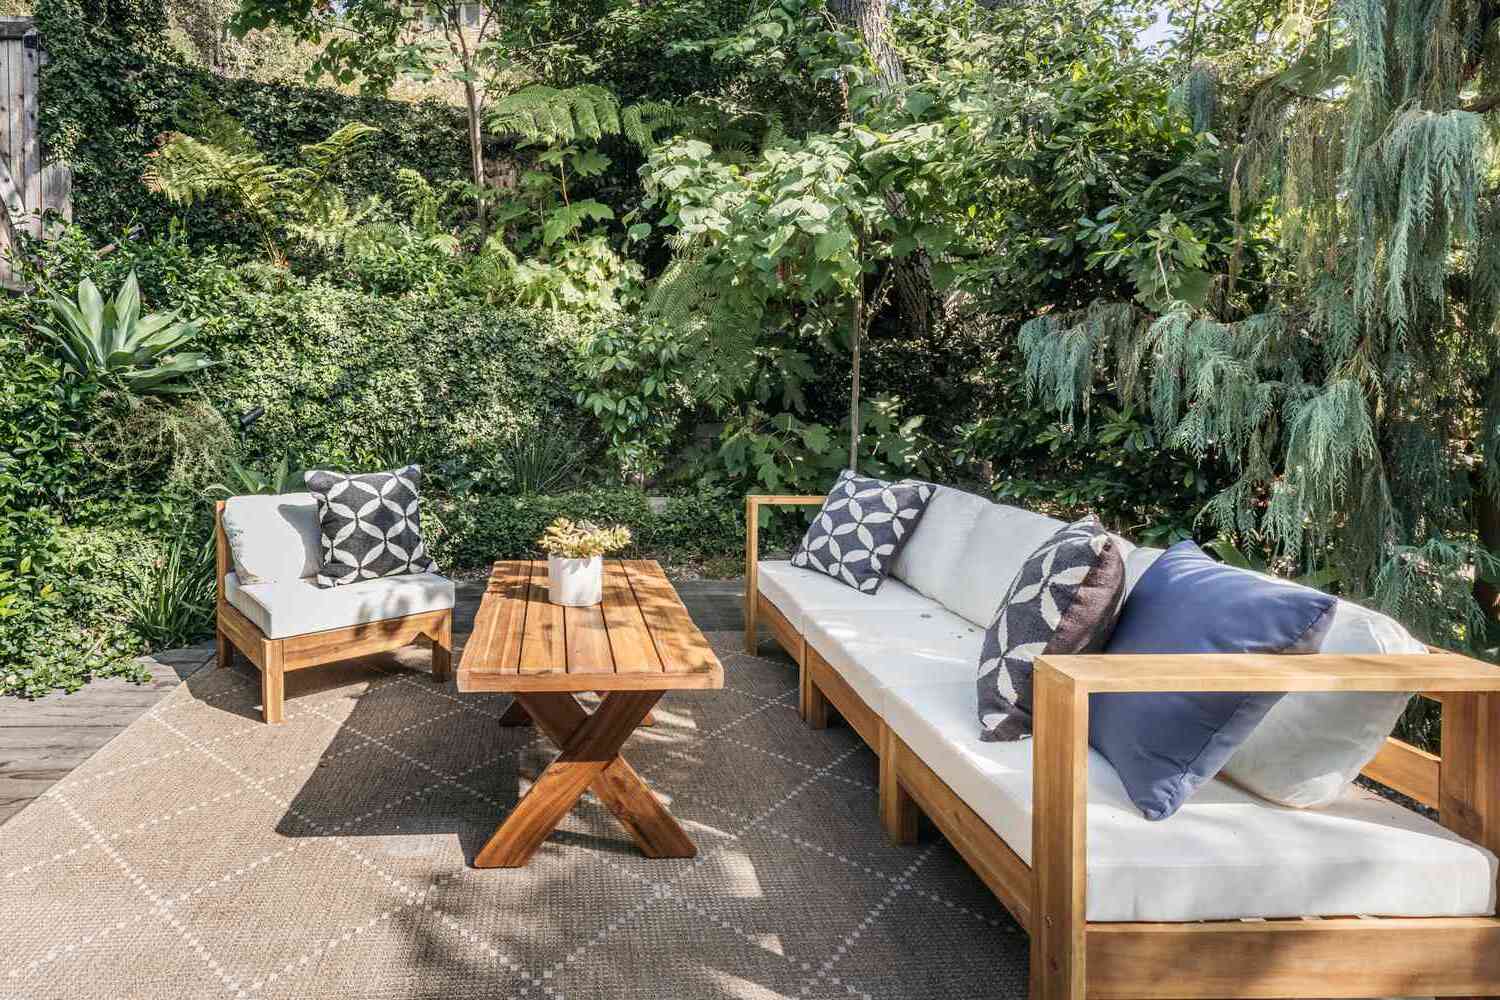
Step 3: Cushion and Pillow Options
When it comes to creating a cozy and inviting outdoor seating area, the choice of cushions and pillows can significantly impact the comfort and style of your DIY outdoor couch. Consider the following options to enhance the overall appeal and comfort of your outdoor retreat:
-
Weather-Resistant Cushions: Opt for cushions specifically designed for outdoor use, as they are crafted from durable and weather-resistant materials. Look for cushions with UV protection and quick-drying capabilities to ensure longevity and easy maintenance.
-
Comfortable Seat Cushions: Select seat cushions that provide ample support and comfort for extended lounging and relaxation. Consider the thickness and firmness of the cushions to cater to individual preferences while ensuring a cozy seating experience.
-
Decorative Outdoor Pillows: Add a touch of personality and style to your outdoor couch with decorative outdoor pillows. Choose pillows in coordinating colors and patterns to complement your outdoor decor, creating an inviting and visually appealing seating area.
-
Mix and Match: Experiment with a mix of solid and patterned cushions and pillows to create visual interest and a personalized look. Mixing different textures and colors can add depth and character to your outdoor seating, reflecting your unique style and taste.
-
Easy-Care Options: Look for cushions and pillows that are easy to clean and maintain, especially in outdoor settings. Removable, machine-washable covers can simplify the upkeep of your outdoor seating, allowing for hassle-free enjoyment of your outdoor space.
-
Consider Size and Fit: Ensure that the dimensions of the cushions and pillows are suitable for your outdoor couch, providing a snug and tailored fit. Properly sized cushions and pillows will contribute to the overall comfort and polished appearance of your seating area.
By carefully selecting cushions and pillows that cater to both comfort and style, you can elevate the ambiance of your outdoor space and create a welcoming retreat for relaxation and entertaining. The right combination of cushions and pillows can transform your DIY outdoor couch into a cozy and inviting haven for enjoying the great outdoors.
Step 4: Finishing Touches
As you near the completion of your DIY outdoor couch project, adding the finishing touches will enhance the overall look and functionality of your outdoor seating area. Consider the following details to elevate the appeal and comfort of your outdoor retreat:
-
Weather-Resistant Finish: Apply a weather-resistant finish, such as outdoor paint or stain, to protect the wood from the elements. Choose a finish that complements your outdoor decor while providing durability and long-term protection against moisture and sunlight.
-
Seating Arrangement: Arrange the seating cushions and pillows to create an inviting and cozy atmosphere. Consider the placement of the cushions to ensure a comfortable and visually appealing seating arrangement that encourages relaxation and socializing.
-
Additional Accessories: Incorporate additional accessories, such as a side table or ottoman, to complement your outdoor couch. These functional additions can provide convenience and versatility, allowing you to further personalize your outdoor space.
-
Personalized Decor: Add personal touches to your outdoor seating area with decorative elements that reflect your style and personality. Consider incorporating outdoor lanterns, potted plants, or string lights to create a warm and inviting ambiance for evening gatherings.
-
Maintenance and Care: Establish a maintenance routine to keep your outdoor couch looking its best. Regularly clean and inspect the cushions, pillows, and wood frame to ensure that they remain in optimal condition for long-term enjoyment.
By paying attention to these finishing touches, you can transform your DIY outdoor couch into a stylish and comfortable focal point of your outdoor living space. The thoughtful details and care put into the final stages of the project will result in a welcoming and enjoyable area for relaxation, entertaining, and making lasting memories in the great outdoors.
Conclusion
In conclusion, creating your own DIY outdoor couch can be a fulfilling and rewarding endeavor that allows you to personalize your outdoor living space while providing a cozy and inviting seating area for relaxation and entertainment. By following the step-by-step process of building the frame, adding the seat and back support, selecting cushions and pillows, and adding the finishing touches, you can craft a comfortable and stylish outdoor retreat that reflects your unique style and enhances your enjoyment of the great outdoors. Whether you're lounging with a good book, hosting outdoor gatherings, or simply soaking up the sunshine, your DIY outdoor couch will serve as a welcoming and functional centerpiece of your outdoor oasis. Embrace the creative process, enjoy the hands-on construction, and take pride in the transformation of your outdoor space into a comfortable and inviting haven that you can enjoy for years to come.