
Home>Create & Decorate>DIY & Crafts>DIY Freeze Dryer: How To Preserve Food At Home
DIY & Crafts
DIY Freeze Dryer: How To Preserve Food At Home
Published: June 16, 2024

Content Creator specializing in woodworking and interior transformations. Caegan's guides motivate readers to undertake their own projects, while his custom furniture adds a personal touch.
Learn how to preserve food at home with a DIY freeze dryer. Discover easy DIY & Crafts techniques for long-lasting food storage. Start preserving today!
(Many of the links in this article redirect to a specific reviewed product. Your purchase of these products through affiliate links helps to generate commission for Twigandthistle.com, at no extra cost. Learn more)
Introduction
Are you tired of throwing away spoiled food? Do you want to preserve your favorite fruits, vegetables, and meats for longer periods? If so, then a DIY freeze dryer might be the solution you've been looking for. In this article, we will explore the benefits of freeze drying food, how a DIY freeze dryer works, the materials needed to build one, a step-by-step guide to creating your own freeze dryer, and some tips for successfully freeze drying food at home. So, let's dive in and discover how you can preserve food at home using a DIY freeze dryer!
Benefits of Freeze Drying Food
Freeze drying food offers numerous benefits, making it an attractive option for preserving food at home. Here are some of the key advantages:
-
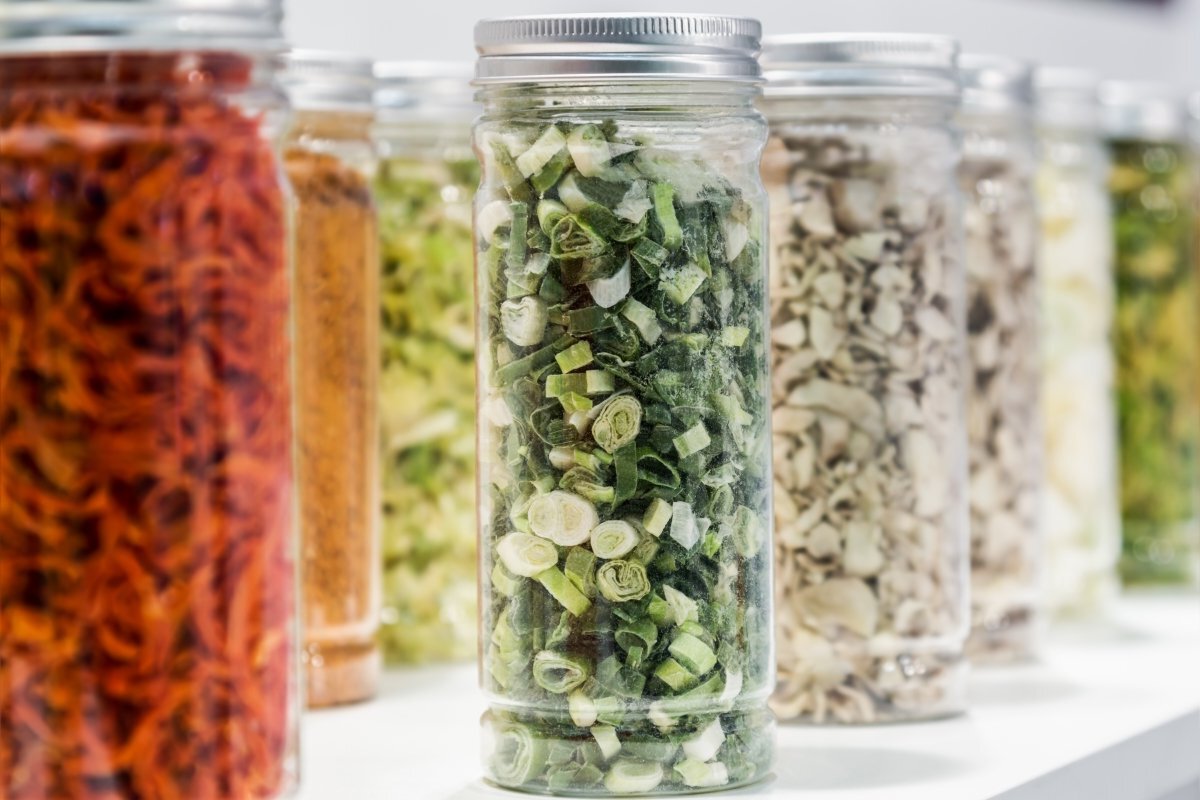
Extended Shelf Life: Freeze-dried food can last for an incredibly long time, often up to 25 years, when stored properly. This extended shelf life makes it an ideal method for preserving seasonal produce or surplus food.
-
Retains Nutritional Value: Unlike traditional drying methods, freeze drying retains the nutritional content of the food. This means that essential vitamins, minerals, and antioxidants are preserved, ensuring that the food remains nutritious even after the preservation process.
-
Lightweight and Portable: Freeze-dried food is lightweight and compact, making it perfect for camping, hiking, or emergency preparedness. It's easy to store and transport, and it rehydrates quickly, providing a convenient option for on-the-go meals.
-
Minimizes Food Waste: By freeze drying food, you can significantly reduce food waste. Instead of letting excess produce spoil, you can preserve it through freeze drying, ensuring that nothing goes to waste.
-
Enhanced Flavor and Texture: Freeze-dried food retains its original flavor, aroma, and texture. When rehydrated, the food closely resembles its fresh counterpart, providing a satisfying eating experience.
-
Convenient Meal Preparation: With a stock of freeze-dried ingredients on hand, meal preparation becomes more convenient. Whether it's fruits, vegetables, or meats, having freeze-dried ingredients allows for quick and easy meal assembly without compromising on quality.
-
Cost-Effective: While the initial investment in a DIY freeze dryer may seem significant, the long-term cost savings can be substantial. By preserving food at its peak freshness, you can avoid purchasing expensive pre-packaged freeze-dried products.
The benefits of freeze drying food make it a practical and efficient method for preserving a wide variety of foods at home. Whether you're looking to reduce food waste, stock up on emergency supplies, or simply enjoy the convenience of long-lasting, nutritious food, a DIY freeze dryer can be a valuable addition to your home preservation tools.
How a DIY Freeze Dryer Works
A DIY freeze dryer operates on the principle of sublimation, a process where a substance transitions directly from a solid to a gas without passing through the liquid phase. The basic components of a freeze dryer include a vacuum pump, a condenser, and a freezing chamber. Here's a breakdown of the freeze-drying process:
-
Freezing: The first step involves placing the food in the freezing chamber, where it is subjected to low temperatures. This freezing process solidifies the water content within the food.
-
Vacuum: Once the food is frozen, the chamber's pressure is reduced using a vacuum pump. This low-pressure environment allows the frozen water in the food to transition directly from a solid to a gas without melting into a liquid state.
-
Sublimation: As the pressure decreases, the frozen water molecules in the food turn into vapor and are drawn out of the food. This process is known as sublimation. The vapor is then collected in the condenser, where it is converted back into a solid state, leaving behind the freeze-dried food.
-
Sealing: After the sublimation process is complete, the freeze-dried food is sealed in airtight packaging to prevent moisture from re-entering. This step is crucial for maintaining the food's long shelf life.
By understanding the principles of sublimation and creating the right conditions within the freeze dryer, it's possible to effectively remove moisture from food while preserving its structure, flavor, and nutritional content. This process allows for the creation of lightweight, shelf-stable food that can be stored for extended periods without the need for refrigeration or special storage conditions.
Materials Needed for a DIY Freeze Dryer
Building a DIY freeze dryer requires specific materials to create the necessary environment for freeze-drying food. Here's a list of essential components and materials you'll need to construct your own freeze dryer:
-
Vacuum Chamber: The heart of the freeze dryer, the vacuum chamber creates the low-pressure environment necessary for sublimation to occur. You can use a thick-walled container, such as a large glass jar or a metal canister, capable of withstanding the vacuum pressure.
-
Vacuum Pump: A high-quality vacuum pump is essential for creating and maintaining the low-pressure environment within the vacuum chamber. Look for a durable pump with sufficient capacity to achieve the desired vacuum levels.
-
Condenser: The condenser is responsible for collecting the vaporized moisture from the sublimation process. You can construct a simple condenser using copper tubing or purchase a pre-made condenser suitable for your DIY freeze dryer setup.
-
Freezing Chamber: To freeze the food before the sublimation process, you'll need a freezing chamber. This can be a separate compartment within the vacuum chamber or a dedicated container capable of reaching and maintaining freezing temperatures.
-
Heating Pad or Element: While not always necessary, a heating pad or element can help facilitate the sublimation process by providing gentle heat to the frozen food, aiding in the vaporization of moisture.
-
Sealing Equipment: A reliable heat sealer or vacuum sealer is essential for packaging the freeze-dried food once the process is complete. This ensures that the food remains protected from moisture and maintains its long shelf life.
-
Insulation Materials: To maintain the desired temperatures and improve energy efficiency, insulation materials such as foam board or insulation blankets can be used to insulate the vacuum chamber and freezing chamber.
-
Temperature and Pressure Gauges: Accurately monitoring the temperature and pressure levels within the freeze dryer is crucial for achieving optimal results. Invest in quality gauges to keep track of these critical parameters throughout the freeze-drying process.
-
Food Trays or Racks: Sturdy, food-grade trays or racks are needed to hold the food items within the vacuum chamber. Ensure that the trays are compatible with the dimensions of your vacuum chamber and can withstand freezing temperatures.
-
Miscellaneous Tools and Supplies: Additionally, you'll need various tools and supplies such as silicone sealant, tubing, clamps, and other hardware to assemble and customize your DIY freeze dryer according to your specific design and requirements.
By gathering these materials and components, you can begin the process of constructing your own DIY freeze dryer and embark on the journey of preserving a wide variety of foods through the power of freeze-drying.
Step-by-Step Guide to Building a DIY Freeze Dryer
-
Prepare the Vacuum Chamber: Begin by selecting a suitable container for the vacuum chamber, ensuring that it is sturdy and airtight. Drill holes in the container for the vacuum pump inlet and outlet, as well as for the condenser tubing. Seal the drilled holes with silicone to maintain the vacuum pressure.
-
Install the Vacuum Pump: Position the vacuum pump outside the vacuum chamber and connect it to the inlet and outlet holes using airtight tubing and fittings. Secure the connections with clamps and ensure that the pump is securely mounted and stable.
-
Construct the Condenser: If building a DIY condenser, coil copper tubing inside a separate container, such as a cooler, and connect it to the vacuum chamber. The condenser should be positioned to collect the vaporized moisture from the sublimation process.
-
Prepare the Freezing Chamber: Set up a compartment within the vacuum chamber or a separate container to serve as the freezing chamber. Place food trays or racks inside the freezing chamber to hold the food items during the freeze-drying process.
-
Assemble Insulation: Line the vacuum chamber and freezing chamber with insulation materials to maintain stable temperatures and improve energy efficiency. Ensure that the insulation does not obstruct the necessary airflow and connections.
-
Install Temperature and Pressure Gauges: Mount temperature and pressure gauges in easily visible locations on the vacuum chamber to monitor the conditions throughout the freeze-drying process. Calibrate the gauges for accuracy.
-
Connect Heating Element (Optional): If using a heating pad or element to aid in the sublimation process, position it within the freezing chamber and connect it to a temperature controller. The heating element should provide gentle heat to facilitate moisture vaporization.
-
Customize and Test: Customize the setup according to your specific design and requirements, ensuring that all components are securely in place. Conduct a thorough test run to verify the functionality of the DIY freeze dryer and make any necessary adjustments.
-
Begin Freeze Drying: Once the DIY freeze dryer is assembled and tested, it's time to start freeze-drying food. Place the prepared food items on the trays or racks within the freezing chamber and initiate the freeze-drying process according to the specific requirements of the food being preserved.
-
Seal the Freeze-Dried Food: After the sublimation process is complete, carefully remove the freeze-dried food from the freezing chamber and seal it in airtight packaging using a heat sealer or vacuum sealer. Label the packages with the contents and date of preservation.
By following this step-by-step guide, you can successfully build your own DIY freeze dryer and embark on the journey of preserving a wide variety of foods through the power of freeze-drying.
Tips for Freeze Drying Food at Home
When it comes to freeze drying food at home, there are several tips and best practices to ensure successful results and optimal preservation. Here are some valuable tips to consider when embarking on your freeze-drying journey:
-
Prep Food Properly: Before freeze drying, ensure that the food is properly prepared. This may include blanching vegetables, pre-freezing fruits, and trimming excess fat from meats. Proper preparation sets the stage for successful freeze drying and helps maintain the quality of the end product.
-
Evenly Distribute Food: When loading food into the freezing chamber, ensure that it is evenly distributed on the trays or racks. This promotes uniform freeze drying and prevents uneven moisture removal, resulting in consistent quality across all items.
-
Monitor Temperature and Pressure: Throughout the freeze-drying process, closely monitor the temperature and pressure within the vacuum chamber. Maintaining the optimal conditions is crucial for achieving efficient sublimation and preserving the food effectively.
-
Adjust Freeze-Drying Times: Different types of food may require varying freeze-drying times. Be prepared to adjust the duration of the process based on the specific characteristics of the food being preserved. Experimentation and observation can help determine the ideal freeze-drying times for different food items.
-
Use Quality Packaging: Once the food is freeze-dried, it's essential to package it in high-quality, airtight containers or bags. This helps protect the food from moisture and external elements, ensuring its long-term shelf life and preserving its quality.
-
Label and Date Packages: Properly label the packaged freeze-dried food with its contents and the date of preservation. This simple step helps you keep track of the items in your inventory and ensures that you can easily identify and use them when needed.
-
Store in a Cool, Dark Place: After packaging, store the freeze-dried food in a cool, dark place away from direct sunlight and moisture. Proper storage conditions play a significant role in maintaining the food's quality and extending its shelf life.
-
Regularly Inspect Stored Food: Periodically inspect the stored freeze-dried food to ensure that the packaging remains intact and that there are no signs of moisture or spoilage. This proactive approach helps identify any issues early and allows for timely corrective action.
-
Experiment with Recipes: Freeze drying opens up opportunities to experiment with various recipes and food combinations. Explore different fruits, vegetables, and even cooked meals to discover new and exciting ways to incorporate freeze-dried ingredients into your culinary creations.
-
Share and Enjoy: Lastly, share the fruits of your freeze-drying efforts with family and friends. Whether it's gifting homemade freeze-dried snacks or incorporating them into shared meals, the joy of freeze-dried food is best experienced when shared with others.
By incorporating these tips into your freeze-drying endeavors, you can enhance the quality of your preserved food and make the most of your DIY freeze dryer. Experiment, learn, and enjoy the process of creating long-lasting, nutritious food through the art of freeze drying.
Conclusion
In conclusion, the art of freeze drying food at home offers a myriad of benefits, from extended shelf life and retained nutritional value to minimized food waste and enhanced convenience. With the knowledge of how a DIY freeze dryer works, the essential materials needed, and a step-by-step guide to building one, individuals can embark on a journey of preserving a wide variety of foods through the power of freeze-drying. By following the provided tips for successful freeze drying at home, enthusiasts can ensure optimal results and enjoy the satisfaction of creating long-lasting, nutritious food using their DIY freeze dryer. Whether it's for emergency preparedness, culinary experimentation, or simply reducing food waste, the DIY freeze dryer opens up a world of possibilities for home food preservation. Embracing the art of freeze drying empowers individuals to take control of their food supply, enjoy seasonal produce year-round, and savor the convenience of lightweight, shelf-stable ingredients. With the right tools, knowledge, and creativity, anyone can harness the power of freeze drying to preserve and enjoy a wide array of foods at home.