
Home>Create & Decorate>DIY & Crafts>DIY Dog Wheelchair: Step-by-Step Guide To Building A Custom Mobility Aid
DIY & Crafts
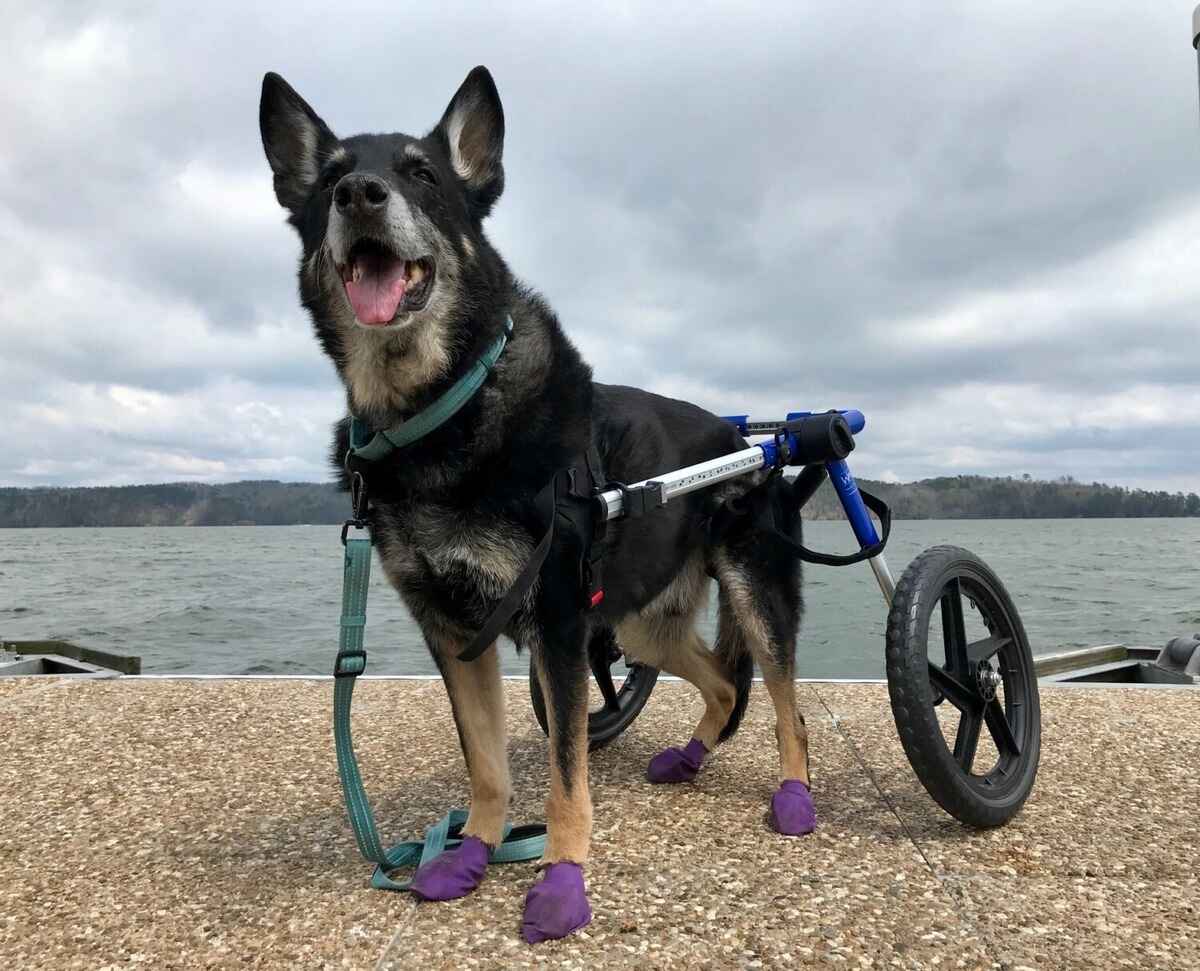
DIY Dog Wheelchair: Step-by-Step Guide To Building A Custom Mobility Aid
Published: June 12, 2024

Content Creator specializing in woodworking and interior transformations. Caegan's guides motivate readers to undertake their own projects, while his custom furniture adds a personal touch.
Learn how to build a custom DIY dog wheelchair with our step-by-step guide. Get the best mobility aid for your furry friend!
(Many of the links in this article redirect to a specific reviewed product. Your purchase of these products through affiliate links helps to generate commission for Twigandthistle.com, at no extra cost. Learn more)
Introduction
Have you ever wondered how you can help your furry friend regain their mobility and independence? Building a DIY dog wheelchair can be a rewarding and cost-effective solution for pet owners whose dogs are facing mobility challenges. Whether your dog has a temporary injury or a permanent disability, a custom-built wheelchair can provide the support they need to move around comfortably. In this step-by-step guide, we will walk you through the process of creating a personalized mobility aid for your beloved canine companion. Let's get started on this pawsome project!
Materials Needed
To build a DIY dog wheelchair, you will need the following materials:
- PVC pipes: These will serve as the main frame of the wheelchair.
- PVC pipe connectors: To join the pipes together and create the frame structure.
- Wheels: Choose sturdy, durable wheels that can support your dog's weight and move smoothly.
- Axles: These will be used to attach the wheels to the wheelchair frame.
- Straps and harness material: To create a comfortable and secure harness for your dog.
- Nuts and bolts: For assembling the different parts of the wheelchair securely.
- Padding or foam: To provide cushioning and support for your dog's body while using the wheelchair.
- Velcro straps: For adjusting and securing the harness around your dog's body.
- Measuring tape and marker: To take accurate measurements and mark the PVC pipes for cutting.
- Saw: For cutting the PVC pipes to the required lengths.
- Drill and screws: For attaching the wheels and axles to the wheelchair frame.
Gathering these materials will set you up for a successful DIY dog wheelchair project. Now, let's move on to the next step of measuring and planning.
Measuring and Planning
Before diving into the construction of the DIY dog wheelchair, it's crucial to take precise measurements and plan the design. Here's how to get started:
-
Measure Your Dog: Begin by measuring your dog's length from the back of their front legs to just before their hind legs. This measurement will determine the length of the wheelchair frame. Additionally, measure the width of your dog's chest to ensure the harness will fit comfortably.
-
Consider the Height: Determine the height at which the wheelchair frame should sit to allow your dog's legs to move freely without touching the ground. This will ensure that your dog can move around comfortably without any restrictions.
-
Plan the Frame Structure: Based on the measurements, plan the design of the wheelchair frame using the PVC pipes and connectors. Mark the pipes for cutting according to the length required for the frame. Consider the placement of the wheels and axles while planning the frame structure.
-
Account for Adjustability: Keep in mind that the wheelchair may need some adjustability as your dog gets accustomed to using it. Planning for adjustability in the harness and frame will allow you to make necessary modifications as needed.
-
Ensure Comfort and Support: While planning the wheelchair, think about adding padding or foam to provide comfort and support for your dog. This will help prevent any discomfort or chafing from prolonged use of the wheelchair.
By carefully measuring and planning the design of the DIY dog wheelchair, you can ensure that it will be tailored to your dog's specific needs and provide the necessary support for their mobility. With the measurements in hand and a clear plan in place, you're ready to move on to the next step of building the frame.
Building the Frame
Now that you have the measurements and a plan in place, it's time to start building the frame of the DIY dog wheelchair. Follow these steps to construct the sturdy and supportive frame for your canine companion:
-
Cut the PVC Pipes: Use a saw to cut the PVC pipes according to the measurements you've taken. Remember to double-check the lengths before cutting to ensure accuracy. You will need four lengths for the sides of the frame and two lengths for the front and back support.
-
Assemble the Frame: Begin by connecting the sides of the frame using the PVC pipe connectors. Create a rectangular shape by joining the four cut PVC pipes with the connectors. This will form the main structure of the wheelchair frame.
-
Attach the Front and Back Support: Once the sides are connected, attach the shorter lengths of PVC pipes to the front and back of the frame. This will provide additional support and stability to the wheelchair structure.
-
Reinforce the Joints: To ensure the frame is strong and secure, reinforce all the joints by using additional PVC connectors and securing them tightly. This step is crucial to bear the weight of your dog and withstand movement.
-
Add Padding and Support: Consider adding padding or foam to the areas where your dog's body will come into contact with the frame. This will help prevent any discomfort or rubbing and provide extra support while using the wheelchair.
By following these steps, you can create a durable and well-constructed frame for the DIY dog wheelchair. Once the frame is built, you can move on to the next phase of attaching the wheels and axles to make the wheelchair mobile and functional for your furry friend.
Attaching Wheels and Axles
Attaching the wheels and axles is a crucial step in transforming the frame into a functional DIY dog wheelchair. Follow these steps to ensure that the wheels are securely attached and the wheelchair can move smoothly:
-
Positioning the Wheels: Determine the placement of the wheels on the frame. Typically, the wheels are attached to the rear of the frame to provide support and mobility for your dog. Mark the positions where the axles will be inserted to ensure that the wheels are aligned and balanced.
-
Drilling Holes for Axles: Use a drill to create holes in the PVC frame at the marked positions for the axles. The holes should be slightly smaller than the diameter of the axles to create a snug fit and provide stability for the wheels.
-
Inserting the Axles: Once the holes are drilled, insert the axles through the holes in the frame. Ensure that the axles are straight and securely positioned to support the weight of the wheelchair and your dog.
-
Attaching the Wheels: Slide the wheels onto the axles and secure them in place using nuts and bolts. Tighten the nuts to prevent any wobbling or instability in the wheels. Test the wheels to ensure they rotate smoothly and freely without any resistance.
-
Checking Wheel Alignment: Verify that the wheels are aligned properly and are parallel to each other. This alignment is essential for the stability and maneuverability of the wheelchair. Make any necessary adjustments to ensure that the wheels are evenly positioned and aligned.
-
Reinforcing the Wheel Attachments: Once the wheels are in place, reinforce the attachments by adding additional nuts and bolts to secure the axles firmly to the frame. This extra reinforcement will provide added strength and stability, especially when your dog is using the wheelchair.
By following these steps, you can effectively attach the wheels and axles to the frame, transforming it into a fully functional DIY dog wheelchair. With the wheels securely in place, your furry friend will soon be ready to test out their new mobility aid.
Creating the Harness
Designing a comfortable and secure harness is essential for ensuring that your dog can move around with ease and stability while using the DIY wheelchair. Follow these steps to create a harness tailored to your dog's specific measurements and needs:
-
Measure Your Dog's Body: Begin by measuring your dog's chest and torso to determine the size of the harness. Use a flexible measuring tape to get accurate measurements, ensuring a snug yet comfortable fit.
-
Select Harness Material: Choose a durable and comfortable material for the harness, such as nylon webbing or padded fabric. The material should be strong enough to support your dog's weight while also being gentle on their skin.
-
Cut the Straps: Based on your dog's measurements, cut the harness material into straps for the chest, torso, and support straps that will connect to the wheelchair frame. Ensure that the straps are long enough to provide ample coverage and support.
-
Create Attachment Points: Sew or attach D-rings or buckles to the straps to create attachment points for securing the harness around your dog's body. These attachment points will allow you to adjust the harness for a snug and secure fit.
-
Assemble the Harness: Begin by connecting the chest and torso straps to form the main body of the harness. Ensure that the straps are securely attached and can bear the weight of your dog without causing any discomfort.
-
Add Padding and Support: Consider adding padding or soft fabric to the areas of the harness that will come into contact with your dog's body. This will provide cushioning and prevent any rubbing or chafing while your dog is using the wheelchair.
-
Attach Support Straps to the Frame: Once the main body of the harness is assembled, attach the support straps to the wheelchair frame. These straps will connect the harness to the frame, providing stability and support for your dog while they are using the wheelchair.
-
Adjustability and Comfort: Ensure that the harness is adjustable to accommodate your dog's movements and provide a comfortable fit. Use Velcro straps or adjustable buckles to allow for easy adjustments as needed.
By following these steps, you can create a custom harness that will securely support your dog and allow them to move around comfortably while using the DIY wheelchair. The harness plays a crucial role in ensuring that your furry friend can enjoy improved mobility and independence with their new mobility aid.
Testing and Adjusting
After completing the construction of the DIY dog wheelchair and creating a custom harness, it's time to proceed with testing and making necessary adjustments to ensure that the mobility aid functions effectively for your furry companion.
-
Fit and Comfort: Begin by carefully placing the harness on your dog and securing them in the wheelchair. Pay close attention to your dog's comfort and behavior as they get accustomed to the new device. Ensure that the harness fits snugly but comfortably, providing the necessary support without causing any discomfort or restriction of movement.
-
Initial Mobility Test: Gently guide your dog to take their first steps in the wheelchair. Observe how they respond to the device and whether they are able to move around comfortably. Allow them to get familiar with the sensation of being in the wheelchair and provide reassurance and encouragement throughout the process.
-
Observation and Adjustment: Watch closely as your dog moves in the wheelchair, noting any signs of discomfort, rubbing, or difficulty in maneuvering. Make any necessary adjustments to the harness or wheelchair frame to address these issues. This may involve tightening or loosening the straps, adding additional padding, or modifying the frame for better alignment and stability.
-
Practice and Support: Encourage your dog to practice using the wheelchair in a safe and controlled environment. Offer support and guidance as they navigate their surroundings, helping them gain confidence and adapt to the new mode of mobility. Be patient and supportive, allowing your dog to progress at their own pace.
-
Fine-Tuning and Modifications: As your dog becomes more accustomed to the wheelchair, continue to fine-tune the fit and functionality of the device. Make any necessary modifications to ensure that the wheelchair provides optimal support and freedom of movement for your dog. This may involve further adjustments to the harness, padding, or wheel alignment.
-
Regular Monitoring and Adaptation: Keep a close eye on your dog's comfort and mobility while using the wheelchair on a regular basis. Monitor their behavior and movement patterns, making ongoing adaptations to the wheelchair as needed. Your dog's comfort and well-being should be the top priority throughout this process.
By carefully testing and adjusting the DIY dog wheelchair, you can ensure that it meets your dog's specific needs and provides the support they require for improved mobility. With patience, observation, and a willingness to make necessary modifications, you can help your furry friend enjoy a renewed sense of freedom and independence with their custom-built mobility aid.
Conclusion
In conclusion, building a DIY dog wheelchair can be a fulfilling and impactful project for pet owners seeking to support their canine companions with mobility challenges. By following the step-by-step guide outlined above, you can create a custom mobility aid tailored to your dog's specific measurements and needs. From gathering the necessary materials to constructing the frame, attaching wheels and axles, creating a comfortable harness, and testing and adjusting the wheelchair, each phase of the process is essential in ensuring that the final product provides optimal support and freedom of movement for your furry friend.
Remember, the well-being and comfort of your dog should always be the primary focus throughout the construction and adaptation of the wheelchair. Regular monitoring, observation, and a willingness to make necessary modifications are key to ensuring that the wheelchair effectively meets your dog's mobility requirements.
With your dedication and the personalized DIY dog wheelchair, you can provide your beloved pet with the gift of enhanced mobility and independence, enriching their quality of life and strengthening the bond between you and your furry companion.