
Home>Organize & Storage>Closet Organization>DIY Bedroom Small Walk-in Closet Ideas
Closet Organization
DIY Bedroom Small Walk-in Closet Ideas
Published: September 1, 2024
Discover creative DIY small walk-in closet ideas to maximize your bedroom space. Get tips on organization, storage solutions, and stylish designs for a clutter-free life.
(Many of the links in this article redirect to a specific reviewed product. Your purchase of these products through affiliate links helps to generate commission for Twigandthistle.com, at no extra cost. Learn more)
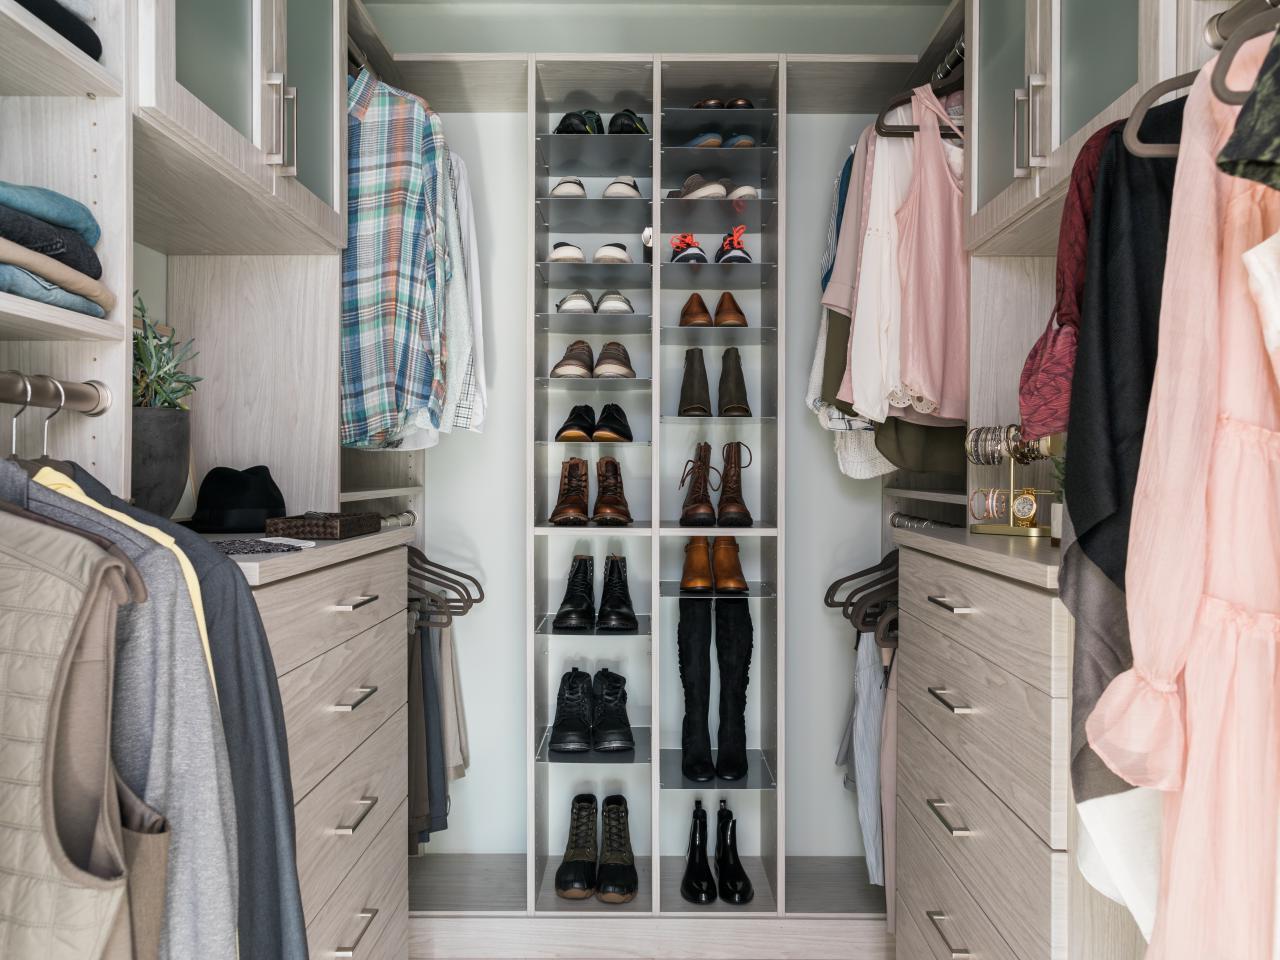
Creating a small walk-in closet in your bedroom can be a fun and rewarding project. With some creativity and a few DIY skills, you can transform a cluttered space into an organized, stylish haven. This guide will provide simple and practical ideas to maximize the storage potential of your small walk-in closet. Whether you have a tiny nook or a larger area, these tips will help you make the most of every inch. Get ready to roll up your sleeves and turn your cramped closet into a functional and beautiful space you'll love.
Getting Ready for Your Project
Measure the Space: Use a tape measure to get the dimensions of your closet area. Write down the height, width, and depth.
Plan Your Layout: Sketch a rough design of where you want shelves, rods, and drawers. Consider using online tools or apps for more precise planning.
Gather Materials: Make a list of needed materials like wood, brackets, screws, and closet rods. Visit a hardware store or order online.
Clear the Area: Remove any existing items from the closet. Clean the space thoroughly to start with a fresh area.
Safety Gear: Wear safety goggles, gloves, and a dust mask. Keep a first aid kit nearby.
Set Up Workspace: Find a flat surface like a workbench or table. Lay out all tools and materials for easy access.
Pre-cut Wood: If possible, have wood pieces cut to size at the store. This saves time and ensures accuracy.
Mark Studs: Use a stud finder to locate wall studs. Mark these spots with a pencil for secure mounting.
Check Tools: Ensure you have a drill, level, screwdriver, and measuring tape. Charge any battery-operated tools.
Pre-drill Holes: Mark and pre-drill holes for screws to make assembly easier and prevent wood from splitting.
Dry Fit: Before final assembly, place shelves and rods in the closet to ensure everything fits as planned.
Ventilation: Make sure the room is well-ventilated, especially if using adhesives or paint.
Lighting: Consider adding a light source inside the closet. Battery-operated LED lights are a good option.
Label Parts: Label each piece of wood or material to avoid confusion during assembly.
Double-Check Measurements: Measure twice, cut once. Double-check all dimensions before making any cuts or drilling holes.
Gather Your Supplies
- Measuring Tape: Essential for measuring dimensions to ensure everything fits perfectly.
- Pencil and Notepad: For jotting down measurements and sketching layout plans.
- Level: Ensures shelves and rods are installed straight.
- Stud Finder: Locates wall studs to securely mount shelves and rods.
- Drill and Drill Bits: Necessary for making holes in walls and assembling parts.
- Screwdriver: Tightens screws for shelves, rods, and other fixtures.
- Hammer: Useful for driving nails or tapping parts into place.
- Nails and Screws: Fasteners for securing shelves, rods, and hooks.
- Wall Anchors: Provides extra support for heavy items when studs aren't available.
- Shelving Units: Creates storage space for clothes, shoes, and accessories.
- Closet Rods: Hangs clothes, maximizing vertical space.
- Brackets: Supports shelves and rods, ensuring stability.
- Hooks: Adds extra hanging space for bags, hats, or scarves.
- Storage Bins and Baskets: Organizes smaller items, keeping the closet tidy.
- Paint and Brushes: Freshens up the closet space, making it look new.
- Lighting Fixtures: Improves visibility inside the closet.
- Mirror: Adds functionality and makes the space feel larger.
- Step Ladder: Helps reach higher areas safely.
- Safety Glasses and Gloves: Protects eyes and hands during installation.
Skills Needed and Time Commitment
Skill Level: Intermediate
Time Required: 1-2 weekends
- Planning and Design: 2-4 hours
- Gathering Materials: 1-2 hours
- Painting and Prep Work: 4-6 hours
- Installing Shelves and Rods: 6-8 hours
- Organizing and Final Touches: 2-4 hours
Follow These Steps
Measure the Space
- Use a tape measure to get the dimensions of the area.
- Write down the width, depth, and height.
Plan the Layout
- Sketch a rough design of the closet.
- Decide where shelves, rods, and drawers will go.
Gather Materials
- Purchase wood, screws, brackets, and closet rods.
- Get tools like a saw, drill, level, and screwdriver.
Install Shelves
- Cut wood to fit the dimensions.
- Attach brackets to the wall using screws.
- Place shelves on brackets and secure them.
Install Closet Rods
- Measure and mark where rods will go.
- Use a level to ensure they are straight.
- Attach rod brackets to the wall and insert rods.
Add Drawers
- Assemble drawer units if pre-bought.
- Secure them to the wall or place them on the floor.
Paint or Stain
- Choose a color or stain that matches your room.
- Apply paint or stain to shelves and rods.
- Let it dry completely.
Organize Your Clothes
- Hang clothes on rods.
- Fold and place items on shelves.
- Store smaller items in drawers.
Add Finishing Touches
- Install hooks for accessories.
- Place baskets or bins for extra storage.
- Add a mirror or lighting if desired.
Helpful Tips and Tricks
Maximize vertical space by installing shelves up to the ceiling. Use baskets or bins on higher shelves for items you don't need daily.
Install hooks on the inside of the closet door for belts, scarves, or jewelry.
Use slim hangers to save space and keep clothes organized.
Add a shoe rack at the bottom to keep footwear tidy and accessible.
Consider a double hanging rod to create two levels of hanging space for shirts and pants.
Use clear storage bins so you can easily see what's inside without rummaging.
Label everything to make finding items quicker and easier.
Add lighting inside the closet to help you see better and make the space feel larger. Battery-operated LED lights are a good option if wiring isn't feasible.
Common mistakes to avoid: Overloading shelves, which can cause them to sag or break. Not measuring the space before buying organizers, leading to items that don't fit. Ignoring the need for ventilation, which can lead to musty smells.
Alternatives for materials or methods: Instead of wood shelves, use wire shelving for better airflow. If you can't install permanent fixtures, use freestanding organizers. For a budget-friendly option, repurpose old furniture like a small dresser or bookshelf.
Budgeting Your Closet Makeover
Materials:
- Wood for Shelves: $50-$100
- Closet Rods: $20-$40
- Brackets and Supports: $15-$30
- Paint or Stain: $20-$40
- Hooks and Hangers: $10-$20
- Storage Bins: $20-$50
Tools:
- Drill: $30-$60
- Screwdriver Set: $10-$20
- Measuring Tape: $5-$10
- Level: $10-$20
- Saw: $20-$50
Total Cost: $210-$440
Budget-Friendly Alternatives:
- Repurpose Old Wood: Free or low cost
- Use Tension Rods: $10-$20
- Buy Second-Hand Tools: Half the price of new
- Skip Paint: Save $20-$40
- DIY Hooks from Wire: Free or low cost
Personalize Your Closet
Shelving Materials: Use wooden planks for a rustic look, or go for metal shelves for a modern feel. Glass shelves can add a touch of elegance.
Colors: Paint the closet in light colors like white or beige to make it feel larger. For a bold statement, use dark colors like navy or charcoal.
Storage Bins: Choose woven baskets for a natural vibe, or use clear plastic bins to easily see what's inside. Fabric bins can add a pop of color.
Lighting: Install LED strip lights for a sleek, modern look. Pendant lights can add a touch of sophistication, while fairy lights create a cozy atmosphere.
Closet Doors: Use sliding barn doors for a rustic touch, or mirrored doors to make the space feel bigger. Curtains can be a soft, flexible option.
Hanging Rods: Opt for adjustable rods to customize the height. Double rods can maximize hanging space. Copper rods add a trendy, industrial look.
Hooks and Racks: Install decorative hooks for accessories. Wall-mounted racks can hold shoes or bags. Magnetic strips are great for small metal items.
Flooring: Use laminate flooring for easy cleaning. Carpet tiles can add warmth and comfort. Vinyl flooring offers a variety of patterns and colors.
Mirrors: Add a full-length mirror to check outfits. Mirrored panels on doors can make the space feel larger. Decorative mirrors can add style.
Seating: Include a small bench for putting on shoes. Ottomans with storage can be practical. Foldable stools save space when not in use.
Eco-Friendly Closet Ideas
Reclaimed wood makes excellent shelves or hanging rods. It adds character and reduces waste. Bamboo is another great option. It's fast-growing and sustainable. Recycled metal can be used for brackets or hooks. It’s sturdy and eco-friendly.
Use low-VOC paint to keep the air clean. VOCs are chemicals that can harm health. Choose paints labeled low or zero VOC.
Repurpose old furniture like dressers or bookshelves. They can be turned into storage units. This saves money and keeps items out of landfills.
Fabric bins made from organic cotton or recycled materials are perfect for organizing. They’re soft, durable, and eco-friendly.
LED lighting is energy-efficient and lasts longer. It reduces electricity use and saves money over time.
Natural fiber rugs like jute or sisal add warmth and are biodegradable. They’re a great alternative to synthetic options.
Sliding doors save space and can be made from reclaimed materials. They’re practical and stylish.
Second-hand mirrors or decor items can add a personal touch. Thrift stores or online marketplaces often have unique finds.
Compostable hangers made from materials like bamboo or recycled paper are a green choice. They’re sturdy and break down naturally when no longer needed.
DIY storage boxes from old cardboard or wood scraps can be customized. They’re a fun project and reduce waste.
Your Closet, Your Style
Creating a small walk-in closet doesn't have to be complicated. Use shelves and hanging rods to maximize space. Add baskets for smaller items. A full-length mirror can make the area feel bigger. Don't forget lighting; it makes a huge difference. Hooks on the door can hold bags or scarves. Consider a shoe rack to keep footwear organized. Labels help keep everything in its place. A stool or small bench can be handy for putting on shoes. Sliding doors save space compared to swinging ones. Personal touches like photos or art make it uniquely yours. Remember, the goal is to make the most of your space while keeping it functional and stylish. With a bit of creativity, your small walk-in closet can be both practical and beautiful. Happy organizing!
How can I maximize space in a small walk-in closet?
Use vertical space! Install shelves up high for items you don't use daily. Add hooks on walls for bags, hats, or scarves. Consider a double-hanging rod to hang more clothes.
What are some budget-friendly storage solutions?
Look for stackable bins and drawer organizers at discount stores. Use tension rods for extra hanging space. Repurpose old boxes or baskets for shoes and accessories.
How do I keep my closet organized?
Sort items by category and color. Use labels for bins and boxes. Regularly declutter and donate items you no longer need. Keep a small hamper in the closet for dirty clothes.
What lighting works best in a small walk-in closet?
Install LED strip lights along shelves or under hanging rods. Use a motion-sensor light for convenience. If possible, add a small ceiling light for overall brightness.
How can I make my closet look stylish?
Use matching hangers for a clean look. Add a small rug or mirror. Incorporate decorative boxes or baskets. Hang a piece of art or a photo on the wall.
What should I do with shoes in a small closet?
Use a shoe rack or over-the-door organizer. Store off-season shoes in clear bins under hanging clothes. Consider stackable shoe shelves for more space.
How do I store accessories like jewelry and belts?
Use a jewelry organizer that hangs on a rod or door. Install small hooks or pegboards for belts and necklaces. Keep small trays or bowls on shelves for rings and earrings.