
Home>Home & Furniture>Roof>How To install polycarbonate roofing
Roof
How To install polycarbonate roofing
Published: August 20, 2024
Learn how to install polycarbonate roofing with our step-by-step guide. Discover tips, tools, and techniques for a durable and weather-resistant roof installation.
(Many of the links in this article redirect to a specific reviewed product. Your purchase of these products through affiliate links helps to generate commission for Twigandthistle.com, at no extra cost. Learn more)
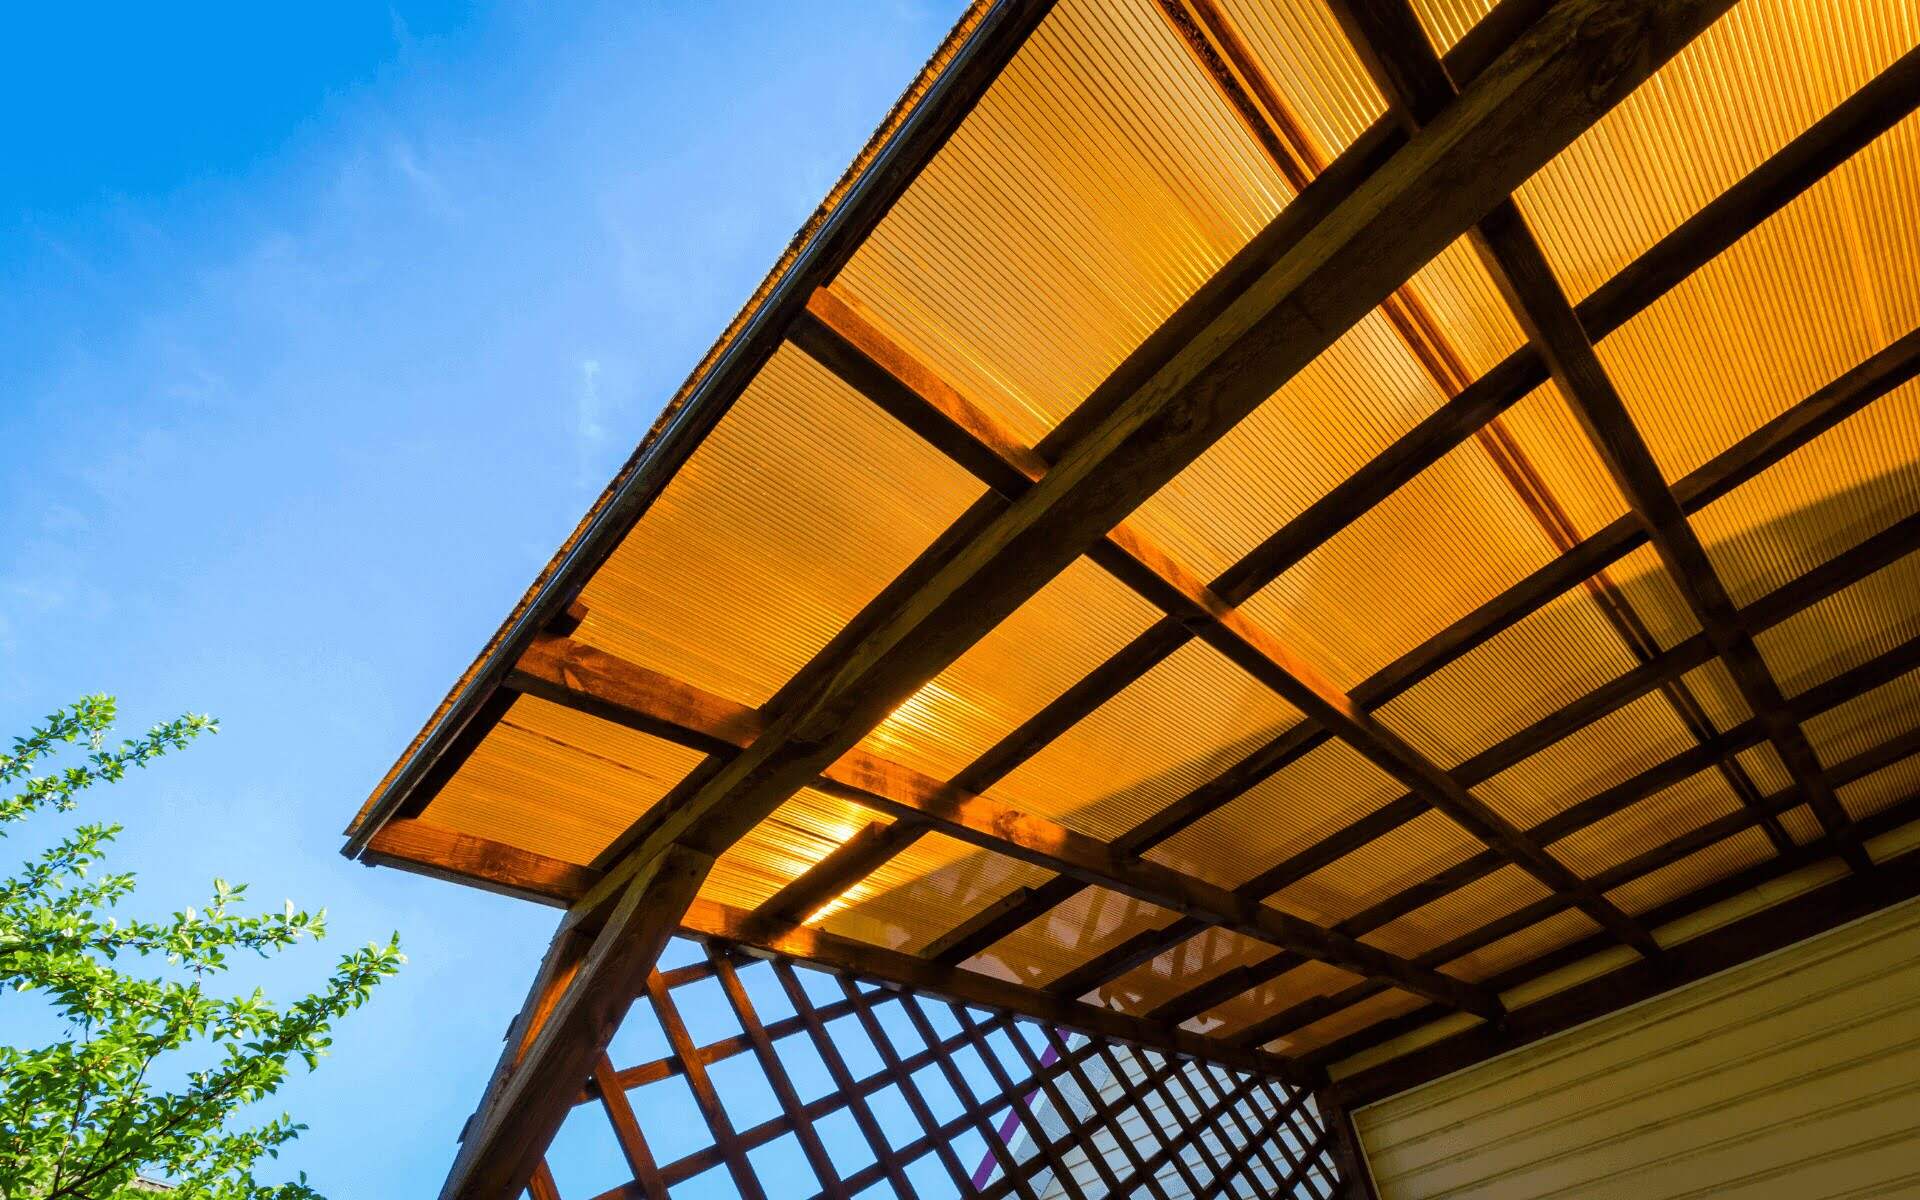
Polycarbonate roofing is a popular choice due to its durability, lightweight nature, and ease of installation. Whether you're looking to cover a patio, carport, or greenhouse, this material stands up well against harsh weather while allowing plenty of natural light. Installing polycarbonate sheets might seem challenging, but with the right tools and a bit of know-how, you can do it yourself. This guide will walk you through the steps, providing tips to ensure a secure and long-lasting installation. Let's get started on turning your outdoor space into a bright, covered area!
Getting Ready for the Project
Measure the Area: Use a tape measure to determine the length and width of the roof. This helps you know how much polycarbonate material you need.
Gather Materials: Collect all necessary tools and materials. You’ll need polycarbonate sheets, screws, a drill, a saw, safety goggles, gloves, and a ladder.
Safety Gear: Wear safety goggles to protect your eyes, gloves to protect your hands, and non-slip shoes for better grip on the ladder.
Clear the Workspace: Remove any debris or obstacles from the area where you’ll be working. This ensures a safe and efficient workspace.
Check the Weather: Choose a day with good weather. Avoid working on windy or rainy days to prevent accidents.
Cut the Sheets: Use a saw to cut the polycarbonate sheets to the required size. Make sure to measure twice and cut once to avoid mistakes.
Pre-Drill Holes: Drill holes in the sheets before installation. This prevents the material from cracking when you screw it in place.
Set Up the Ladder: Place the ladder on a stable surface. Ensure it’s secure before climbing to avoid falls.
Lay Out the Sheets: Arrange the polycarbonate sheets on the ground in the order they will be installed. This helps you visualize the layout and make any adjustments before starting.
Check for Permits: Some areas require permits for roofing projects. Check local regulations to ensure compliance.
Materials and Tools Checklist
- Polycarbonate Sheets: These are the main roofing material. They are lightweight, durable, and provide UV protection.
- Measuring Tape: Used to measure the dimensions of the roof accurately.
- Pencil: For marking measurements on the polycarbonate sheets.
- Circular Saw or Jigsaw: Needed to cut the polycarbonate sheets to the required size.
- Drill: Used for making holes in the sheets for screws.
- Screws and Washers: Secure the sheets to the roof structure. Washers help distribute the pressure evenly.
- Screwdriver: Tightens the screws into place.
- Ladder: Provides access to the roof.
- Safety Gear: Includes gloves, safety glasses, and a helmet to protect yourself while working.
- Silicone Sealant: Seals the edges and joints to prevent water leakage.
- Rafters or Purlins: Support the polycarbonate sheets and provide a structure to attach them.
- Flashings: Used to cover the joints and edges, providing a neat finish and additional waterproofing.
- Clamps: Hold the sheets in place while you secure them with screws.
- Level: Ensures the sheets are installed evenly.
Required Skills and Time Commitment
Skill Level: Intermediate
Time Required: 6-8 hours
Preparation: 1-2 hours
- Measure the roof area.
- Gather tools and materials.
Cutting Panels: 1 hour
- Use a fine-tooth saw.
- Wear safety goggles.
Installing Panels: 3-4 hours
- Start from one end.
- Overlap panels correctly.
Securing Panels: 1 hour
- Use screws and washers.
- Ensure panels are tight.
Finishing Touches: 30 minutes
- Check for gaps.
- Apply sealant if needed.
Detailed Installation Guide
Gather Materials and Tools
- Polycarbonate sheets
- Screws and washers
- Drill
- Measuring tape
- Safety goggles and gloves
- Ladder
- Saw (if cutting sheets)
Measure the Roof Area
- Use a measuring tape to determine the length and width of the roof.
- Calculate the number of polycarbonate sheets needed.
Cut the Sheets (if necessary)
- Wear safety goggles and gloves.
- Use a saw to cut the sheets to the required size.
Prepare the Roof Frame
- Ensure the roof frame is clean and free of debris.
- Check that the frame is sturdy and properly aligned.
Position the First Sheet
- Place the first polycarbonate sheet at one end of the roof.
- Align it with the edge of the roof frame.
Drill Holes for Screws
- Use a drill to make holes in the sheet, spaced about 12 inches apart.
- Make sure holes are slightly larger than the screws to allow for expansion.
Secure the Sheet
- Insert screws with washers into the holes.
- Tighten screws until snug, but avoid over-tightening.
Overlap the Next Sheet
- Position the next sheet so it overlaps the first by at least one corrugation.
- Repeat the drilling and securing process.
Continue Installing Sheets
- Continue placing, drilling, and securing sheets until the entire roof is covered.
- Ensure each sheet overlaps the previous one.
Seal the Edges
- Use sealant to cover any gaps at the edges of the roof.
- Ensure all edges are properly sealed to prevent leaks.
Inspect the Roof
- Check all screws and overlaps to ensure they are secure.
- Make any necessary adjustments.
Clean Up
- Remove any debris or leftover materials.
- Store tools and unused materials properly.
Helpful Tips and Tricks
Measure twice, cut once. Always double-check measurements before cutting polycarbonate sheets. This avoids waste and ensures a proper fit.
Pre-drill holes. Drill holes slightly larger than the screws to allow for expansion and contraction. This prevents cracks.
Use proper support. Ensure rafters or purlins are spaced correctly. Polycarbonate needs adequate support to prevent sagging.
Seal edges. Use appropriate sealing tape on edges to prevent water ingress and dust accumulation.
Install with the UV-protected side up. Polycarbonate sheets often have a UV-protected side. Make sure this side faces the sun to prolong the material's life.
Overlap sheets correctly. Overlap sheets by at least one corrugation to ensure a watertight seal.
Avoid walking directly on sheets. Use a plank or board to distribute weight if you need to walk on the roof.
Use the right screws and washers. Polycarbonate roofing requires specific screws and washers to ensure a secure and watertight installation.
Common mistakes to avoid:
Over-tightening screws. This can cause stress cracks. Tighten screws just enough to hold the sheet securely.
Ignoring thermal expansion. Polycarbonate expands and contracts with temperature changes. Not accounting for this can lead to buckling or gaps.
Cutting without proper tools. Use a fine-toothed saw or specialized polycarbonate cutter to avoid jagged edges.
Alternatives for materials or methods:
Acrylic sheets. These can be used instead of polycarbonate but are less impact-resistant.
Metal roofing. Provides durability but lacks the transparency of polycarbonate.
Fiberglass panels. Another option, though they may yellow over time and are less flexible than polycarbonate.
Budgeting for Your Roofing Project
Polycarbonate Sheets: $20-$30 per sheet (4x8 feet) Roofing Screws: $10-$15 per box (100 screws) Closure Strips: $10-$15 per pack (enough for 10 feet) Sealant: $5-$10 per tube Drill: $30-$50 Circular Saw: $50-$100 Measuring Tape: $5-$10 Safety Gear: $20-$30 (gloves, goggles)
Total Estimated Cost: $150-$260
Budget-Friendly Alternatives:
- Borrow tools like a drill and circular saw from friends or neighbors.
- Use a hand saw instead of a circular saw: $10-$20.
- Purchase used tools from thrift stores or online marketplaces.
- Opt for bulk packs of screws and sealant to save money.
Personalizing Your Polycarbonate Roof
Polycarbonate roofing can be customized in many ways. For alternative materials, consider using corrugated metal sheets or fiberglass panels. These materials offer different levels of durability and appearance.
Colors can also be varied. Polycarbonate sheets come in clear, bronze, opal, and even green. Choose a color that matches your home's style or the desired light diffusion.
For styles, you can opt for flat sheets or corrugated sheets. Flat sheets provide a sleek, modern look, while corrugated sheets add texture and strength.
Frame materials can be customized too. Use wood for a rustic feel or aluminum for a contemporary look. Each material has its own benefits in terms of durability and maintenance.
Fasteners and seals can also be varied. Use stainless steel screws for a polished finish or rubber washers for better waterproofing.
Overhangs and gutters can be added to manage rainwater. Overhangs provide extra shade, while gutters help direct water away from the structure.
Ventilation options include adding ridge vents or side vents to improve airflow under the roofing.
Insulation can be added for better temperature control. Use foam boards or reflective insulation to keep the space cooler in summer and warmer in winter.
Lighting can be integrated by installing LED strips or solar lights along the edges or underneath the roofing.
Decorative elements like trim or molding can be added to enhance the overall look. Choose styles that complement your home's architecture.
By mixing and matching these elements, you can create a polycarbonate roofing system that fits your specific needs and aesthetic preferences.
Eco-Friendly Roofing Tips
Polycarbonate roofing is a great choice for eco-friendly projects. Here are some tips to make the installation process even more sustainable:
Reuse existing materials: If you have old roofing materials, consider reusing them. For example, old metal sheets can be repurposed for support structures.
Choose recycled polycarbonate: Look for polycarbonate sheets made from recycled materials. These are just as durable and help reduce waste.
Use eco-friendly sealants: Opt for sealants that are non-toxic and environmentally friendly. These products are better for your health and the planet.
Install rainwater collection systems: Polycarbonate roofing can be paired with rainwater collection systems. This allows you to harvest rainwater for gardening or other uses.
Optimize natural light: Polycarbonate sheets are transparent, so use them to maximize natural light in your space. This reduces the need for artificial lighting, saving energy.
Recycle old roofing: If replacing an old roof, make sure to recycle the old materials. Many recycling centers accept roofing materials like metal and asphalt.
Use sustainable framing: Choose framing materials like bamboo or reclaimed wood. These options are more sustainable than new lumber.
Plan for ventilation: Proper ventilation reduces the need for air conditioning. Design your roof with vents to allow hot air to escape naturally.
Minimize waste: Measure carefully to avoid excess cutting. This reduces waste and ensures you use only what you need.
Solar panel integration: Consider integrating solar panels with your polycarbonate roofing. This can provide renewable energy for your home.
By following these tips, you can install polycarbonate roofing in an eco-friendly way.
Ready to Roof
Installing polycarbonate roofing isn't rocket science. With the right tools, a bit of patience, and some elbow grease, you can transform your space. Remember to measure twice, cut once. Secure those panels tightly to avoid leaks. Don't forget to wear safety gear when handling sharp tools or climbing ladders.
If you run into trouble, don't hesitate to ask for help. Sometimes, an extra pair of hands makes all the difference. Keep your workspace tidy to avoid accidents.
Once everything's in place, step back and admire your handiwork. You've just added a durable, weather-resistant roof that'll last for years. Enjoy the satisfaction of a job well done. Now, whether it's a greenhouse, patio, or shed, your new roof will stand strong against the elements. Happy building!
What tools do I need to install polycarbonate roofing?
You'll need a drill, screws, measuring tape, saw, safety goggles, and gloves. A ladder and caulking gun might come in handy too.
How do I cut polycarbonate sheets?
Use a fine-tooth saw or circular saw. Make sure to wear safety goggles and gloves. Secure the sheet to prevent it from moving while cutting.
Can I install polycarbonate roofing by myself?
Absolutely! Just follow the instructions carefully. Having a friend to help can make the job easier and safer.
How do I secure the sheets to the frame?
Use screws with rubber washers to prevent leaks. Drill holes slightly larger than the screws to allow for expansion and contraction.
Do I need to seal the edges?
Yes, use silicone sealant to seal the edges. This helps keep water and debris out, ensuring a longer lifespan for your roof.
How do I maintain polycarbonate roofing?
Clean it with mild soap and water. Avoid using abrasive cleaners or solvents. Check for any loose screws or sealant that needs reapplying.
Is polycarbonate roofing durable?
Definitely! It's lightweight, impact-resistant, and can withstand harsh weather conditions. Proper installation and maintenance can make it last for many years.