
Home>Home & Furniture>Roof>How to Build DIY Roof Scaffolding
Roof
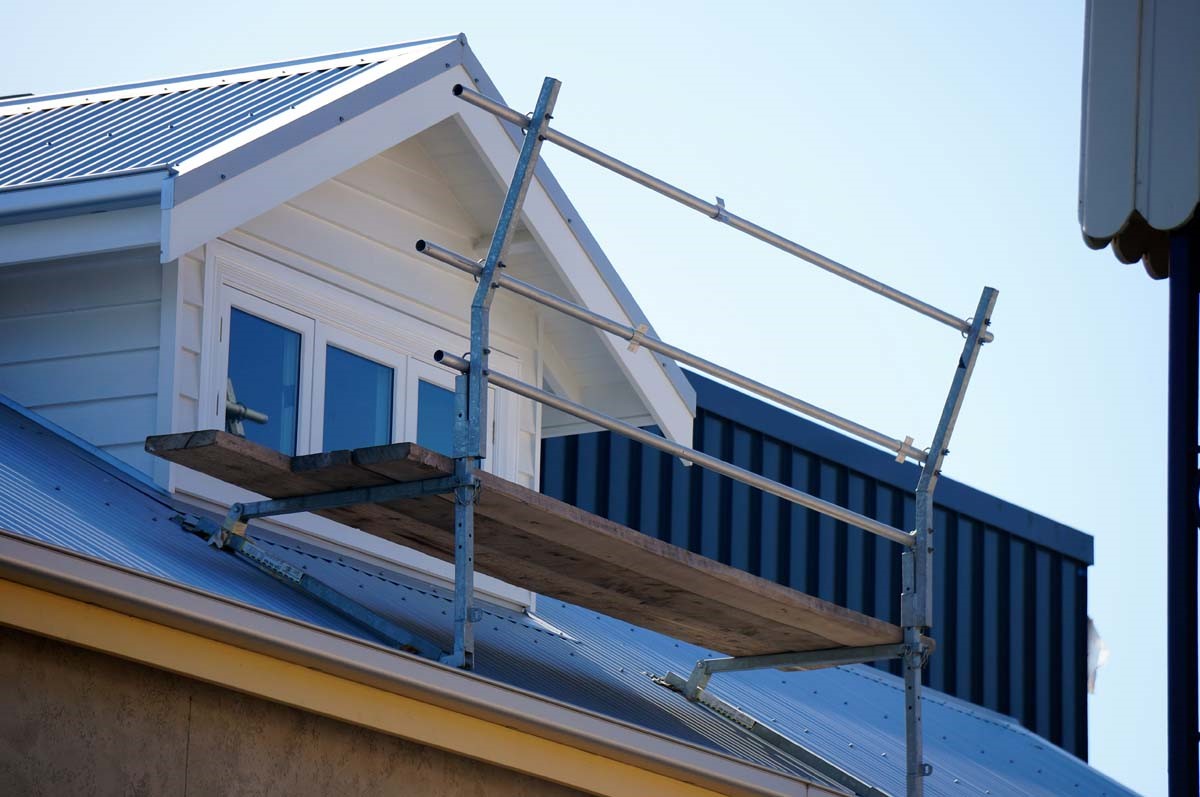
How to Build DIY Roof Scaffolding
Published: August 17, 2024
Learn how to build DIY roof scaffolding safely and efficiently with our step-by-step guide. Perfect for homeowners and DIY enthusiasts looking to tackle roofing projects.
(Many of the links in this article redirect to a specific reviewed product. Your purchase of these products through affiliate links helps to generate commission for Twigandthistle.com, at no extra cost. Learn more)
Building your own roof scaffolding can save money and add an extra layer of safety to your home improvement projects. It might seem challenging, but with simple tools and patience, you can do it safely and efficiently. The right scaffolding provides a stable surface for painting, repairing shingles, or cleaning gutters. This guide will walk you through the basic steps and considerations for constructing safe, reliable scaffolding. Whether you're a seasoned handyman or just starting out, following these instructions can help ensure your roof tasks are completed without a hitch. Let's get those tools ready and dive in.
Getting Ready for the Project
Plan Your Project: Measure the area where scaffolding will be placed. Sketch a simple diagram showing dimensions.
Gather Materials: Collect lumber, screws, nails, metal brackets, and scaffolding planks. Ensure all materials are in good condition.
Check Local Regulations: Verify local building codes to ensure compliance. Some areas have specific requirements for scaffolding.
Inspect Tools: Ensure tools like saws, drills, hammers, and wrenches are in working order.
Set Up Workspace: Clear the area of debris. Lay out materials and tools for easy access.
Safety Gear: Wear hard hats, gloves, safety glasses, and non-slip shoes. Use a safety harness if working at significant heights.
Stabilize the Ground: Ensure the ground is level. Use wooden planks or concrete blocks to create a stable base.
Assemble Base Frame: Start with the base. Use metal brackets to secure joints. Ensure the frame is square and level.
Add Vertical Supports: Attach vertical supports to the base. Secure them with screws and brackets.
Install Cross Bracing: Add cross bracing for stability. This prevents the scaffolding from swaying.
Place Scaffolding Planks: Lay planks across the top. Ensure they are secure and level.
Inspect for Stability: Double-check all connections. Make sure the scaffolding is stable before climbing.
Test Weight Capacity: Gradually add weight to ensure it can support the necessary load.
Keep Area Clear: Maintain a clear area around the scaffolding. This reduces the risk of tripping or falling objects.
What You Will Need
- Lumber: Strong wooden planks for the base and support beams.
- Plywood: Used for the platform where you will stand.
- Nails and Screws: Essential for securing the wood pieces together.
- Hammer: For driving nails into the wood.
- Screwdriver: Needed for tightening screws.
- Saw: To cut the lumber and plywood to the required sizes.
- Measuring Tape: Ensures accurate measurements for cutting and assembling.
- Level: Ensures the scaffolding is even and stable.
- Safety Harness: Protects you from falls while working at height.
- Hard Hat: Protects your head from potential falling debris.
- Work Gloves: Protects your hands while handling materials.
- Ladder: Helps you reach the scaffolding platform.
- Brackets: Provides additional support and stability to the structure.
- Wrench: Tightens any bolts used in the assembly.
- Paint or Sealant: Protects the wood from weather damage.
Lumber and plywood form the main structure. Nails, screws, a hammer, and a screwdriver secure everything. A saw cuts materials to size. Measuring tape and a level ensure accuracy. Safety gear like a harness, hard hat, and gloves keep you safe. A ladder helps you climb up. Brackets add stability. A wrench tightens bolts. Paint or sealant protects the wood.
Skills and Time Commitment
Skill Level: Advanced
Time Required: 8-12 hours
- Planning and Measuring: 1-2 hours
- Gathering Materials: 1 hour
- Assembling the Base: 2-3 hours
- Erecting the Scaffolding: 3-4 hours
- Safety Checks: 1 hour
Building Your Roof Scaffolding: Step-by-Step
Gather Materials:
- Scaffolding planks
- Metal pipes
- Couplers
- Base plates
- Ladders
- Safety harness
- Wrenches
Prepare the Area:
- Clear the ground around the house.
- Ensure the ground is level.
Set Up Base Plates:
- Place base plates on the ground where each scaffold leg will go.
- Ensure they are stable and level.
Assemble the Frame:
- Connect metal pipes using couplers to form the base frame.
- Tighten couplers with wrenches.
Add Vertical Supports:
- Attach vertical pipes to the base frame.
- Secure with couplers.
Install Horizontal Braces:
- Connect horizontal braces between vertical supports.
- Ensure they are level and secure.
Place Scaffolding Planks:
- Lay planks across horizontal braces.
- Ensure planks are secure and do not move.
Add Guardrails:
- Attach guardrails to the top of the vertical supports.
- Secure with couplers.
Check Stability:
- Ensure all connections are tight.
- Check that the scaffold does not wobble.
Install Ladders:
- Attach ladders to the scaffold for access.
- Secure ladders to prevent movement.
Use Safety Gear:
- Wear a safety harness.
- Attach harness to a secure point on the scaffold.
Inspect Regularly:
- Check the scaffold daily for any loose connections.
- Tighten any loose couplers immediately.
Helpful Tips and Tricks
Measure Twice, Cut Once: Always double-check measurements before cutting materials. This saves time and reduces waste.
Use Quality Lumber: Opt for sturdy, high-quality wood like pressure-treated lumber. It lasts longer and supports more weight.
Secure Connections: Use galvanized screws instead of nails. Screws provide better stability and are easier to remove if adjustments are needed.
Level Ground: Ensure the ground where scaffolding will stand is level. Use shims or adjustable base plates to stabilize uneven surfaces.
Safety First: Wear safety gear like gloves, goggles, and a hard hat. Secure scaffolding with guardrails and toe boards to prevent falls.
Plan for Access: Design scaffolding with easy access points. Use ladders or staircases for safe climbing.
Weatherproofing: If scaffolding will be up for a while, cover it with tarps to protect from rain and sun damage.
Common Mistakes to Avoid:
- Overloading: Never exceed the weight limit of your scaffolding. Distribute weight evenly.
- Ignoring Inspections: Regularly check for loose screws or damaged wood.
- Skipping Bracing: Always use diagonal bracing for added stability.
Material Alternatives:
- Instead of wood, consider metal scaffolding for more durability.
- Use scaffold planks instead of regular lumber for better weight distribution.
- For temporary setups, rent scaffolding from a local supplier.
Budgeting for Your Project
Lumber: For a basic scaffold, you'll need around 10 pieces of 2x4 lumber. Each piece costs about $5, totaling $50.
Plywood: A sheet of 3/4-inch plywood for the platform costs around $30.
Screws and Nails: A box of 3-inch screws and a box of nails will cost about $15 each, totaling $30.
Metal Brackets: To secure the structure, you'll need metal brackets. These cost about $2 each. If you need 20, that’s $40.
Safety Gear: Hard hats, gloves, and safety glasses will cost around $50 total.
Ladders: If you don’t have one, a sturdy ladder costs about $100.
Total Cost: Adding everything up, the total cost is roughly $300.
Budget-Friendly Alternatives:
- Reuse old lumber if you have any.
- Borrow tools and safety gear from friends or neighbors.
- Check local classifieds for second-hand ladders and materials.
Different Ways to Customize
Materials: Instead of using wood for the scaffolding, consider metal pipes or aluminum for a more durable structure. PVC pipes can also work for lighter tasks.
Colors: Paint the scaffolding in bright colors like yellow or orange for better visibility and safety. Use weather-resistant paint to protect against the elements.
Styles: Opt for a modular design that allows easy assembly and disassembly. This makes storage and transport simpler. Add wheels to the base for mobility, ensuring they have locking mechanisms for stability.
Platforms: Use non-slip materials for the platforms, such as rubber mats or textured plywood. This provides extra safety when working at heights.
Height Adjustments: Incorporate adjustable legs to accommodate uneven ground. This ensures the scaffolding remains level and secure.
Safety Features: Add guardrails and toe boards to prevent falls and keep tools from sliding off. Attach safety harness anchor points for additional security.
Storage: Design the scaffolding to be foldable or collapsible for easy storage when not in use. This saves space in your garage or shed.
Accessories: Include tool trays or buckets that can be attached to the scaffolding for easy access to your tools and materials.
Eco-Friendly Building Tips
Reclaimed Wood: Use old wood from previous projects or find some at salvage yards. This reduces waste and gives the scaffolding a sturdy base.
Bamboo: Strong and lightweight, bamboo grows quickly, making it a sustainable choice. It’s also easy to work with and can be reused.
Metal Pipes: Reuse metal pipes from old structures. They provide strong support and can be recycled again after use.
Natural Fiber Ropes: Instead of synthetic ropes, opt for natural fibers like hemp or jute. They are biodegradable and strong enough for scaffolding needs.
Recycled Plastic Boards: Use boards made from recycled plastic for platforms. They are durable, weather-resistant, and eco-friendly.
Non-Toxic Paints: If painting the scaffolding, choose non-toxic, eco-friendly paints. They are safer for you and the environment.
Solar-Powered Tools: Use solar-powered tools to reduce electricity consumption. They are efficient and help lower your carbon footprint.
Reusable Fasteners: Opt for screws and bolts that can be reused in future projects. This minimizes waste and saves money.
Local Materials: Source materials locally to reduce transportation emissions. This supports local businesses and cuts down on your project’s carbon footprint.
Plan Efficiently: Measure twice, cut once. Proper planning reduces material waste and ensures you only use what’s necessary.
Your Roof Scaffolding is Ready
Building DIY roof scaffolding might seem tricky, but with the right tools and steps, it's totally doable. Remember to prioritize safety by using sturdy materials and double-checking your work. Measure everything twice to avoid mistakes. If something feels off, trust your gut and fix it before moving on. Don’t rush the process; take your time to ensure everything is secure. Once you’ve finished, give yourself a pat on the back. You’ve just saved money and gained some serious handyman skills. Now, you can tackle other projects with more confidence. Keep your tools organized for the next job, and always stay curious about learning new techniques. Happy building!
What materials do I need to build roof scaffolding?
You’ll need lumber, screws, nails, metal brackets, and safety gear like a harness and helmet. Don’t forget a measuring tape and saw.
How high should my scaffolding be?
Your scaffolding should be high enough to reach the roof comfortably. Measure from the ground to the roofline and add a few feet for safety.
How do I ensure the scaffolding is stable?
Make sure to anchor the scaffolding to the ground and use cross braces for added support. Check for level ground before setting up.
Can I build scaffolding by myself?
It’s possible, but having a buddy helps. Two sets of hands make it safer and quicker. Plus, someone can spot you in case of trouble.
What safety precautions should I take?
Always wear a harness and helmet. Use non-slip shoes and make sure the area is clear of debris. Double-check all connections before climbing.
How long does it take to build roof scaffolding?
Depending on your experience and the size of the project, it could take a few hours to a full day. Plan ahead and don’t rush.
Can I reuse my scaffolding for future projects?
Yes, if the materials are still in good condition. Store them properly to avoid damage and inspect before each use.