
Home>Home & Furniture>Roof>DIY Rubber Roof Installation Guide
Roof
DIY Rubber Roof Installation Guide
Published: August 22, 2024
Learn how to install a durable rubber roof yourself with our step-by-step DIY guide. Save money and ensure a long-lasting roof with expert tips and detailed instructions.
(Many of the links in this article redirect to a specific reviewed product. Your purchase of these products through affiliate links helps to generate commission for Twigandthistle.com, at no extra cost. Learn more)
Thinking about tackling a home improvement project? Installing a rubber roof might be the perfect challenge. This guide will walk you through the basics of DIY rubber roof installation, making the process straightforward and manageable. Whether you're upgrading an old roof or building something new, rubber roofing offers durability and ease of maintenance. Plus, it's eco-friendly! From gathering materials to laying down the final sheet, you'll find everything you need right here. Get ready to roll up your sleeves and create a sturdy, long-lasting roof that will protect your home for years to come.
Getting Ready for Your Project
Measure the Roof: Use a tape measure to get the exact dimensions of your roof. This helps in buying the right amount of rubber roofing material.
Clean the Surface: Sweep away any debris, dirt, or old roofing material. A clean surface ensures the rubber adheres properly.
Check for Damage: Inspect the roof for any cracks, holes, or weak spots. Repair these areas to prevent future leaks.
Gather Tools and Materials: Collect all necessary tools like a utility knife, roller, adhesive, and the rubber roofing material. Having everything ready saves time.
Set Up a Safe Workspace: Use a sturdy ladder and wear non-slip shoes. Make sure the area is clear of obstacles to avoid accidents.
Weather Check: Ensure the weather forecast is clear. Rain or strong winds can disrupt the installation process.
Safety Gear: Wear gloves, safety glasses, and a hard hat. Safety gear protects you from potential injuries.
Plan the Layout: Unroll the rubber material and let it relax in the sun. This makes it easier to handle and fit onto the roof.
Mark Guidelines: Use chalk to mark where the rubber sheets will go. This helps in aligning them correctly.
Test Fit: Lay the rubber sheets on the roof without adhesive to check the fit. Adjust as needed before final installation.
Essential Materials and Tools
Rubber Roofing Membrane: This is the main material for the roof. It’s durable, waterproof, and flexible.
Adhesive: Used to stick the rubber membrane to the roof deck. Make sure it’s compatible with the rubber material.
Seam Tape: Ensures the seams between rubber sheets are watertight.
Primer: Prepares the roof surface for adhesive application, ensuring better adhesion.
Roller: Helps apply adhesive evenly and press the membrane down firmly.
Utility Knife: Used to cut the rubber membrane to the correct size.
Measuring Tape: Ensures accurate measurements for cutting the membrane and placing it correctly.
Chalk Line: Helps mark straight lines on the roof for precise placement of the membrane.
Broom: Sweeps the roof surface clean before installation, removing debris that could affect adhesion.
Caulk Gun: Applies sealant around edges and penetrations to prevent leaks.
Sealant: Seals edges, corners, and any penetrations like vents or pipes.
Safety Gear: Includes gloves, safety glasses, and non-slip shoes to protect yourself during installation.
Ladder: Provides access to the roof safely.
Heat Gun: Sometimes needed to help the membrane conform to roof contours or to activate certain adhesives.
Roof Deck Repair Materials: Plywood or other materials to fix any damage to the roof deck before installing the membrane.
Required Skills and Time Commitment
Skill Level: Intermediate
Time Required: 1-2 days
- Preparation: 2-4 hours
- Removing Old Roofing: 3-5 hours
- Cleaning and Repairing Surface: 2-3 hours
- Installing Rubber Membrane: 4-6 hours
- Sealing and Finishing Touches: 2-3 hours
Detailed Installation Steps
Gather Materials and Tools
- Rubber roofing membrane
- Adhesive
- Roller
- Utility knife
- Measuring tape
- Broom
- Caulk gun
- Sealant
Prepare the Roof Surface
- Sweep the roof to remove debris.
- Ensure the surface is smooth and dry.
Measure and Cut the Membrane
- Measure the roof dimensions.
- Cut the rubber membrane to fit, leaving extra for edges.
Apply Adhesive
- Roll back half of the membrane.
- Apply adhesive to the roof surface using a roller.
- Wait for the adhesive to become tacky.
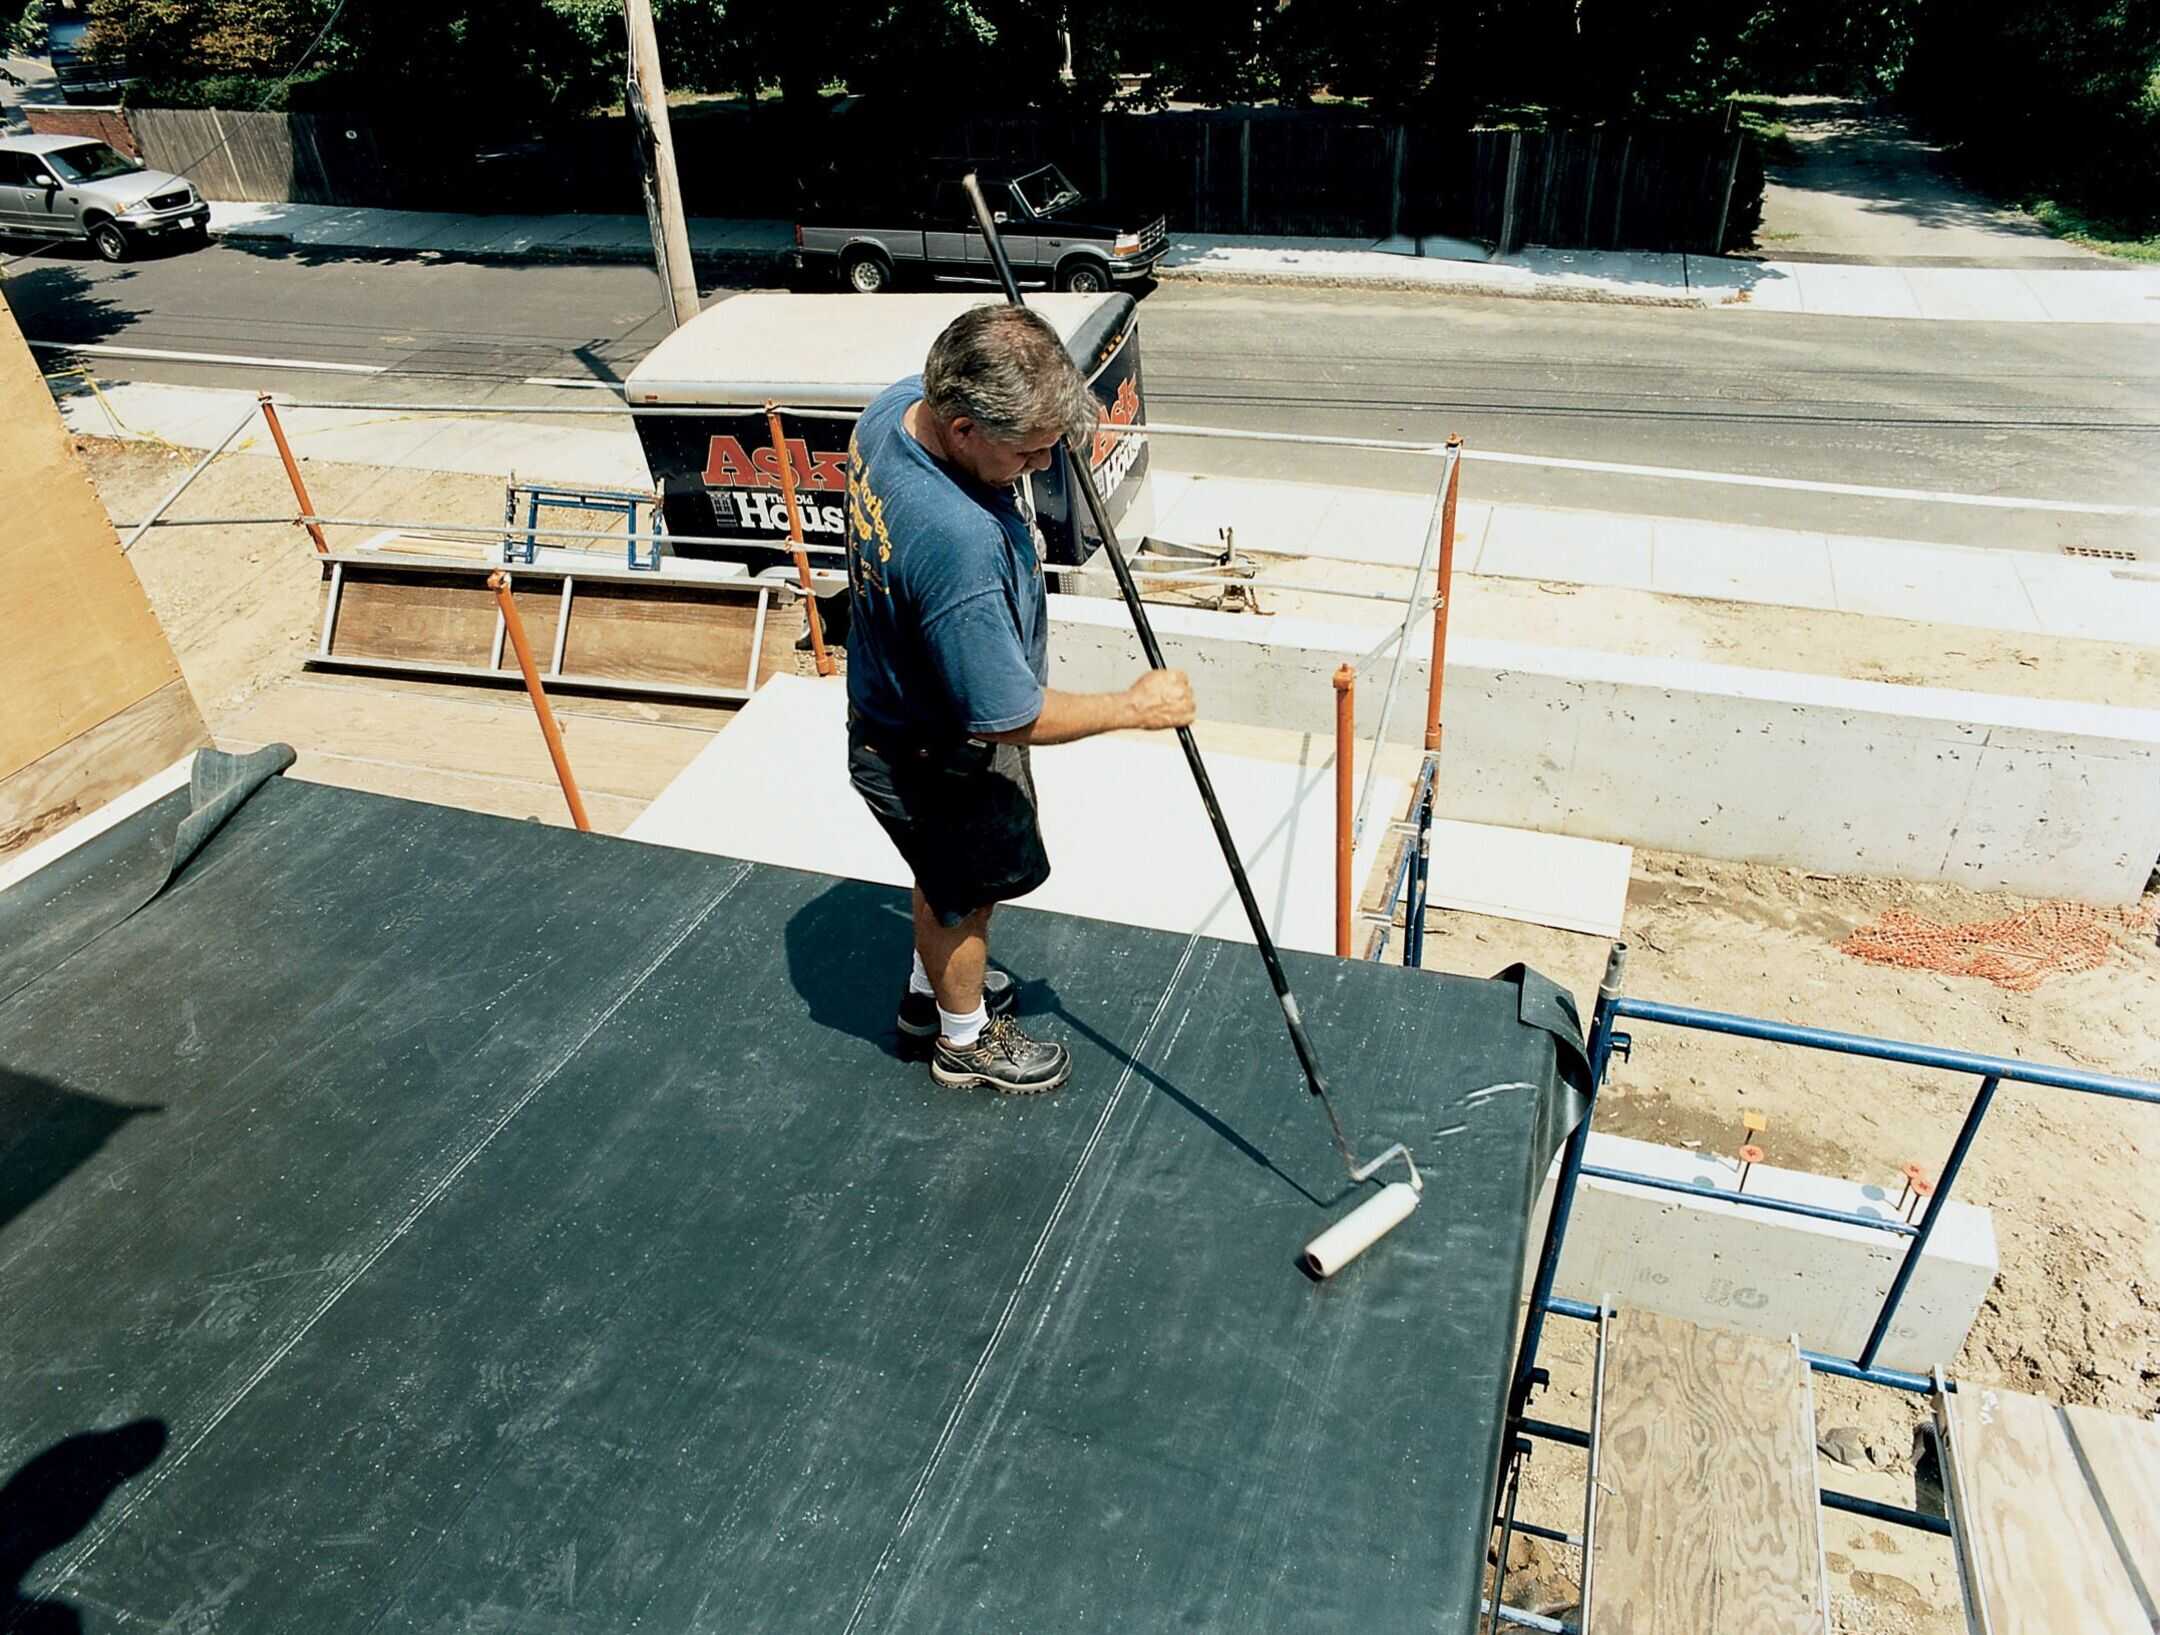
Lay the Membrane
- Carefully roll the membrane back onto the adhesive.
- Smooth out air bubbles with a broom or roller.
Repeat for the Other Half
- Roll back the other half of the membrane.
- Apply adhesive and wait until tacky.
- Roll the membrane back and smooth out bubbles.
Trim Excess Membrane
- Use a utility knife to trim excess membrane around edges.
Seal the Edges
- Apply sealant along the edges using a caulk gun.
- Press the edges down firmly.
Inspect and Finish
- Check for any bubbles or loose areas.
- Ensure all edges are sealed properly.
Helpful Tips and Tricks
Measure Twice, Cut Once: Always double-check measurements before cutting your rubber roofing material. This prevents waste and ensures a snug fit.
Clean the Surface: Make sure the roof surface is clean and dry before applying the rubber. Dirt or moisture can prevent proper adhesion.
Use a Roller: A heavy roller helps smooth out air bubbles and ensures the rubber adheres well to the roof surface.
Overlap Seams: Overlap seams by at least 3 inches. This helps prevent leaks.
Apply Adhesive Evenly: Spread adhesive evenly to avoid lumps or gaps. Use a notched trowel for consistent application.
Work in Sections: Apply the rubber in manageable sections. This makes it easier to handle and reduces mistakes.
Check Weather Conditions: Install rubber roofing on a dry, mild day. Extreme temperatures or rain can affect the adhesive.
Trim Excess Material: After the rubber is in place, trim any excess material for a clean finish.
Seal Edges: Use a high-quality sealant around edges and seams to prevent water infiltration.
Allow Time to Cure: Let the adhesive cure fully before walking on the roof or placing any heavy objects on it.
Common Mistakes to Avoid:
Skipping Primer: Always use a primer if recommended. Skipping this step can lead to poor adhesion.
Ignoring Manufacturer Instructions: Follow the manufacturer's guidelines closely. Ignoring these can void warranties and lead to installation issues.
Not Checking for Damage: Inspect the rubber for any tears or defects before installation. Damaged material can compromise the roof's integrity.
Alternatives for Materials or Methods:
Liquid Rubber Coating: Instead of rubber sheets, consider using liquid rubber coating. It's easier to apply and can reach tricky areas.
EPDM Tape: For small repairs or seams, EPDM tape can be a quick and effective solution.
Self-Adhesive Membranes: These are easier to install and don't require additional adhesive, making the process simpler.
Budgeting for Your DIY Roof
Rubber Roofing Membrane: $100-$150 per 100 square feet
Adhesive: $50-$75 per gallon (covers about 100 square feet)
Seam Tape: $50-$75 per roll (covers about 100 feet)
Flashing: $20-$30 per roll
Roofing Nails: $10-$15 per pound
Utility Knife: $10-$20
Measuring Tape: $10-$15
Roller: $20-$30
Caulk Gun: $10-$15
Roofing Caulk: $5-$10 per tube
Safety Gear (Gloves, Goggles): $20-$30
Total Estimated Cost: $305-$465
Budget-Friendly Alternatives:
Recycled Rubber Roofing: $80-$120 per 100 square feet
Generic Adhesive: $30-$50 per gallon
Basic Seam Tape: $30-$50 per roll
DIY Flashing (Aluminum Foil Tape): $10-$20 per roll
Basic Utility Knife: $5-$10
Basic Measuring Tape: $5-$10
Basic Roller: $10-$20
Basic Caulk Gun: $5-$10
Generic Roofing Caulk: $3-$5 per tube
Basic Safety Gear: $10-$20
Total Estimated Cost with Alternatives: $188-$315
Creative Variations and Customizations
Alternative Materials:
- EPDM Rubber: Durable, easy to install. Comes in black or white.
- TPO (Thermoplastic Olefin): Reflects heat, energy-efficient. Available in white, gray, or tan.
- PVC (Polyvinyl Chloride): Resistant to chemicals, fire, and punctures. Colors include white, gray, and tan.
Colors:
- Black: Absorbs heat, good for colder climates.
- White: Reflects heat, ideal for warmer areas.
- Gray: Neutral, blends with most home exteriors.
- Tan: Earthy, complements natural surroundings.
Styles:
- Smooth Finish: Sleek, modern look.
- Textured Finish: Adds grip, reduces slipping.
- Patterned: Mimics shingles or tiles for a traditional appearance.
Edge Treatments:
- Metal Edging: Provides a clean, finished look.
- Rubber Trim: Flexible, easy to install.
- Wood Trim: Adds a rustic touch, can be painted or stained.
Insulation Options:
- Foam Board: Lightweight, easy to cut.
- Spray Foam: Fills gaps, provides excellent insulation.
- Reflective Insulation: Reflects heat, keeps the roof cooler.
Drainage Solutions:
- Gutters: Direct water away from the roof.
- Scuppers: Allow water to drain through parapet walls.
- Downspouts: Channel water from gutters to the ground.
Adhesives:
- Water-Based: Easy to clean up, less odor.
- Solvent-Based: Stronger bond, more durable.
- Tape: Quick, easy to apply, no drying time.
Underlayment:
- Plywood: Strong, provides a solid base.
- OSB (Oriented Strand Board): Cost-effective, easy to work with.
- Insulation Board: Adds an extra layer of insulation.
Seam Treatments:
- Heat Welding: Creates a strong, waterproof bond.
- Adhesive Tape: Quick, easy to apply.
- Liquid Sealant: Fills gaps, ensures a watertight seal.
Tools:
- Rollers: Smooth out the rubber, remove air bubbles.
- Heat Gun: For heat welding seams.
- Utility Knife: Cut rubber to size.
Maintenance Tips:
- Regular Inspections: Check for damage, clean debris.
- Patch Kits: Keep on hand for quick repairs.
- Cleaning Solutions: Use mild soap, water to clean the surface.
Safety Gear:
- Gloves: Protect hands from adhesives, sharp edges.
- Goggles: Shield eyes from debris.
- Knee Pads: Comfort while working on the roof.
Eco-Friendly Roofing Tips
Eco-friendly materials can make your rubber roof installation more sustainable. Recycled rubber is a great option. It uses old tires, reducing waste. EPDM (Ethylene Propylene Diene Monomer) rubber is durable and long-lasting, which means fewer replacements over time.
Use water-based adhesives instead of solvent-based ones. They emit fewer harmful chemicals. Reflective coatings can help reduce energy costs by keeping your home cooler in the summer.
Reusing materials is another way to be eco-friendly. If you have an old rubber roof, consider recycling it. Some companies specialize in recycling roofing materials.
For insulation, opt for recycled or natural materials like cellulose or wool. These materials are better for the environment compared to traditional options.
When removing the old roof, try to salvage any materials that can be reused. This reduces waste and saves money.
Lastly, ensure proper disposal of any waste materials. Many recycling centers accept construction waste, including rubber roofing.
Your Roof, Your Rules
Installing a rubber roof yourself isn't just about saving money. It's about taking control of your home improvement projects. By following the steps, using the right tools, and paying attention to details, you can achieve a professional-looking result. Remember, preparation is key. Clean the surface thoroughly, measure accurately, and apply the adhesive evenly. Don't rush the process. Take your time to ensure everything is done correctly. If you hit a snag, don't hesitate to seek advice or look up additional resources. With patience and effort, you'll have a durable, weather-resistant roof that stands the test of time. Plus, you'll have the satisfaction of knowing you did it yourself. So, roll up your sleeves, gather your materials, and get started. Your new rubber roof awaits!
What tools do I need for installing a rubber roof?
You’ll need a utility knife, measuring tape, roller, adhesive, primer, and a broom. Make sure you have protective gloves and safety goggles too.
How do I prepare the roof surface?
First, clean the roof thoroughly. Remove any debris, dirt, or old roofing material. Ensure the surface is dry and smooth before applying any primer or adhesive.
Can I install a rubber roof by myself?
Absolutely! With the right tools and instructions, a DIY rubber roof installation is totally doable. Just take your time and follow each step carefully.
How long does it take to install a rubber roof?
Typically, it takes about 1-2 days for a standard-sized roof. This includes preparation, application, and curing time. Larger or more complex roofs might take a bit longer.
What type of adhesive should I use?
Use a water-based or solvent-based adhesive specifically designed for EPDM rubber roofing. Check the manufacturer’s recommendations for the best results.
How do I ensure the rubber roof is properly sealed?
After laying the rubber membrane, use a roller to press it down firmly. Pay special attention to edges and seams. Apply seam tape and sealant to prevent any leaks.
How do I maintain my rubber roof after installation?
Regularly inspect the roof for any damage or wear. Clean it with a soft broom and mild detergent. Avoid using harsh chemicals or abrasive tools that could damage the membrane.