
Home>Home & Furniture>Roof>DIY Roof Mount Basketball Hoop Guide
Roof
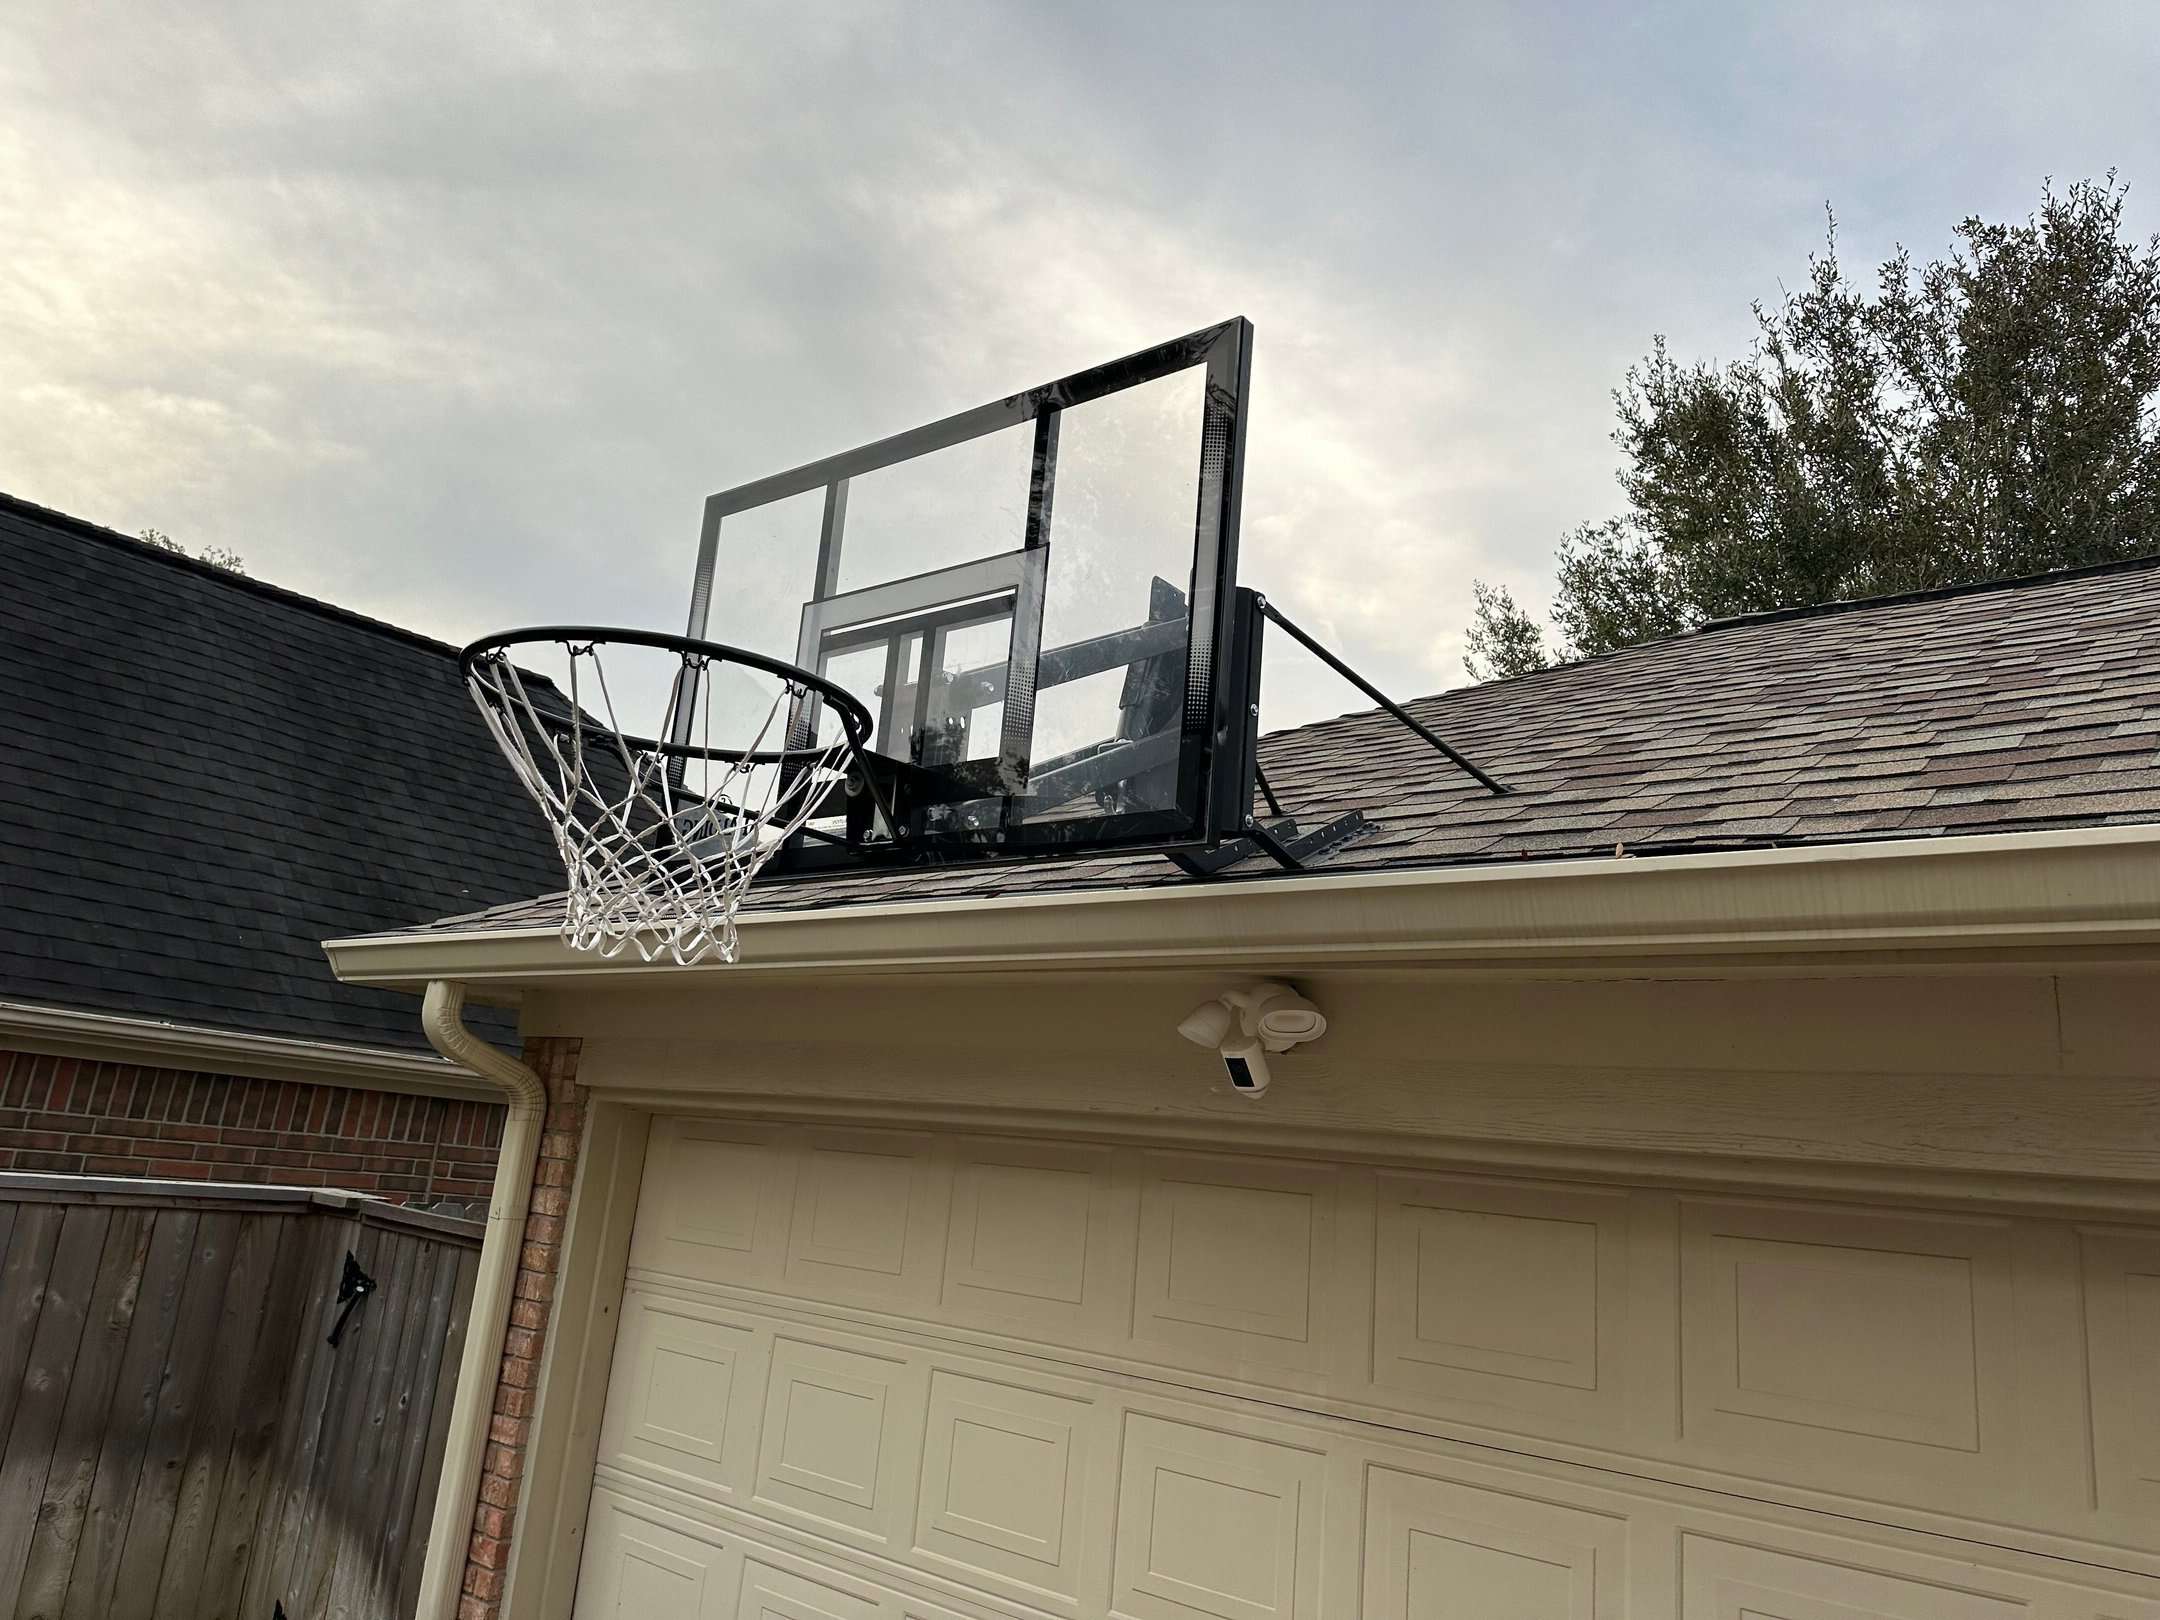
DIY Roof Mount Basketball Hoop Guide
Published: August 22, 2024
Learn how to install a DIY roof mount basketball hoop with our step-by-step guide. Perfect for sports enthusiasts looking to enhance their home court experience.
(Many of the links in this article redirect to a specific reviewed product. Your purchase of these products through affiliate links helps to generate commission for Twigandthistle.com, at no extra cost. Learn more)
Thinking about adding a basketball hoop to your roof? Great idea! A roof mount basketball hoop saves ground space and provides endless fun. Building one yourself can be rewarding, cost-effective, and tailored to your needs. This guide will walk you through the basic steps, tools, and materials needed to get your hoop up and ready for action. With some basic skills and patience, you’ll have a fantastic hoop set up in no time. So, gather your tools and let’s start this exciting project together!
Getting Ready for the Project
Safety Gear: Wear gloves, safety goggles, and a helmet. This protects you from falling debris or tools.
Check Roof Condition: Inspect the roof for damage or weak spots. Fix any issues before starting.
Gather Tools: Have a drill, screws, measuring tape, level, and a ladder ready. Ensure all tools are in good working order.
Clear Workspace: Remove any obstacles around the area where you’ll be working. This prevents tripping or accidents.
Measure and Mark: Use the measuring tape to find the center of the roof area where the hoop will go. Mark this spot clearly.
Pre-Drill Holes: Pre-drill holes for the mounting brackets. This makes it easier to attach the hoop and reduces the risk of splitting the roof material.
Check Weather: Ensure the weather is clear. Avoid working on the roof during rain or high winds.
Have a Helper: Ask a friend or family member to assist. They can hold the ladder or pass tools, making the job safer and easier.
What You Need: Materials and Tools
- Basketball Hoop Kit: Includes the backboard, rim, and mounting brackets. Essential for the main structure.
- Ladder: Needed to reach the roof safely. Ensure it’s sturdy.
- Drill: For making holes in the roof and mounting the brackets. A cordless drill is preferable.
- Drill Bits: Different sizes for various screws and bolts. Usually included in the drill kit.
- Wrench Set: Tightens bolts and nuts. Adjustable wrenches work best.
- Screwdriver Set: For securing screws. Both flathead and Phillips are useful.
- Measuring Tape: Ensures accurate placement of the hoop. Measure twice, cut once.
- Level: Ensures the backboard is straight. A small, handheld level works fine.
- Marker or Pencil: Marks drilling spots. Use something visible on your roof material.
- Safety Gear: Includes gloves, safety glasses, and a helmet. Safety first.
- Sealant: Prevents leaks where holes are drilled. Choose a weatherproof sealant.
- Socket Set: For tightening bolts and nuts. Often used with the wrench set.
- Stud Finder: Locates roof studs for secure mounting. Ensures stability.
- Extension Cord: If using a corded drill. Make sure it’s long enough to reach the roof.
- Helper: An extra set of hands for holding parts and ensuring safety. Always better with a buddy.
Skill Level and Time Commitment
Skill Level: Intermediate
Time Required: 3-5 hours
Steps:
- Gather Materials: Ensure you have all necessary tools and parts.
- Locate Studs: Find the roof studs for secure mounting.
- Mark Drill Points: Use a pencil to mark where you will drill.
- Drill Holes: Carefully drill holes at the marked points.
- Mount Bracket: Attach the mounting bracket securely.
- Attach Backboard: Secure the backboard to the bracket.
- Install Hoop: Fix the hoop to the backboard.
- Check Stability: Ensure everything is tightly secured and stable.
Tips:
- Safety First: Always use a sturdy ladder and wear protective gear.
- Double Check: Verify measurements before drilling.
- Assistance: Having a helper can make the process smoother.
How to Build It: Step-by-Step Guide
Gather Materials and Tools
- Basketball hoop kit
- Ladder
- Drill
- Screws and anchors
- Measuring tape
- Level
- Pencil
- Wrench
Choose Location
- Find a spot on the roof with enough space.
- Ensure the area is clear of obstacles.
Measure and Mark
- Use the measuring tape to find the center of the chosen spot.
- Mark the center with a pencil.
Install Mounting Bracket
- Position the bracket on the marked spot.
- Use the level to ensure it is straight.
- Mark the screw holes with a pencil.
Drill Holes
- Drill holes at the marked spots.
- Insert anchors if needed.
Attach Bracket
- Align the bracket with the drilled holes.
- Secure it with screws using the drill.
- Tighten screws with a wrench for extra security.
Assemble Hoop
- Follow the instructions in the kit to assemble the hoop.
- Attach the backboard to the bracket.
Secure Hoop
- Ensure all bolts and screws are tight.
- Double-check the stability of the hoop.
Test
- Give the hoop a few gentle tugs to ensure it is secure.
- Shoot a few practice shots to test stability.
Clean Up
- Remove any tools and debris from the area.
- Store unused materials properly.
Helpful Tips and Tricks
Measure Twice, Drill Once: Ensure accurate measurements before drilling holes. This prevents misalignment and unnecessary damage.
Use a Stud Finder: Locate roof studs to secure the hoop. Attaching directly to studs provides better stability.
Weatherproof Materials: Opt for rust-resistant screws and weatherproof backboards. This ensures longevity despite exposure to elements.
Pre-Drill Holes: Pre-drilling prevents wood from splitting and makes screw insertion easier.
Level the Hoop: Use a level to ensure the hoop is straight. A crooked hoop affects gameplay and looks unprofessional.
Safety Gear: Wear gloves and safety glasses. Protect yourself from debris and sharp edges.
Check Local Regulations: Some areas have rules about mounting structures on roofs. Ensure compliance to avoid fines.
Common Mistakes to Avoid:
Skipping Stud Finder: Attaching to weak spots can cause the hoop to fall.
Ignoring Weatherproofing: Using non-weatherproof materials leads to rust and deterioration.
Incorrect Measurements: Misaligned holes make the installation process harder and less secure.
Alternatives for Materials or Methods:
Portable Hoops: If roof mounting seems complex, consider a portable basketball hoop. Easier to install and move.
Wall-Mounted Hoops: Attach the hoop to a sturdy wall instead of the roof. Provides similar benefits with potentially easier installation.
Adjustable Hoops: Choose an adjustable hoop for flexibility in height, especially useful for growing kids.
Estimating the Cost
Backboard and Rim: $100 - $200
Mounting Bracket: $50 - $100
Bolts and Screws: $10 - $20
Drill: $50 - $100 (if you don't have one)
Wrench Set: $20 - $40
Measuring Tape: $10 - $15
Level: $10 - $20
Ladder: $50 - $100 (if you don't have one)
Total Cost: $300 - $595
Budget-Friendly Alternatives:
Backboard and Rim: Look for second-hand options or sales, $50 - $100
Mounting Bracket: DIY with scrap metal or wood, $10 - $30
Bolts and Screws: Buy in bulk, $5 - $10
Drill: Borrow from a friend or rent, $0 - $20
Wrench Set: Borrow or buy used, $10 - $20
Measuring Tape: Borrow or buy used, $0 - $5
Level: Use a smartphone app, $0
Ladder: Borrow from a neighbor, $0
Total Budget-Friendly Cost: $75 - $185
Different Ways to Customize
Alternative Materials: Instead of using metal brackets, try wooden mounts for a rustic look. Use PVC pipes instead of metal poles for a lighter, easier-to-handle option. Opt for a plexiglass backboard instead of traditional glass for safety and durability.
Colors: Paint the backboard in team colors or favorite shades. Use reflective paint for night play. Consider a camouflage pattern for a unique twist.
Styles: Choose a vintage design with an old-school hoop and net. Go for a modern look with sleek, minimalistic lines. Add a custom logo or family name to the backboard for personalization.
Mounting Options: Install a foldable mount to save space when not in use. Use adjustable brackets to change the hoop height easily. Try a swivel mount to rotate the hoop for different play angles.
Additional Features: Add LED lights around the backboard for nighttime visibility. Install a scoreboard above the hoop for competitive games. Attach a ball return net to make practice more efficient.
Eco-Friendly Tips
Reclaimed wood can be used for the backboard. Old pallets or barn wood work well. Recycled metal pipes or brackets can serve as the mounting hardware. Natural paint or sealant, free from harmful chemicals, will protect the wood. Repurposed tires can be cut and used as padding around the hoop for safety. Solar-powered lights can illuminate the hoop for nighttime play. Recycled plastic can be molded into the hoop itself. Rainwater collection systems can be installed nearby to water plants or gardens, making use of the roof's runoff.
Ready to Shoot Some Hoops?
You've got all the tools and know-how to install your own roof mount basketball hoop. Just remember to double-check your measurements, ensure your brackets are secure, and use the right hardware for your roof type. Safety first, so don't skip on wearing protective gear. Once everything's in place, give it a good test before you start playing. A solid installation means more fun and fewer worries. Now, grab that basketball and enjoy your new setup. Happy shooting!
How do I choose the right spot for my roof mount basketball hoop?
Look for a flat, sturdy section of your roof. Make sure there's enough space below for safe play. Avoid areas near windows or fragile items.
What tools will I need to install a roof mount basketball hoop?
You'll need a drill, ladder, measuring tape, level, wrench, and some screws or bolts. Safety gear like gloves and goggles is also a good idea.
Can I install the hoop by myself, or do I need help?
It's possible to do it alone, but having a buddy makes it easier and safer. Hoops can be heavy and tricky to balance.
How high should I mount the basketball hoop?
Regulation height is 10 feet from the ground to the rim. Use a measuring tape to get it just right.
What should I do if my roof isn't flat?
You might need a mounting bracket designed for angled roofs. These help keep the hoop level even if the roof isn't.
How do I ensure the hoop is securely attached?
Double-check all bolts and screws. Use a level to make sure the backboard is straight. Give it a few test pulls to ensure it's stable.
What maintenance does a roof mount basketball hoop need?
Regularly check for loose bolts and rust. Clean the backboard and rim to keep them in good shape.