
Home>Home & Furniture>Roof>DIY Outdoor Grill Station with Roof
Roof
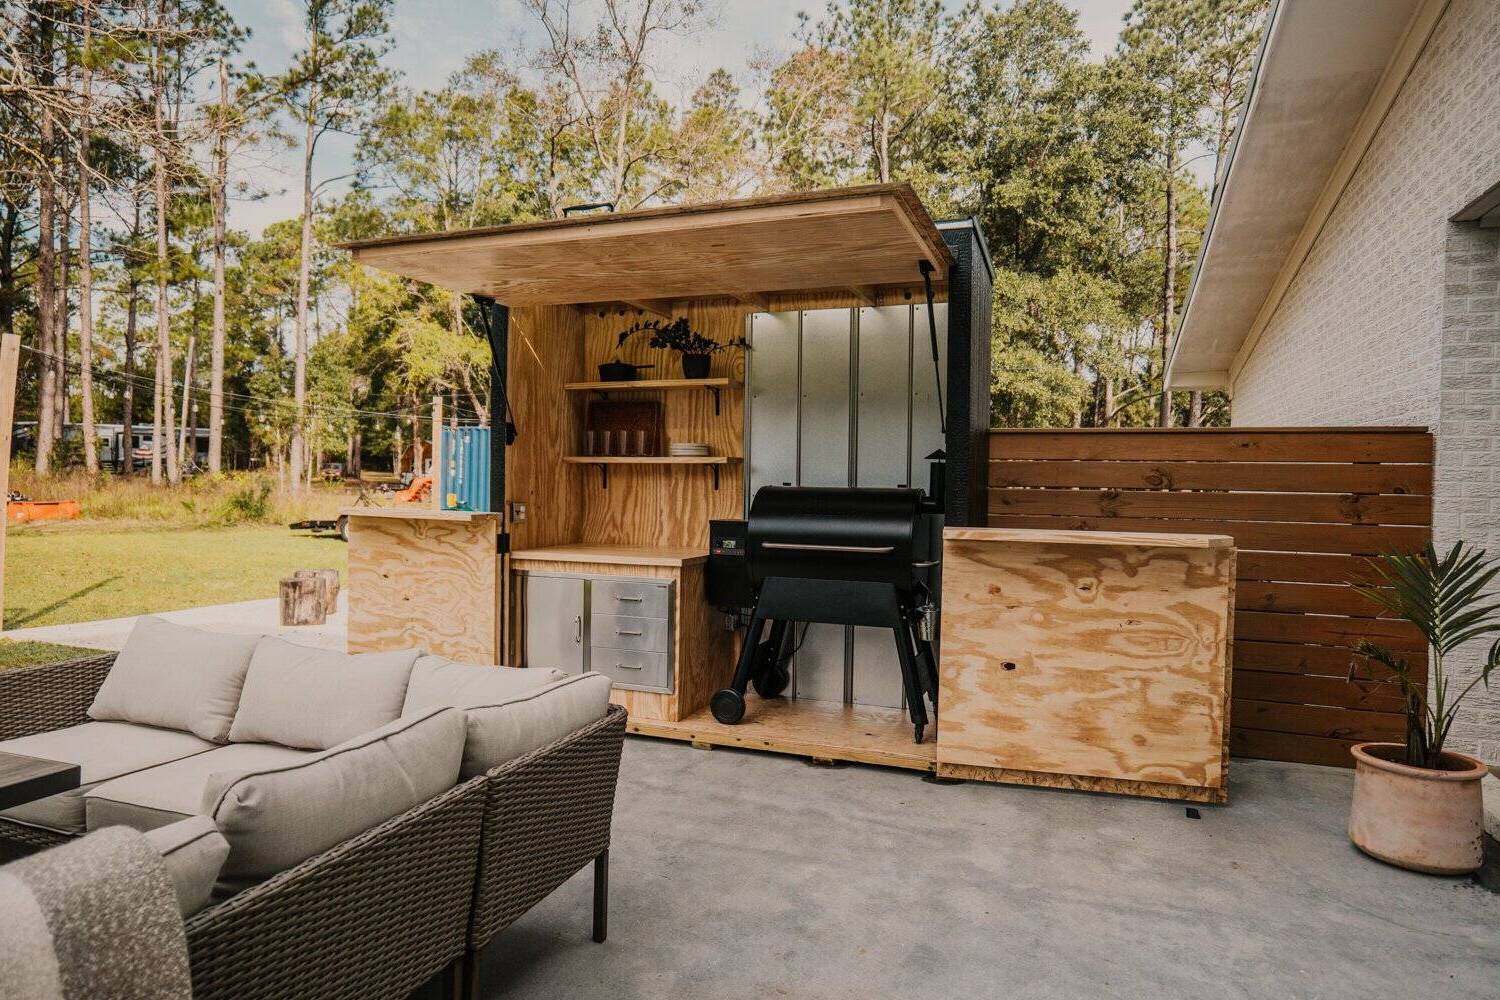
DIY Outdoor Grill Station with Roof
Published: August 23, 2024
Discover how to build a DIY outdoor grill station with a roof. Step-by-step guide, materials list, and expert tips to create the perfect backyard BBQ setup.
(Many of the links in this article redirect to a specific reviewed product. Your purchase of these products through affiliate links helps to generate commission for Twigandthistle.com, at no extra cost. Learn more)
Building your own outdoor grill station can be a fun and rewarding project. This setup not only enhances your backyard but also offers a dedicated space for all your grilling needs. Adding a roof to your station gives you a perfect spot to cook, rain or shine. With a bit of planning, some basic tools, and a few weekends, you can create a grill station that becomes the heart of your outdoor entertaining area. Ready to fire up your creativity and get started on this exciting project? Let's dive into the essentials.
Preparation Steps
Plan Your Design: Sketch out your grill station. Decide on dimensions, materials, and where everything will go.
Gather Materials: Collect all necessary materials like wood, screws, nails, roofing material, and tools. Make sure you have everything before starting.
Check Local Codes: Ensure your project complies with local building codes. Some areas require permits for structures with roofs.
Choose a Location: Pick a flat, stable area in your yard. Make sure it's away from flammable materials and has good ventilation.
Prepare the Ground: Clear the area of debris, level the ground, and lay a solid foundation. Pavers or concrete slabs work well.
Set Up a Safe Workspace: Organize tools and materials in a clean, well-lit area. Keep a first aid kit nearby.
Wear Safety Gear: Use gloves, safety glasses, and ear protection. Proper footwear is also important to avoid injuries.
Measure and Cut: Measure twice, cut once. Accurate measurements ensure everything fits together properly.
Pre-Drill Holes: Pre-drilling prevents wood from splitting and makes assembly easier.
Assemble Frame: Start with the base, then build up the sides and roof supports. Use clamps to hold pieces in place while securing them.
Install Roofing: Attach roofing material securely. Ensure it’s weatherproof to protect your grill station from the elements.
Add Finishing Touches: Sand any rough edges, paint or stain the wood, and install any additional features like shelves or hooks.
Gather Your Materials and Tools
Materials:
- Pressure-Treated Lumber: Used for the frame and roof structure. It resists rot and insects.
- Concrete Mix: Secures the posts in the ground, providing stability.
- Galvanized Screws and Nails: Prevent rust and ensure durability.
- Metal Roofing Panels: Protects the grill station from rain and sun.
- Grill: The main component for cooking.
- Countertop Material: Provides a prep area. Options include granite, concrete, or stainless steel.
- Pavers or Concrete Slabs: Creates a stable floor.
- Stain or Paint: Protects the wood and adds aesthetic appeal.
- Outdoor Sealant: Waterproofs the wood, extending its life.
- Gravel: Used for drainage around the base.
Tools:
- Measuring Tape: Ensures accurate measurements.
- Level: Keeps everything straight and even.
- Post Hole Digger: Digs holes for the posts.
- Circular Saw: Cuts the lumber to size.
- Drill: Drives screws and drills holes.
- Hammer: Drives nails and secures components.
- Screwdriver: Tightens screws.
- Shovel: Mixes and spreads concrete.
- Trowel: Smooths concrete surfaces.
- Paintbrush or Roller: Applies stain or paint evenly.
- Safety Gear: Includes gloves, goggles, and ear protection for safety.
Required Skills and Time
Skill Level: Advanced
Time Required: 2-3 weekends
- Planning and Design: 4-6 hours
- Gathering Materials: 2-4 hours
- Building the Frame: 10-12 hours
- Installing the Roof: 8-10 hours
- Finishing Touches: 4-6 hours
Instructions for Building
Gather Materials:
- Pressure-treated wood
- Cement
- Screws and nails
- Metal roofing sheets
- Grill
- Countertop material
- Paint or stain
- Tools: saw, drill, hammer, measuring tape, level
Choose Location:
- Find a flat, stable area in your yard.
- Ensure it's away from flammable materials.
Build the Base:
- Measure and mark the area.
- Dig holes for the posts, about 2 feet deep.
- Place posts in holes, fill with cement, and let it dry.
Construct the Frame:
- Attach horizontal beams to the posts using screws.
- Ensure the frame is level.
Add Countertops:
- Measure and cut the countertop material.
- Secure countertops to the frame with screws.
Install the Grill:
- Place the grill in the designated spot.
- Ensure it's stable and secure.
Build the Roof Frame:
- Attach vertical supports to the base frame.
- Connect horizontal beams to form the roof frame.
Attach Roofing Sheets:
- Measure and cut metal roofing sheets.
- Secure sheets to the roof frame with screws.
Paint or Stain:
- Apply paint or stain to the wood for protection.
- Let it dry completely.
Final Touches:
- Add hooks or shelves for utensils.
- Ensure everything is secure and stable.
Helpful Tips and Tricks
Plan Your Layout: Measure your space carefully. Sketch a simple design to visualize where everything will go.
Use Pressure-Treated Wood: This type of wood resists rot and insects, making it perfect for outdoor projects.
Level Ground: Ensure the ground is level before building. Use a spirit level to check.
Pre-Drill Holes: Avoid splitting wood by pre-drilling holes for screws.
Weatherproof Materials: Use stainless steel screws and bolts to prevent rust.
Ventilation: Leave gaps for airflow to prevent overheating and smoke buildup.
Common Mistakes to Avoid:
Skipping Permits: Check local regulations. Some areas require permits for structures like this.
Ignoring Safety: Wear gloves, goggles, and a mask when cutting wood or metal.
Poor Drainage: Ensure water can drain away from the grill station to avoid wood rot.
Alternatives for Materials or Methods:
Composite Decking: Instead of wood, use composite decking for a low-maintenance option.
Metal Roofing: Use corrugated metal sheets instead of shingles for a durable, easy-to-install roof.
Concrete Countertops: Consider concrete instead of granite or tile for a sturdy, weather-resistant surface.
Estimating the Costs
Lumber: $200-$300 for treated wood. Concrete: $50 for bags to set posts. Roofing Material: $100-$150 for metal or shingles. Grill: $200-$500 depending on size and features. Countertop: $100-$200 for concrete or tile. Screws and Nails: $20-$30. Paint or Stain: $30-$50. Tools: $100-$200 if you need basics like a saw, drill, and level.
Total Cost: $800-$1,480.
Budget-Friendly Alternatives: Use pallet wood for lumber, saving $100-$150. Opt for a basic grill around $150. Use recycled materials for countertops, saving $50-$100. Borrow or rent tools, reducing costs by $50-$100.
Customizing Your Grill Station
Materials: Use reclaimed wood for a rustic look or stainless steel for a modern feel. Concrete blocks can add a sturdy, industrial vibe.
Colors: Paint the wood in bright colors like red or blue for a fun, lively atmosphere. For a more elegant touch, go with neutral tones like gray or beige.
Roof Styles: Opt for a metal roof for durability or a thatched roof for a tropical look. A polycarbonate roof can provide a sleek, contemporary style.
Countertops: Use granite for a high-end finish or tile for a colorful, customizable surface. Butcher block countertops offer a warm, traditional feel.
Storage: Add built-in cabinets for a clean, organized look. Open shelving can give a more casual, accessible feel. Use hooks and racks for hanging utensils and tools.
Lighting: Install string lights for a cozy, festive atmosphere. Recessed lighting can provide a sleek, modern touch. Lanterns or sconces add a classic, timeless look.
Seating: Build a bar-style counter with high stools for a social vibe. Use benches for a communal, picnic-style setting. Individual chairs can offer a more flexible seating arrangement.
Extras: Include a mini-fridge for convenience. Add a sink for easy cleanup. Incorporate a fire pit nearby for added warmth and ambiance.
Eco-Friendly Building Tips
Reclaimed wood can be used for the frame and roof structure. This not only saves trees but also gives a rustic look. Recycled metal for the grill and shelves adds durability while reducing waste. Bamboo is a fast-growing, sustainable option for countertops. Solar-powered lights can illuminate the area without using electricity. Eco-friendly paint or stain ensures fewer harmful chemicals are released into the environment. Rainwater collection systems can be integrated into the roof design to water nearby plants. Using natural stone or recycled concrete for the flooring provides a sturdy, eco-friendly base.
Enjoy Your New Grill Station
You've got your grill station set up, complete with a sturdy roof. Now, it's time to fire up the grill and enjoy some delicious meals. Remember, the key to a great DIY project is planning and patience. You’ve put in the hard work, and now you can reap the rewards. Invite friends over, show off your new setup, and make some unforgettable memories. Keep an eye on maintenance to ensure your grill station stays in top shape. Regular checks and a bit of TLC will go a long way. Enjoy your new outdoor space, and happy grilling!
How do I start building an outdoor grill station with a roof?
First, plan your design. Measure your space, decide on materials, and sketch a layout. Gather tools like a saw, drill, screws, and level.
What materials should I use for the roof?
Use weather-resistant materials like metal, polycarbonate, or treated wood. These withstand rain, sun, and wind.
How do I ensure the grill station is safe?
Keep the grill away from flammable materials. Install a fire extinguisher nearby. Ensure proper ventilation to avoid smoke buildup.
Can I add storage to my grill station?
Absolutely! Add shelves, cabinets, or hooks for utensils. Use stainless steel or treated wood for durability.
How do I maintain my outdoor grill station?
Regularly clean the grill and surfaces. Check the roof for damage. Reapply sealant to wood parts annually to prevent rot.
What kind of lighting should I install?
Use LED lights for energy efficiency. Consider string lights for ambiance or task lighting for cooking areas.
Can I customize the design?
Yes, personalize it with paint, tiles, or decorative elements. Add a bar area or seating for extra functionality.