
Home>Create & Decorate>DIY & Crafts>DIY Pull Up Bar: Build Your Own Fitness Station At Home
DIY & Crafts
DIY Pull Up Bar: Build Your Own Fitness Station At Home
Published: February 24, 2024

Senior Editor in Create & Decorate, Kathryn combines traditional craftsmanship with contemporary trends. Her background in textile design and commitment to sustainable crafts inspire both content and community.
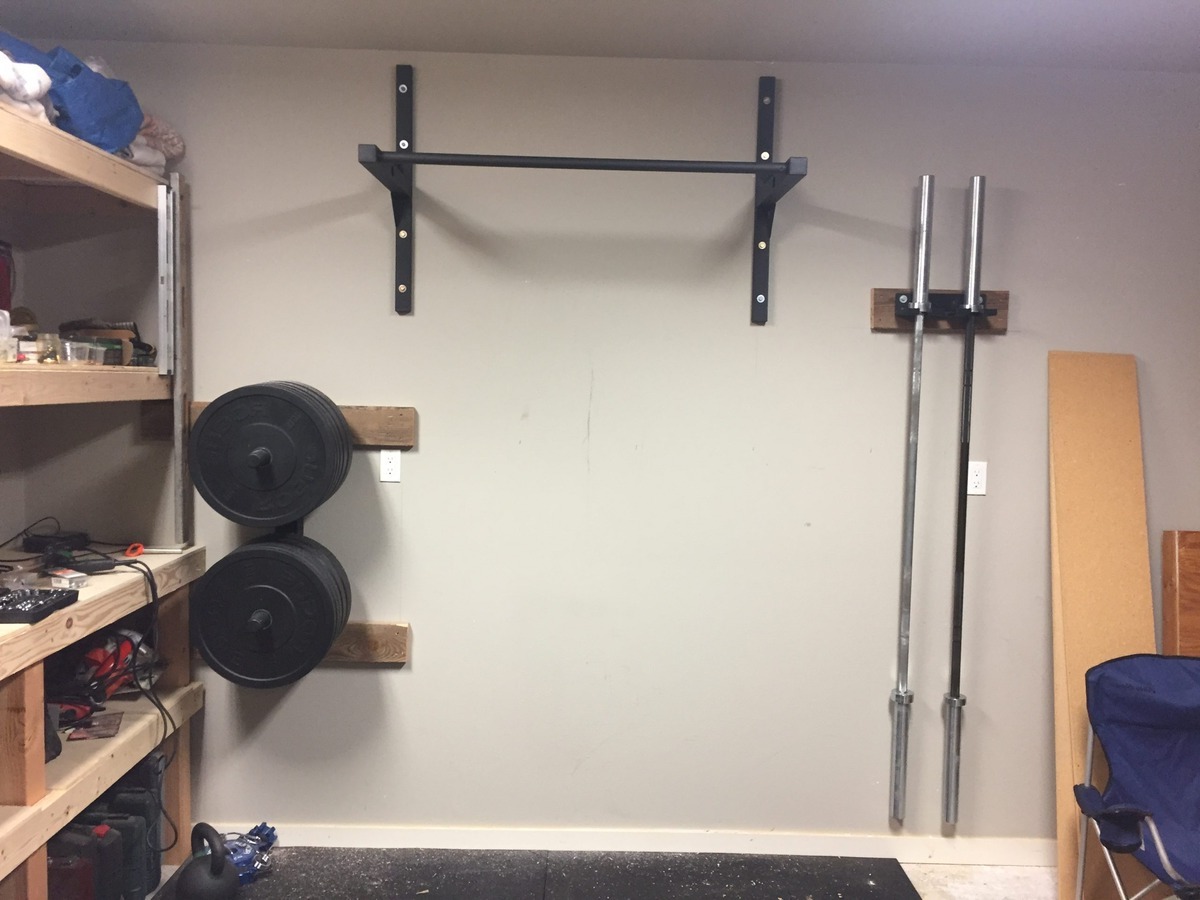
Build your own DIY pull-up bar and create a convenient fitness station at home with this easy-to-follow guide. Perfect for DIY & Crafts enthusiasts.
(Many of the links in this article redirect to a specific reviewed product. Your purchase of these products through affiliate links helps to generate commission for Twigandthistle.com, at no extra cost. Learn more)
Introduction
Are you looking to elevate your fitness routine without leaving the comfort of your home? Building a DIY pull-up bar could be the perfect solution. A pull-up bar is a versatile piece of equipment that offers a wide range of exercises to strengthen your upper body, core, and overall physique. Whether you're a fitness enthusiast, a beginner looking to start a new workout regimen, or someone seeking a convenient way to stay active, a DIY pull-up bar can be a game-changer.
By constructing your own pull-up bar, you not only save money on expensive gym memberships or equipment purchases, but you also have the freedom to customize the bar to suit your specific needs and space. Additionally, having a pull-up bar at home provides the flexibility to work out at any time, regardless of the weather or time constraints. It's a convenient and efficient way to incorporate fitness into your daily routine.
In this comprehensive guide, we will walk you through the process of building your very own pull-up bar, from gathering the necessary materials to step-by-step construction instructions. We'll also provide essential safety tips to ensure that your DIY pull-up bar is not only effective but also safe to use.
Embark on this DIY journey with us, and discover how you can create a functional and durable pull-up bar that will become a staple in your home fitness routine. Let's roll up our sleeves and get ready to build a fitness station that will elevate your workouts to new heights!
Benefits of Having a Pull Up Bar at Home
Having a pull-up bar at home offers a multitude of benefits that can significantly enhance your fitness journey. Here are some compelling reasons why incorporating a DIY pull-up bar into your home gym setup can be a game-changer:
-
Versatile Workout Options: A pull-up bar opens the door to a wide range of exercises that target various muscle groups. From traditional pull-ups and chin-ups to leg raises, hanging knee tucks, and even modified push-ups, the versatility of a pull-up bar allows for a comprehensive upper body and core workout.
-
Convenience and Accessibility: With a pull-up bar at home, you have the convenience of fitting in a quick workout whenever it suits your schedule. There's no need to commute to the gym or adhere to specific operating hours. Whether it's early morning, during a lunch break, or in the evening, your home pull-up bar is always accessible.
-
Cost-Effective Fitness Solution: Building your own pull-up bar is a cost-effective alternative to purchasing expensive gym equipment or committing to a gym membership. By utilizing readily available materials, you can create a durable and functional fitness station without breaking the bank.
-
Space-Saving and Customizable: A DIY pull-up bar can be tailored to fit your available space, whether it's in a garage, backyard, or even a dedicated home gym area. Its compact design makes it an ideal addition to any home workout space, offering a high-impact workout without occupying a significant footprint.
-
Strength and Muscle Development: Regular use of a pull-up bar can lead to significant improvements in upper body strength, grip strength, and overall muscle development. The variety of exercises that can be performed on a pull-up bar allows for progressive overload, which is essential for muscle growth and strength gains.
-
Enhanced Functional Fitness: Pull-up bar exercises promote functional fitness by engaging multiple muscle groups simultaneously. This translates to improved stability, coordination, and overall functional strength, which can benefit daily activities and sports performance.
-
Motivation and Consistency: The presence of a pull-up bar at home serves as a constant reminder and motivator to stay active. It eliminates the common barriers to exercise, such as time constraints and external factors, making it easier to maintain a consistent workout routine.
Incorporating a DIY pull-up bar into your home fitness setup can revolutionize the way you approach strength training and overall wellness. With its versatility, accessibility, and cost-effectiveness, a pull-up bar becomes a valuable asset in achieving your fitness goals and maintaining a healthy lifestyle.
Materials Needed for Building a DIY Pull Up Bar
Building your own DIY pull-up bar requires a selection of sturdy and reliable materials to ensure the structural integrity and safety of the final product. Here's a comprehensive list of the materials you will need to construct a durable and functional pull-up bar at home:
1. Steel Pipe or Bar:
The main component of the pull-up bar is the steel pipe or bar, which serves as the primary structure for performing exercises. Opt for a high-quality steel pipe or bar with a diameter that provides a comfortable grip. The length of the pipe will depend on the width of the space where the pull-up bar will be installed.
2. Mounting Hardware:
To securely attach the pull-up bar to a sturdy support structure, you will need mounting hardware such as heavy-duty wall brackets, ceiling mounts, or door frame mounts. Ensure that the mounting hardware is designed to bear the weight and stress of dynamic movements during workouts.
3. Wood for Reinforcement (Optional):
If you plan to mount the pull-up bar on a wooden support beam or joist, consider using additional wood for reinforcement. This may include a wooden mounting plate or support beams to distribute the load and prevent damage to the existing structure.
4. Measuring Tape and Level:
Accurate measurements and precise leveling are crucial for the safe and effective installation of the pull-up bar. A measuring tape and a level will help ensure that the bar is positioned at the correct height and alignment for optimal performance.
5. Drill and Drill Bits:
A reliable drill and a set of drill bits are essential for creating pilot holes and securing the mounting hardware to the support structure. Choose drill bits that are suitable for the type of material you will be drilling into, whether it's wood, concrete, or metal.
6. Wrenches and Screwdrivers:
Having a set of wrenches and screwdrivers on hand will facilitate the assembly and tightening of bolts, nuts, and screws during the installation process. Ensure that you have the appropriate tools for the specific fasteners used in the mounting hardware.
7. Protective Gear:
Prioritize safety by wearing appropriate protective gear, including work gloves and safety goggles, when handling and assembling the materials. This will help prevent injuries and ensure a safe construction process.
By gathering these essential materials and tools, you will be well-equipped to embark on the construction of your DIY pull-up bar. With careful planning and attention to detail, you can create a robust and reliable fitness station that will support your strength training endeavors for years to come.
Step-by-Step Instructions for Building the Pull Up Bar
1. Measure and Plan:
Begin by determining the location where you intend to install the pull-up bar. Use a measuring tape to assess the available space and identify a suitable mounting point. Consider factors such as ceiling height, wall or beam strength, and clearance for performing exercises. Once the location is determined, carefully plan the positioning of the bar to ensure optimal functionality and safety.
2. Select and Prepare the Steel Pipe:
Choose a steel pipe or bar of appropriate length and diameter for the pull-up bar. If necessary, cut the pipe to the desired length using a pipe cutter or a metal saw. Smooth any rough edges with sandpaper to create a comfortable grip surface. Optionally, you can add a layer of grip tape or rubber coating to enhance the grip and prevent slippage during workouts.
3. Install Mounting Hardware:
Depending on the chosen location, install the mounting hardware using the appropriate fasteners and tools. For wall or ceiling mounts, use a drill to create pilot holes and securely attach the brackets or mounts. If mounting on a door frame, ensure that the door frame mount is installed according to the manufacturer's guidelines for stability and weight capacity.
4. Attach the Steel Pipe:
With the mounting hardware in place, carefully position the steel pipe onto the installed brackets or mounts. Use wrenches and screwdrivers to secure the pipe, ensuring that it is level and securely fastened to the support structure. Test the stability of the bar by applying gentle pressure before proceeding.
5. Reinforcement (If Applicable):
If mounting the pull-up bar on a wooden support beam or joist, reinforce the area with additional wood as needed. This may involve attaching a wooden mounting plate or support beams to distribute the load and minimize stress on the existing structure. Ensure that the reinforcement is securely fastened and capable of supporting the weight of the bar and user.
6. Safety Check and Test:
Once the pull-up bar is assembled, perform a thorough safety check to verify the stability and integrity of the installation. Test the bar by gradually applying weight and performing controlled movements to ensure that it can support the intended exercises. Confirm that all fasteners are tightened and that the bar is securely anchored to the support structure.
7. Personalization and Finishing Touches:
Consider adding personal touches to the pull-up bar, such as custom grips, padding, or decorative elements to enhance its visual appeal and functionality. Ensure that any additions do not compromise the safety or structural integrity of the bar.
By following these step-by-step instructions, you can confidently build a DIY pull-up bar that meets your fitness needs and seamlessly integrates into your home workout space. With careful attention to detail and adherence to safety guidelines, your homemade pull-up bar will become a reliable tool for achieving your strength and fitness goals.
Safety Tips for Using the DIY Pull Up Bar
Ensuring the safety of your DIY pull-up bar is paramount to enjoying a secure and effective workout experience. By following these essential safety tips, you can maximize the benefits of your homemade fitness station while minimizing the risk of accidents or injuries.
-
Inspect Regularly: Before each workout session, visually inspect the pull-up bar and its mounting hardware for any signs of wear, damage, or loose components. Check for cracks, rust, or weakened areas on the steel pipe, as well as the integrity of the mounting brackets or mounts. Address any issues promptly to maintain a safe exercise environment.
-
Weight Capacity: Be mindful of the weight capacity of your DIY pull-up bar and ensure that it aligns with your body weight and the intensity of your workouts. Exceeding the weight limit can compromise the structural integrity of the bar and increase the risk of accidents. If multiple users will be using the pull-up bar, verify that it can accommodate their combined weight.
-
Secure Mounting: Double-check the stability and secure attachment of the pull-up bar to the support structure before each use. Tighten any loose bolts or fasteners and confirm that the bar is firmly anchored in place. Avoid using the pull-up bar if there are any doubts about its stability.
-
Proper Grip: Maintain a firm and secure grip on the pull-up bar during exercises to prevent slipping or losing control. Consider using chalk or grip-enhancing products to improve hand adherence, especially if your hands tend to sweat during workouts.
-
Warm-Up and Cool Down: Prior to engaging in pull-up bar exercises, perform a thorough warm-up routine to prepare your muscles and joints for the physical demands. After completing your workout, engage in a proper cool-down to aid in muscle recovery and reduce the risk of post-exercise soreness.
-
Exercise Variation: Avoid repetitive or excessive strain on specific muscle groups by incorporating a variety of exercises and grips into your pull-up bar routine. This helps distribute the workload across different muscles and reduces the likelihood of overuse injuries.
-
Spotter or Assistance: If you are attempting challenging or advanced exercises on the pull-up bar, consider having a spotter or assistance nearby to ensure your safety. Having a support person can provide reassurance and aid in the event of fatigue or unexpected difficulties during the workout.
-
Clear Surroundings: Ensure that the area surrounding the pull-up bar is free from obstacles, furniture, or other hazards that could interfere with your movements. Having ample space around the bar allows for unrestricted exercise performance and reduces the risk of accidental collisions.
By adhering to these safety tips, you can create a secure and supportive environment for utilizing your DIY pull-up bar. Prioritizing safety not only safeguards your well-being but also enhances the overall enjoyment and effectiveness of your home workout routine.
Conclusion
In conclusion, the journey of building your own DIY pull-up bar is not just about constructing a piece of fitness equipment; it's about empowering yourself to take control of your health and well-being. By embarking on this DIY project, you have embraced the opportunity to create a personalized fitness station that aligns with your unique space, preferences, and fitness goals.
The process of building a DIY pull-up bar is a testament to your commitment to a healthier lifestyle. It signifies the dedication to incorporate strength training and functional fitness into your daily routine, without the constraints of a traditional gym setting. As you meticulously select the materials, measure the space, and assemble the components, you are actively investing in your physical strength and overall wellness.
Furthermore, the DIY pull-up bar serves as a symbol of versatility and adaptability. It adapts to your schedule, offering the convenience of a quick workout session whenever time permits. It accommodates various exercises, allowing you to target different muscle groups and progress in your fitness journey. Its presence in your home serves as a constant reminder of your commitment to staying active and maintaining a consistent workout regimen.
Beyond the physical aspects, the DIY pull-up bar represents creativity and resourcefulness. By utilizing readily available materials and tools, you have demonstrated ingenuity in crafting a functional fitness solution without the need for expensive gym memberships or specialized equipment. This resourcefulness extends to the customization of the pull-up bar, tailoring it to fit seamlessly into your home environment while reflecting your personal style and preferences.
As you complete the construction of your DIY pull-up bar and begin incorporating it into your fitness routine, you are embarking on a journey of self-improvement and empowerment. The pull-up bar becomes more than just a piece of equipment; it becomes a catalyst for positive change, motivating you to push your limits, achieve new milestones, and embrace the transformative power of physical activity.
In essence, the DIY pull-up bar represents a commitment to holistic well-being, encompassing physical strength, mental resilience, and the pursuit of a healthier lifestyle. It stands as a testament to your determination to prioritize self-care and embrace the rewards of an active and balanced life. With your DIY pull-up bar as a steadfast companion in your fitness journey, you are poised to elevate your workouts, surpass your fitness goals, and revel in the satisfaction of a truly personalized fitness experience.