
Home>Home & Furniture>Kitchen>DIY Kitchen Sink Splash Guard Guide
Kitchen
DIY Kitchen Sink Splash Guard Guide
Published: August 3, 2024
Learn how to create a DIY kitchen sink splash guard with our step-by-step guide. Save money, reduce mess, and enhance your kitchen's functionality with easy-to-find materials.
(Many of the links in this article redirect to a specific reviewed product. Your purchase of these products through affiliate links helps to generate commission for Twigandthistle.com, at no extra cost. Learn more)
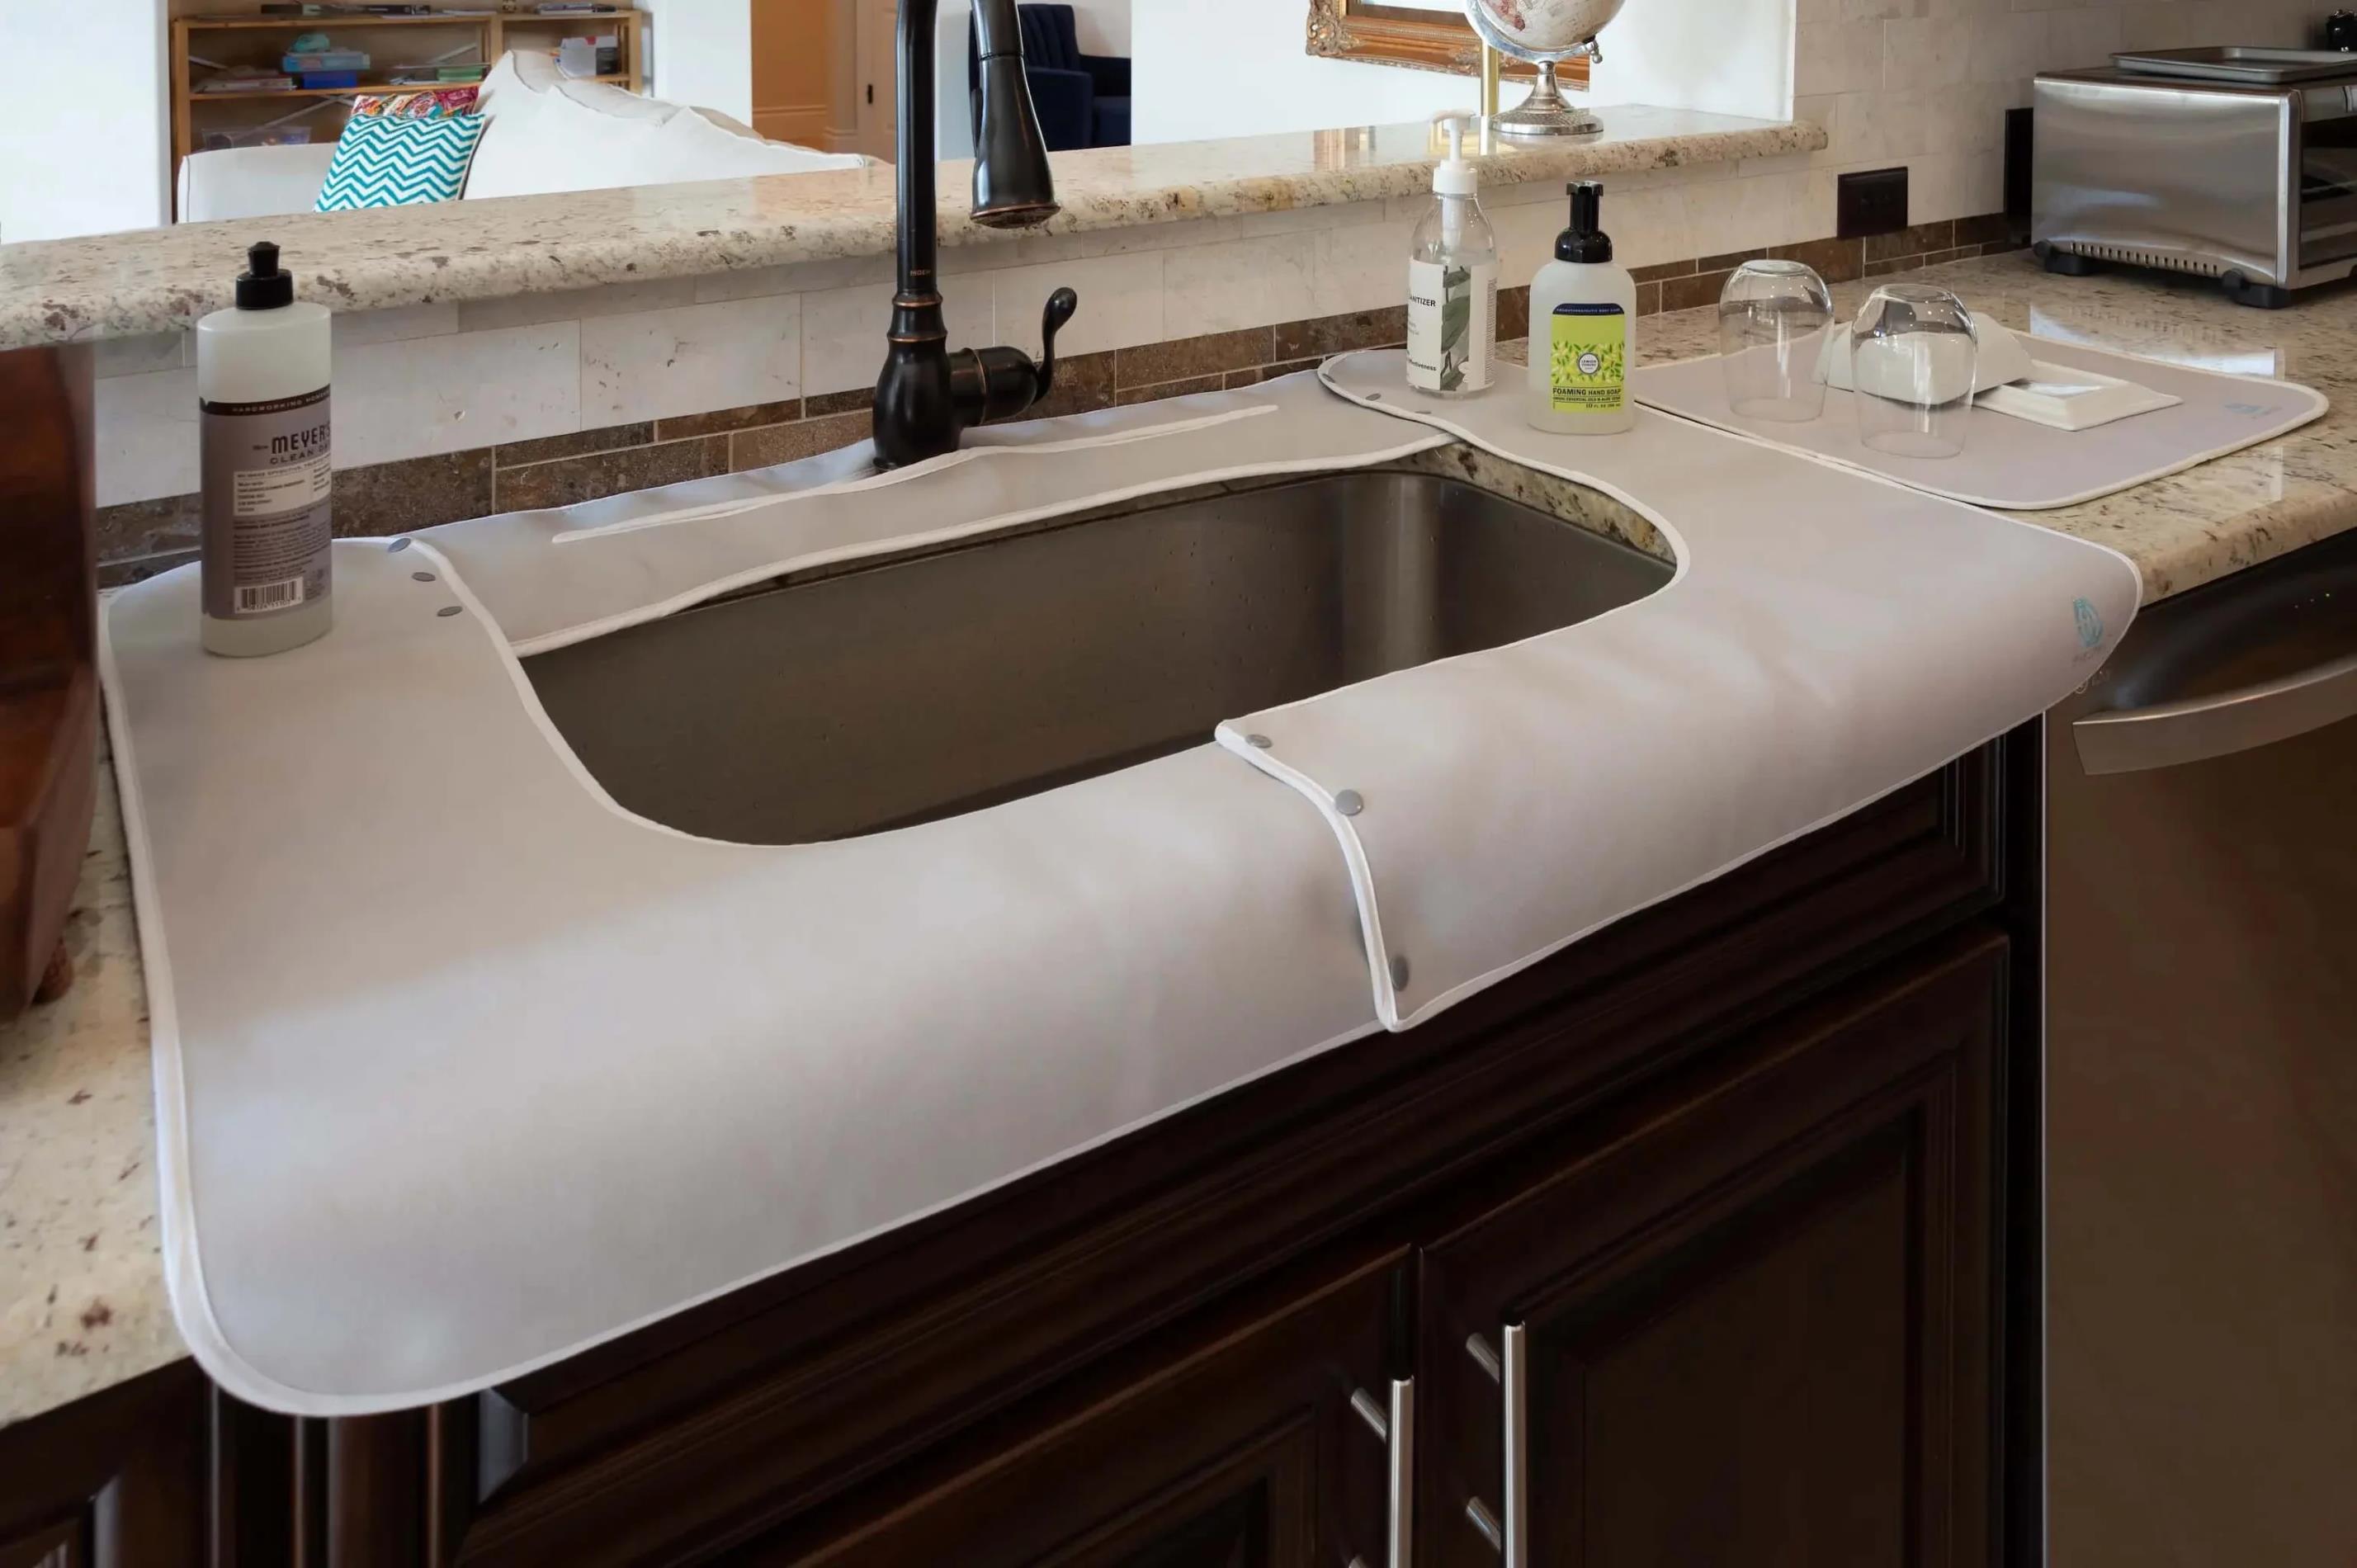
Tired of wiping water off your kitchen counter every time you use the sink? A splash guard might be the answer. Not only will it keep your counters dry, but it can also save you time and effort in cleaning. This guide will show you how to make your own DIY kitchen sink splash guard. You don’t need to be an expert or spend a lot of money. With a few basic materials and some simple steps, you’ll have a splash guard ready in no time. Let's get started on creating a cleaner, drier kitchen!
Getting Ready for Your Project
Gather Materials: Collect splash guard, adhesive, measuring tape, scissors, and cleaning supplies.
Clear the Area: Remove any items around the sink. Ensure the workspace is free of clutter.
Clean the Surface: Use a mild cleaner to scrub the area where the splash guard will be installed. Dry it thoroughly.
Measure and Mark: Use the measuring tape to determine the exact length and height needed. Mark these measurements on the splash guard.
Cut to Size: Carefully cut the splash guard to fit the marked measurements using scissors.
Apply Adhesive: Follow the adhesive instructions. Apply it evenly on the back of the splash guard.
Position and Press: Align the splash guard with the marked area. Press firmly to ensure it sticks well.
Safety Tips:
- Wear gloves to protect your hands from sharp edges.
- Use ventilation if the adhesive has strong fumes.
- Keep children and pets away from the workspace.
Allow to Set: Let the adhesive dry completely before using the sink. This usually takes a few hours.
Test for Stability: Gently press on the splash guard to ensure it is securely attached.
What You Need to Get Started
- Silicone Caulk: A waterproof sealant to secure the splash guard.
- Caulk Gun: A tool to apply the silicone caulk evenly.
- Measuring Tape: Measures the dimensions of the sink area.
- Utility Knife: Cuts the splash guard material to the correct size.
- Splash Guard Material: Can be plastic, rubber, or silicone, used to create the barrier.
- Rubbing Alcohol: Cleans the sink area before applying the splash guard.
- Cleaning Cloth: Wipes down the sink area after using rubbing alcohol.
- Masking Tape: Holds the splash guard in place while the caulk dries.
- Scissors: Trims any excess material from the splash guard.
- Marker or Pencil: Marks measurements on the splash guard material.
- Level: Ensures the splash guard is installed straight.
How Much Time and Skill Are Needed?
Skill Level: Beginner
Time Required: 1-2 hours
- Gather Materials: 10 minutes
- Measure and Cut: 20 minutes
- Install Splash Guard: 30 minutes
- Seal Edges: 20 minutes
- Clean Up: 10 minutes
Follow These Steps
Gather Materials:
- Plastic cutting board or flexible plastic sheet
- Measuring tape
- Marker
- Scissors or utility knife
- Adhesive strips or suction cups
Measure the Sink:
- Use the measuring tape to measure the width of your sink.
- Note the height you want for the splash guard.
Mark the Plastic:
- Lay the plastic cutting board or sheet flat.
- Use the marker to draw the dimensions you measured.
Cut the Plastic:
- Carefully cut along the marked lines with scissors or a utility knife.
- Smooth any rough edges with sandpaper if needed.
Attach Adhesive Strips:
- Apply adhesive strips or suction cups to the edges of the plastic.
- Make sure they are evenly spaced for a secure hold.
Install the Splash Guard:
- Press the splash guard against the sink edge.
- Ensure it is firmly attached and covers the area where water splashes.
Test for Stability:
- Run water in the sink to check if the splash guard stays in place.
- Adjust the position or add more adhesive if necessary.
Clean and Maintain:
- Wipe the splash guard regularly to keep it clean.
- Replace adhesive strips or suction cups if they lose their grip.
Helpful Tips and Tricks
Measure Carefully: Before starting, measure the area around your sink. This ensures the splash guard fits perfectly.
Use Clear Silicone: Clear silicone sealant works best for attaching splash guards. It’s waterproof and blends well with most kitchen designs.
Smooth Edges: Sand down any rough edges on your splash guard. This prevents accidental cuts and makes it look more professional.
Apply Even Pressure: When attaching the splash guard, apply even pressure to avoid air bubbles. Use a flat tool like a spatula to press it down.
Clean Surface: Ensure the sink area is clean and dry before applying the splash guard. Dirt or moisture can weaken the adhesive.
Common Mistakes to Avoid:
- Skipping Measurements: Not measuring can lead to a poor fit.
- Using Wrong Adhesive: Regular glue won’t hold up against water. Always use waterproof sealant.
- Ignoring Dry Time: Let the adhesive dry completely before using the sink. Rushing this step can cause the guard to come loose.
Material Alternatives:
- Acrylic Sheets: These are durable and easy to cut.
- Plexiglass: Offers a clear, sturdy option.
- Flexible Plastic: Easier to mold around curved sinks.
Method Alternatives:
- Velcro Strips: For a removable option, use heavy-duty Velcro strips instead of adhesive.
- Magnetic Strips: If your sink is metal, magnetic strips can hold the guard in place without glue.
How Much Will It Cost?
Materials:
- Silicone Caulk: $5-$10
- Plastic or Acrylic Sheet: $10-$20
- Double-Sided Tape: $5-$10
- Sandpaper: $3-$5
Tools:
- Utility Knife: $5-$10
- Caulk Gun: $5-$10
- Measuring Tape: $3-$5
- Marker: $1-$2
Total Cost: $37-$72
Budget-Friendly Alternatives:
- Plastic Sheet: Use a shower curtain liner ($5-$10)
- Caulk Gun: Use squeeze tube silicone ($5-$7)
- Utility Knife: Use scissors you already own
Different Ways to Customize
Materials: Instead of using standard plastic, try silicone for flexibility or stainless steel for a sleek look. Acrylic sheets can also work well and are easy to cut.
Colors: Paint or cover the splash guard with waterproof contact paper in various colors or patterns. Choose bright colors to add a pop to your kitchen or neutral tones for a more classic look.
Styles: Create a foldable splash guard using hinged panels for easy storage. Add suction cups to the base for a removable option. For a more permanent solution, use adhesive strips to secure it to the countertop.
Shapes: Customize the shape to fit your sink area perfectly. Make it taller for more coverage or wider to protect a larger area. Cut it into a curved shape for a more elegant design.
Decorations: Add stickers or decals to personalize the splash guard. Use stencils to paint designs or patterns. Attach hooks or clips to hold dishcloths or small kitchen tools.
Functionality: Incorporate a built-in soap dish or sponge holder. Add a magnetic strip to hold metal utensils. Create a drainage hole at the bottom to let water flow back into the sink.
Eco-Friendly Options: Use recycled materials like old cutting boards or repurpose glass panels from picture frames. Opt for biodegradable or compostable materials if possible.
Eco-Friendly Ideas
Recycled Plastic: Use old plastic containers or bottles. Cut them into the shape needed for a splash guard. This reduces waste and gives a second life to plastic.
Cork: Cork is a renewable resource. It’s water-resistant and can be cut to fit around the sink. Glue pieces together for a thicker guard.
Old Shower Curtains: Repurpose old shower curtains. Cut them to size and attach them with suction cups or adhesive hooks. They’re waterproof and easy to clean.
Bamboo: Bamboo is sustainable and grows quickly. Use bamboo mats or panels. Cut them to fit and secure them with adhesive strips.
Reclaimed Wood: Use wood from old furniture or pallets. Sand it down and treat it with a waterproof sealant. Attach it around the sink area for a rustic look.
Fabric Scraps: Use waterproof fabric scraps. Sew them together to create a custom splash guard. Attach with Velcro for easy removal and cleaning.
Glass: Use old glass panes or windows. Cut them to size and secure them with silicone adhesive. Glass is easy to clean and looks sleek.
Tile: Use leftover tiles from other projects. Create a mosaic splash guard by gluing tiles to a backing board. Seal the grout to make it waterproof.
Metal Sheets: Repurpose metal sheets from old appliances. Cut them to size and secure them with screws or adhesive. Metal is durable and easy to clean.
Rubber Mats: Use old rubber mats or flooring. Cut them to fit around the sink. Rubber is water-resistant and easy to clean.
Your DIY Journey Begins
Creating a kitchen sink splash guard yourself saves money and adds a personal touch to your space. With some basic materials and a bit of time, you can craft a guard that fits your sink perfectly. Remember to measure accurately, choose durable materials, and follow the steps carefully. This project not only keeps your kitchen cleaner but also gives you a sense of accomplishment. Plus, you can customize it to match your kitchen's style. So, grab your tools, get creative, and enjoy the process. Happy DIY-ing!
How do I make a DIY kitchen sink splash guard?
Use a plastic cutting board or flexible silicone mat. Cut it to fit the space behind your sink. Secure it with suction cups or adhesive strips.
What materials do I need?
You'll need a cutting board or silicone mat, scissors, suction cups, or adhesive strips.
Can I use household items?
Absolutely! Plastic folders, old placemats, or even shower curtains can work as splash guards.
How do I clean my DIY splash guard?
Wipe it down with a damp cloth and some mild soap. For tougher stains, use a bit of vinegar or baking soda.
Will it damage my sink or countertop?
Not at all! Using suction cups or removable adhesive ensures no permanent marks or damage.
How long will it last?
With proper care, a DIY splash guard can last several months to a year. Just replace it if it starts to wear out.
Can I customize the design?
Sure thing! Use waterproof stickers, paint, or even fabric to make it match your kitchen decor.