
Home>Home & Furniture>Kitchen>DIY BBQ Island Building Guide
Kitchen
DIY BBQ Island Building Guide
Published: July 24, 2024
Transform your backyard with our DIY BBQ Island Building Guide. Step-by-step instructions, materials list, and expert tips for creating the perfect outdoor kitchen space.
(Many of the links in this article redirect to a specific reviewed product. Your purchase of these products through affiliate links helps to generate commission for Twigandthistle.com, at no extra cost. Learn more)
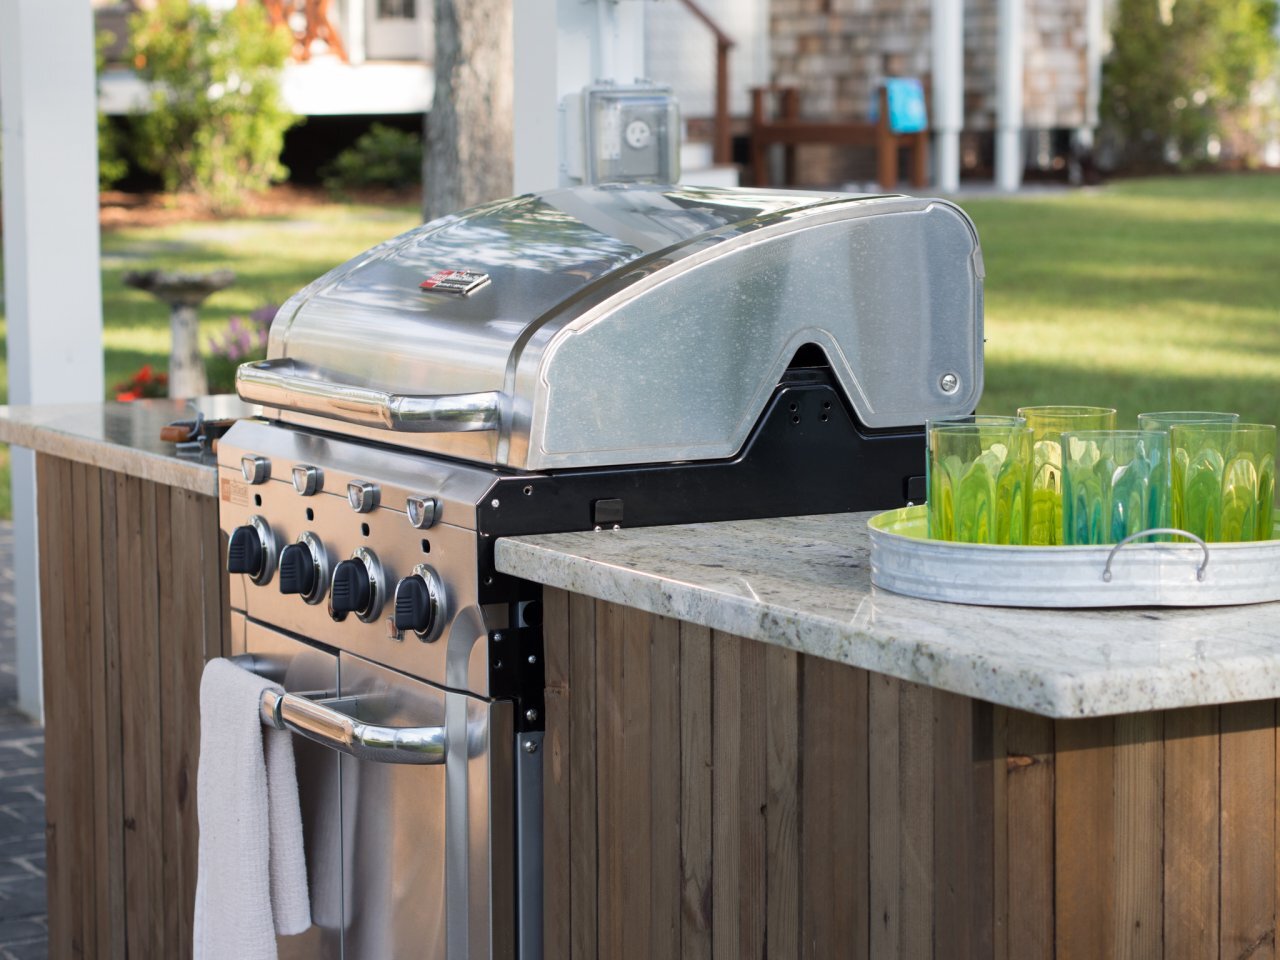
Building your own BBQ island can transform your backyard into an outdoor oasis. Imagine grilling in style with a custom setup, perfect for summer gatherings or quiet family dinners. This guide will walk you through the essentials, from planning the layout to choosing materials and adding finishing touches. Whether you're a seasoned DIY enthusiast or a beginner, this project offers a satisfying blend of creativity and practicality. Get ready to roll up your sleeves, gather your tools, and create a BBQ island that will be the centerpiece of your outdoor entertaining space. Let's get started!
Getting Ready for Your BBQ Island Project
Plan Your Design: Sketch out your BBQ island's layout. Decide where the grill, storage, and countertops will go. Measure your space to ensure everything fits.
Gather Materials: Collect all necessary materials like bricks, cement, tiles, and a grill. Make a list to avoid multiple trips to the store.
Safety Gear: Wear safety goggles, gloves, and a dust mask. Keep a first aid kit nearby in case of minor injuries.
Clear the Area: Remove any debris, plants, or obstacles from the workspace. Ensure the ground is level for a stable foundation.
Set Up Workspace: Arrange tools like a trowel, level, and saw within easy reach. Keep a bucket of water handy for mixing cement.
Check Local Codes: Verify local building codes and permits. Some areas have regulations for outdoor structures.
Utility Lines: Locate any gas, water, or electric lines. Avoid digging or building over these to prevent accidents.
Foundation: Lay a solid foundation using concrete or pavers. This step ensures your BBQ island remains sturdy.
Dry Fit: Before cementing, dry fit all components to see how they align. Adjust as needed to ensure a perfect fit.
Weather Considerations: Check the weather forecast. Avoid starting the project if rain or extreme heat is expected.
Essential Materials and Tools
- Cement: Used for the foundation and securing bricks or blocks.
- Bricks or Concrete Blocks: Form the structure of the BBQ island.
- Rebar: Provides strength to the concrete foundation.
- Grill Insert: The main cooking component.
- Countertop Material: Can be granite, tile, or concrete for the prep area.
- Mortar: Binds bricks or blocks together.
- Plywood: Used for framing and support.
- Screws and Nails: Fasten various parts together.
- Metal Lath: Supports the mortar and adds strength.
- Stucco: Finishes the exterior for a polished look.
- Tile or Stone Veneer: Optional for a decorative finish.
Tools:
- Shovel: Digs the foundation.
- Trowel: Spreads mortar.
- Level: Ensures everything is even.
- Tape Measure: Measures materials accurately.
- Hammer: Drives nails and breaks small pieces.
- Drill: Makes holes for screws.
- Saw: Cuts wood and other materials.
- Wheelbarrow: Transports heavy materials.
- Masonry Saw: Cuts bricks or blocks.
- Safety Gear: Includes gloves, goggles, and a dust mask.
Required Skills and Time Commitment
Skill Level: Advanced
Time Required: 3-5 days
- Planning and Design: 4-6 hours
- Gathering Materials: 2-4 hours
- Building the Frame: 1-2 days
- Installing Countertops and Appliances: 1 day
- Finishing Touches: 4-6 hours
Detailed Building Instructions
Plan Your Design
- Measure the available space.
- Sketch a layout including grill, counter space, and storage.
- Decide on materials (brick, stone, metal).
Gather Materials and Tools
- Purchase bricks, mortar, cement board, tiles, and a grill.
- Get tools: trowel, level, saw, drill, screws, and safety gear.
Prepare the Area
- Clear the ground where the island will sit.
- Ensure the surface is level.
Build the Foundation
- Lay a concrete slab or use pavers.
- Let it cure for 24-48 hours.
Construct the Frame
- Use metal studs or wood to build the frame.
- Secure the frame to the foundation with screws.
Install Cement Board
- Cut cement board to fit the frame.
- Attach using screws and a drill.
Apply Mortar and Bricks
- Mix mortar according to instructions.
- Lay bricks, ensuring they are level and aligned.
- Let the mortar dry for 24 hours.
Install the Grill
- Place the grill into the designated space.
- Secure it according to the manufacturer’s instructions.
Add Countertops
- Measure and cut countertops to fit.
- Secure them with adhesive or screws.
Finish with Tiles or Stone
- Apply adhesive to the cement board.
- Lay tiles or stone, pressing firmly.
- Grout between tiles and let it dry.
Add Storage and Accessories
- Install doors, drawers, and shelves.
- Add hooks or racks for utensils.
Inspect and Test
- Check stability and safety.
- Test the grill to ensure proper function.
Helpful Tips and Tricks
Plan Your Layout: Sketch your BBQ island design before starting. Measure twice, cut once.
Use Quality Materials: Opt for weather-resistant materials like stainless steel, concrete, or stone. These last longer and require less maintenance.
Level Ground: Ensure the ground is level before building. Uneven surfaces can cause structural issues.
Ventilation: Proper ventilation is crucial. Install vents to prevent gas buildup.
Electrical and Plumbing: If adding a sink or outlets, consult a professional. Incorrect installation can be dangerous.
Common Mistakes to Avoid:
- Skipping Permits: Check local regulations. Building without permits can lead to fines.
- Ignoring Weight Limits: Ensure your base can support the island's weight. Weak foundations can cause collapse.
- Poor Insulation: Use fire-resistant insulation around the grill to prevent heat damage.
Material Alternatives:
- Instead of stone, consider concrete blocks for a sturdy, cost-effective option.
- For countertops, granite is durable but expensive. Tile offers a cheaper, customizable alternative.
- Use pressure-treated wood for framing if metal is too pricey. Ensure it's properly sealed to prevent rot.
Budgeting for Your BBQ Island
Concrete blocks: $50-$100
Cement: $20-$30
Rebar: $10-$20
Grill: $200-$500
Countertop material: $100-$300
Tile or stone veneer: $100-$200
Wood for framing: $50-$100
Screws and nails: $10-$20
Paint or sealant: $20-$40
Tools (saw, drill, trowel, level): $100-$200
Total cost: $660-$1,510
Budget-friendly alternatives:
Concrete blocks: Use cinder blocks instead, $30-$60
Countertop material: Opt for plywood with a weatherproof finish, $50-$100
Tile or stone veneer: Use painted concrete or brick veneer, $50-$100
Grill: Consider a portable grill, $100-$200
Tools: Borrow from friends or rent, $50-$100
Budget-friendly total cost: $410-$860
Personalizing Your BBQ Island
Materials: Use concrete blocks instead of wood for a more durable structure. Try stainless steel for a sleek, modern look. Natural stone or brick can give a rustic feel.
Colors: Paint the island in earth tones for a natural vibe. Use bright colors like red or blue for a fun, festive look. Neutral colors like gray or white can make it look clean and modern.
Styles: Add a tile countertop for easy cleaning and a polished look. Use wooden accents for a cozy, traditional feel. Install LED lights for nighttime grilling. Add a mini-fridge or sink for extra convenience.
Grill Types: Choose a charcoal grill for a classic BBQ flavor. Use a gas grill for quick and easy cooking. Try a smoker for slow-cooked, flavorful meats.
Seating: Build a bar counter with stools for a social grilling area. Add a bench or picnic table for family-style dining. Use outdoor cushions for comfort.
Storage: Install cabinets or shelves for storing utensils and supplies. Use hooks for hanging tools. Add a drawer for keeping small items organized.
Extras: Include a pizza oven for more cooking options. Add a fire pit nearby for warmth and ambiance. Install a canopy or umbrella for shade.
Eco-Friendly Building Tips
Reclaimed Wood: Use old pallets or barn wood. Sand and treat them for a rustic look.
Recycled Metal: Find scrap metal for frames or accents. It’s sturdy and eco-friendly.
Concrete Blocks: Use leftover blocks from other projects. They’re durable and easy to work with.
Eco-Friendly Paint: Choose low-VOC or natural paints. They’re better for the environment and your health.
Bamboo: Use bamboo for shelves or trim. It’s a fast-growing, renewable resource.
Solar Lights: Install solar-powered lights. They save energy and look great.
Recycled Countertops: Look for countertops made from recycled glass or paper. They’re stylish and sustainable.
Natural Stone: Use stones from your yard or local area. They add a natural touch without the carbon footprint of shipping.
Reclaimed Bricks: Use old bricks for a classic look. They’re often available from demolition sites.
Compostable Materials: Use compostable materials for temporary structures or forms. They break down naturally after use.
Your BBQ Island Awaits
Building your own BBQ island isn't just about saving money; it's about creating a space that reflects your style. You've learned how to plan, gather materials, and put everything together. Now, it's time to fire up that grill and enjoy the fruits of your labor. Remember, the key to a successful DIY project is patience and attention to detail. Don't rush the process. Take pride in each step, knowing that every brick laid and every screw tightened brings you closer to your dream outdoor kitchen. Invite friends and family over, show off your handiwork, and make some unforgettable memories. With your new BBQ island, you're not just cooking; you're crafting experiences. So grab those tongs, light that fire, and let the good times roll. Happy grilling!
What materials do I need to build a BBQ island?
You'll need concrete blocks, cement, rebar, grill components, tile or stone for the countertop, and stucco or stone veneer for the exterior. Don't forget screws, adhesive, and sealant.
How much space do I need for a BBQ island?
A BBQ island typically needs at least 6 to 8 feet of space. This allows room for the grill, prep area, and some storage. Make sure to measure your yard and plan accordingly.
Can I build a BBQ island on a wooden deck?
It's not recommended to build directly on a wooden deck due to fire hazards. If you must, use a fireproof base like concrete or pavers under the island to protect the deck.
How long does it take to build a BBQ island?
Depending on your skill level and the complexity of the design, it can take anywhere from a weekend to a few weeks. Plan for extra time if you're new to DIY projects.
Do I need any special tools?
Basic tools like a drill, screwdriver, trowel, and level are essential. You might also need a wet saw for cutting tiles and a masonry saw for concrete blocks.
How do I ensure my BBQ island is weatherproof?
Use weather-resistant materials like stainless steel for the grill and sealed stone or tile for the countertop. Apply a waterproof sealant to all surfaces and cover the island when not in use.
Can I add extra features like a sink or fridge?
Absolutely! Just make sure you have access to plumbing and electricity. Plan these additions in the design phase to avoid complications later.