
Home>Home & Furniture>Garage & Basement>How to Waterproof Basement Walls from Inside
Garage & Basement
How to Waterproof Basement Walls from Inside
Published: August 31, 2024
Learn how to waterproof basement walls from the inside with our comprehensive guide. Protect your home from moisture and mold with these expert tips and techniques.
(Many of the links in this article redirect to a specific reviewed product. Your purchase of these products through affiliate links helps to generate commission for Twigandthistle.com, at no extra cost. Learn more)
Waterproofing basement walls from the inside can protect your home from water damage and mold. This simple DIY project can save you time and money in the long run. Whether you’re dealing with minor dampness or significant leaks, addressing the issue from the inside is an effective way to keep your basement dry. All you need are a few tools, some materials, and a bit of time. With the right approach, even a beginner can tackle this project successfully. Let’s get started on making your basement a dry, usable space.
Preparation Steps
Inspect the Walls: Look for cracks, holes, or any signs of water damage. Mark these areas for repair.
Clean the Walls: Remove dirt, dust, and any loose paint using a wire brush or vacuum. Clean surfaces ensure better adhesion of waterproofing materials.
Repair Cracks and Holes: Use hydraulic cement or a similar product to fill in cracks and holes. This prevents water from seeping through.
Check for Mold: If mold is present, clean it with a mixture of water and bleach. Wear gloves and a mask to protect yourself.
Set Up a Ventilated Workspace: Ensure good ventilation to avoid inhaling fumes from waterproofing products. Open windows or use fans.
Gather Materials: Collect all necessary tools and materials like waterproofing paint, brushes, rollers, and protective gear.
Wear Protective Gear: Put on gloves, safety goggles, and a mask to protect yourself from chemicals and dust.
Protect the Floor: Lay down plastic sheets or drop cloths to catch any drips or spills.
Test for Moisture: Use a moisture meter to check the walls. High moisture levels may require additional drying time or dehumidifiers.
Plan for Drying Time: Ensure you have enough time for each layer of waterproofing material to dry properly before applying the next.
Materials and Tools Checklist
- Waterproof Paint or Sealant: Special paint that creates a barrier to stop water from seeping through walls.
- Concrete Patch: Used to fill in cracks or holes in the walls before applying the waterproof paint.
- Wire Brush: Helps clean the walls by removing dirt, debris, and old paint.
- Bucket and Sponge: Needed for cleaning the walls with water and detergent.
- Detergent: Used with water to clean the walls thoroughly.
- Putty Knife: Helps apply the concrete patch to cracks and holes.
- Sandpaper: Smooths out patched areas before painting.
- Paint Roller and Brushes: Used to apply the waterproof paint evenly on the walls.
- Drop Cloths: Protects the floor from paint spills and splatters.
- Painter's Tape: Keeps paint off areas you don't want to be painted.
- Gloves and Safety Goggles: Protects your hands and eyes while working.
- Dehumidifier: Helps keep the basement dry during and after the waterproofing process.
Required Skills and Time Commitment
Skill Level: Intermediate
Time Required: 1-2 days
- Clean the Walls: 2-3 hours
- Patch Cracks and Holes: 3-4 hours
- Apply Waterproofing Paint: 4-6 hours (including drying time)
- Install a Dehumidifier: 1 hour
Detailed Instructions
Inspect Walls:
- Look for cracks, holes, or any signs of water damage.
- Mark problem areas with chalk.
Clean Walls:
- Use a wire brush to remove dirt, mold, or loose paint.
- Wash walls with a mixture of water and mild detergent.
- Let walls dry completely.
Seal Cracks and Holes:
- Apply hydraulic cement to cracks and holes.
- Smooth out with a trowel.
- Allow cement to dry as per instructions on the package.
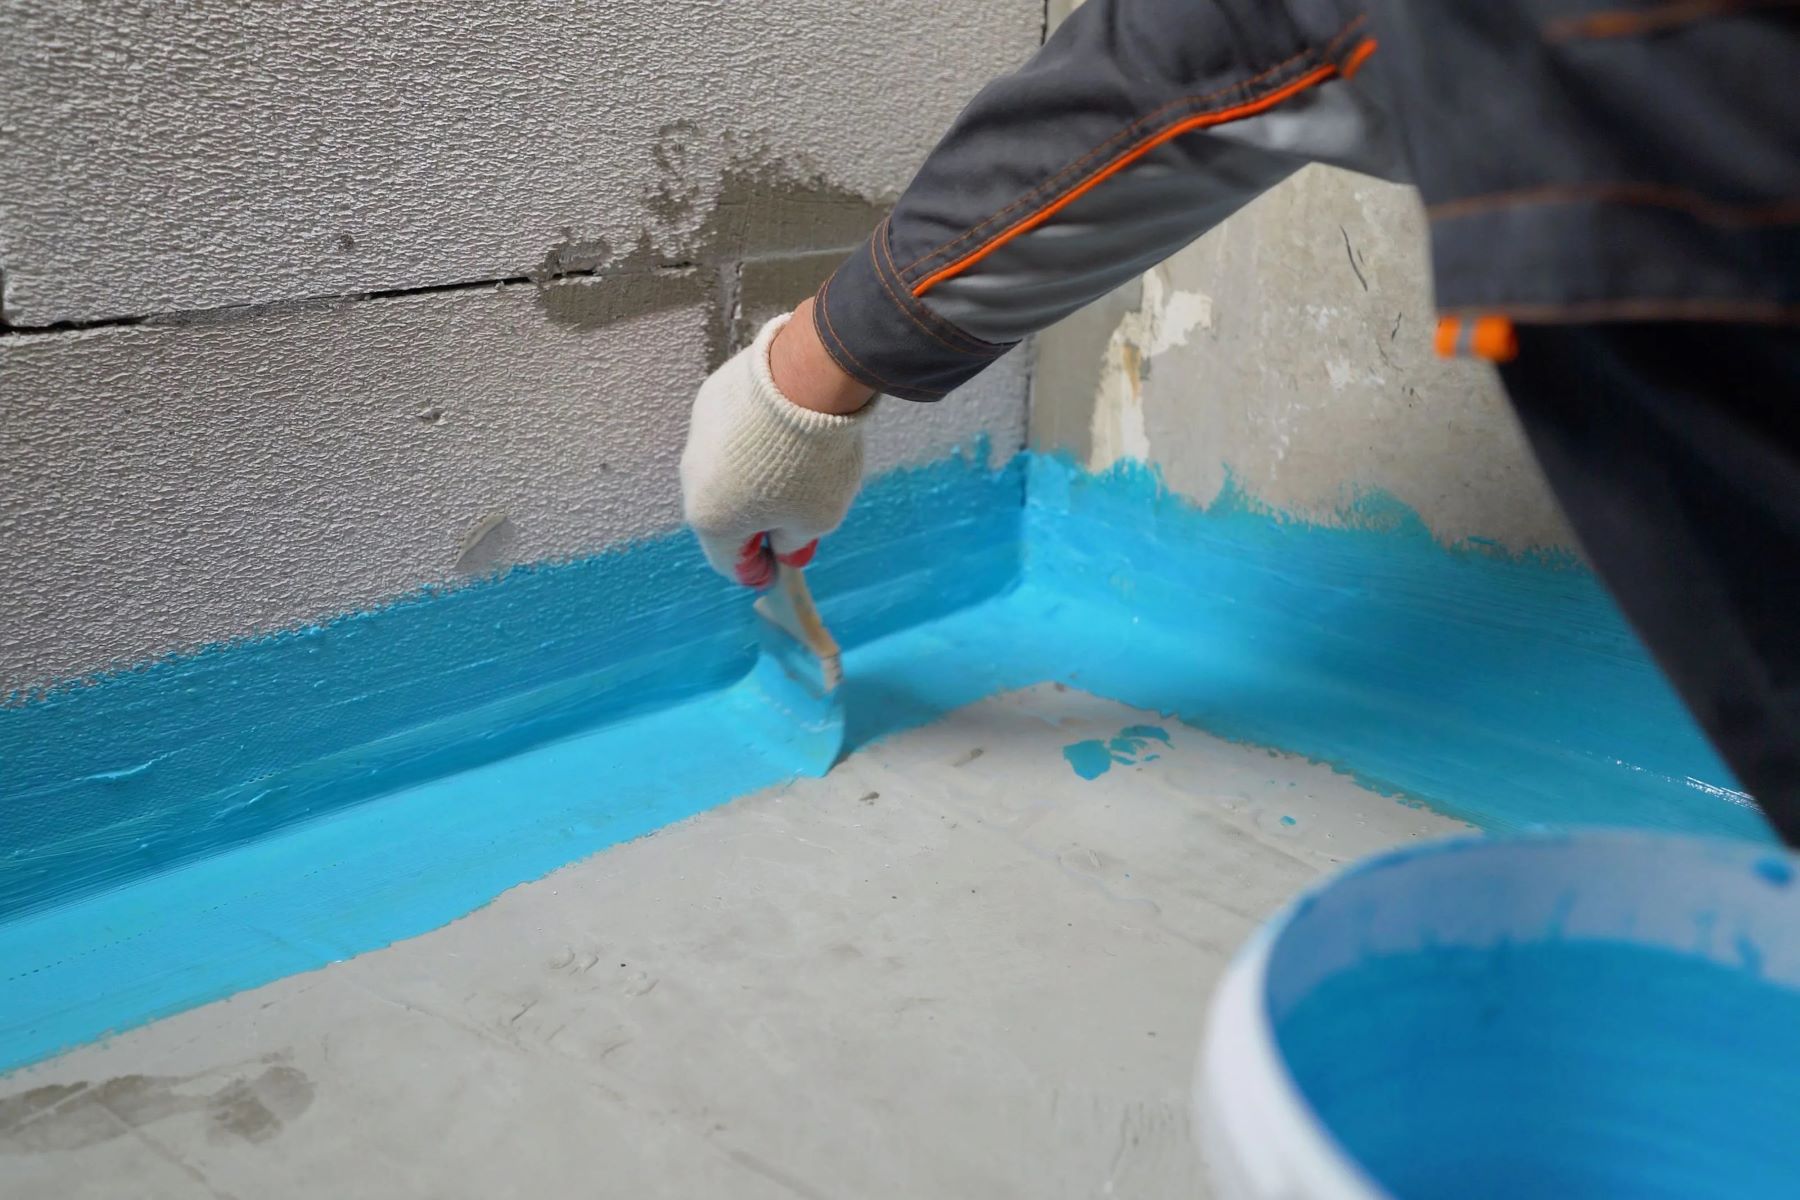
Apply Waterproofing Paint:
- Choose a waterproofing paint designed for basement walls.
- Stir paint thoroughly.
- Use a paintbrush to cut in edges and corners.
- Apply the first coat with a roller, covering all areas evenly.
- Let the first coat dry completely.
Apply Second Coat:
- Apply a second coat of waterproofing paint.
- Ensure even coverage, especially over problem areas.
- Allow the second coat to dry thoroughly.
Install a Dehumidifier:
- Place a dehumidifier in the basement to control moisture levels.
- Set it to maintain a humidity level below 60%.
Check for Leaks Regularly:
- Inspect walls periodically for any new signs of moisture.
- Reapply waterproofing paint if needed.
Helpful Tips and Tricks
Clean the Walls: Start by cleaning the walls thoroughly. Use a wire brush to remove dirt, mold, and old paint. This ensures the waterproofing material sticks properly.
Seal Cracks and Holes: Use hydraulic cement to fill any cracks or holes. Hydraulic cement expands as it dries, creating a tight seal.
Apply Waterproof Paint: Use a high-quality waterproof paint or sealant. Apply at least two coats for better protection. Make sure each coat dries completely before adding the next.
Install a Dehumidifier: A dehumidifier helps reduce moisture in the air, preventing mold growth and dampness.
Check for Leaks: Regularly inspect your basement for new leaks or damp spots. Early detection makes repairs easier.
Use a Sump Pump: If your basement is prone to flooding, install a sump pump. It helps remove water quickly, keeping your basement dry.
Insulate Pipes: Insulate any exposed pipes to prevent condensation, which can add moisture to the basement.
Common Mistakes to Avoid:
Skipping Surface Prep: Not cleaning the walls properly can make the waterproofing less effective.
Ignoring Small Cracks: Even tiny cracks can let in water. Seal all cracks, no matter how small.
Using the Wrong Paint: Not all paints are waterproof. Make sure to use paint specifically designed for waterproofing.
Alternatives for Materials or Methods:
Waterproof Membranes: Instead of paint, use a waterproof membrane. These sheets are applied to the walls and provide a strong barrier against moisture.
Interior Drainage Systems: Install an interior drainage system to direct water away from the walls and into a sump pump.
Silicone-Based Sealants: Use silicone-based sealants for a flexible, long-lasting solution. They are especially good for areas that may shift or settle over time.
Budgeting for the Project
Waterproofing paint: $30-$50 per gallon (covers about 75-100 sq. ft.)
Hydraulic cement: $20-$30 for a 10 lb. bucket
Concrete patch: $10-$20 for a 1 qt. container
Wire brush: $5-$10
Putty knife: $5-$15
Paint roller and tray: $10-$20
Caulk gun: $5-$15
Silicone caulk: $5-$10 per tube
Plastic sheeting: $10-$20 for a 10x25 ft. roll
Safety gear (gloves, goggles, mask): $10-$20
Total estimated cost: $110-$210
Budget-friendly alternatives:
Use regular cement instead of hydraulic cement: $10 for a 10 lb. bag
Borrow tools like a wire brush, putty knife, paint roller, and tray from friends or neighbors
Opt for cheaper brands of waterproofing paint and silicone caulk
Total estimated cost with alternatives: $70-$130
Different Approaches and Customizations
Materials: Instead of traditional waterproofing paint, try using liquid rubber or silicone-based sealants. These materials offer flexibility and durability. Epoxy coatings can also provide a strong barrier against moisture.
Colors: Waterproofing products often come in limited colors, usually white or clear. However, you can paint over them with masonry paint in any color you like. This allows you to match the basement walls with the rest of your home’s decor.
Styles: For a more decorative approach, consider using waterproofing panels or tiles. These can be installed over the waterproofed walls and come in various styles and patterns. Brick veneer or stone veneer panels can give your basement a more rustic or elegant look.
Alternative Methods: Instead of just sealing the walls, you can install an interior drainage system. This involves placing drainage channels along the perimeter of the basement floor to collect and direct water to a sump pump. This method is more complex but highly effective.
Insulation: Adding insulated panels over the waterproofed walls can help with temperature control and add another layer of moisture protection. Foam board insulation is a good option for this purpose.
Finishing Touches: To improve the overall appearance, consider adding baseboards or trim around the edges of the walls. This can hide any imperfections and give the basement a more finished look. Wall decals or murals can also be applied to add personality and style.
Eco-Friendly Tips
Eco-friendly materials can help waterproof basement walls. Recycled plastic panels work well. They keep moisture out and are made from reused materials. Soy-based sealants are another option. These sealants are non-toxic and effective.
Clay-based paints can also help. They are natural and breathable, reducing mold growth. Permeable concrete is another choice. It allows water to pass through without damaging the walls.
Methods matter too. Install a sump pump to remove water. Use a dehumidifier to keep air dry. Fix cracks with eco-friendly fillers. Insulate pipes to prevent condensation.
Reusing materials can save money and resources. Old tiles can be used for drainage. Reclaimed wood can create barriers. Even old plastic sheets can help keep water out.
Keep Your Basement Dry
Waterproofing basement walls from the inside is a smart move. Start by cleaning the walls thoroughly, then seal any cracks or gaps with hydraulic cement. Apply a waterproofing paint or membrane to create a barrier against moisture. Don't forget to install a dehumidifier to keep the air dry. Regularly check for any signs of leaks or dampness and address them immediately. By following these steps, you can protect your basement from water damage, mold, and mildew. A dry basement means a healthier home and more usable space. So, roll up your sleeves and get to work. Your basement will thank you!
How do I know if my basement walls need waterproofing?
Look for signs like dampness, mold, musty odors, or water stains. If you see any of these, it's time to waterproof.
What materials do I need to waterproof my basement walls?
You'll need a waterproofing sealant, a brush or roller, a wire brush, cleaning supplies, and possibly a dehumidifier.
Can I waterproof my basement walls by myself?
Absolutely! With the right tools and materials, you can tackle this project on your own. Just follow the instructions carefully.
How long does it take to waterproof basement walls?
It usually takes a weekend. Cleaning and prepping might take a day, and applying the sealant another day. Drying time varies.
Do I need to clean the walls before waterproofing?
Yes, cleaning is crucial. Remove any dirt, mold, or loose paint with a wire brush and cleaning solution. This helps the sealant stick better.
How often should I reapply the waterproofing sealant?
Typically, every 5-10 years. However, check your walls regularly for any signs of wear or damage.
Will waterproofing my basement walls stop all water issues?
It helps a lot but might not solve everything. You may need to address drainage issues or install a sump pump for complete protection.