
Home>Home & Furniture>Garage & Basement>How to DIY Basement Spray Foam Insulation
Garage & Basement
How to DIY Basement Spray Foam Insulation
Published: August 30, 2024
Learn how to DIY basement spray foam insulation with our step-by-step guide. Save money, improve energy efficiency, and keep your basement cozy year-round.
(Many of the links in this article redirect to a specific reviewed product. Your purchase of these products through affiliate links helps to generate commission for Twigandthistle.com, at no extra cost. Learn more)
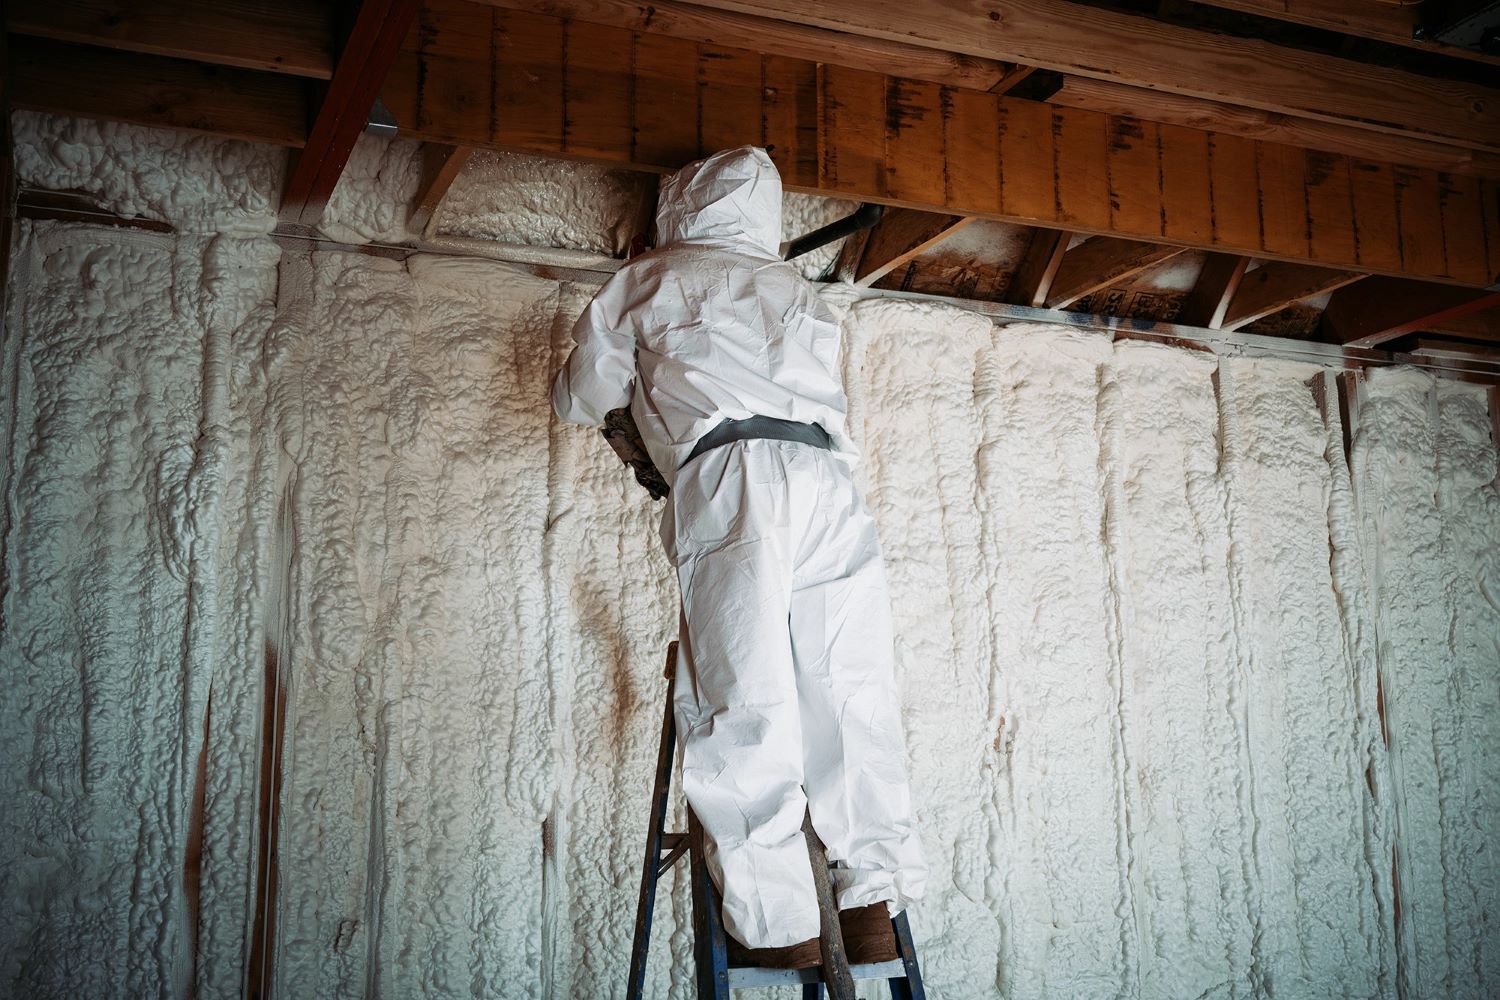
Thinking about insulating your basement? Spray foam insulation might be the perfect solution. This method can help keep your basement warm in winter and cool in summer, saving energy and money. Plus, it's a great project for DIY enthusiasts. Not only does it provide excellent insulation, but it can also help reduce noise and prevent moisture buildup. If you’re ready to tackle this project, there are a few things you need to know before getting started. This guide will walk you through the basics, ensuring you have the knowledge to insulate your basement like a pro.
Getting Ready for the Project
Safety Gear: Wear goggles, gloves, a respirator mask, and long sleeves to protect from chemicals.
Ventilation: Ensure the basement has proper ventilation. Open windows and use fans to circulate air.
Clear the Area: Remove any furniture, storage boxes, and debris from the workspace.
Seal Gaps: Use caulk or weatherstripping to seal any large gaps or cracks in the walls.
Cover Fixtures: Protect electrical outlets, light fixtures, and windows with plastic sheeting or painter's tape.
Temperature Check: Make sure the room temperature is between 60-80°F for optimal foam application.
Practice: Test the spray foam on a piece of cardboard to get a feel for the application process.
Read Instructions: Carefully read the manufacturer's instructions on the spray foam canister.
Plan Your Path: Start from the top and work your way down to ensure even coverage.
Keep Fire Extinguisher Nearby: Always have a fire extinguisher within reach in case of emergencies.
Materials and Tools Checklist
- Spray Foam Insulation Kit: Contains the foam and necessary nozzles for application. Choose a kit suitable for the area size.
- Protective Gear: Includes safety goggles, gloves, and a respirator mask to protect from chemicals.
- Utility Knife: Used for trimming excess foam after it cures.
- Measuring Tape: Ensures accurate measurements of the area to be insulated.
- Drop Cloths: Protects floors and surrounding areas from foam overspray.
- Caulk Gun and Caulk: Seals any gaps or cracks before applying foam.
- Ladder: Needed for reaching higher areas in the basement.
- Vacuum Cleaner: Cleans up any debris or dust before starting the insulation process.
- Spray Bottle with Water: Helps with foam adhesion by slightly dampening surfaces.
- Permanent Marker: Marks areas that need insulation or trimming.
These materials and tools ensure a safe, efficient, and effective insulation process.
Skill Level and Time Commitment
Skill Level: Advanced
Time Required: 2-3 days
Preparation: 4-6 hours
- Clear the basement
- Cover items with plastic sheets
- Ensure proper ventilation
Surface Cleaning: 2-3 hours
- Remove dust and debris
- Dry any damp areas
Masking and Taping: 3-4 hours
- Protect windows, doors, and outlets
Spray Foam Application: 1-2 days
- Apply foam in sections
- Allow each layer to dry
Trimming Excess Foam: 2-3 hours
- Use a utility knife or saw
Cleanup and Inspection: 3-4 hours
- Remove masking tape
- Check for gaps or missed spots
Detailed Steps to Follow
Gather Materials:
- Spray foam insulation kit
- Protective gear (gloves, goggles, mask)
- Drop cloths or plastic sheeting
- Utility knife
- Measuring tape
Prepare the Area:
- Clear the basement of any items.
- Lay down drop cloths or plastic sheeting to protect the floor.
- Ensure proper ventilation by opening windows or using fans.
Wear Protective Gear:
- Put on gloves, goggles, and a mask to protect yourself from chemicals.
Measure and Mark:
- Use a measuring tape to determine the areas needing insulation.
- Mark these areas with a pencil or chalk.
Shake the Canisters:
- Follow the instructions on the spray foam kit to shake and prepare the canisters.
Attach the Nozzle:
- Attach the nozzle to the spray foam canister as per the kit's instructions.
Test Spray:
- Do a small test spray on a piece of cardboard to ensure the foam is coming out correctly.
Apply the Foam:
- Start spraying in the marked areas, holding the nozzle about 12 inches away from the surface.
- Move in a steady, sweeping motion to apply an even layer.
- Fill all gaps, cracks, and crevices.
Let it Expand:
- Allow the foam to expand and fill the space. Do not overfill; the foam will expand significantly.
Trim Excess Foam:
- Once the foam has dried (usually a few hours), use a utility knife to trim any excess.
Clean Up:
- Remove drop cloths or plastic sheeting.
- Dispose of any waste materials properly.
Inspect:
- Check for any missed spots and apply additional foam if necessary.
Ventilate:
- Keep the area well-ventilated for a few days to ensure all fumes dissipate.
Helpful Tips and Tricks
Wear protective gear like gloves, goggles, and a mask. Ventilate the area well to avoid inhaling fumes. Measure the space accurately to buy the right amount of spray foam. Clean the surfaces before starting to ensure proper adhesion. Practice spraying on a piece of cardboard to get a feel for the nozzle. Spray in layers rather than one thick coat to allow for even expansion. Keep a utility knife handy to trim excess foam after it dries.
Common mistakes include not wearing protective gear, which can lead to skin irritation or respiratory issues. Over-spraying can cause the foam to expand too much, leading to waste and mess. Skipping surface preparation can result in poor adhesion. Not allowing layers to dry properly can cause uneven insulation.
Alternatives to spray foam include fiberglass batts, which are easier to install but less effective at sealing gaps. Rigid foam boards offer good insulation but require precise cutting and fitting. Cellulose insulation is eco-friendly but can be messy to install.
Estimating the Costs
Spray foam insulation can be a great way to keep your basement warm and energy-efficient. Here’s a rough estimate of the total cost for materials and tools:
Spray Foam Kits: These usually come in different sizes. For a medium-sized basement, you might need two 600-board-foot kits. Each kit costs around $600, so $1,200 for both.
Protective Gear: Safety first! You’ll need a respirator mask ($30), goggles ($10), gloves ($5), and a protective suit ($15). Total for gear: $60.
Prep Materials: You’ll need plastic sheeting to cover areas you don’t want foam on ($20), painter’s tape ($5), and drop cloths ($10). Total for prep: $35.
Miscellaneous Tools: A utility knife ($10), caulk gun ($15), and foam cleaner ($10). Total for tools: $35.
Total Estimated Cost: $1,330
Budget-Friendly Alternatives:
- Smaller Kits: If your basement is smaller, consider using two 200-board-foot kits instead. Each costs about $300, so $600 for both.
- Borrow Tools: Check if friends or family have some tools you can borrow.
- DIY Protective Gear: Use old clothes and make a DIY mask if you’re comfortable with that.
Total with Alternatives: Around $695
Different Approaches and Customizations
Alternative Materials: Instead of spray foam, consider using rigid foam boards. They are easier to install and can be cut to fit any space. Fiberglass batts are another option, though they may not provide as tight a seal as spray foam.
Colors: Spray foam typically comes in white or yellow, but you can paint over it with any color you like. Use latex paint for a smooth finish. If using rigid foam boards, they often come with a foil face that can be left as is or painted.
Styles: For a more finished look, cover the spray foam with drywall or plywood. This not only improves aesthetics but also adds an extra layer of insulation. If you prefer an industrial look, leave the spray foam exposed but trim it neatly.
Thickness: Adjust the thickness of the spray foam to meet your insulation needs. Closed-cell foam offers higher R-value per inch, making it ideal for tighter spaces. Open-cell foam is less dense and can be used where moisture control is less of a concern.
Application Techniques: Use a spray foam kit for smaller areas or hire a professional for larger spaces. For rigid foam boards, use a utility knife to cut and adhesive to secure them in place. Seal gaps with spray foam or caulk.
Environmental Considerations: Opt for eco-friendly spray foam that uses water or plant-based materials as blowing agents. Rigid foam boards made from recycled materials are also available.
Cost: Spray foam can be pricey. Save money by using it only in critical areas and filling the rest with cheaper insulation like fiberglass. Rigid foam boards can also be a cost-effective alternative.
Safety: Always wear protective gear like gloves, goggles, and a mask when working with spray foam. Ensure proper ventilation to avoid inhaling fumes. For rigid foam boards, a dust mask and gloves are sufficient.
Moisture Control: Use vapor barriers in conjunction with spray foam or rigid foam boards to prevent moisture buildup. This is especially important in basements prone to dampness.
Soundproofing: Spray foam provides excellent soundproofing. For added noise reduction, combine it with acoustic panels or soundproof drywall. Rigid foam boards also offer some soundproofing benefits.
Eco-Friendly Tips
Choose eco-friendly spray foam: Look for spray foam insulation made from soy-based or castor oil-based materials. These options are more sustainable than traditional petroleum-based foams.
Use recycled materials: When preparing your basement, consider using recycled drywall or reclaimed wood for framing. This reduces waste and gives new life to old materials.
Proper ventilation: Ensure good ventilation while applying spray foam. This helps reduce the release of volatile organic compounds (VOCs), making the process safer for you and the environment.
Seal gaps and cracks: Before applying spray foam, seal any gaps or cracks with caulk or weatherstripping. This improves insulation efficiency, reducing the amount of foam needed.
Reuse protective gear: Use reusable protective gear like washable coveralls and gloves. This minimizes waste compared to single-use items.
Dispose of waste responsibly: Collect any leftover foam and packaging materials. Take them to a recycling center that accepts construction waste.
Energy-efficient tools: Use energy-efficient tools like LED work lights and rechargeable batteries. This reduces your overall energy consumption during the project.
Plan your project: Measure your basement carefully to avoid over-purchasing materials. This reduces waste and ensures you only use what you need.
Educate yourself: Learn about local recycling programs and eco-friendly practices. This helps you make informed decisions throughout your project.
Your Cozy Basement Awaits
You've got the know-how now. Spray foam insulation in your basement isn't just a money-saver; it's a game-changer for comfort. Remember to wear protective gear, follow the instructions, and take your time. Prep work is key, so don't skip it. Measure twice, spray once. Ventilation is crucial, so keep the area well-ventilated. If you hit a snag, don't hesitate to ask for help. DIY projects can be tricky, but the rewards are worth it. Your basement will be warmer, your energy bills lower, and you'll have the satisfaction of a job well done. So, roll up your sleeves, get that spray foam, and transform your basement into a cozy, energy-efficient space. You've got this!
What tools do I need for basement spray foam insulation?
You’ll need a spray foam kit, protective gear (goggles, gloves, mask), a utility knife, and a ladder. Don’t forget drop cloths to cover the floor.
How do I prepare my basement for spray foam insulation?
Clear out the area, cover anything you don’t want sprayed with drop cloths, and make sure the walls are clean and dry. Seal any large gaps with caulk or foam sealant.
Is spray foam insulation safe to use?
Yes, but you must wear protective gear. The chemicals can be harmful if inhaled or if they come into contact with your skin. Ensure the area is well-ventilated.
How thick should the spray foam insulation be?
Aim for about 2-3 inches of closed-cell foam or 3-5 inches of open-cell foam. This provides good insulation and moisture control.
Can I apply spray foam insulation myself, or should I hire a professional?
You can definitely do it yourself if you’re comfortable with DIY projects and follow the instructions carefully. However, for larger areas or if you’re unsure, hiring a professional might be a good idea.
How long does it take for spray foam insulation to cure?
Spray foam typically cures in about 24 hours. During this time, keep the area ventilated and avoid touching the foam.
What are the benefits of using spray foam insulation in my basement?
Spray foam provides excellent insulation, reduces energy costs, acts as a moisture barrier, and can even help with soundproofing.