
Home>Home & Furniture>Garage & Basement>DIY Floating Garage Shelves Guide
Garage & Basement
DIY Floating Garage Shelves Guide
Published: September 27, 2024
Learn how to build DIY floating garage shelves with our step-by-step guide. Maximize your storage space efficiently and stylishly with easy-to-follow instructions.
(Many of the links in this article redirect to a specific reviewed product. Your purchase of these products through affiliate links helps to generate commission for Twigandthistle.com, at no extra cost. Learn more)
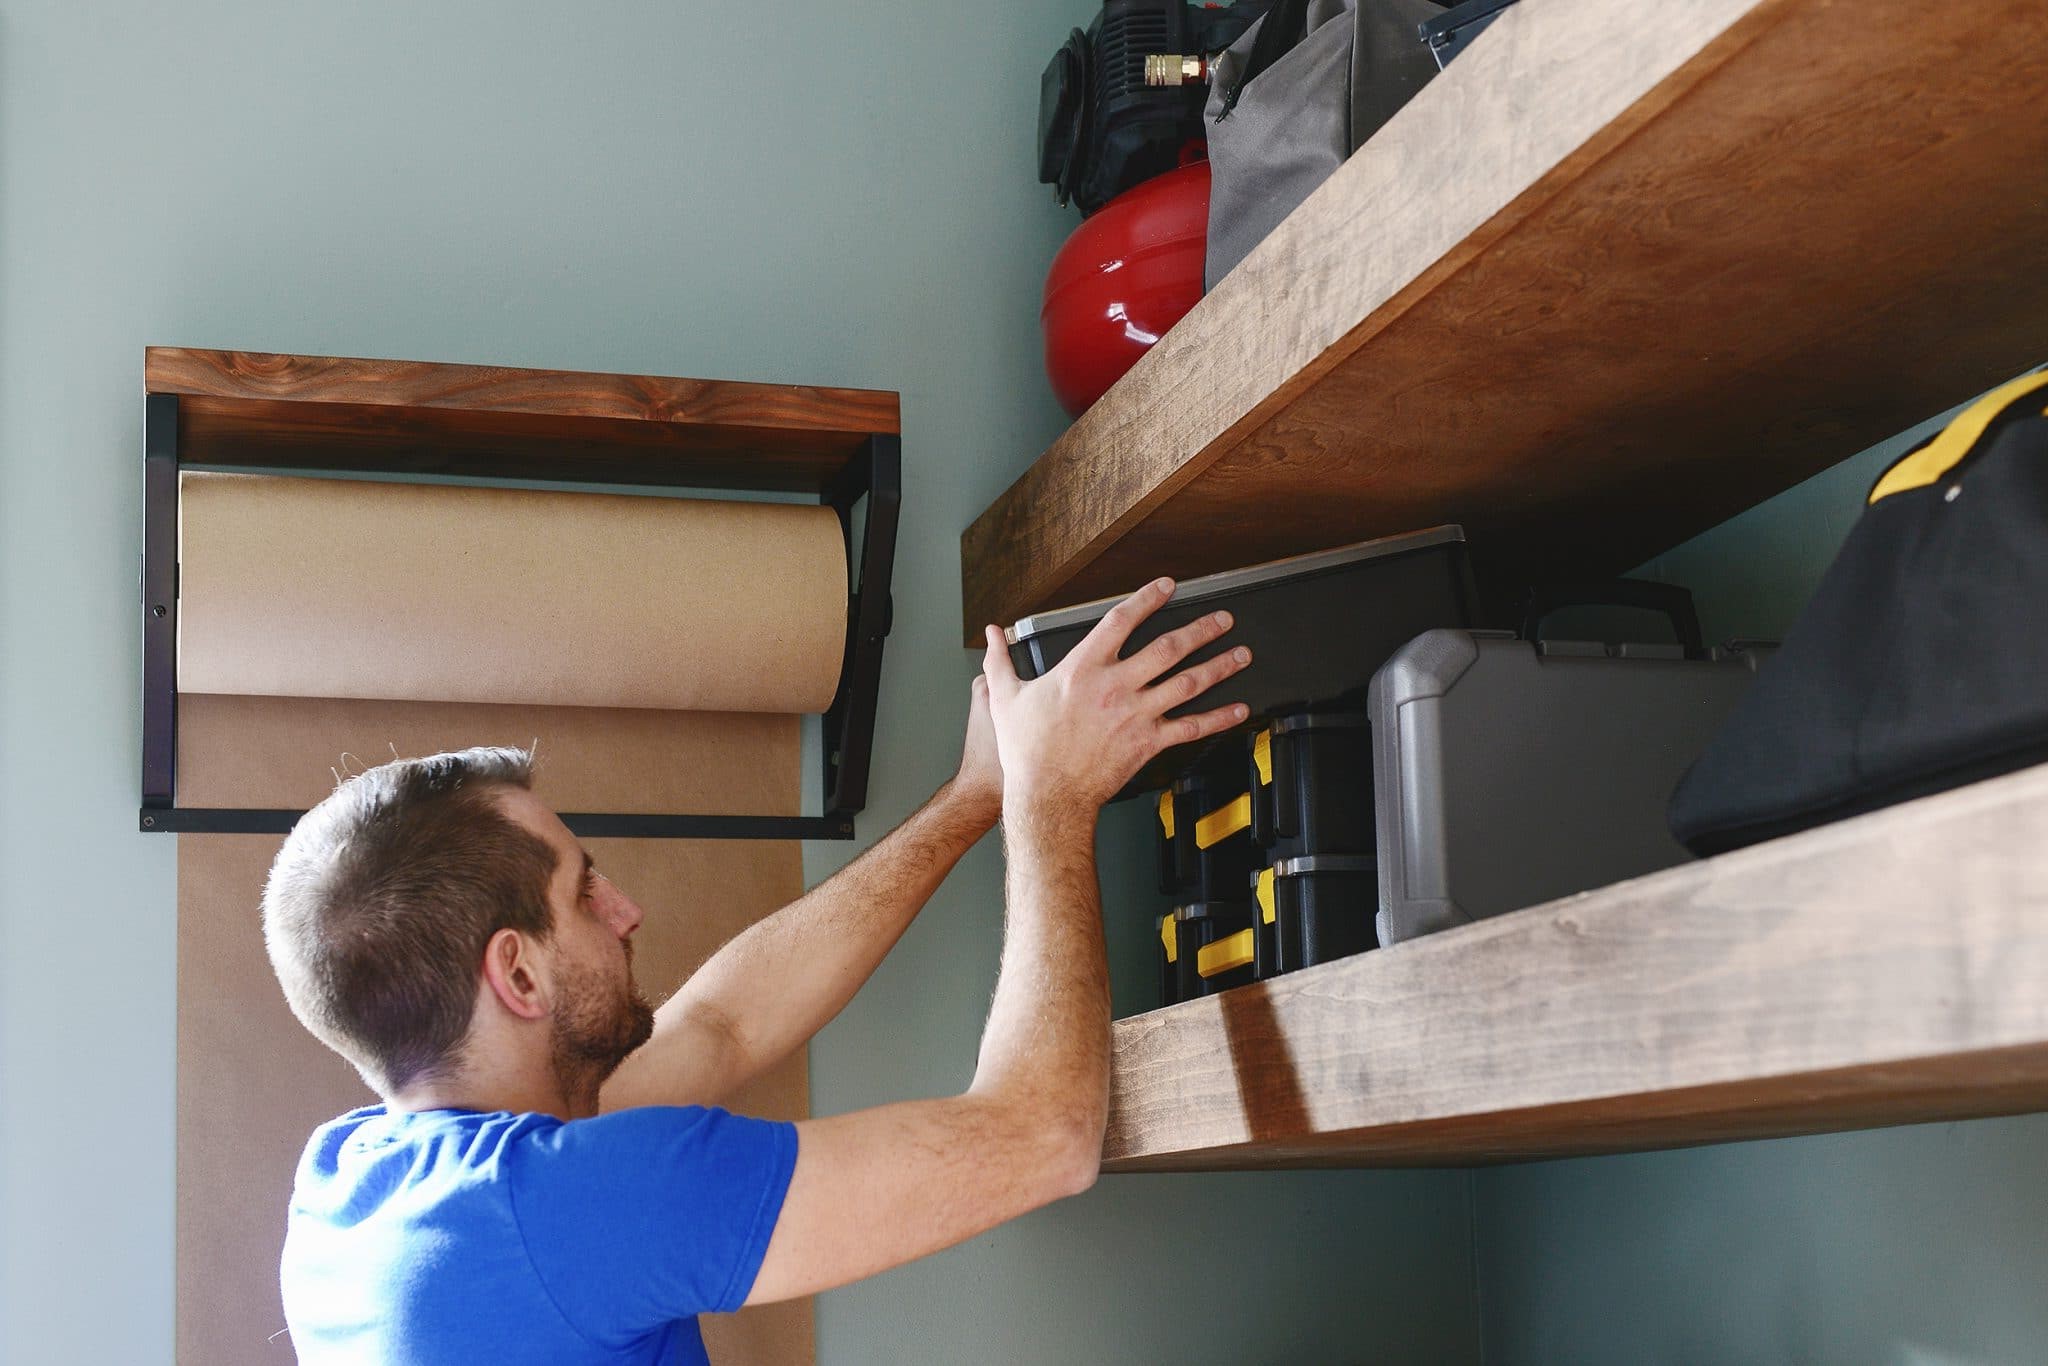
Looking to maximize garage space without cluttering the floor? DIY floating shelves might be your answer. These shelves not only provide storage but also keep things organized and accessible. Whether storing tools, seasonal items, or sports equipment, floating shelves offer flexibility and easy customization. You don’t need to be a professional carpenter; with basic tools and materials, anyone can build these. This guide will walk you through creating sturdy, functional shelves tailored to your needs. Ready to transform your garage into a neat, efficient space? Let’s get started on this practical project.
Getting Ready for the Project
Measure the Space: Use a tape measure to determine the length, width, and height of the area where you want the shelves. Write down these measurements.
Gather Materials: Collect all necessary materials like wood planks, brackets, screws, and wall anchors. Make sure you have enough for the entire project.
Safety Gear: Wear safety goggles and gloves to protect your eyes and hands. Keep a first aid kit nearby in case of minor injuries.
Clear the Area: Remove any items from the garage floor and walls where you plan to install the shelves. This will give you a clean workspace.
Find Studs: Use a stud finder to locate wall studs. Mark these spots with a pencil. Studs provide strong support for heavy shelves.
Cut Wood: If needed, cut the wood planks to the desired length using a saw. Sand the edges to avoid splinters.
Pre-Drill Holes: Pre-drill holes in the wood planks and wall where the brackets will be attached. This makes it easier to screw them in later.
Level the Brackets: Use a level to ensure the brackets are straight. Mark the spots where the screws will go.
Secure Brackets: Attach the brackets to the wall using screws and wall anchors. Make sure they are firmly in place.
Attach Shelves: Place the wood planks on the brackets. Secure them with screws to prevent movement.
Test Stability: Gently push on the shelves to make sure they are stable and can hold weight. Adjust if necessary.
Organize Tools: Keep all tools and materials organized in a toolbox or container. This helps maintain a tidy workspace.
Gather Your Materials and Tools
- Plywood Sheets: These form the shelves. Choose sturdy, high-quality plywood to support heavy items.
- 2x4 Lumber: Used for the frame and supports. Provides strength and stability.
- Wood Screws: Essential for securing the frame and shelves. Opt for 3-inch screws for a strong hold.
- Wall Anchors: Needed if attaching shelves to drywall. Prevents shelves from pulling away from the wall.
- Brackets: Metal brackets add extra support. Use heavy-duty ones for added strength.
- Level: Ensures shelves are straight. A must-have for a professional look.
- Measuring Tape: For accurate measurements. Helps in cutting wood to the right size.
- Drill: Used for making holes and driving screws. A cordless drill is convenient.
- Saw: Needed to cut plywood and lumber. A circular saw works well for this project.
- Sandpaper: Smooths rough edges on wood. Makes shelves look polished and prevents splinters.
- Stud Finder: Locates wall studs for secure mounting. Ensures shelves are anchored properly.
- Pencil: For marking measurements and cut lines. Simple but essential.
- Safety Gear: Includes gloves, goggles, and a dust mask. Protects you while working.
These materials and tools will help you build sturdy, reliable floating garage shelves.
Required Skills and Time Commitment
Skill Level: Intermediate
Time Required: 4-6 hours
- Gather Materials: 30 minutes
- Measure and Mark: 1 hour
- Cut Wood: 1 hour
- Assemble Shelves: 1.5 hours
- Mount Shelves: 1.5 hours
Detailed Step-by-Step Instructions
Gather Materials:
- Plywood or MDF boards
- 2x4 lumber
- Screws
- Wall anchors
- Brackets
- Level
- Drill
- Measuring tape
- Stud finder
- Pencil
Measure and Mark:
- Use the measuring tape to determine the desired length and height for the shelves.
- Mark the spots on the wall where the shelves will be installed using a pencil.
Find Studs:
- Use a stud finder to locate wall studs.
- Mark the stud locations with a pencil.
Cut Lumber:
- Cut the 2x4 lumber to the desired length for the shelf supports.
- Cut the plywood or MDF boards to the desired shelf size.
Attach Brackets:
- Secure brackets to the wall at the marked stud locations using screws and wall anchors.
- Ensure brackets are level before fully tightening screws.
Install Supports:
- Attach the 2x4 supports to the wall brackets using screws.
- Double-check that supports are level.
Mount Shelves:
- Place the plywood or MDF boards on top of the 2x4 supports.
- Secure the shelves to the supports with screws from underneath.
Check Stability:
- Ensure all screws are tight.
- Verify that shelves are stable and level.
Organize:
- Place items on the newly installed shelves.
- Enjoy the extra storage space in your garage.
Helpful Tips and Tricks
Measure Twice, Cut Once: Always double-check measurements before cutting wood. This saves time and materials.
Use a Stud Finder: Ensure shelves are anchored to wall studs for maximum support. Floating shelves need strong backing.
Level Up: Use a level to make sure shelves are straight. Crooked shelves can cause items to slide off.
Pre-Drill Holes: Prevent wood from splitting by pre-drilling holes before inserting screws.
Heavy-Duty Brackets: Choose sturdy brackets that can handle the weight of items you plan to store.
Sand Edges: Smooth out rough edges to avoid splinters and give shelves a polished look.
Paint or Stain Before Installation: It’s easier to paint or stain wood before mounting it on the wall.
Common Mistakes to Avoid:
Skipping Studs: Don’t mount shelves directly into drywall. They won’t hold much weight and could fall.
Incorrect Measurements: Misjudging space can lead to shelves that don’t fit or look awkward.
Overloading Shelves: Avoid putting too much weight on shelves. Even sturdy shelves have limits.
Ignoring Safety Gear: Always wear safety goggles and gloves when cutting or sanding wood.
Alternatives for Materials or Methods:
Plywood Instead of Solid Wood: Plywood is often cheaper and easier to work with than solid wood.
Metal Brackets: For a modern look, use metal brackets instead of wooden ones.
Floating Shelf Kits: Pre-made kits can save time and ensure all parts fit together perfectly.
Wall Anchors: If you can’t find studs, use heavy-duty wall anchors for additional support.
Estimating the Cost
Materials:
- 2x4 Lumber: $3 per board, need 6 boards = $18
- Plywood: $30 per sheet, need 1 sheet = $30
- Wood Screws: $5 per box
- Wall Anchors: $10 per pack
- Brackets: $2 each, need 8 = $16
- Wood Stain or Paint: $15 per can
Tools:
- Drill: $40 (if you don't own one)
- Saw: $50 (if you don't own one)
- Measuring Tape: $5
- Level: $10
- Screwdriver: $5
Total Cost:
- Materials: $84
- Tools: $110 (if needed)
Budget-Friendly Alternatives:
- Reclaimed Wood: Free or cheaper from pallets or old furniture
- Basic Screws: $3 per box instead of specialty wood screws
- Hand Saw: $10 instead of a power saw
- Borrow Tools: Ask friends or family to save on tool costs
Creative Variations and Customizations
Materials: Instead of using plywood, try metal or wire shelving for a more industrial look. Reclaimed wood can add a rustic touch. Plastic shelves work well in damp environments.
Colors: Paint the shelves in bright colors to make the garage more lively. Use dark colors like black or navy for a sleek, modern appearance. Stain the wood to highlight its natural grain.
Styles: For a minimalist style, use clean lines and simple brackets. Add decorative brackets or corbels for a more traditional look. Floating shelves without visible supports give a contemporary feel.
Sizes: Customize the shelf depth to fit specific items like bins or tools. Vary the length of the shelves to create a dynamic, staggered look. Adjust the height between shelves to accommodate taller items.
Finishes: Use a glossy finish for easy cleaning. A matte finish can reduce glare and give a more subdued look. Weatherproof finishes are great for garages exposed to the elements.
Additional Features: Add hooks underneath for hanging tools or bikes. Install LED strip lights for better visibility. Incorporate magnetic strips for holding metal tools.
Eco-Friendly Tips
Reclaimed wood can be a great choice for floating garage shelves. Look for old pallets, barn wood, or leftover lumber from other projects. This not only saves money but also reduces waste.
Bamboo is another eco-friendly option. It grows quickly and is very strong, making it perfect for sturdy shelves.
Use non-toxic paints and finishes to protect the wood. These products are better for the environment and safer for your health.
Metal brackets can often be found at thrift stores or salvage yards. Reusing these materials helps reduce the demand for new metal production.
For the shelf supports, consider using recycled plastic or composite materials. These are made from recycled products and are very durable.
When cutting and assembling, try to minimize waste by planning your cuts carefully. Use any leftover pieces for smaller projects or donate them to someone who can use them.
Solar-powered tools can help reduce your carbon footprint. If you don’t have these, try to use hand tools whenever possible.
Finally, share or donate any tools or materials you no longer need. This keeps them out of landfills and helps others with their projects.
Your Garage, Your Masterpiece
Building floating garage shelves isn't just about storage. It's about creating a space that works for you. With some basic tools, a bit of planning, and a dash of creativity, you can transform your garage into an organized haven. Remember, measure twice, cut once. Use sturdy brackets and quality wood to ensure your shelves hold up over time. Don't be afraid to customize the design to fit your needs. Whether you need space for tools, sports equipment, or seasonal decorations, these shelves can handle it all. So roll up your sleeves, grab your drill, and get started. Your garage will thank you.
How much weight can floating garage shelves hold?
Floating garage shelves can hold anywhere from 50 to 300 pounds, depending on the materials used and how well they're anchored to the wall. Always check the weight limits of your brackets and screws.
What materials do I need to build floating garage shelves?
You'll need wood planks, brackets, screws, a drill, a level, and wall anchors. For a more polished look, consider using paint or stain for the wood.
How do I ensure the shelves are level?
Use a level when marking where the brackets will go. Double-check the levelness after attaching the brackets but before placing the wood planks.
Can I install floating shelves on drywall?
Yes, but you'll need to use wall anchors or find studs to ensure the shelves are secure. Drywall alone won't support heavy loads.
How far apart should the brackets be?
Space the brackets about 16 to 24 inches apart. This spacing provides enough support for most loads and keeps the shelf stable.
How deep should the shelves be?
Garage shelves are typically 12 to 24 inches deep. The depth depends on what you plan to store. Larger items need deeper shelves.
How high should I install the shelves?
Install shelves at a height that's convenient for you. Common heights range from 4 to 6 feet off the ground, but adjust based on your storage needs.