
Home>Home & Furniture>Doors & Windows>How to Create Stunning Sea Glass Art
Doors & Windows
How to Create Stunning Sea Glass Art
Published: August 22, 2024
Discover the art of creating stunning sea glass masterpieces with our step-by-step guide. Learn tips, techniques, and design ideas to elevate your sea glass art projects.
(Many of the links in this article redirect to a specific reviewed product. Your purchase of these products through affiliate links helps to generate commission for Twigandthistle.com, at no extra cost. Learn more)
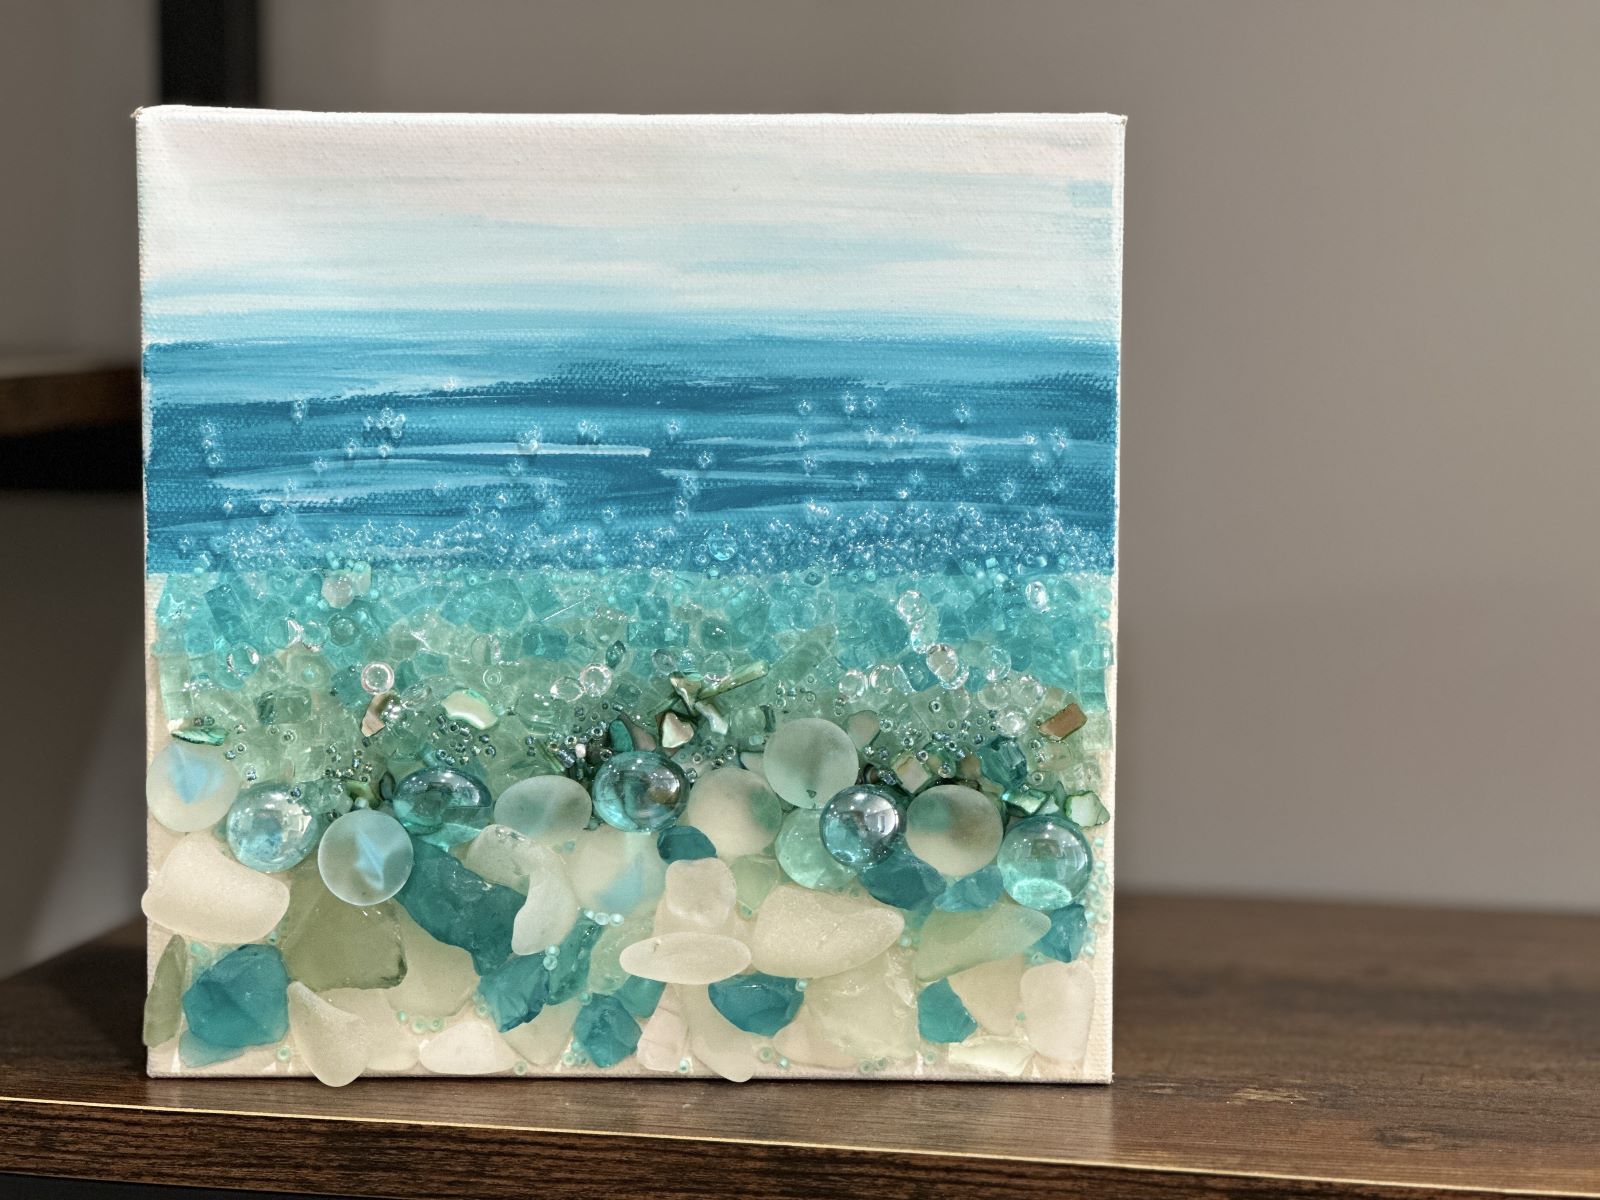
Sea glass art brings the ocean's beauty into your home. It's a fun, creative way to use those colorful, frosted pieces found on the beach. You can make unique decorations, gifts, or even jewelry. This guide will show you how to start your sea glass art project. All you need are some simple tools and a bit of imagination. Whether you're an experienced crafter or just beginning, you'll find tips and ideas to help you create something special. Transform those tiny treasures into stunning works of art that capture the magic of the sea.
Getting Ready for Your Project
Gather Materials: Collect sea glass, glue, a canvas or frame, and any additional decorations like shells or sand.
Safety First: Wear gloves to protect your hands from sharp edges. Use safety goggles if cutting glass.
Workspace Setup: Choose a flat, well-lit area. Lay down newspapers or a drop cloth to catch any spills.
Clean Sea Glass: Wash the sea glass with warm soapy water. Rinse and let it dry completely.
Plan Your Design: Arrange the sea glass pieces on the canvas without glue. Experiment with different patterns until satisfied.
Prepare Glue: Use a strong, clear-drying adhesive. Have a small brush or applicator ready.
Apply Glue: Start gluing pieces from the center outwards. Press each piece firmly and hold for a few seconds.
Let it Dry: Allow the artwork to dry for at least 24 hours in a dust-free area.
Final Touches: Add any extra decorations or a protective sealant if desired.
Gathering Your Materials and Tools
Sea Glass: These are smooth, frosted pieces of glass found on beaches. They come in various colors and sizes, perfect for creating beautiful designs.
Canvas or Wood Board: A sturdy surface to arrange and glue your sea glass pieces. Choose a size that fits your design idea.
Strong Adhesive: Use a clear, strong glue like E6000 or a hot glue gun to attach the sea glass to your canvas or board.
Tweezers: Helpful for placing small pieces of sea glass precisely without getting glue on your fingers.
Pencil and Eraser: Sketch your design lightly on the canvas or board before gluing the sea glass. An eraser helps correct any mistakes.
Protective Gloves: Wear gloves to protect your hands from sharp edges on the sea glass and from the adhesive.
Ruler: Useful for measuring and ensuring your design is centered and symmetrical.
Sealant Spray: Once your artwork is complete, use a clear sealant spray to protect and preserve your sea glass art.
Paper Towels: Keep these handy for cleaning up any glue spills or wiping your hands.
Small Containers: Use these to sort and organize your sea glass by color and size, making it easier to find the right piece for your design.
Required Skills and Time Commitment
Skill Level: Beginner
Time Required: 2-3 hours
- Gather Materials: Collect sea glass, a canvas or frame, glue, and optional decorative items.
- Plan Your Design: Arrange sea glass on the canvas to create your desired pattern.
- Glue Pieces: Secure each piece of sea glass with glue.
- Let Dry: Allow the glue to dry completely, usually 1-2 hours.
- Add Finishing Touches: Add any extra decorations or frame your artwork.
Instructions for Making Sea Glass Art
Gather Materials
- Sea glass pieces
- Canvas or wooden board
- Strong adhesive (like E6000)
- Tweezers
- Pencil
- Optional: Paint, brushes, and other decorative items
Plan Your Design
- Lay out sea glass pieces on the canvas without glue.
- Arrange them into a pattern or picture.
- Use a pencil to lightly sketch the design on the canvas.
Prepare the Canvas
- If desired, paint the canvas or wooden board.
- Let the paint dry completely before proceeding.
Glue Sea Glass
- Apply a small amount of adhesive to the back of each sea glass piece.
- Press the piece onto the canvas following your sketched design.
- Use tweezers for precise placement.
Let It Dry
- Allow the adhesive to dry completely.
- Check the glue instructions for drying time.
Add Final Touches
- Optionally, add more decorations like shells or beads.
- Ensure all elements are securely glued.
Display Your Art
- Find a suitable spot to hang or place your sea glass art.
- Enjoy your unique creation!
Helpful Tips and Tricks
Choose the Right Glass: Collect sea glass with smooth edges and frosted surfaces. Avoid sharp or jagged pieces.
Plan Your Design: Lay out your sea glass on a flat surface before gluing. This helps visualize the final piece.
Use Strong Adhesive: E6000 glue works well for sea glass. It dries clear and holds strong.
Work on a Flat Surface: Ensure your workspace is level to prevent pieces from sliding.
Frame It: Use shadow boxes or deep frames to protect and display your art.
Add Background: Consider using sand, shells, or colored paper as a background to enhance your design.
Seal Your Art: Apply a clear sealant to protect your sea glass art from dust and damage.
Common Mistakes to Avoid:
Overcrowding: Too many pieces can make the art look cluttered. Leave some space between pieces.
Weak Glue: Hot glue may not hold sea glass securely. Use a strong adhesive instead.
Ignoring Layout: Skipping the layout step can lead to a less appealing design.
Alternatives for Materials or Methods:
Faux Sea Glass: If real sea glass is hard to find, use tumbled glass from craft stores.
Epoxy Resin: For a glossy finish, consider using epoxy resin to coat your sea glass art.
Different Bases: Instead of frames, try using driftwood, canvas, or old windows as a base for your art.
Estimating the Cost
Sea glass (1 lb): $10-$20
Canvas or wooden board: $5-$15
Strong adhesive (like E6000): $5-$7
Tweezers: $3-$5
Protective gloves: $2-$4
Clear sealant spray: $5-$8
Optional frame: $10-$20
Total cost: $40-$79
Budget-friendly alternatives:
Collect sea glass from beaches for free. Use an old picture frame instead of buying a new one. Repurpose a piece of wood or cardboard as your base.
Different Ways to Customize
Alternative materials can change the look of sea glass art. Instead of sea glass, try using colored glass beads or gemstones. These materials can add a different texture and sparkle.
Colors can also make a big difference. Use pastel shades for a soft, beachy feel or bright, bold colors for a more vibrant look. Mixing different shades of blue and green can mimic the ocean.
Styles can vary too. Arrange pieces in a mosaic pattern for a classic look or create a random, scattered design for a more natural feel. Try making shapes or pictures with the glass, like fish or seashells, for a themed piece.
For the background, use canvas, wood, or even old window frames. Each background material can give a unique feel to the art. Painting the background in ocean colors can enhance the sea glass effect.
Frames can also be customized. Use driftwood for a rustic look or metal frames for a modern touch. Adding LED lights behind the glass can make the art glow, adding an extra dimension.
Adhesives matter too. Use clear-drying glue for a seamless look or epoxy resin for a glossy finish. Experimenting with different adhesives can change the final appearance.
Adding extra elements like sand, small shells, or starfish can make the piece more interesting. These additions can create a more detailed and layered artwork.
Personal touches like initials, dates, or small messages can make the art special. These can be painted or etched onto the glass or background.
Eco-Friendly Tips
Collect sea glass from beaches instead of buying new pieces. This helps clean up shorelines and reduces waste. Use old picture frames or shadow boxes to display your art. Thrift stores often have these items at low prices. Repurpose broken glass from old bottles or jars by tumbling them to create your own sea glass. Choose eco-friendly adhesives like water-based glues instead of harsh chemical ones. Incorporate natural elements such as driftwood or shells found on the beach. Use non-toxic paints and sealants to finish your artwork. Opt for recycled paper or cardboard as backing materials. Share your creations with friends and family to inspire them to make their own eco-friendly art.
Your Sea Glass Masterpiece Awaits
Creating sea glass art is a rewarding and fun project. With just a few materials and some creativity, you can transform ordinary sea glass into stunning art pieces. Remember to plan your design, arrange your pieces before gluing, and take your time. Experiment with different backgrounds and frames to find what best showcases your work. Don’t be afraid to mix in other elements like shells or driftwood for added texture.
Once finished, you’ll have a unique piece of art that reflects your style and effort. Whether you keep it for yourself or give it as a gift, your sea glass art will surely be a conversation starter. So, gather your materials, let your imagination run wild, and start creating your sea glass masterpiece today!
What materials do I need to make sea glass art?
You'll need sea glass, a canvas or frame, glue, and tweezers. Optional items include paint, sand, and shells for extra decoration.
Where can I find sea glass?
Sea glass can be found on beaches or purchased from craft stores and online. Make sure to clean it before using it in your art.
How do I clean sea glass?
Soak the sea glass in warm, soapy water for a few hours. Then, scrub gently with a toothbrush to remove any dirt or grime. Rinse well and let it dry.
What kind of glue should I use?
Use a clear-drying craft glue or epoxy. These types of glue will hold the sea glass securely and won't be visible once dried.
Can I paint the canvas before adding sea glass?
Absolutely! Painting the canvas can add a background color or scene that complements your sea glass. Just make sure the paint is completely dry before gluing on the glass.
How do I arrange the sea glass on the canvas?
Lay out your design before gluing. Use tweezers to place the pieces precisely. Start with larger pieces and fill in gaps with smaller ones.
Is it safe to handle sea glass?
Yes, sea glass is usually safe to handle because it's been smoothed by the ocean. However, be cautious of any sharp edges and handle with care.