
Home>Home & Furniture>Doors & Windows>How to Build DIY Window Box Brackets
Doors & Windows
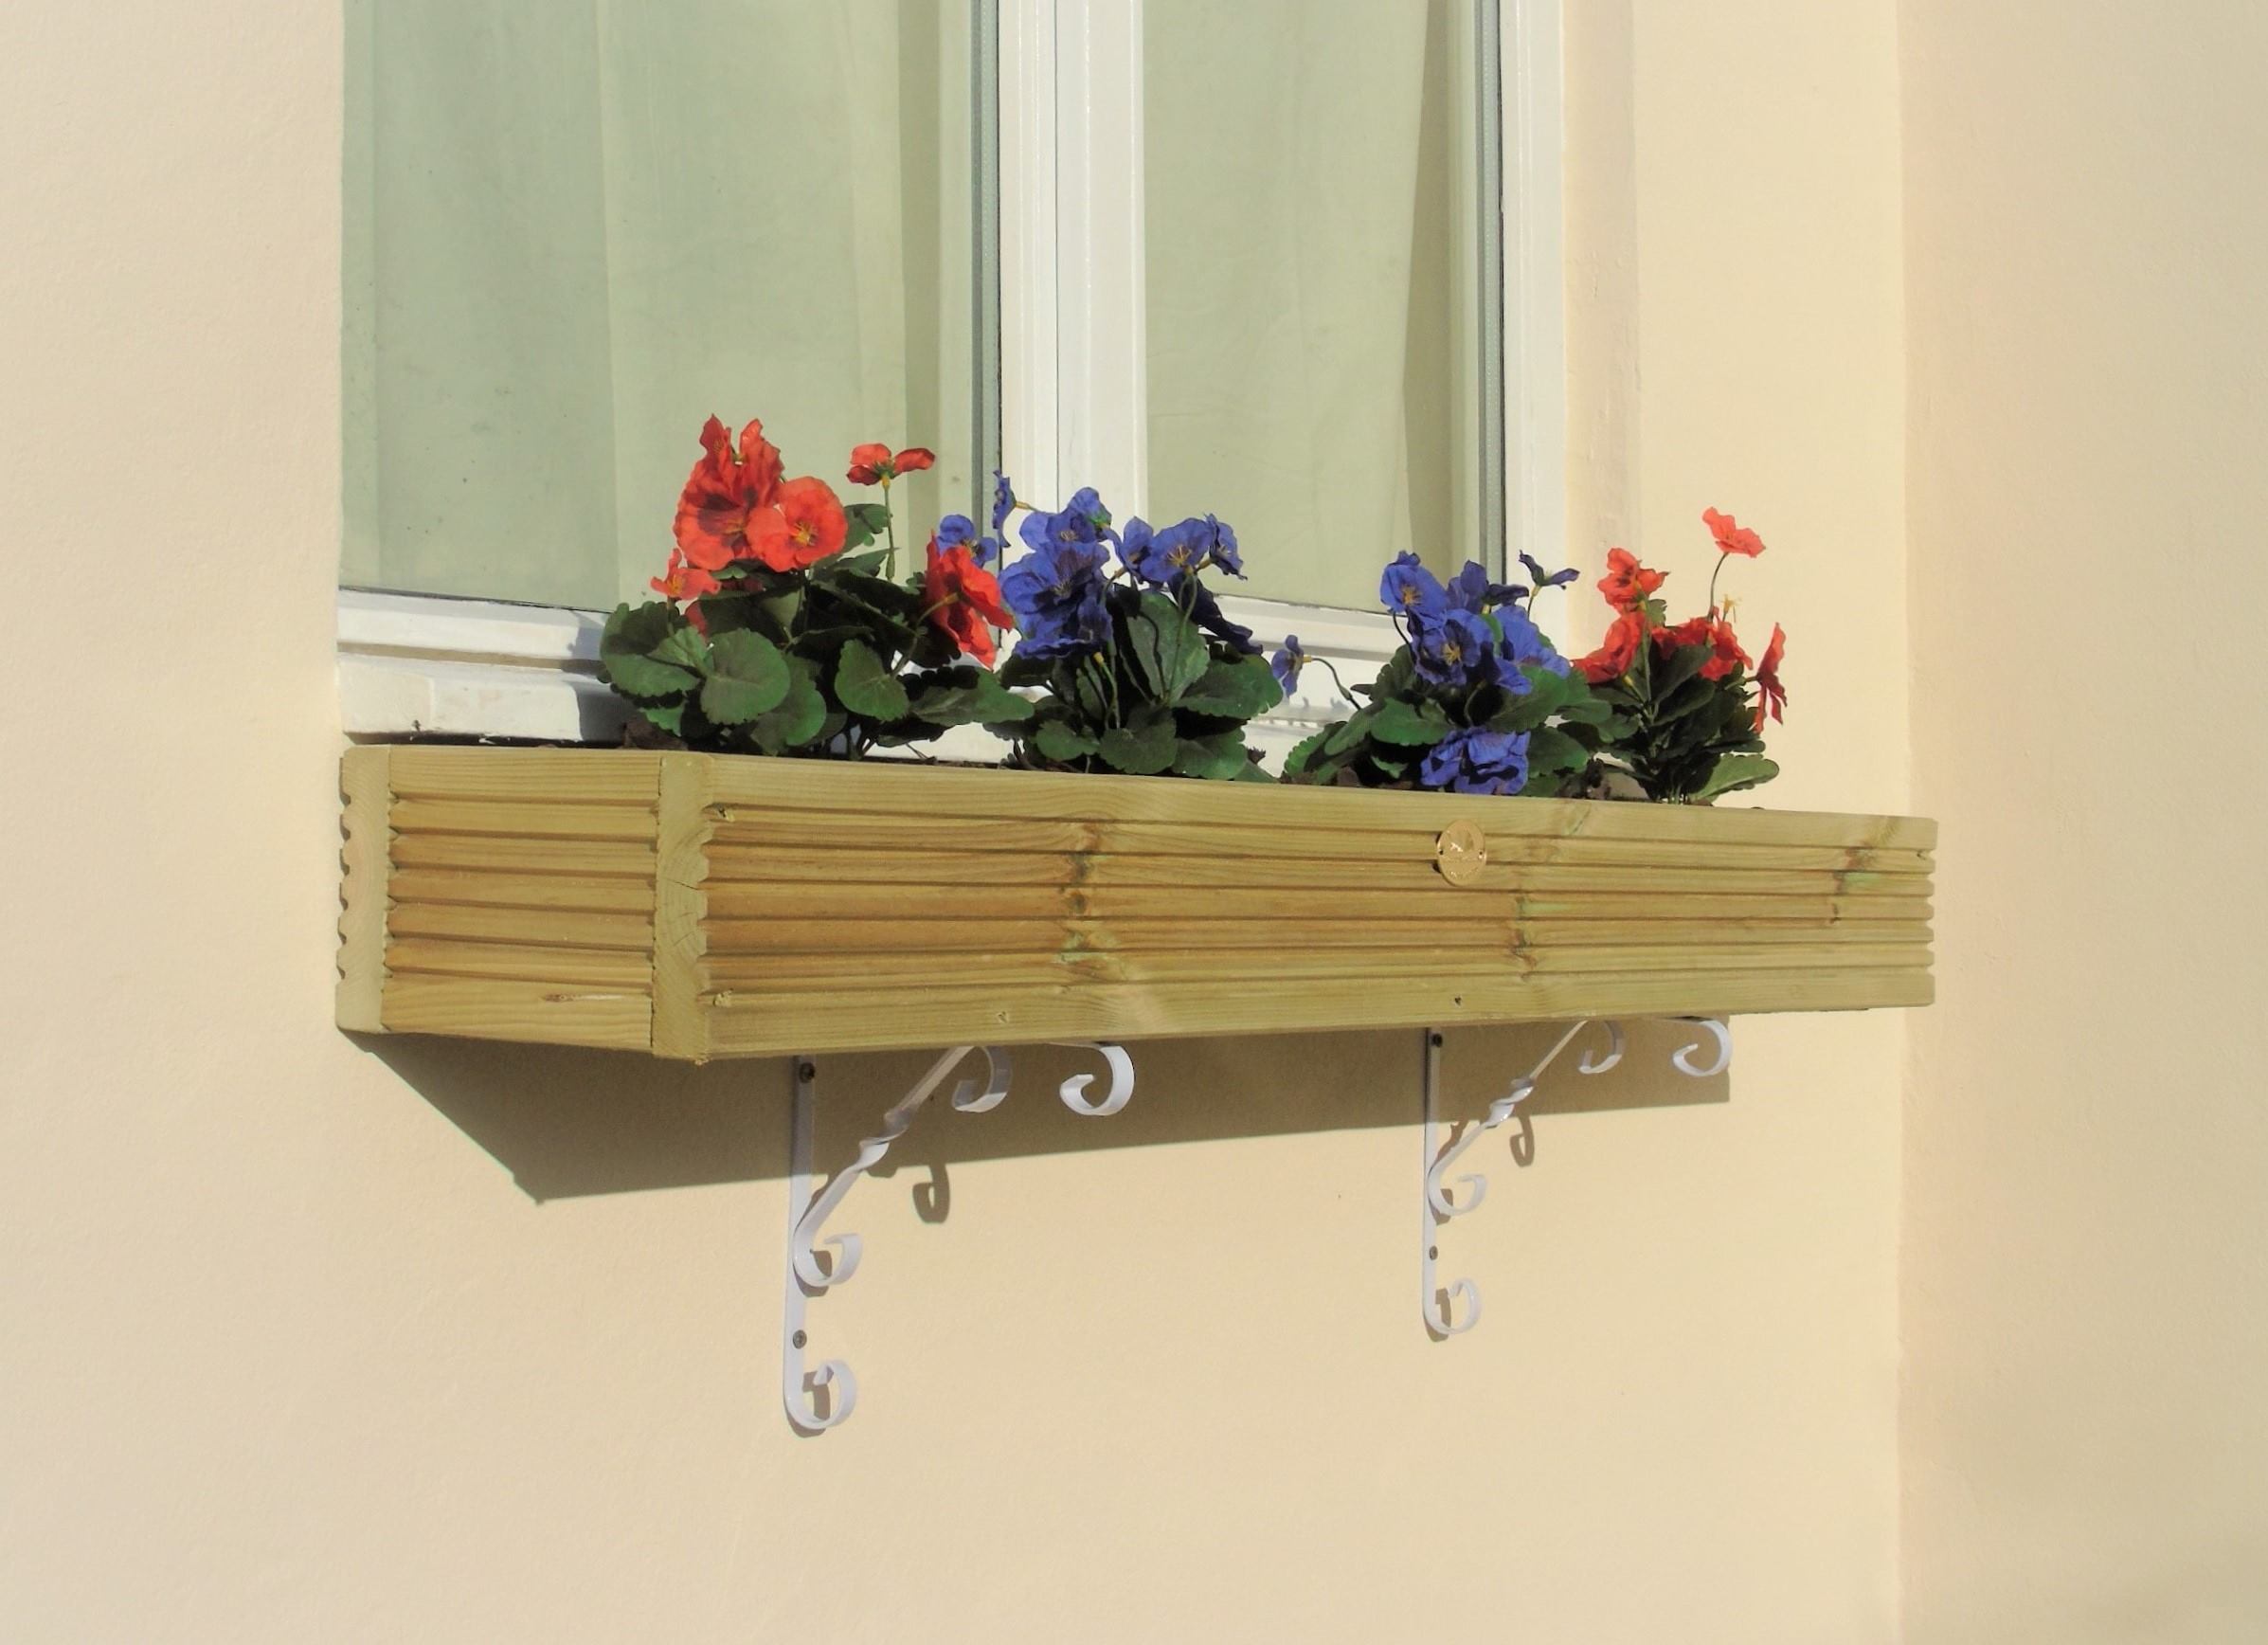
How to Build DIY Window Box Brackets
Published: August 25, 2024
Learn how to build DIY window box brackets with our step-by-step guide. Enhance your home's curb appeal with this easy and cost-effective project. Perfect for beginners!
(Many of the links in this article redirect to a specific reviewed product. Your purchase of these products through affiliate links helps to generate commission for Twigandthistle.com, at no extra cost. Learn more)
Building your window box brackets can be a fun and rewarding project. Not only does it let you add a personal touch to your home, but it also allows you to save money. Crafting these brackets isn't too complex, making it a perfect weekend task even if you're new to DIY. With just a few materials and basic tools, you'll have sturdy brackets ready to hold your beautiful window boxes. Ready to get started? Follow these simple steps, and you'll have brackets that are both functional and stylish in no time!
Getting Ready for Your Project
Gather Materials: Collect wood, screws, brackets, a saw, a drill, measuring tape, sandpaper, and paint or stain.
Measure the Window: Measure the width of the window to determine the size of the window box and brackets.
Safety Gear: Wear safety goggles and gloves to protect your eyes and hands.
Workspace Setup: Clear a flat surface to work on. Ensure good lighting and ventilation.
Cut the Wood: Use a saw to cut the wood to the desired length for the brackets. Sand the edges to smooth them out.
Pre-Drill Holes: Pre-drill holes in the wood to make it easier to screw the pieces together.
Assemble Brackets: Use screws to attach the pieces of wood together, forming the brackets.
Paint or Stain: Apply paint or stain to the brackets to protect the wood and match your window box.
Drying Time: Allow the paint or stain to dry completely before installing the brackets.
Check Stability: Ensure the brackets are sturdy and can support the weight of the window box.
Materials and Tools Needed
Wood: Choose a durable type like cedar or redwood. These resist rot and weather damage.
Measuring Tape: Essential for accurate measurements. Ensures all pieces fit together perfectly.
Saw: A hand saw or circular saw will work. Used to cut wood to the required sizes.
Drill: Needed for making holes and driving screws. A cordless drill offers more flexibility.
Screws: Use weather-resistant screws. These hold the brackets together securely.
Sandpaper: Smooths rough edges. Helps prepare the wood for painting or staining.
Paint or Stain: Protects the wood from the elements. Choose a color that matches your home.
Paintbrushes: Used to apply paint or stain. Ensure even coverage on all surfaces.
Level: Ensures the brackets are straight. Prevents your window box from tilting.
Pencil: Marks measurements and drill points. Helps with precise placement.
Safety Gear: Includes gloves and safety glasses. Protects you while working with tools.
Skill Level and Time Required
Skill Level: Intermediate
Time Required: 3-4 hours
- Gather Materials: 15 minutes
- Measure and Cut Wood: 1 hour
- Assemble Brackets: 1 hour
- Sand and Finish: 30 minutes
- Install Brackets: 30 minutes
Step-by-Step Instructions
Gather Materials:
- Wooden boards (2x4 or 2x6)
- Screws
- Wood glue
- Sandpaper
- Paint or stain
- Measuring tape
- Saw
- Drill
Measure and Cut:
- Measure the width of the window box.
- Cut two pieces of wood to match this width (these will be the horizontal supports).
- Cut four pieces of wood for the vertical supports (two for each bracket).
Assemble Brackets:
- Attach one vertical support to each end of a horizontal support using wood glue and screws.
- Repeat for the second bracket.
Add Diagonal Supports:
- Cut four pieces of wood at a 45-degree angle for diagonal supports.
- Attach these diagonals between the horizontal and vertical supports for added strength.
Sand and Finish:
- Sand all surfaces to remove rough edges.
- Paint or stain the brackets to match your window box or exterior.
Install Brackets:
- Mark the desired height on the wall under the window.
- Drill pilot holes into the wall.
- Secure the brackets to the wall using screws.
Mount Window Box:
- Place the window box on the brackets.
- Secure the box to the brackets with screws to prevent movement.
Tips and Tricks for Success
Measure Twice, Cut Once: Always double-check measurements before cutting wood. This saves time and materials.
Use Treated Wood: Opt for pressure-treated wood or cedar. These resist rot and weather damage better than regular wood.
Pre-Drill Holes: Pre-drilling holes prevents wood from splitting when you insert screws.
Level Brackets: Use a level to ensure brackets are straight. Crooked brackets can cause the window box to tilt.
Seal and Paint: Apply a sealant and paint to protect wood from moisture. This extends the life of your brackets.
Use Galvanized Screws: These resist rust better than regular screws, especially important for outdoor projects.
Common Mistakes to Avoid:
Skipping Measurements: Eyeballing measurements often leads to mistakes. Always use a tape measure.
Ignoring Weight Limits: Ensure brackets can support the weight of a fully planted window box. Check weight limits of materials used.
Not Using a Level: Failing to use a level results in uneven brackets. This can cause the window box to fall.
Alternatives for Materials or Methods:
Metal Brackets: If wood isn't your style, consider metal brackets. They offer a sleek look and are very durable.
Plastic Lumber: For a low-maintenance option, use plastic lumber. It doesn't rot and requires no painting.
L-Brackets: Use L-brackets for extra support. These can be added to the bottom of your wooden brackets for added strength.
Estimating the Cost
Materials:
- Wood (2x4 or 2x6): $10-$15 per piece
- Screws: $5 per box
- Wood Glue: $3-$5
- Sandpaper: $5
- Paint or Stain: $10-$15
Tools:
- Saw: $30-$50 (or borrow)
- Drill: $40-$60 (or borrow)
- Measuring Tape: $5
- Clamps: $10-$20 (optional)
Total Cost: $118-$175
Budget-Friendly Alternatives:
- Reclaimed Wood: Often free or very cheap
- Borrow Tools: Ask friends or family
- Basic Paint: $5-$10 instead of premium brands
Creative Variations and Customizations
Materials: Instead of using wood, try metal for a more modern look or plastic for a lightweight option. Reclaimed wood adds a rustic touch.
Colors: Paint the brackets in bright colors like yellow or blue to make them stand out. For a classic look, use white or black. Stain the wood to highlight its natural grain.
Styles: For a traditional style, use ornate designs with curved edges. A minimalist style can be achieved with straight lines and simple shapes. Add decorative elements like carvings or metal accents for a unique touch.
Finishes: Use a glossy finish for a sleek look or a matte finish for a subtle appearance. Weatherproof finishes are great for outdoor use.
Sizes: Customize the size to fit different window widths. Larger brackets can support heavier boxes, while smaller ones are perfect for compact spaces.
Mounting Options: Use hidden brackets for a floating effect or exposed brackets for a bold statement. Adjustable brackets allow for easy changes in height and angle.
Eco-Friendly Tips
Reclaimed wood makes excellent window box brackets. Look for old pallets, barn wood, or leftover lumber from other projects. Sand it down to remove splinters and give it a smooth finish.
Recycled metal can also be used. Old metal pipes or brackets from discarded furniture can be repurposed. Cut them to size and shape them as needed.
Natural finishes like beeswax or linseed oil protect wood without harmful chemicals. These finishes are eco-friendly and safe for plants.
Upcycled plastic is another option. Use sturdy plastic containers or old garden tools. Cut and shape them into brackets, then paint them to match your window box.
Bamboo is a sustainable material that grows quickly. It's strong and lightweight, making it perfect for window box brackets. Look for bamboo scraps from other projects or buy small amounts from a local supplier.
Natural rope can be used to hang window boxes. Choose jute or hemp, which are biodegradable and strong. Knot the rope securely to hold the weight of the window box.
Solar-powered tools reduce energy consumption. Use solar-powered drills or saws when cutting and assembling your brackets.
Local sourcing reduces the carbon footprint. Find materials from local suppliers or community recycling centers. This supports local businesses and reduces transportation emissions.
Minimalist design uses fewer materials. Simple, sturdy brackets require less wood or metal, making them more sustainable.
Your DIY Adventure Awaits
Building DIY window box brackets can be a fun, rewarding project. With some basic tools, a bit of patience, and a dash of creativity, you can create sturdy, attractive brackets that add charm to your home. Remember to measure carefully, choose the right materials, and take your time with each step. Don't rush the process; enjoy it. Once your brackets are up, you'll have a beautiful spot for flowers or herbs, adding a personal touch to your space. Plus, you'll have the satisfaction of knowing you built it yourself. So grab your tools, gather your materials, and get started. Happy building!
What materials do I need to build window box brackets?
You’ll need wood, screws, a saw, a drill, measuring tape, sandpaper, and paint or stain.
How do I measure for the brackets?
Measure the width of your window box and the depth you want the brackets to extend. Add a bit extra for stability.
What type of wood should I use?
Use weather-resistant wood like cedar or redwood. They hold up well against the elements.
How do I cut the wood?
Use a saw to cut the wood to your measured lengths. Make sure to sand the edges to avoid splinters.
How do I assemble the brackets?
Drill pilot holes in the wood pieces, then use screws to attach them together. Ensure everything is square and sturdy.
Should I paint or stain the brackets?
It’s up to you! Paint offers more color options, while stain shows off the wood’s natural grain. Either way, use a sealant to protect against weather.
How do I attach the brackets to my house?
Find the studs in your wall, then use long screws to secure the brackets. Make sure they’re level and evenly spaced.