
Home>Home & Furniture>Doors & Windows>How to Build a DIY Wyze Window Mount
Doors & Windows
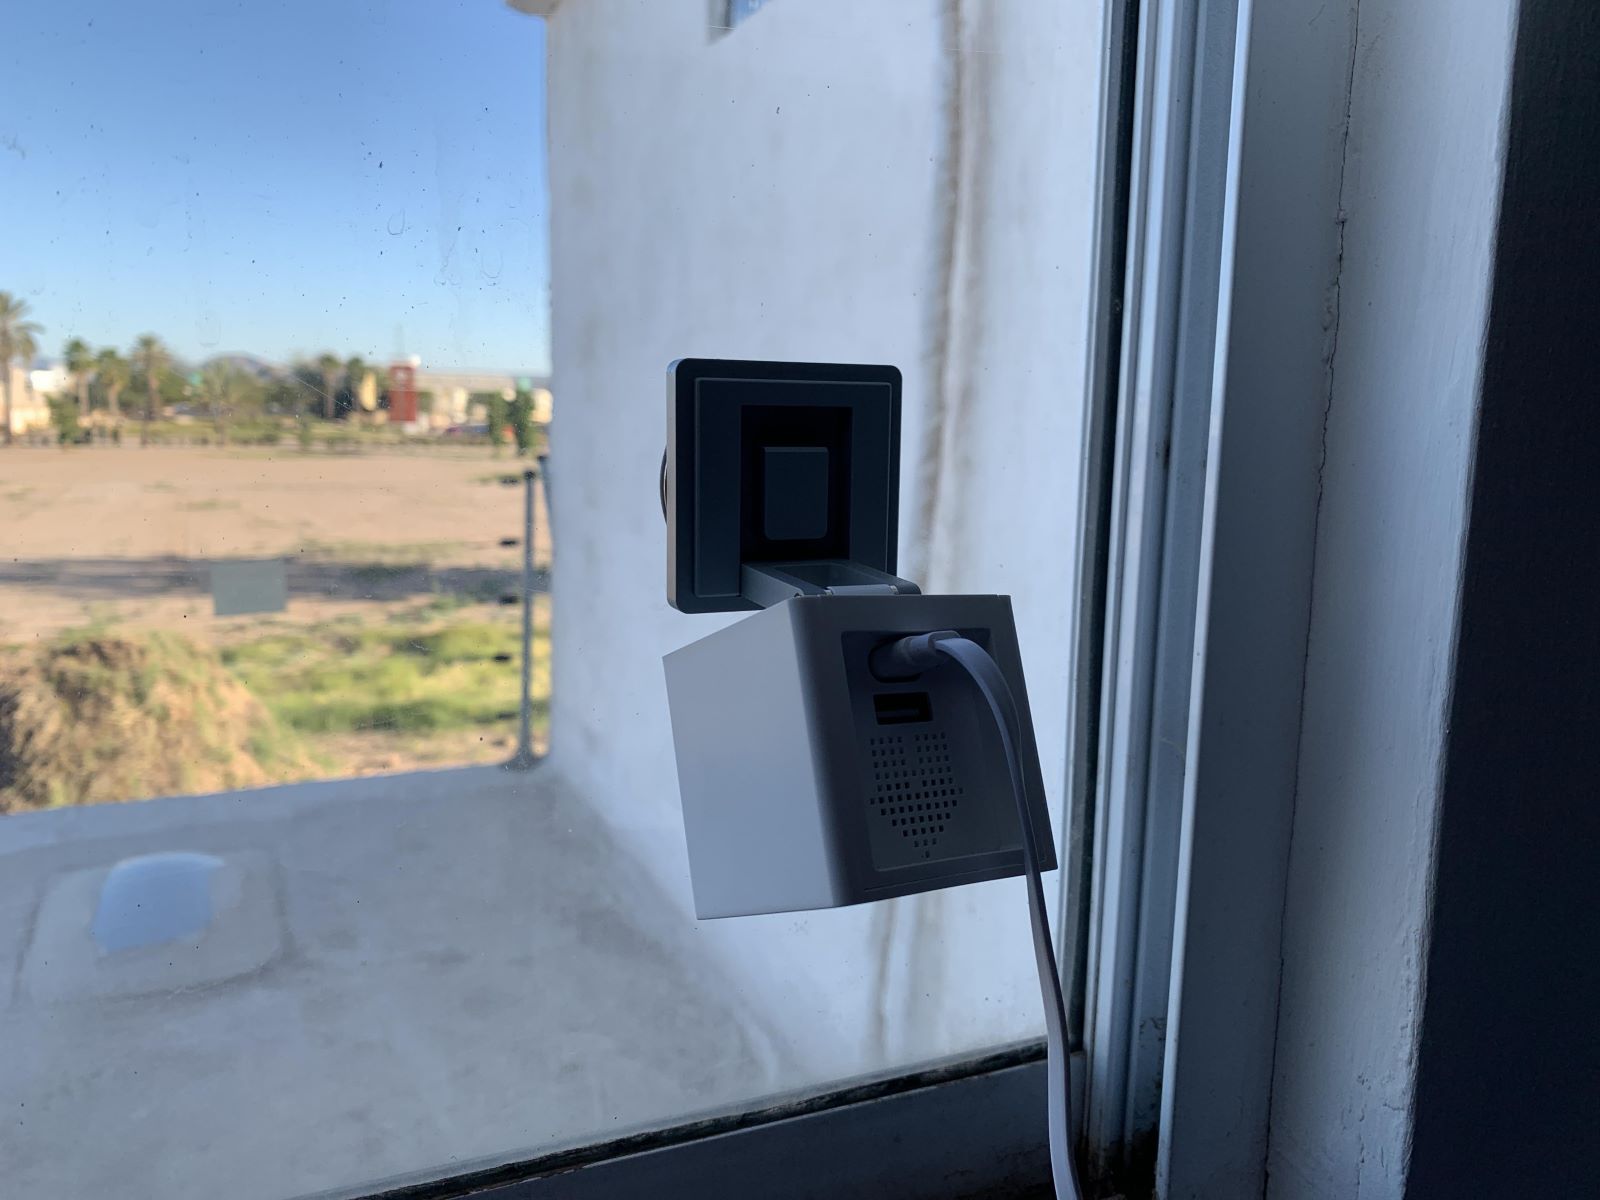
How to Build a DIY Wyze Window Mount
Published: August 28, 2024
Learn how to build a DIY Wyze window mount with our step-by-step guide. Perfect for enhancing home security and capturing clear outdoor footage. Easy and budget-friendly!
(Many of the links in this article redirect to a specific reviewed product. Your purchase of these products through affiliate links helps to generate commission for Twigandthistle.com, at no extra cost. Learn more)
Want a better view from your Wyze camera? Making your window mount is a fun, easy project! No need for special tools or spending much money. You can create a sturdy, custom mount using simple materials found around the house or at your local hardware store. This guide will help you safely secure your camera to any window, giving you a clear view both day and night. Follow these steps, and you'll have your DIY Wyze window mount up and running in no time. Let's get started with some basic supplies and steps!
Getting Ready for Your Project
Gather Materials: Collect all necessary items like a Wyze camera, suction cups, a small piece of wood or plastic, screws, a screwdriver, and a drill.
Safety Gear: Wear safety goggles and gloves to protect your eyes and hands while drilling and handling tools.
Workspace Setup: Choose a well-lit, clutter-free area. Lay down a drop cloth to catch any debris.
Measure and Mark: Measure the window and mark where the mount will go. Ensure the camera has a clear view.
Pre-drill Holes: Pre-drill holes in the wood or plastic piece to make it easier to attach the suction cups and camera.
Attach Suction Cups: Secure the suction cups to the wood or plastic piece using screws. Make sure they are tight.
Mount the Camera: Attach the Wyze camera to the mount. Ensure it is firmly in place and can be adjusted as needed.
Test Stability: Before placing it on the window, test the stability of the mount by gently shaking it.
Clean the Window: Clean the window surface where the mount will be placed to ensure the suction cups stick well.
Place the Mount: Press the suction cups firmly against the window. Adjust the camera angle for the best view.
Check Functionality: Turn on the camera and check the live feed to ensure it captures the desired area.
Gathering Materials and Tools
Wyze Camera: Essential for capturing video footage. Ensure it’s compatible with the mount.
Suction Cups: Used to attach the mount securely to the window. Look for strong, durable ones.
Plastic or Metal Bracket: Acts as the main structure holding the camera. Choose a sturdy material.
Screws and Nuts: Necessary for assembling the bracket and securing the camera. Make sure they fit the bracket holes.
Drill: Required for making holes in the bracket if not pre-drilled. Use a drill bit that matches the screw size.
Screwdriver: Needed to tighten screws and nuts. Ensure it fits the screw heads.
Measuring Tape: Helps measure the exact placement of the mount on the window.
Marker: Used to mark drilling spots on the bracket and window.
Level: Ensures the mount is straight. A small, handheld level works best.
Cable Clips: Keeps the camera’s power cable organized and out of the way. Choose adhesive clips for easy attachment.
Alcohol Wipes: Cleans the window surface before attaching suction cups. Ensures a strong hold.
Zip Ties: Secures loose cables. Use small, adjustable ones for flexibility.
Required Skills and Time Commitment
Skill Level: Intermediate
Estimated Time Required:
- Gather Materials: 15 minutes
- Measure and Cut Wood: 30 minutes
- Assemble Frame: 45 minutes
- Attach Mounting Hardware: 20 minutes
- Install Wyze Camera: 10 minutes
Total Time: Approximately 2 hours
Detailed Instructions for Assembly
Gather Materials:
- Wyze camera
- Suction cup hooks
- Small piece of wood or plastic
- Double-sided tape
- Screwdriver
- Screws
Prepare the Mount:
- Cut the wood or plastic to a size that fits the camera base.
- Smooth any rough edges with sandpaper.
Attach Suction Cups:
- Place suction cups on the back of the wood or plastic piece.
- Ensure they are evenly spaced for stability.
Secure the Camera:
- Use screws to attach the camera base to the wood or plastic.
- Tighten screws until the camera is firmly in place.
Apply Double-Sided Tape:
- Stick double-sided tape to the bottom of the wood or plastic.
- This adds extra security to the mount.
Mount on Window:
- Clean the window surface where the mount will go.
- Press the suction cups firmly against the window.
- Ensure the mount is secure and stable.
Adjust Camera Angle:
- Position the camera to get the desired view.
- Tighten any adjustable parts to lock the angle.
Test the Setup:
- Check the camera feed to ensure it captures the intended area.
- Make any necessary adjustments for optimal viewing.
Helpful Tips and Tricks
Measure Twice, Cut Once: Always double-check measurements before cutting any materials. This ensures everything fits perfectly.
Use Strong Adhesive: For a secure mount, use a strong adhesive like 3M Command Strips. They hold well and can be removed without damaging surfaces.
Level the Mount: Use a spirit level to make sure the mount is straight. A crooked mount can affect the camera's view.
Cable Management: Keep cables tidy using cable clips or zip ties. This prevents tangling and keeps the setup neat.
Weatherproofing: If the window is exposed to elements, consider using weatherproof tape around the edges to protect the camera.
Test the View: Before finalizing the mount, test the camera's view. Adjust the position to cover the desired area.
Use a Template: Create a paper template of the mount to visualize placement and avoid mistakes.
Common Mistakes to Avoid:
Incorrect Measurements: Not measuring properly can lead to a poor fit. Always double-check.
Weak Adhesive: Using weak adhesive can cause the mount to fall. Opt for strong, reliable options.
Ignoring Cable Management: Messy cables can get in the way and look untidy. Keep them organized.
Not Testing the View: Finalizing the mount without testing the camera's view can result in blind spots.
Alternatives for Materials or Methods:
Suction Cups: Instead of adhesive strips, use suction cups for a temporary mount. They are easy to reposition.
Velcro Strips: For a removable option, use Velcro strips. They provide a strong hold and can be adjusted.
Magnetic Mounts: If the window frame is metal, consider using magnetic mounts. They are easy to install and remove.
Command Hooks: Use Command hooks for hanging the camera. They are strong and leave no residue when removed.
Estimating the Cost
Materials:
- Wyze Cam: $25
- Suction Cups: $10 (pack of 4)
- Small Wooden Board: $5
- Double-Sided Tape: $4
- Velcro Strips: $3
- Screws and Anchors: $2
Tools:
- Drill: $30 (or borrow one)
- Screwdriver: $5
- Measuring Tape: $3
- Sandpaper: $2
Total Cost: $89
Budget-Friendly Alternatives:
- Use Recycled Wood: Free (instead of buying a new board)
- Borrow Tools: Free (from friends or neighbors)
- Buy a Single Suction Cup: $3 (instead of a pack)
- Use Adhesive Hooks: $2 (instead of screws and anchors)
Revised Total Cost: $50
Personalizing Your Project
Materials: Instead of using wood, try acrylic or metal for a sleeker look. PVC pipes can also work for a lightweight option.
Colors: Paint the mount to match your room's color scheme. Use spray paint for a smooth finish or chalk paint for a rustic look. Stickers or decals can add a fun touch.
Styles: For a modern style, use minimalist designs with clean lines. For a vintage feel, add decorative brackets or distressed paint. A steampunk look can be achieved with copper pipes and gears.
Mounting Options: Use suction cups for easy removal or command strips for a damage-free option. Magnets can also be used if the window frame is metal.
Adjustability: Add hinges or swivel joints to make the mount adjustable. Telescoping arms can help with positioning.
Cable Management: Use cable clips or channels to keep wires tidy. Velcro straps can also help manage excess cable length.
Weatherproofing: If placing outside, use weather-resistant materials like stainless steel or treated wood. Sealant can protect against moisture.
Additional Features: Add a shelf for extra gadgets or a small planter for a touch of greenery. LED lights can provide better visibility at night.
Eco-Friendly Tips
Reusing old materials can make your project more eco-friendly. Look for scrap wood or leftover plastic from other projects. These can be cut to size for the mount.
Recycling is another great option. Use an old phone holder or bracket that you no longer need. These can be repurposed to hold the Wyze camera securely.
For adhesives, choose eco-friendly glue or tape. These options are less harmful to the environment compared to traditional adhesives.
When painting or finishing, opt for non-toxic paints or stains. These are safer for you and the planet.
Lastly, consider using solar-powered tools if you have them. This reduces the energy footprint of your project.
Your DIY Adventure Awaits
Building a DIY Wyze window mount isn't just about saving money. It's about learning new skills, getting creative, and having fun. You now have the knowledge to create a sturdy, functional mount that fits your needs. Remember, the key is to measure twice, cut once, and always double-check your work. Don't be afraid to make mistakes; they're part of the learning process. With some patience and effort, you'll have a custom mount that works perfectly for your space. So grab your tools, gather your materials, and get started. Your window mount project is a great way to dive into the world of DIY. Happy building!
How do I attach the Wyze Cam to the window mount?
Use the adhesive strips included with the mount. Clean the window surface first, then press the mount firmly against the glass. Attach the Wyze Cam to the mount using the magnetic base.
Will the camera fall off the window?
No, the adhesive strips are strong enough to hold the camera securely. Just make sure the window is clean before attaching the mount.
Can I adjust the camera angle once it's mounted?
Yes, the magnetic base allows you to easily adjust the camera angle. Just tilt or rotate the camera to get the perfect view.
Does the mount block the camera's view?
Not at all. The mount is designed to be low-profile, so it won't obstruct the camera's field of view.
Is it easy to remove the mount from the window?
Yes, you can gently peel the adhesive strips off the window. If any residue remains, use a bit of rubbing alcohol to clean it off.
Can I use the mount on other surfaces besides windows?
While it's designed for windows, you can use it on any smooth, flat surface. Just make sure the surface is clean for the best adhesion.
Will the mount work with other camera brands?
It might, as long as the camera has a magnetic base or can be attached using adhesive strips. However, it's specifically designed for Wyze Cams.