
Home>Home & Furniture>Doors & Windows>DIY Wedding Door Entrance Guide
Doors & Windows
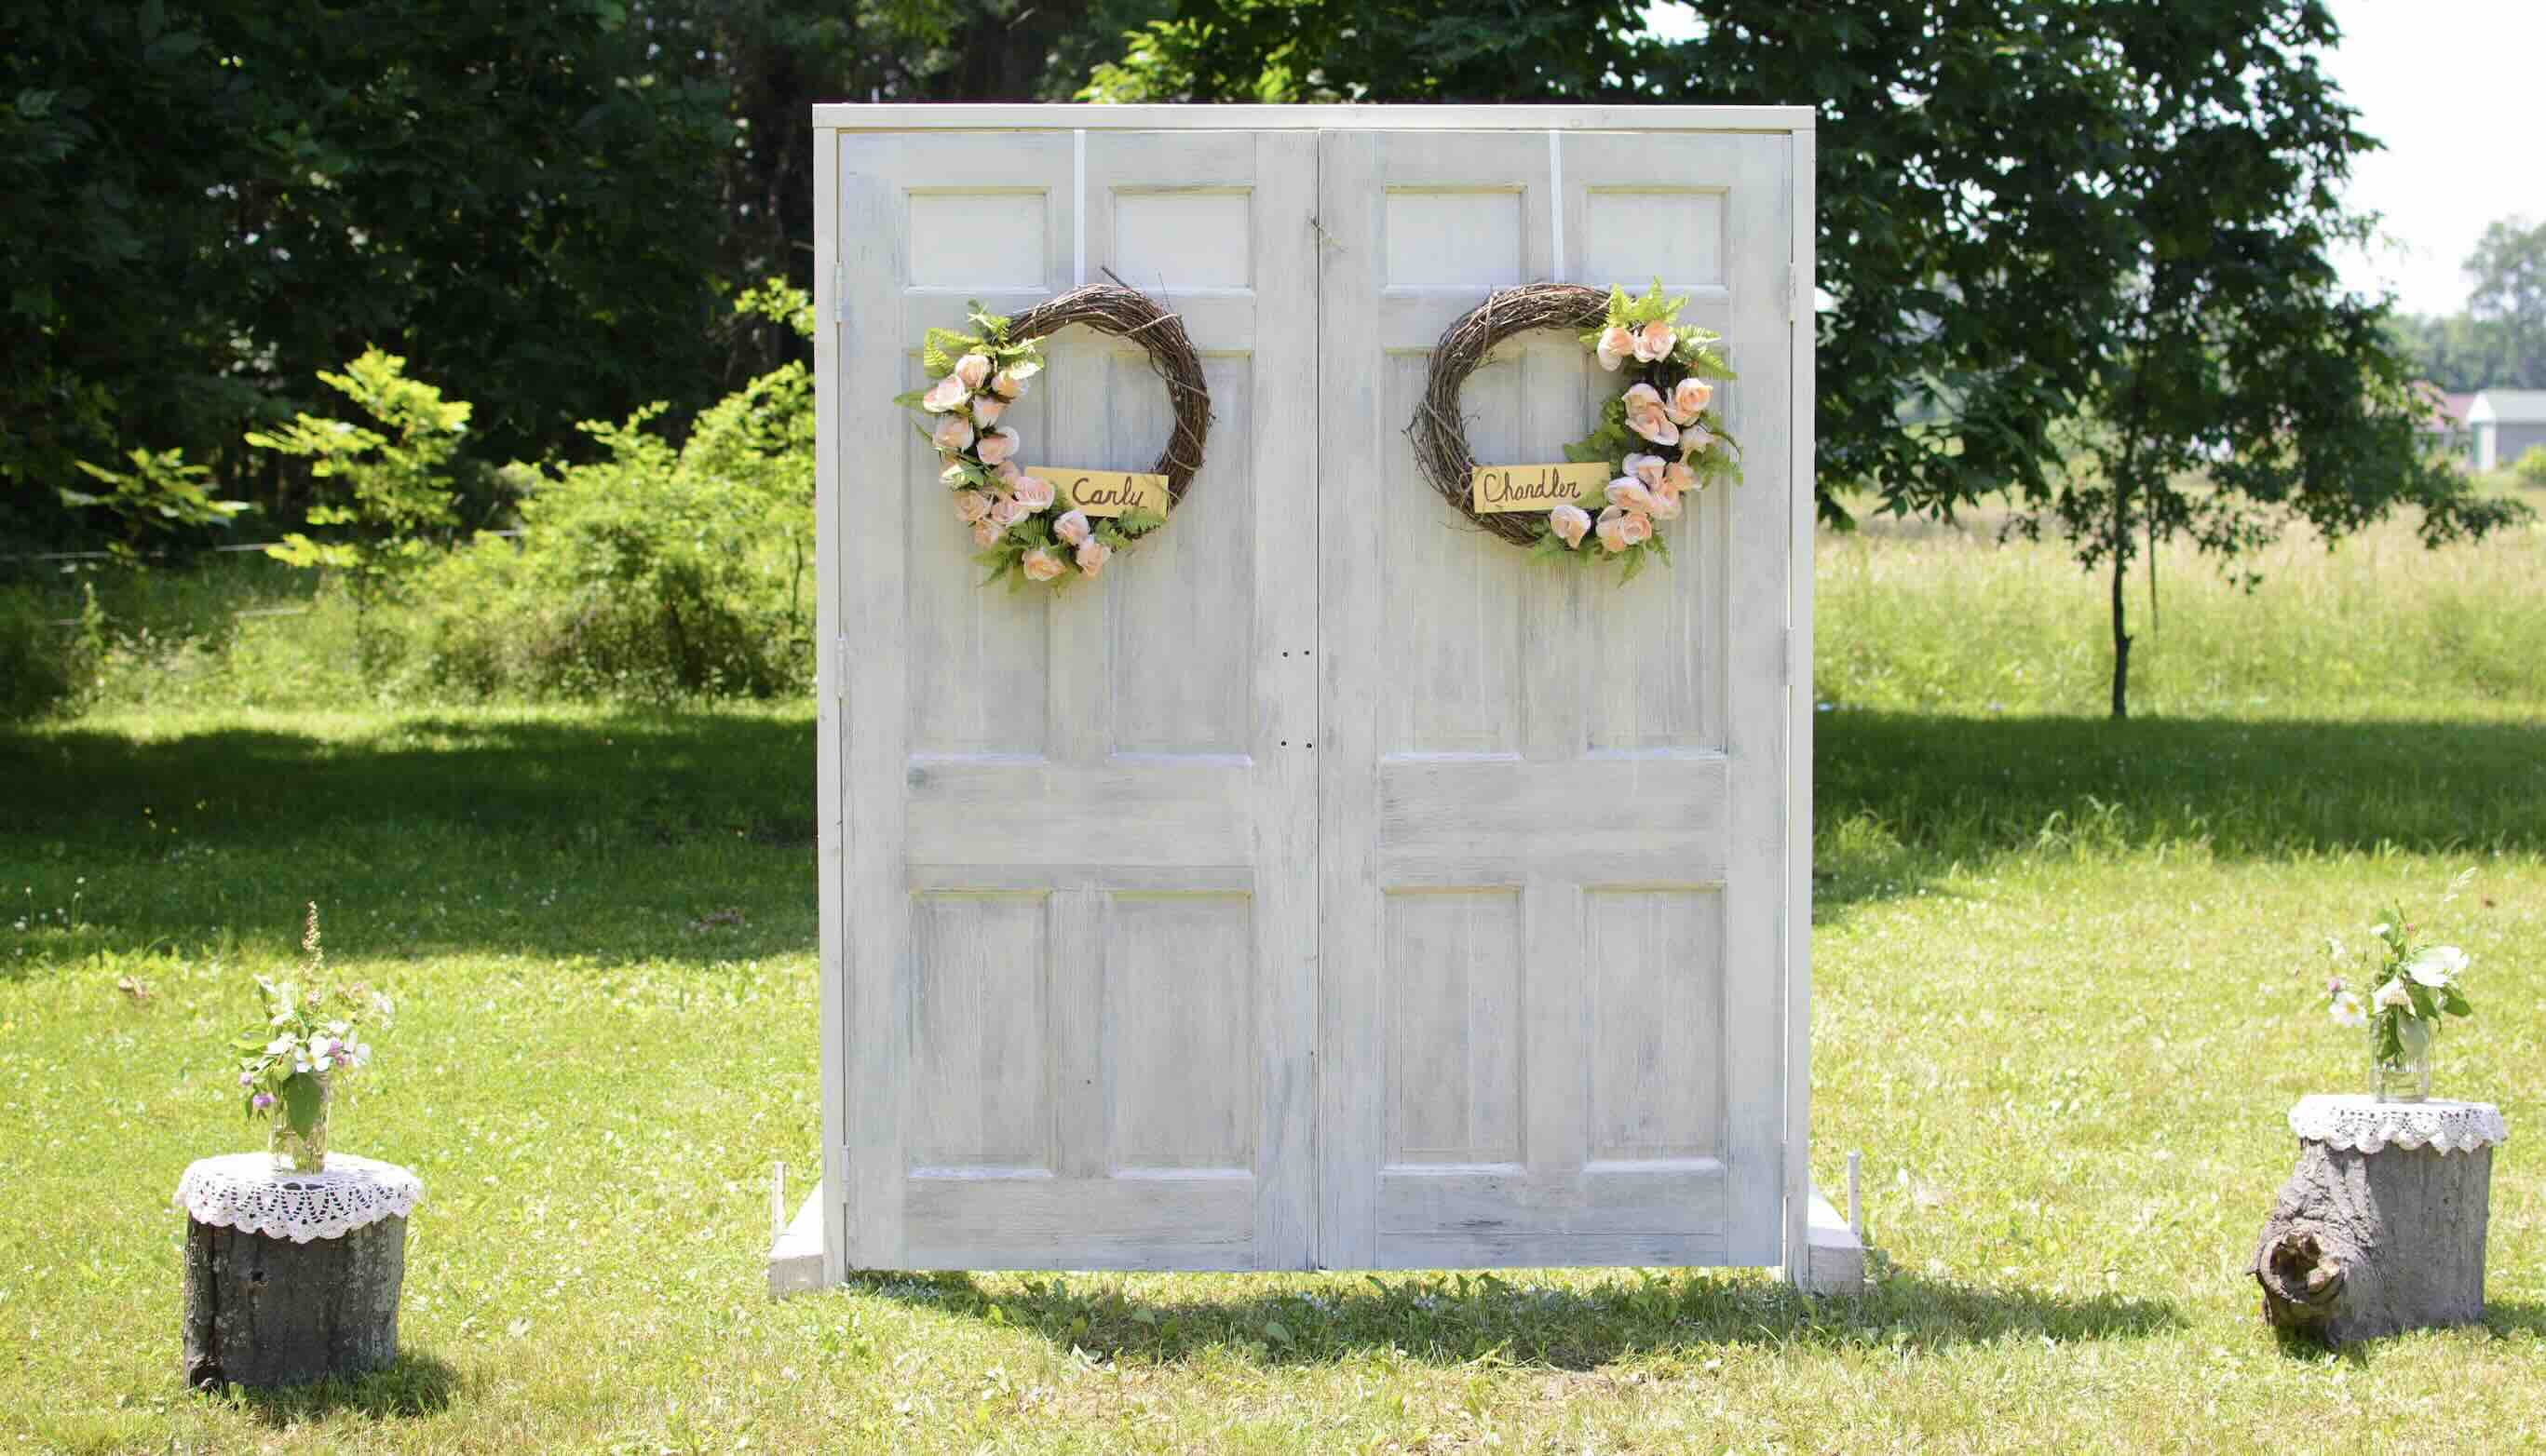
DIY Wedding Door Entrance Guide
Published: September 23, 2024
Create a stunning DIY wedding door entrance with our step-by-step guide. Transform ordinary doors into magical entryways for your special day. Easy, elegant, and unforgettable!
(Many of the links in this article redirect to a specific reviewed product. Your purchase of these products through affiliate links helps to generate commission for Twigandthistle.com, at no extra cost. Learn more)
Planning a wedding can be both exciting and a bit overwhelming. Creating a memorable entrance sets the tone for your special day. One fantastic way to do this is by crafting your own wedding door entrance. Not only does it add a personal touch, but it also allows you to show off your creativity. Whether you're going for a rustic, elegant, or whimsical theme, a DIY entrance can match perfectly. Best of all, making it yourself can save money and provide a fun project leading up to your big day. Ready to impress your guests right from the start? Let's get started!
Getting Ready for Your DIY Wedding Entrance
Gather Materials: Collect all necessary items like wood, paint, nails, screws, and decorations. Make sure everything is within reach.
Measure and Cut: Measure the dimensions for the door frame. Use a saw to cut wood pieces to the correct size.
Safety Gear: Wear safety goggles, gloves, and a dust mask. This protects your eyes, hands, and lungs from debris.
Workspace Setup: Choose a flat, open area to work. Lay down a tarp or old sheet to catch any mess.
Check Tools: Ensure tools like hammers, drills, and screwdrivers are in good working condition. Charge any battery-operated tools.
Sand Wood: Smooth out rough edges with sandpaper. This helps paint and decorations adhere better.
Prime and Paint: Apply a primer coat to the wood. Once dry, paint the wood in your chosen color. Allow it to dry completely.
Assemble Frame: Use screws and a drill to put the frame together. Double-check that everything is level and secure.
Decorate: Add flowers, ribbons, or other decorations. Use a hot glue gun or small nails to attach them securely.
Transport Carefully: If the entrance needs to be moved, do so gently to avoid damaging any parts.
Essential Materials and Tools
- Wooden Door: A sturdy door to serve as the main entrance piece.
- Paint: Choose colors that match your wedding theme.
- Paintbrushes: Different sizes for detailed and broad strokes.
- Sandpaper: Smooths the door's surface before painting.
- Decorative Hardware: Handles, knobs, or hinges to add charm.
- Floral Garland: Fresh or artificial flowers to drape over the door.
- Ribbon: Adds a touch of elegance to the floral arrangements.
- Hot Glue Gun: Secures decorations in place.
- Measuring Tape: Ensures accurate placement of decorations.
- Screwdriver: Attaches hardware to the door.
- Hammer and Nails: For any additional attachments or support.
- Ladder: Reaches higher areas safely.
- Drop Cloth: Protects the ground from paint spills.
- Level: Ensures everything is straight and aligned.
- Staple Gun: Secures fabric or other materials to the door.
- Scissors: Cuts ribbons, fabric, or other materials.
- Pencil: Marks measurements or placement spots.
Each tool and material plays a crucial role in creating a beautiful, personalized wedding door entrance.
Required Skills and Time Commitment
Skill Level: Intermediate
Time Required: 4-6 hours
Steps:
- Gather Materials: Collect wood, paint, nails, hinges, and decorations.
- Measure and Cut: Measure door frame dimensions. Cut wood to size.
- Assemble Frame: Nail pieces together to form the frame.
- Attach Hinges: Secure hinges to the frame.
- Paint and Decorate: Paint the door and add decorations.
- Install: Position the door at the entrance and secure it.
Important Tips:
- Safety Gear: Wear gloves and goggles.
- Precision: Ensure accurate measurements.
- Help: Get assistance for heavy lifting.
Detailed Step-by-Step Guide
Gather Materials:
- Two old doors
- Hinges
- Screws
- Drill
- Sandpaper
- Paint or stain
- Paintbrushes
- Decorative elements (flowers, ribbons, etc.)
Prepare the Doors:
- Sand the doors to remove any rough spots.
- Wipe them clean to remove dust.
Paint or Stain:
- Apply paint or stain to the doors.
- Let them dry completely.
Attach Hinges:
- Place the doors side by side.
- Attach hinges to connect the doors.
- Ensure they can open and close smoothly.
Decorate:
- Add flowers, ribbons, or other decorations.
- Secure decorations with glue or wire.
Set Up the Entrance:
- Position the doors at the venue entrance.
- Ensure they are stable and won't tip over.
Final Touches:
- Add a welcome sign or personal message.
- Check for any last-minute adjustments.
Helpful Tips and Tricks
Measure the space where the door will go. Make sure it fits well. Use sturdy materials like wood or metal for the frame. Decorate with flowers, ribbons, or lights. Secure the decorations with zip ties or strong tape. Paint the door in colors that match the wedding theme. Add a sign with the couple's names or a welcome message.
Common mistakes to avoid: Not measuring the space correctly. Using weak materials that might break. Overloading the door with too many decorations. Forgetting to secure the decorations properly.
Alternatives: Instead of wood, try using a lightweight PVC frame. For decorations, consider fabric drapes or balloons. Instead of paint, use removable wallpaper for easy changes.
Estimating the Costs
Materials:
- Wood (for the door frame): $50-$100
- Paint or Stain: $20-$40
- Decorative Elements (flowers, ribbons, etc.): $30-$100
- Hinges and Handles: $15-$30
- Nails and Screws: $5-$10
Tools:
- Hammer: $10-$20
- Screwdriver: $5-$15
- Paintbrushes: $5-$10
- Measuring Tape: $5-$10
- Saw: $20-$50 (or rent for $10-$20)
Total Estimated Cost: $165-$385
Budget-Friendly Alternatives:
- Reclaimed Wood: Often free or very cheap
- Borrow Tools from friends or family
- DIY Decorations using paper or fabric you already have
- Second-hand Stores for handles and hinges
Total with Alternatives: $50-$150
Creative Variations and Customizations
Materials: Instead of traditional wood, try using reclaimed barn wood for a rustic look or PVC pipes for a lightweight, modern feel. Fabric drapes can add a soft touch, while metal frames offer an industrial vibe.
Colors: Paint the door in pastel shades for a vintage theme or bold colors like red or navy for a dramatic entrance. Metallic finishes such as gold or silver can add a touch of elegance.
Styles: For a boho look, decorate with macramé hangings and wildflowers. A classic style might include white roses and greenery. Beach-themed entrances can feature seashells and driftwood.
Decorations: Add fairy lights for a magical touch or chalkboard signs for a personalized message. Floral garlands can drape over the door, while ribbons and bunting add color and movement.
Alternative Uses: Use the door as a photo backdrop or a seating chart display. Attach small shelves to hold wedding favors or guest books.
Eco-Friendly Tips
Reclaimed Wood: Use old pallets or barn wood to create a rustic entrance. Sand and stain them for a polished look.
Fabric Scraps: Gather leftover fabric from previous projects. Create bunting or drapes for the door.
Potted Plants: Instead of cut flowers, use potted plants. They can be reused or planted after the wedding.
Recycled Paper: Make signs or banners from recycled paper. Decorate with eco-friendly ink or paint.
Secondhand Finds: Visit thrift stores for unique items like vintage doors or frames. These can add charm without new materials.
Natural Elements: Incorporate branches, stones, or shells. These can be collected locally and returned to nature afterward.
LED Lights: Use energy-efficient LED string lights. They consume less power and last longer.
Biodegradable Decorations: Choose decorations that break down naturally, like paper confetti or wooden accents.
Upcycled Furniture: Repurpose old furniture pieces as part of the entrance. An old dresser can hold flowers or guest books.
Reusable Items: Select items that can be used again, like fabric banners or wooden signs. This reduces waste and saves money.
Your DIY Wedding Door Entrance Awaits
Creating a DIY wedding door entrance isn't just about saving money, it's about adding a personal touch to your big day. By using simple materials like wood, paint, and flowers, you can craft an entrance that reflects your unique style. Remember to measure your space carefully and plan your design before starting. Don't be afraid to experiment with colors and textures. Enlist friends or family to help, making the process fun and memorable. Once finished, your entrance will not only welcome guests but also set the tone for your celebration. So grab your tools, gather your supplies, and start building. Your dream wedding entrance is just a few steps away.
How do I choose the right materials for my wedding door entrance?
Pick materials that match your wedding theme. Wood, fabric, and flowers are popular choices. Make sure they’re sturdy and weather-resistant if your wedding’s outdoors.
What tools will I need for this project?
Basic tools like a hammer, nails, a saw, and a measuring tape are essential. Depending on your design, you might also need a staple gun, glue, or paint.
How much time should I allocate for building the entrance?
Plan for at least a couple of weekends. Time includes gathering materials, building, and decorating. Always give yourself extra time for unexpected issues.
Can I personalize the entrance?
Absolutely! Add personal touches like your initials, wedding date, or favorite flowers. Use colors that match your wedding palette.
How do I ensure the entrance is stable?
Make sure the base is wide and heavy enough to support the structure. Use braces or stakes for added stability, especially if it’s windy.
What are some decorative ideas for the entrance?
Use decorations like fairy lights, ribbons, or garlands. Fresh flowers or greenery can add a natural touch. Think about adding a welcome sign.
How do I transport the entrance to the venue?
If it’s large, you might need a truck or van. Transport in pieces if possible, then assemble on-site. Make sure everything is secure to avoid damage.