
Home>Home & Furniture>Doors & Windows>DIY Temporary Door Ideas
Doors & Windows
DIY Temporary Door Ideas
Published: September 22, 2024
Discover creative and practical DIY temporary door ideas to enhance your space. Learn step-by-step guides and tips for easy, budget-friendly solutions.
(Many of the links in this article redirect to a specific reviewed product. Your purchase of these products through affiliate links helps to generate commission for Twigandthistle.com, at no extra cost. Learn more)
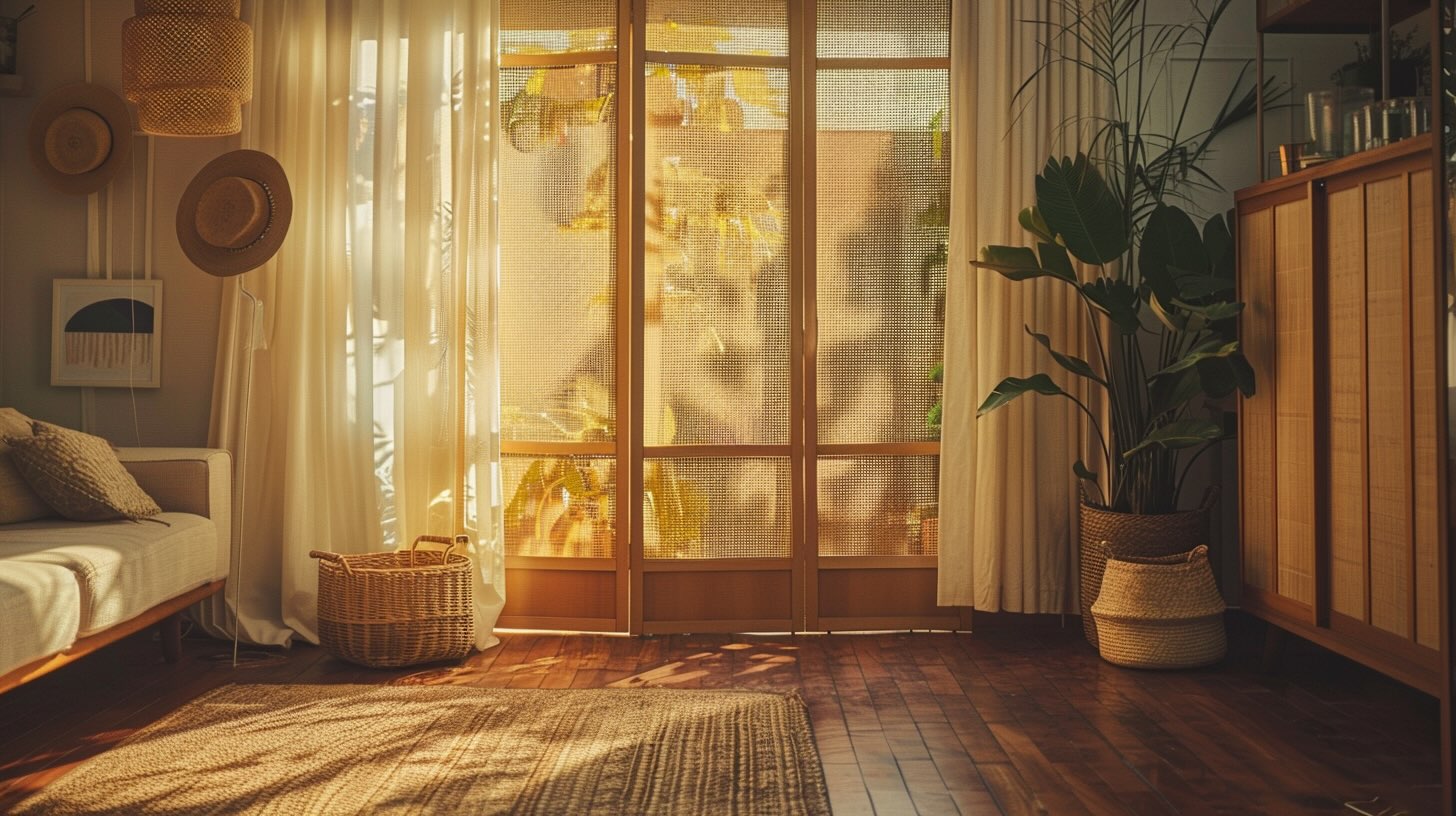
Looking for a quick fix to add privacy or a barrier in your home without making permanent changes? Temporary doors are a great solution. They can be practical, stylish, and easy to set up. From curtain doors to room dividers, these options can fit any budget and skill level. Whether you're renting, hosting guests, or just need a short-term solution, creating your own temporary door can be both fun and rewarding. Let's look at some simple, creative ways to get started on your DIY project!
Getting Ready for Your Project
Measure the Doorway: Use a tape measure to get the height and width of the doorway. Write down these measurements.
Choose Materials: Decide whether you'll use a curtain, folding screen, or plywood. Gather all necessary supplies like fabric, hinges, or screws.
Clear the Workspace: Move furniture and other items away from the doorway. Ensure you have enough room to work comfortably.
Safety Gear: Wear safety goggles and gloves to protect your eyes and hands. If using power tools, ensure they are in good working condition.
Prepare Tools: Lay out tools like a drill, screwdriver, hammer, and measuring tape. Keep them within easy reach.
Mark the Wall: Use a pencil to mark where you’ll attach hooks, hinges, or brackets. Double-check measurements to ensure accuracy.
Pre-Drill Holes: If attaching hardware, pre-drill holes to make installation easier and prevent splitting the material.
Test Fit: Before final installation, test fit the temporary door to ensure it fits properly. Make any necessary adjustments.
Secure the Door: Attach the door using screws, hooks, or other hardware. Ensure it’s stable and functions as intended.
Clean Up: Remove any debris or tools from the workspace. Make sure the area is safe and tidy.
What You Need: Materials and Tools
Curtain Rod: A sturdy rod to hang the curtain. Choose one that fits the width of the doorway.
Curtains or Fabric: Use thick fabric or curtains to create a door-like barrier. They provide privacy and can be easily moved aside.
Tension Rod: An alternative to a curtain rod, especially if you don't want to drill holes. It uses tension to stay in place.
Beads or String Curtains: For a more decorative option, beads or string curtains can be used. They allow light to pass through while still marking the doorway.
Velcro Strips: Useful for attaching fabric directly to the door frame. Easy to remove and reposition.
Command Hooks: These adhesive hooks can hold lightweight curtains or fabric without damaging walls.
Room Divider: A freestanding option that can be moved around. Great for temporary use.
PVC Pipe: Can be used to create a frame for hanging fabric or curtains. Lightweight and easy to assemble.
Hinges and Latch: If you want a more solid temporary door, lightweight hinges and a latch can be used with a piece of plywood or similar material.
Measuring Tape: Essential for ensuring all materials fit the doorway properly.
Scissors: Needed for cutting fabric or trimming materials to size.
Screwdriver/Drill: If using screws or installing a more solid temporary door, these tools will be necessary.
Staple Gun: Useful for attaching fabric to wooden frames or other materials.
Fabric Glue: For attaching decorative elements to fabric or securing hems.
Sandpaper: If using wood, sandpaper will smooth rough edges.
Paint or Stain: Optional, for customizing the look of wooden materials.
These materials and tools will help you create a functional and attractive temporary door solution.
Skill Level and Time Commitment
Skill Level: Beginner
Time Required: 1-2 hours
Curtain Door:
- Skill Level: Beginner
- Time Required: 30 minutes
Folding Screen:
- Skill Level: Beginner
- Time Required: 1 hour
Sliding Barn Door:
- Skill Level: Intermediate
- Time Required: 2 hours
Beaded Curtain:
- Skill Level: Beginner
- Time Required: 45 minutes
Room Divider:
- Skill Level: Beginner
- Time Required: 1 hour
How to Do It: Step-by-Step Guide
Curtain Door
- Materials Needed: Curtain rod, curtains, hooks, measuring tape, pencil.
- Steps:
- Measure the width and height of the doorway.
- Mark where the curtain rod brackets will go.
- Install the brackets using screws.
- Slide the curtain onto the rod.
- Hang the rod on the brackets.
- Adjust the curtain to cover the doorway.
Sliding Barn Door
- Materials Needed: Plywood, sliding door hardware kit, screws, measuring tape, saw, drill.
- Steps:
- Measure the doorway and cut plywood to size.
- Attach the sliding door hardware to the top of the plywood.
- Install the track above the doorway.
- Hang the door on the track.
- Test the door to ensure it slides smoothly.
Beaded Curtain
- Materials Needed: Beaded curtain, hooks, measuring tape, pencil.
- Steps:
- Measure the width of the doorway.
- Mark where the hooks will go above the doorway.
- Install the hooks using screws.
- Hang the beaded curtain on the hooks.
- Adjust the beads to ensure they hang evenly.
Fabric Panel Door
- Materials Needed: Fabric, tension rod, sewing machine (optional), measuring tape, scissors.
- Steps:
- Measure the doorway and cut fabric to size, adding extra for hems.
- Hem the edges of the fabric using a sewing machine or fabric glue.
- Insert the tension rod through the top hem.
- Place the tension rod in the doorway, adjusting it to fit snugly.
- Ensure the fabric hangs evenly.
Cardboard Door
- Materials Needed: Large cardboard sheets, duct tape, utility knife, measuring tape.
- Steps:
- Measure the doorway and cut cardboard to size.
- Reinforce the edges of the cardboard with duct tape.
- Create a handle using extra cardboard and tape.
- Place the cardboard in the doorway.
- Secure it with additional tape if needed.
PVC Pipe and Fabric Door
- Materials Needed: PVC pipes, fabric, PVC connectors, measuring tape, scissors.
- Steps:
- Measure the doorway and cut PVC pipes to size.
- Assemble the PVC frame using connectors.
- Cut fabric to fit the frame, leaving extra for hems.
- Attach the fabric to the frame using fabric glue or sewing.
- Place the frame in the doorway, securing it with tension.
Hanging Blanket
- Materials Needed: Blanket, hooks, measuring tape, pencil.
- Steps:
- Measure the width of the doorway.
- Mark where the hooks will go above the doorway.
- Install the hooks using screws.
- Hang the blanket on the hooks.
- Adjust the blanket to cover the doorway completely.
Helpful Tips and Tricks
Use a Curtain: Hang a heavy curtain or tapestry using a tension rod. It’s easy to install and remove.
Room Divider Screens: These can be folded and moved as needed. They come in various designs to match your decor.
Sliding Barn Door: Use a sliding barn door kit. It’s stylish and can be installed without much hassle.
Beaded Curtains: For a retro look, hang beaded curtains. They’re simple to put up and take down.
PVC Pipe Frame: Create a frame with PVC pipes and hang fabric over it. It’s lightweight and customizable.
Common Mistakes to Avoid:
Incorrect Measurements: Always measure the doorway accurately before starting. Wrong measurements can lead to poor fitting.
Weak Support: Ensure the support for your temporary door is strong enough. Weak support can cause the door to fall.
Ignoring Aesthetics: Choose materials that match your room’s decor. A mismatched door can look out of place.
Alternatives for Materials or Methods:
Fabric Panels: Instead of heavy curtains, use fabric panels. They’re lighter and easier to handle.
Accordion Doors: These can be a good alternative to sliding doors. They fold neatly and save space.
Cardboard or Foam Board: For a quick fix, use cardboard or foam board. Decorate it with paint or wallpaper for a better look.
Estimating the Cost
Curtain Door:
- Curtain: $20-$50
- Tension Rod: $10-$20
- Hooks: $5-$10
Total: $35-$80
Budget-Friendly Alternative: Use an old sheet or blanket instead of a new curtain. This can reduce the cost to around $15.
Folding Screen:
- Folding Screen: $50-$100
Total: $50-$100
Budget-Friendly Alternative: Make your own using cardboard or plywood. This can reduce the cost to around $20-$30.
Sliding Barn Door:
- Barn Door Kit: $100-$200
- Door Panel: $50-$100
Total: $150-$300
Budget-Friendly Alternative: Use a large piece of plywood and basic sliding hardware. This can reduce the cost to around $50-$100.
Beaded Curtain:
- Beaded Curtain: $20-$40
Total: $20-$40
Budget-Friendly Alternative: Make your own using string and beads. This can reduce the cost to around $10-$15.
Room Divider:
- Room Divider: $50-$150
Total: $50-$150
Budget-Friendly Alternative: Use a large piece of fabric and a clothesline. This can reduce the cost to around $20-$30.
Different Ways to Customize
Curtains: Use heavy fabric for privacy or light, sheer material for a breezy look. Choose colors that match your room's decor.
Sliding Panels: Use plywood or MDF, paint them, or cover with wallpaper. Install barn door hardware for a rustic feel or sleek tracks for a modern look.
Beaded Curtains: Opt for wooden beads for a boho vibe or plastic beads for a retro style. Mix colors to create patterns or keep it monochrome for simplicity.
Room Dividers: Use folding screens made of wood, metal, or fabric. Paint or stencil designs on them for a personal touch.
Hanging Plants: Create a green barrier with hanging planters. Use macrame hangers for a vintage look or modern pots for a contemporary style.
Rope Curtains: Hang thick ropes from a rod for a nautical theme. Dye the ropes different colors for a playful touch.
Tapestries: Hang a large tapestry or quilt. Choose patterns that reflect your personality or room theme.
PVC Pipe Frame: Build a frame with PVC pipes and drape fabric over it. Paint the pipes to match your decor.
Bookshelves: Use a tall bookshelf as a divider. Fill it with books, plants, or decorative items.
Bamboo Blinds: Hang bamboo blinds for a natural, earthy feel. Roll them up or down as needed for privacy.
Accordion Doors: Install accordion-style doors. Choose from vinyl, wood, or fabric materials.
Magnetic Curtains: Attach magnets to fabric edges and metal strips on the door frame. Easily open and close by pulling the fabric apart.
Eco-Friendly Tips
Reclaimed Wood Panels: Use old wooden pallets or leftover wood from other projects. Sand them down and attach hinges for a rustic, eco-friendly door.
Fabric Curtains: Repurpose old sheets, tablecloths, or curtains. Hang them using a tension rod or hooks for a soft, flexible door.
Cardboard Panels: Collect large cardboard pieces from old boxes. Tape or glue them together, then paint or decorate for a lightweight, temporary door.
Bamboo Screens: Bamboo grows quickly, making it a sustainable choice. Use bamboo screens or mats as a natural, stylish door.
Sliding Barn Door: Create a sliding door using reclaimed wood or metal. Install a simple track system for easy opening and closing.
Beaded Curtains: String together old beads, shells, or other small items. Hang them in a doorway for a fun, decorative barrier.
Old Doors: Find an old door at a thrift store or salvage yard. Paint or refinish it, then use it as a temporary door.
Hanging Plants: Use macramé plant hangers or shelves with potted plants. Create a green, living door that adds privacy and fresh air.
Your DIY Door Awaits
Creating a temporary door can be a fun, cost-effective project. Whether you use curtains, room dividers, or sliding panels, each option offers flexibility and style. Remember, the key is to match your needs and space. Don't be afraid to experiment with different materials and designs. A little creativity goes a long way. Plus, you can always change it up if you get bored. So grab your tools, gather your materials, and get started. Your perfect temporary door is just a few steps away. Happy DIY-ing!
How can I make a temporary door for a room?
Use a tension rod and a curtain. Just extend the rod across the doorway and hang the curtain. Easy peasy!
What's a quick way to create a temporary door for privacy?
Try a folding screen. You can buy one or make one with some hinges and panels. It’s portable and simple to set up.
Can I use cardboard to make a temporary door?
Absolutely! Cut the cardboard to fit the doorway, then secure it with duct tape or Velcro strips. It’s cheap and effective.
How do I make a temporary door for a closet?
A shower curtain and tension rod work great. Just hang the curtain in front of the closet opening. It’s quick and looks neat.
What’s the best material for a temporary door?
Fabric or wood panels are top choices. Fabric is easy to hang, while wood panels offer more sturdiness.
Can I use beads for a temporary door?
Sure thing! Beaded curtains add a fun, retro vibe. Just hang them from a rod or hook above the doorway.
How do I make a temporary door for a pet?
Use a baby gate. It’s perfect for keeping pets in or out of a room without blocking your view.