
Home>Home & Furniture>Doors & Windows>DIY Teacher Door Signs: Personalize Your Classroom
Doors & Windows
DIY Teacher Door Signs: Personalize Your Classroom
Published: September 22, 2024
Discover creative DIY teacher door signs to personalize your classroom. Easy, fun, and customizable ideas to make your classroom welcoming and unique. Get started today!
(Many of the links in this article redirect to a specific reviewed product. Your purchase of these products through affiliate links helps to generate commission for Twigandthistle.com, at no extra cost. Learn more)
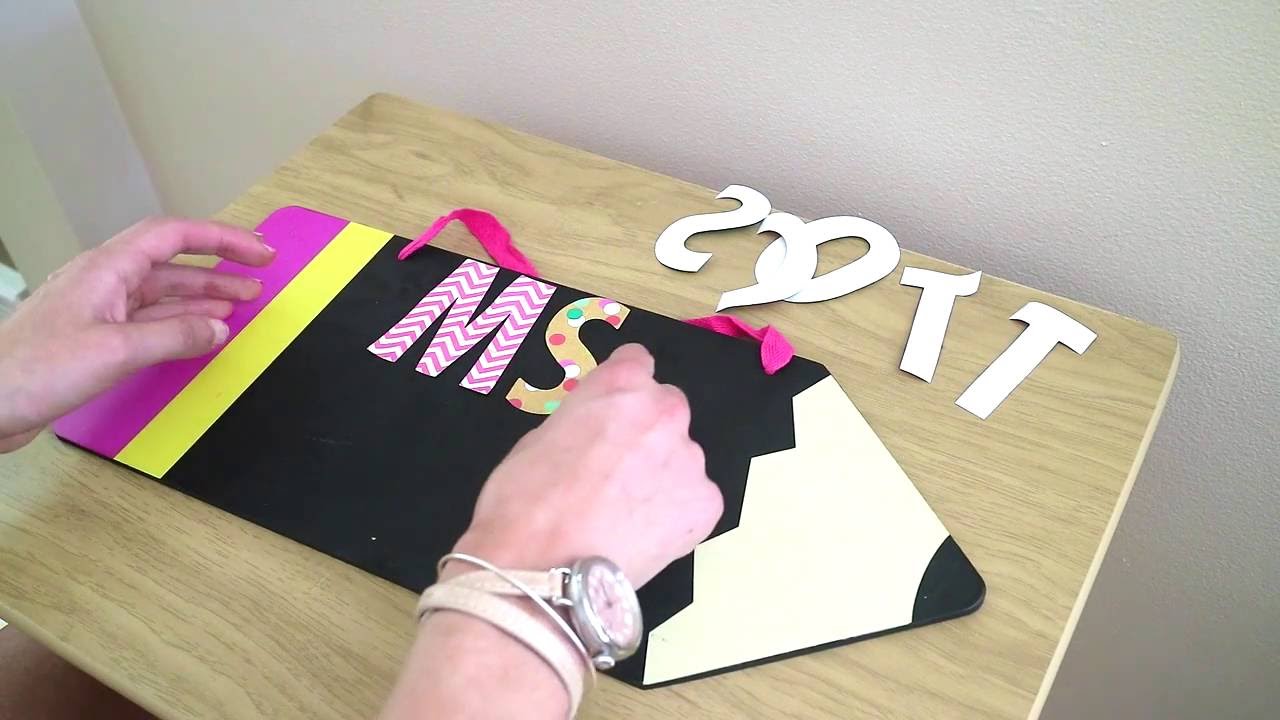
Personalizing your classroom can make it feel welcoming and fun. Creating DIY teacher door signs is a simple way to achieve this. You can add your name, grade level, or favorite quote to the sign. With easy-to-find materials like cardboard, markers, and stickers, you can craft something unique. It’s not just about decoration; a personalized door sign helps students feel more connected to the classroom environment. Plus, it can be a delightful project to do on a weekend or in your free time. Ready to start your crafting adventure? Let’s dive into some creative ideas.
Getting Ready for Your Project
Gather Materials: Collect all necessary supplies like cardstock, markers, glue, scissors, and decorative items such as stickers or ribbons.
Choose a Design: Decide on a theme or design for the door sign. Sketch it out on paper to visualize the final product.
Measure the Door: Measure the door where the sign will hang to ensure it fits perfectly.
Set Up Workspace: Find a clean, flat surface to work on. Lay down newspaper or a drop cloth to protect the area from glue or marker stains.
Safety First: Use scissors carefully. If using a hot glue gun, handle it with caution to avoid burns. Keep all sharp objects out of reach of young children.
Cut and Assemble: Cut out the shapes and letters for the sign. Assemble them according to your design plan.
Decorate: Add decorative elements like stickers, ribbons, or glitter to make the sign stand out.
Attach Hanging Mechanism: Attach a string, ribbon, or adhesive hooks to the back of the sign for easy hanging.
Clean Up: Dispose of any scraps or waste materials properly. Store unused supplies for future projects.
Gather Your Supplies
Wooden Plaques: These form the base of your door sign. Choose a size that fits your design.
Acrylic Paints: Use these to add color and designs to your sign. They dry quickly and are easy to work with.
Paintbrushes: Needed for applying paint. Different sizes help with detailed work and larger areas.
Stencils: Great for creating uniform letters and shapes. They help keep your design neat.
Permanent Markers: Useful for adding fine details or writing text. They won't smudge once dry.
Hot Glue Gun: Essential for attaching decorations like ribbons or embellishments. It provides a strong hold.
Ribbons: Add a decorative touch. Use them to hang the sign or as part of the design.
Embellishments: Items like buttons, stickers, or small wooden shapes. They add personality to your sign.
Sandpaper: Smooths the edges of the wooden plaque. Ensures a clean, finished look.
Sealant Spray: Protects your finished sign from wear and tear. Keeps colors vibrant.
Pencil: For sketching your design before painting. Helps plan the layout.
Ruler: Ensures straight lines and even spacing. Keeps everything aligned.
Scissors: Needed for cutting ribbons or trimming embellishments. Keep them sharp for clean cuts.
Skill Level and Time Commitment
Skill Level: Beginner
Estimated Time Required: 1-2 hours
- Gather Materials: 10 minutes
- Design Sign: 20-30 minutes
- Cut and Assemble: 30-40 minutes
- Decorate: 20-30 minutes
This project is simple and fun, perfect for those new to DIY.
How to Make Your Door Sign
Gather Materials:
- Wooden or plastic sign base
- Paints (acrylic or spray)
- Paintbrushes
- Stencils or letter stickers
- Hot glue gun
- Decorative items (ribbons, buttons, stickers)
- Hanging hardware (hooks, string, or ribbon)
- Sandpaper (if using wood)
- Pencil and ruler
Prepare the Sign Base:
- If using wood, sand the surface until smooth.
- Wipe off any dust with a damp cloth.
- Let it dry completely.
Paint the Base:
- Apply a base coat of paint using a brush or spray.
- Allow the paint to dry.
- Apply a second coat if needed for full coverage.
- Let it dry completely.
Design Your Sign:
- Use a pencil and ruler to lightly sketch your design.
- Plan where the letters and decorations will go.
Add Letters:
- Place stencils or letter stickers on the sign.
- Paint over the stencils or around the stickers.
- Carefully remove stencils or stickers once the paint is dry.
Decorate:
- Use a hot glue gun to attach decorative items.
- Add ribbons, buttons, or stickers to enhance the design.
Attach Hanging Hardware:
- If using hooks, screw them into the top of the sign.
- For string or ribbon, hot glue or staple it to the back of the sign.
Final Touches:
- Check for any touch-ups needed in the paint.
- Ensure all decorations are securely attached.
- Let everything dry completely before hanging.
Hang Your Sign:
- Choose a spot on your classroom door.
- Use appropriate hardware to hang the sign securely.
Enjoy your personalized classroom door sign!
Helpful Hints for Success
Choose the Right Materials: Use sturdy cardstock or foam board for durability. Avoid thin paper; it can tear easily.
Use Templates: Find free templates online to save time. Customize them with your own text and colors.
Layering: Add depth by layering different materials. For example, place a cut-out name on top of a colorful background.
Adhesives: Use double-sided tape or glue dots for a clean look. Hot glue can be messy and leave bumps.
Laminating: Laminate your signs for extra protection. This makes them last longer and easier to clean.
Common Mistakes to Avoid:
- Overcrowding: Don’t put too much text or too many images. Keep it simple and readable.
- Wrong Size: Measure your door space before making the sign. Too big or too small can look awkward.
- Poor Color Choices: Use contrasting colors for text and background. Light text on a light background is hard to read.
Alternatives:
- Vinyl Letters: Use vinyl letters for a professional look. They stick well and are easy to apply.
- Chalkboard Paint: Paint a section of the door with chalkboard paint. Change messages easily with chalk.
- Magnetic Sheets: Use magnetic sheets if your door is metal. Easy to move and change.
Shortcuts:
- Pre-made Kits: Buy pre-made kits that include all materials. Saves time on gathering supplies.
- Printables: Use printable designs. Just print, cut, and assemble.
- Stencils: Use stencils for perfect lettering without freehand drawing.
Budgeting for Your DIY Sign
Materials:
- Wooden Plaques: $10-$15 each
- Acrylic Paints: $10 for a basic set
- Paint Brushes: $5 for a set
- Stencils: $5-$10
- Sealant: $5
- Hanging Hardware: $3
Tools:
- Sandpaper: $3
- Painter's Tape: $3
- Hot Glue Gun: $10
- Scissors: $2
Total Estimated Cost: $56-$66
Budget-Friendly Alternatives:
- Use cardboard instead of wooden plaques: Free if recycled
- Homemade stencils using paper and scissors: Free
- Basic craft paint instead of acrylic: $5
- Reuse old brushes: Free if available
Total Estimated Cost with Alternatives: $23-$28
Creative Ideas for Personalization
Materials: Instead of wood, try foam board or acrylic sheets. Both are lightweight and easy to cut. For a rustic look, use reclaimed wood or corkboard.
Colors: Use chalkboard paint for a sign you can update regularly. Bright, neon colors can make the sign pop. For a more classic look, stick with black and white or pastel shades.
Styles: Add a border with washi tape or ribbon. Use stencils for neat lettering or freehand for a personal touch. Attach small hooks or clips to hang notes or decorations.
Themes: Match the sign to your classroom theme. For a science class, add atom or planet designs. In an art room, use paint splatters or brush strokes. For a reading corner, incorporate book shapes or literary quotes.
Textures: Add fabric or felt elements for a tactile experience. Use glitter or metallic paint for some sparkle. Incorporate natural elements like leaves or flowers for an earthy feel.
Lettering: Try vinyl stickers for clean, professional text. Use wooden letters for a 3D effect. Hand-paint the letters for a unique, artistic look.
Extras: Attach a small chalkboard or whiteboard section for messages. Add LED lights for a fun, illuminated sign. Use magnets to make parts of the sign interchangeable.
Eco-Friendly Crafting Tips
Recycled cardboard can be a great base for your sign. Cut it into the desired shape and paint or decorate it.
Old fabric scraps can add texture and color. Glue them onto the cardboard for a patchwork effect.
Wood scraps from previous projects can be sanded and painted. Use stencils to add letters or designs.
Bottle caps can be painted and glued to spell out words or create patterns.
Corkboard pieces from old bulletin boards can be cut into shapes and used as a base or decoration.
Natural materials like twigs, leaves, or pressed flowers can add a unique touch. Glue them onto the sign for a nature-inspired look.
Reused paper from old notebooks or flyers can be cut into letters or shapes. Glue them onto the sign for a layered effect.
Eco-friendly paints and glues made from natural ingredients can reduce your environmental impact. Look for non-toxic options.
Upcycled frames from old pictures can border your sign. Paint or decorate them to match your classroom theme.
String or yarn leftovers can be used to create hanging loops or decorative elements. Wrap them around the edges or create tassels.
Your Classroom, Your Style
Creating DIY teacher door signs is a fun way to add a personal touch to your classroom. Using simple materials like cardboard, paint, and markers, you can craft something unique that reflects your personality. Plus, it’s a great way to engage students and make them feel welcome. Don’t worry about making it perfect; the charm lies in its homemade feel. Remember, the goal is to create a welcoming environment for your students. So, gather your supplies, let your creativity flow, and enjoy the process. You’ll be surprised at how a small project can make a big difference in your classroom’s atmosphere. Happy crafting!
How do I make a DIY teacher door sign?
Start with a sturdy base like wood or foam board. Paint or decorate it with your favorite colors. Add letters or stickers to spell out your name or classroom number. Finally, attach a hanger or ribbon to the back.
What materials do I need?
You’ll need a base material (wood, foam board), paint or markers, letters or stickers, glue, and a hanger or ribbon. Optional items include glitter, buttons, or fabric for extra flair.
Can I use recycled materials?
Absolutely! Cardboard, old picture frames, or even scrap wood can make great bases. Just make sure they’re sturdy enough to hang on a door.
How long does it take to make one?
It usually takes about 1-2 hours depending on how detailed you want to get. Drying time for paint or glue might add a bit more time.
Do I need any special tools?
Not really. Basic craft supplies like scissors, glue, and paintbrushes should do the trick. A hot glue gun can be handy but isn’t necessary.
Can kids help with this project?
Definitely! Kids can help with painting, decorating, and even gluing. Just supervise them, especially if using a hot glue gun.
How do I hang the sign on my door?
Use a ribbon, string, or hook. If your door is metal, magnetic strips can work too. Make sure whatever you use is secure so the sign doesn’t fall.