
Home>Home & Furniture>Doors & Windows>DIY: How to Paint a Door Step-by-Step
Doors & Windows
DIY: How to Paint a Door Step-by-Step
Published: September 18, 2024
Learn how to paint a door like a pro with our step-by-step DIY guide. Perfect for beginners, this comprehensive tutorial ensures a flawless finish every time.
(Many of the links in this article redirect to a specific reviewed product. Your purchase of these products through affiliate links helps to generate commission for Twigandthistle.com, at no extra cost. Learn more)
Painting a door yourself can brighten up any room and give it a fresh look. You don't need to be a professional to get great results. With a bit of patience and the right tools, anyone can master this DIY project. This guide will take you through the steps to ensure your door looks fantastic. From preparing the surface to applying the final coat, every stage is crucial for a smooth finish. Whether you're looking to spruce up your home or just enjoy a weekend project, painting a door is a satisfying and straightforward task. Let's get started!
Getting Ready to Paint
Gather Supplies: Get paint, brushes, painter's tape, sandpaper, drop cloths, and a screwdriver.
Choose a Workspace: Pick a well-ventilated area, like a garage or outdoor space. Lay down drop cloths to protect the floor.
Remove the Door: Unscrew hinges using a screwdriver. Place the door on sawhorses or a sturdy table.
Clean the Door: Wipe down with a damp cloth to remove dust and dirt. Let it dry completely.
Sand the Surface: Use sandpaper to smooth out any rough spots. This helps the paint stick better.
Fill Holes and Cracks: Use wood filler for any imperfections. Let it dry, then sand again.
Tape Off Hardware: Cover doorknobs, hinges, and any other hardware with painter's tape.
Prime the Door: Apply a coat of primer to ensure even paint coverage. Let it dry according to the primer's instructions.
Safety First: Wear a mask to avoid inhaling fumes. Use gloves to protect your hands.
Test Paint: Apply a small amount of paint on a hidden area to check color and adhesion.
Stir Paint: Mix the paint thoroughly to ensure an even color.
Start Painting: Use a brush for edges and a roller for larger areas. Apply thin, even coats.
Dry and Recoat: Let the first coat dry completely before applying a second coat.
Reattach the Door: Once the paint is fully dry, remove the painter's tape and reattach the door to its hinges.
Gather Your Supplies
- Paint: Choose a high-quality paint suitable for doors. Latex or oil-based paints work well.
- Primer: Helps the paint adhere better and lasts longer.
- Sandpaper: Use medium-grit (120-150) for smoothing the door surface.
- Painter's Tape: Protects areas you don't want to paint, like hinges or glass panels.
- Drop Cloth: Protects the floor from paint drips and spills.
- Paintbrushes: Use a high-quality brush for detailed areas and edges.
- Paint Roller: Covers larger, flat areas quickly and evenly.
- Paint Tray: Holds the paint for easy access while using the roller.
- Screwdriver: Removes door hardware like knobs and hinges.
- Cleaning Cloths: Wipe down the door before painting to remove dust and dirt.
- Bucket of Soapy Water: Cleans the door surface before sanding.
- Putty Knife: Fills in any holes or cracks with wood filler.
- Wood Filler: Repairs any imperfections on the door surface.
- Stir Sticks: Mixes the paint thoroughly before application.
- Gloves: Protects your hands from paint and chemicals.
- Masking Paper: Covers larger areas to protect from paint splatters.
- Step Ladder: Reaches the top of the door easily if it's tall.
Each tool and material plays a crucial role in ensuring a smooth, professional-looking paint job.
How Much Time and Skill Is Needed?
Skill Level: Beginner
Time Required: 3-4 hours
- Preparation: 30 minutes
- Removing Hardware: 15 minutes
- Sanding: 30 minutes
- Priming: 1 hour (including drying time)
- Painting: 1-1.5 hours (including drying time)
- Reattaching Hardware: 15 minutes
Painting a Door: Step-by-Step Guide
Remove the Door:
- Take the door off its hinges using a screwdriver.
- Place it on a pair of sawhorses or a flat surface.
Remove Hardware:
- Unscrew and remove handles, knobs, and locks.
- Keep all parts in a safe place.
Clean the Door:
- Wipe down the door with a damp cloth to remove dust and dirt.
- Use mild soap if needed.
Sand the Door:
- Use medium-grit sandpaper to smooth the surface.
- Wipe away dust with a tack cloth.
Fill Holes and Cracks:
- Apply wood filler to any holes or cracks.
- Let it dry, then sand smooth.
Apply Primer:
- Use a paintbrush or roller to apply a coat of primer.
- Let it dry completely.
Sand Again:
- Lightly sand the primed surface with fine-grit sandpaper.
- Wipe off dust with a tack cloth.
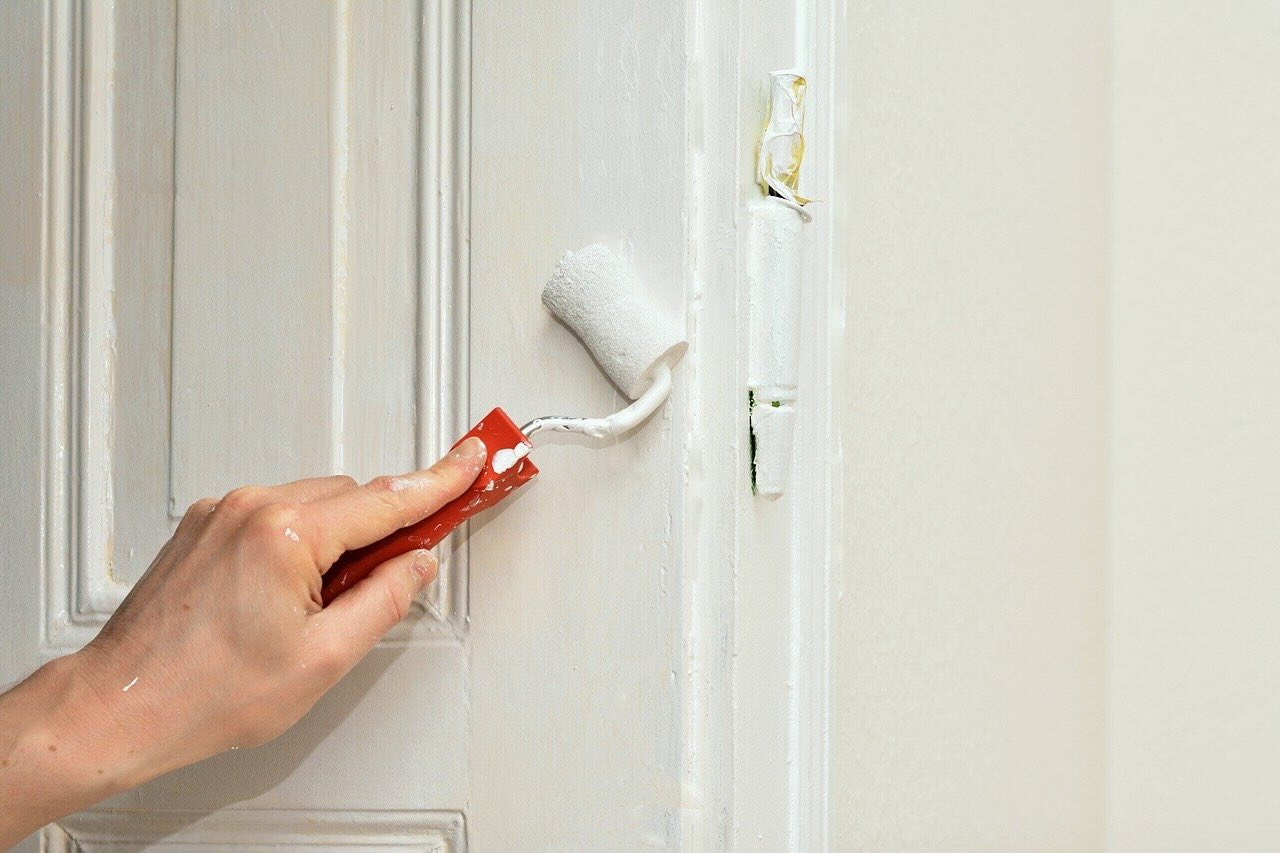
Paint the Door:
- Start with the edges using a brush.
- Use a roller for flat surfaces, applying thin, even coats.
- Let the first coat dry, then apply a second coat if needed.
Let It Dry:
- Allow the paint to dry completely, following the paint can's instructions.
Reattach Hardware:
- Screw handles, knobs, and locks back into place.
Rehang the Door:
- Lift the door back onto its hinges.
- Secure it with screws.
Final Touches:
- Check for any missed spots and touch up if necessary.
- Clean up your workspace.
Helpful Tips for a Smooth Finish
Preparation is key. Remove the door from its hinges and lay it flat. This prevents drips and makes painting easier. Use a drop cloth to protect the floor.
Clean the door thoroughly. Dirt and grease can ruin the finish. Use a mild detergent and water, then let it dry completely.
Sand the door lightly. This helps the paint adhere better. Use fine-grit sandpaper and sand in the direction of the wood grain.
Fill any holes or cracks with wood filler. Let it dry, then sand it smooth.
Prime the door. Primer helps the paint stick and covers any stains or old paint. Use a high-quality primer and let it dry completely.
Use painter's tape to cover any hardware or areas you don't want painted. This ensures clean lines and protects surfaces.
Choose the right paint. For doors, a semi-gloss or gloss finish works best. These finishes are durable and easy to clean.
Use a high-quality brush or roller. Cheap tools can leave streaks or shed bristles. A foam roller works well for smooth finishes.
Paint in thin, even coats. Thick coats can drip and take longer to dry. Let each coat dry completely before applying the next.
Sand lightly between coats. This helps the next coat adhere better and gives a smoother finish. Use fine-grit sandpaper.
Common mistakes to avoid: Skipping primer, using cheap brushes, applying thick coats, and not sanding between coats.
Alternatives: If you don't want to remove the door, you can paint it in place. Just be extra careful with drips. For a quicker project, use a paint-and-primer-in-one product.
How Much Will This Project Cost?
Paint: A gallon of good-quality paint costs around $30-$50. One gallon should be enough for a standard door with some left over.
Primer: If the door has never been painted or has a dark color, a quart of primer costs about $10-$15.
Paintbrushes/Rollers: A decent paintbrush costs around $10-$15. Rollers are about $5-$10 each.
Painter's Tape: A roll costs about $5-$7.
Sandpaper: A pack of assorted grits costs around $5-$10.
Drop Cloth: A basic drop cloth costs about $5-$10.
Cleaning Supplies: A bottle of cleaner or degreaser costs around $5.
Total Cost: Roughly $70-$120.
Budget-Friendly Alternatives:
- Paint: Look for sales or use leftover paint from other projects.
- Brushes/Rollers: Reuse old ones if they are still in good condition.
- Drop Cloth: Use old sheets or newspapers.
- Cleaning Supplies: Use household cleaners you already have.
Different Styles and Customizations
Alternative Materials: Instead of traditional paint, consider using chalk paint for a matte finish or milk paint for a vintage look. For a more durable option, use enamel paint.
Colors: Choose bold colors like navy blue, emerald green, or mustard yellow to make the door stand out. For a more subtle look, go with pastel shades like mint green, lavender, or soft pink. Metallic paints like gold, silver, or bronze can add a touch of glamour.
Styles: Add stencils or decals to create patterns or designs on the door. For a rustic look, use a distressing technique by sanding edges after painting. Consider a two-tone style by painting the door one color and the trim another. For a modern look, use geometric patterns or color blocking.
Hardware: Swap out old doorknobs and hinges for new ones in brushed nickel, antique brass, or matte black. Add a door knocker or kick plate for extra flair.
Finishes: Use a high-gloss finish for a sleek, modern look or a satin finish for a more traditional appearance. For added protection, apply a clear coat or polyurethane over the paint.
Textures: Create texture by using a sponge or rag to apply the paint. For a wood-like texture, use a wood grain tool over the paint.
Accents: Add molding or trim around the door for a more elegant look. Consider adding a window or glass panel to the door for added light and style.
Eco-Friendly Painting Tips
Gather Materials: Use eco-friendly paint with low or no VOCs (volatile organic compounds). Reuse old brushes and rollers if possible. If you need new ones, choose those with natural bristles and wooden handles.
Prepare the Door: Remove the door from its hinges. Place it on a pair of sawhorses or a sturdy table. Sand the door using recycled sandpaper or a sanding sponge. Wipe it down with a damp cloth to remove dust.
Protect Surroundings: Use old sheets or recycled plastic to cover the floor and nearby furniture. This prevents paint splatters and keeps your workspace clean.
Prime the Door: Apply a coat of eco-friendly primer. This helps the paint adhere better and last longer. Let it dry completely.
Paint the Door: Start with the edges and panels using a brush. Then, use a roller for the larger, flat areas. Apply thin, even coats of eco-friendly paint. Let each coat dry before applying the next.
Clean Up: Wash brushes and rollers with water if you used water-based paint. For oil-based paint, use a natural solvent like citrus-based cleaner. Store leftover paint properly for future touch-ups.
Reattach the Door: Once the paint is fully dry, reattach the door to its hinges. Make sure it swings freely and doesn't stick.
Dispose of Waste: Properly dispose of any leftover materials. Recycle empty paint cans and other recyclable items. If you have leftover paint, consider donating it to a local community center or school.
Your Door Looks Amazing!
Painting a door yourself can be super rewarding. You’ve prepped, primed, and painted like a pro. Now, step back and admire your work. Notice how a fresh coat of paint can transform a space? It’s not just about the color; it’s about the effort you put in. Remember, the key steps were sanding, priming, and applying even coats. If you missed a spot, no worries. Touch it up and let it dry. Keep your brushes clean for next time. You’ve learned a lot, and your door looks fantastic. Don’t forget to share your success with friends or family. They might want to try it too. Now, enjoy the new look of your door. You did it!
How do I prepare a door for painting?
Start by removing the door from its hinges. Lay it flat on sawhorses. Remove hardware like knobs and hinges. Clean the door with a mild detergent to remove dirt and grease. Sand the door lightly to smooth out any imperfections and help the paint adhere better. Wipe off dust with a tack cloth.
What type of paint should I use?
Use a high-quality latex or oil-based paint. Latex paint is easier to clean up and dries faster, while oil-based paint provides a smoother finish and is more durable. Choose a semi-gloss or gloss finish for easier cleaning and a more polished look.
Do I need to use a primer?
Yes, using a primer is a good idea. It helps the paint adhere better and provides a more even finish. If the door is already painted and in good condition, you might get away with a paint-and-primer-in-one product.
How many coats of paint are necessary?
Typically, two coats of paint are enough. The first coat might look uneven, but the second coat will provide full coverage. Make sure the first coat is completely dry before applying the second one.
How long should I wait between coats?
Wait at least 4-6 hours between coats of latex paint. For oil-based paint, wait 24 hours. Check the paint can for specific drying times, as they can vary by brand and type.
Can I paint the door while it’s still hanging?
It's possible, but not recommended. Painting the door while it's hanging can lead to drips and uneven coverage. Removing it allows for a smoother, more professional finish.
How do I avoid brush marks?
Use a high-quality brush or roller. Apply paint in thin, even coats. For a super smooth finish, consider using a foam roller or a paint sprayer. Lightly sand between coats with fine-grit sandpaper to remove any imperfections.