
Home>Home & Furniture>Doors & Windows>DIY Door Swag Ideas
Doors & Windows
DIY Door Swag Ideas
Published: September 12, 2024
Discover creative and easy DIY door swag ideas to elevate your home's entrance. Learn step-by-step instructions and tips for crafting beautiful, seasonal door decorations.
(Many of the links in this article redirect to a specific reviewed product. Your purchase of these products through affiliate links helps to generate commission for Twigandthistle.com, at no extra cost. Learn more)
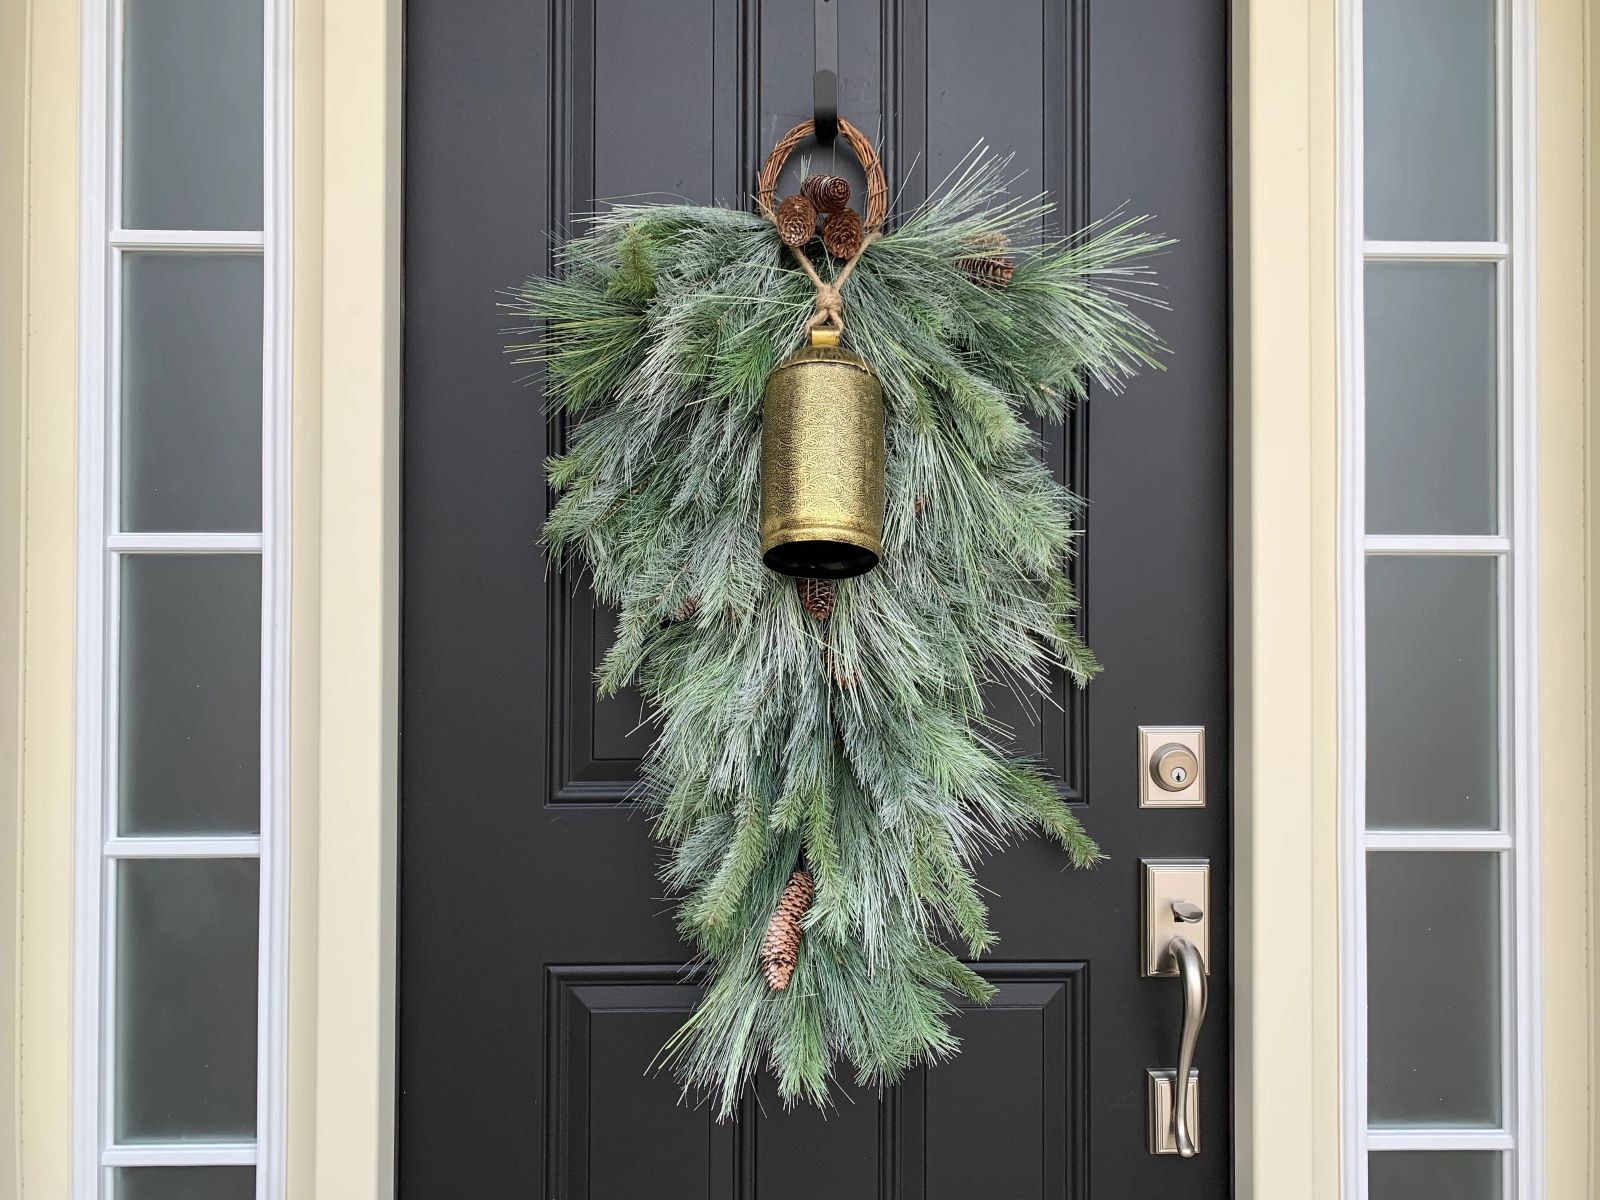
Decorating your front door can be a fun, creative way to welcome guests and show off your style. Door swags, in particular, add charm and personality. These arrangements can be made from various materials like flowers, greenery, ribbons, or even seasonal items. You don't need to be an expert to create something beautiful. With a few simple supplies and some imagination, you can make a unique door swag that fits your taste and the occasion. Get ready to transform your entryway and make a great first impression on anyone who visits.
Getting Ready for Your Project
Gather Materials: Collect greenery, flowers, ribbon, wire, and a door hook. Fresh or faux greenery works.
Safety First: Wear gloves to protect hands from sharp stems. Use wire cutters carefully.
Set Up Workspace: Find a flat surface with good lighting. Lay out materials for easy access.
Measure Door: Ensure the swag fits your door. Measure the width and height.
Prepare Greenery: Trim stems to desired length. Remove any dead leaves.
Create Base: Form a base with sturdy branches. Secure with wire.
Add Decorations: Attach flowers and ribbon to the base. Use wire to hold everything in place.
Test Stability: Shake gently to ensure everything stays put.
Hang Swag: Use a door hook to hang your creation. Adjust as needed for balance.
Clean Up: Dispose of trimmings and store leftover materials.
Gathering Your Supplies
- Floral Wire: Thin, flexible wire used to secure greenery and decorations.
- Wire Cutters: Tool for cutting floral wire to desired lengths.
- Scissors: Used for trimming ribbons and other materials.
- Hot Glue Gun: Bonds decorations securely.
- Glue Sticks: Used with the hot glue gun for adhesive purposes.
- Greenery: Fresh or artificial leaves, branches, or ferns for the base of the swag.
- Flowers: Fresh or artificial blooms to add color and texture.
- Ribbon: Decorative material for bows or accents.
- Pinecones: Natural elements for a rustic touch.
- Ornaments: Small decorative items like baubles or bells.
- Hooks: Used to hang the finished swag on the door.
- Twine: Natural string for tying elements together.
- Decorative Picks: Pre-made decorations on sticks for easy insertion.
- Spray Paint: Optional for coloring pinecones or other elements.
- Measuring Tape: Ensures accurate lengths of ribbon and greenery.
Floral wire and wire cutters help secure everything in place. Scissors trim ribbons and other materials. Hot glue guns and glue sticks bond decorations. Greenery forms the base, while flowers add color. Ribbon creates bows or accents. Pinecones and ornaments add a rustic touch. Hooks hang the swag. Twine ties elements together. Decorative picks add flair. Spray paint can color elements. Measuring tape ensures accurate lengths.
Skill Level and Time Commitment
Skill Level: Beginner
Time Required: 1-2 hours
- Gather Materials: 10 minutes
- Prepare Base: 15 minutes
- Attach Greenery: 20 minutes
- Add Decorations: 30 minutes
- Final Touches: 15 minutes
Total Time: 1-2 hours
How to Make Your Door Swag
Gather Materials
- Fresh or faux greenery (pine, eucalyptus, etc.)
- Floral wire
- Wire cutters
- Ribbon
- Decorative elements (pinecones, berries, ornaments)
Prepare Greenery
- Cut greenery into manageable pieces.
- Arrange pieces in a fan shape.
Secure Greenery
- Use floral wire to bind stems together.
- Wrap wire tightly to ensure stability.
Add Decorative Elements
- Attach pinecones, berries, or ornaments using floral wire.
- Distribute decorations evenly for balance.
Attach Ribbon
- Cut a length of ribbon.
- Tie a bow around the center of the swag.
Create Hanging Loop
- Form a loop with floral wire at the top.
- Secure loop tightly to the swag.
Hang Swag
- Use a hook or nail on the door.
- Adjust swag to hang straight.
Final Touches
- Fluff greenery and ribbon.
- Ensure all elements are secure.
Helpful Hints for Success
Choose the right base: Use a sturdy wire hanger or grapevine wreath as the foundation. These materials hold their shape well.
Layer greenery: Start with a mix of fresh or faux greenery like pine, eucalyptus, or holly. Layering different textures adds depth.
Secure with floral wire: Use floral wire to attach greenery and decorations. It keeps everything in place without being visible.
Add focal points: Incorporate focal points like pinecones, ornaments, or ribbons. These draw attention and add personality.
Balance the design: Ensure decorations are evenly distributed. This creates a balanced look.
Use zip ties: For heavier items, use zip ties instead of floral wire. They provide extra strength.
Weatherproof materials: If your door swag will be outside, choose weatherproof materials. This prevents damage from rain or snow.
Common mistakes to avoid:
Overloading: Avoid adding too many decorations. It can make the swag look cluttered.
Ignoring balance: Make sure both sides of the swag are balanced. Uneven designs can look lopsided.
Weak base: Using a flimsy base can cause the swag to lose shape. Always start with something sturdy.
Alternatives for materials or methods:
Use natural elements: Instead of store-bought decorations, use natural elements like twigs, berries, or dried flowers.
Try fabric scraps: Use leftover fabric scraps to create bows or other decorations. It’s a great way to recycle.
Hot glue gun: If floral wire isn’t available, a hot glue gun can work for attaching lighter items.
Budgeting for Your DIY
Materials:
- Evergreen branches: $10-$15
- Floral wire: $3
- Ribbon: $5
- Pinecones: $5
- Ornaments: $10
Tools:
- Wire cutters: $10
- Scissors: $5
Total cost: $48-$53
Budget-friendly alternatives:
- Use branches from your yard: Free
- Repurpose old ornaments: Free
- Make a bow from fabric scraps: Free
New total cost: $23-$28
Personalizing Your Creation
Alternative materials can change the look and feel of your door swag. Instead of traditional greenery, try using dried flowers, feathers, or fabric scraps. For a rustic touch, incorporate burlap or twine.
Colors make a big difference too. Use bold, bright colors for a cheerful vibe or muted, earthy tones for a more natural look. Metallic accents like gold or silver can add a touch of elegance.
Styles can vary widely. For a modern look, use geometric shapes and minimalist designs. For a vintage feel, add lace or antique ornaments. A seasonal theme can also be fun—think pumpkins for fall or snowflakes for winter.
Personal touches make your swag unique. Add initials, small photos, or handmade charms. Use LED lights for a bit of sparkle.
Mix and match these ideas to create a door swag that truly reflects your style.
Eco-Friendly Crafting Ideas
Use recycled fabric scraps for ribbons or bows. Old newspapers can be twisted into decorative shapes. Collect pinecones, twigs, and acorns from your yard for natural elements. Repurpose old ornaments or broken jewelry for added sparkle. Dried flowers or herbs from your garden can add a lovely scent. Use biodegradable twine instead of plastic ties. Cardboard from old boxes can be cut into festive shapes. Wine corks can be strung together for a rustic touch. Reuse old buttons for unique accents. Scrap wood pieces can be painted or stained for a sturdy base.
Your Doorway to Creativity
Creating your own door swag is a fun, rewarding project. It lets you add a personal touch to your home’s entrance. Using simple materials like ribbons, greenery, and seasonal decorations, you can craft something unique. Plus, it’s a great way to recycle old items and give them a new life. Whether you’re going for a rustic look or something more elegant, the possibilities are endless. Don’t be afraid to experiment with different textures and colors. Remember, the best part of DIY is making it your own. So grab your glue gun, gather your supplies, and get creative. Your front door will thank you, and so will your guests. Happy crafting!
How do I make a simple door swag?
Gather greenery like pine, cedar, or eucalyptus. Cut branches to about 18 inches. Layer them in a fan shape, with the largest pieces at the back. Secure with floral wire. Add a ribbon or ornaments for decoration.
What materials do I need?
You'll need greenery, floral wire, scissors, and decorations like ribbons or ornaments. A hook or nail to hang it on the door helps too.
How long does it take to make?
Making a door swag usually takes about 30 minutes to an hour, depending on how detailed you want it to be.
Can I use artificial greenery?
Absolutely! Artificial greenery works great and lasts longer. Just follow the same steps as with real greenery.
How do I keep my door swag fresh?
Mist your swag with water every few days. Keep it out of direct sunlight and away from heat sources to make it last longer.
Can I customize my door swag?
Definitely! Use different types of greenery, ribbons, and ornaments to match your style or the season. Get creative!
Where should I hang my door swag?
Hang it on your front door, garage door, or even indoors on a wall. Use a hook or nail to secure it.